Do you want to learn how to draw a pencil?
In this beginner tutorial, easydrawforkids.com will take you through a step-by-step process for drawing a standard wooden pencil with a sharp tip and eraser.
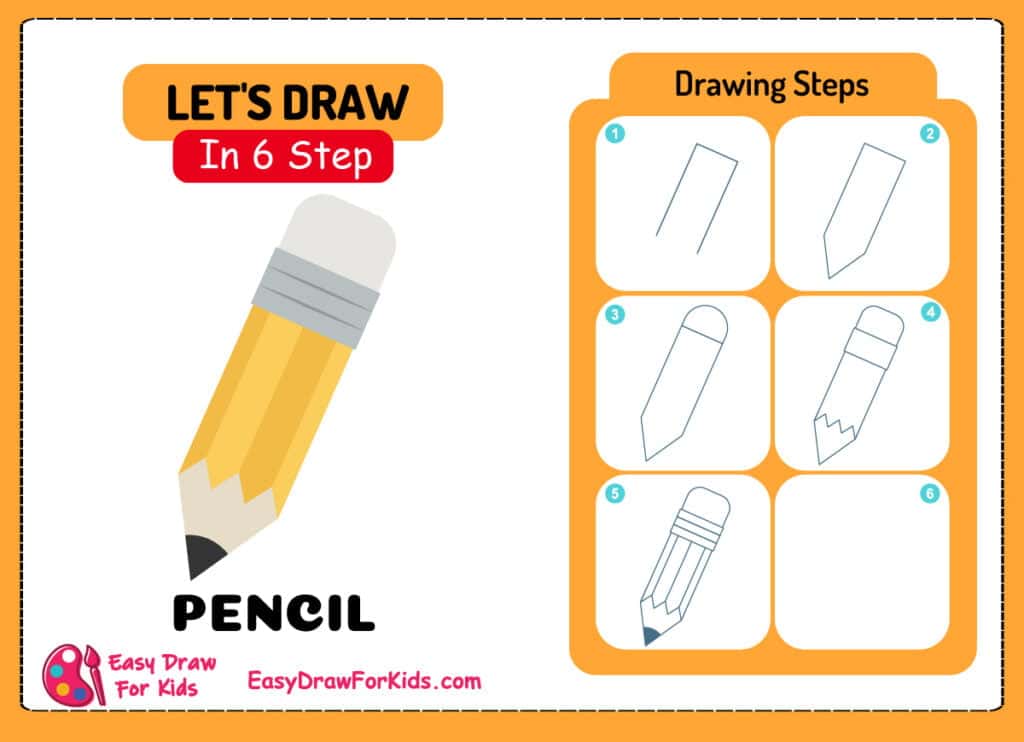
How To Draw A Pencil – A Step By Step Guide
1. Easy Pencil Drawing
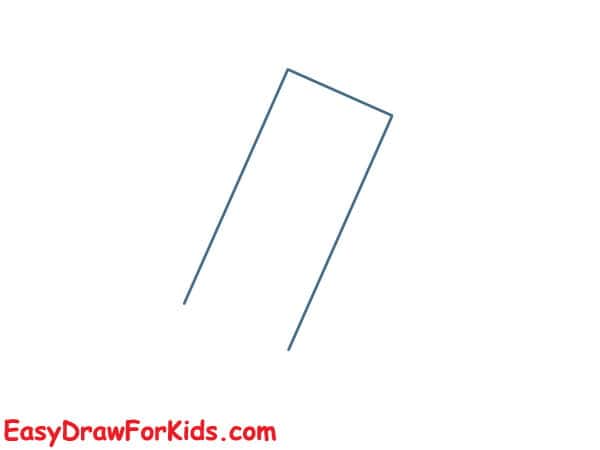
Step 1: Start by draw a long and slightly tilted rectangle, as shown in the picture.
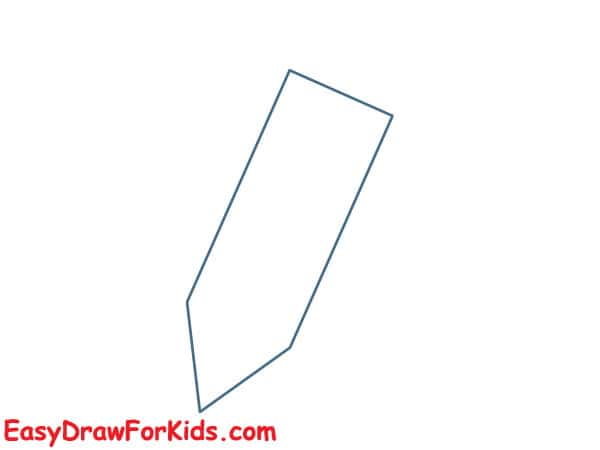
Step 2: Sketch the graphite tip at the end of the pencil. Make it a slightly tapered shape.
Step 3: Draw a rounded rectangular shape on the tip of the pencil to form the eraser.

Step 4: Draw a rectangle as the ferrule (metal band) at the top of the pencil. Then, draw a zigzag line at the end of the pencil, as shown in the picture.
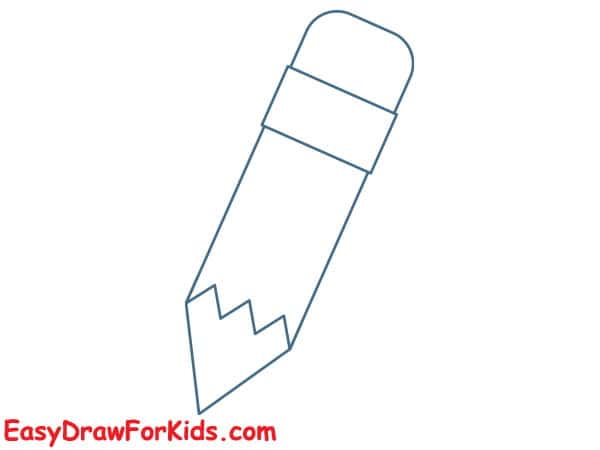
Step 5: Draw slightly curved, parallel lines along the pencil’s body to create the wood grain texture.
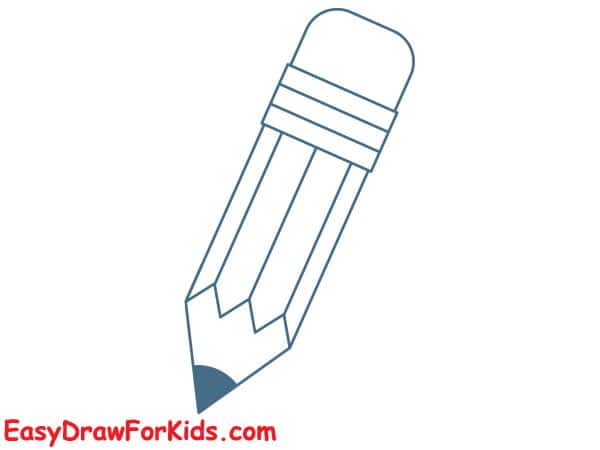
Step 6: Use a brown or yellow for the wood of the pencil.
Use a silver color for the metal ferrule at the top of the pencil and a dark gray for the graphite tip at the end of the pencil.

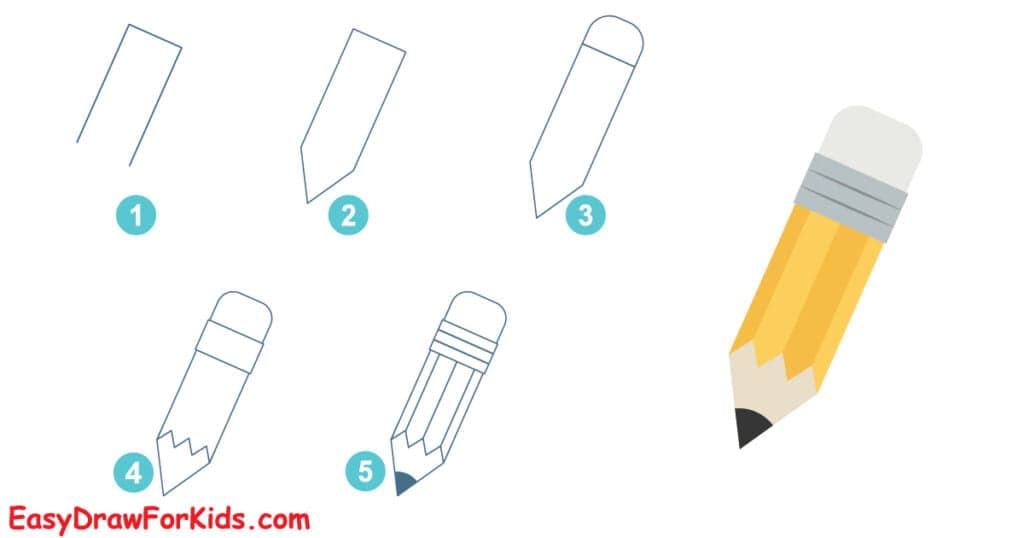
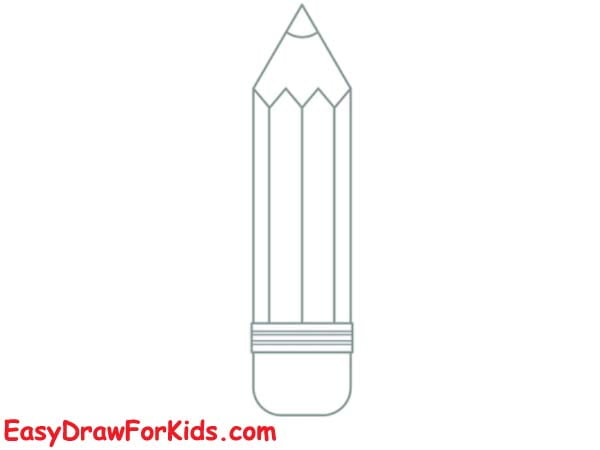
2. Simple Pencil Drawing
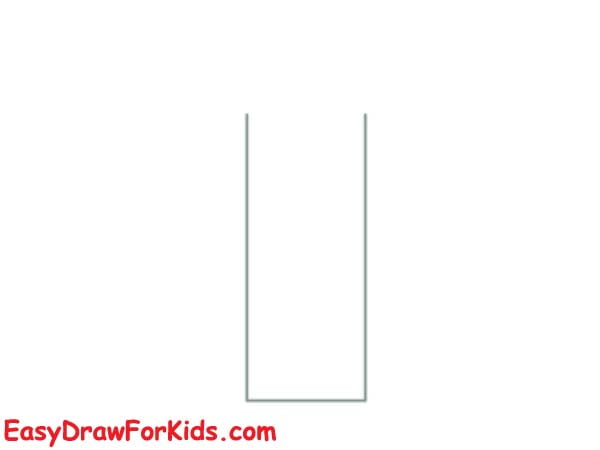
Step 1: Draw a long, rectangular shape for the body of the pencil.
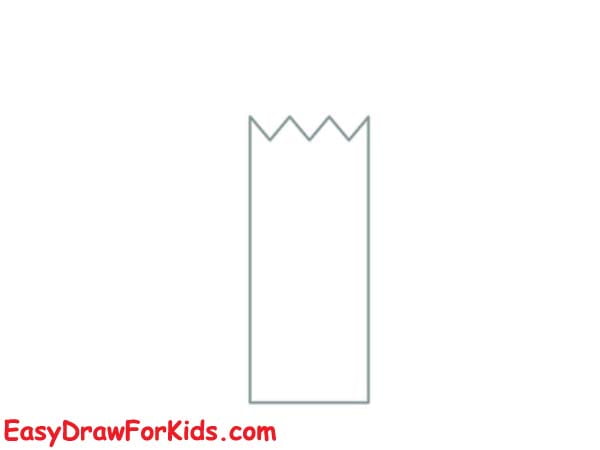
Step 2: Draw a zigzag line above the rectangle
Step 3: Draw a pyramid at the top of the pencil
Draw the ferrule (metal band) at the top of the pencil.

Step 4: Draw a rounded rectangular shape on top of the ferrule for the eraser

Step 5: Sketch the wood grain texture along the body of the pencil.
Step 6: Color to complete your pencil drawing.

That concludes a thorough step-by-step overview of how to draw a pencil using basic drawing techniques.
Mastering these fundamental techniques sets you up for tackling all kinds of still-life subjects.