Pigeons are a staple of urban life and art inspiration.
If you’ve ever wanted to create your pigeon drawing, now’s the time to learn how.
Learn how to draw a pigeon may seem challenging at first, but with a few simple steps, you’ll be sketching this charming bird in no time.
Let’s explore how to bring this feathered friend to life on paper.
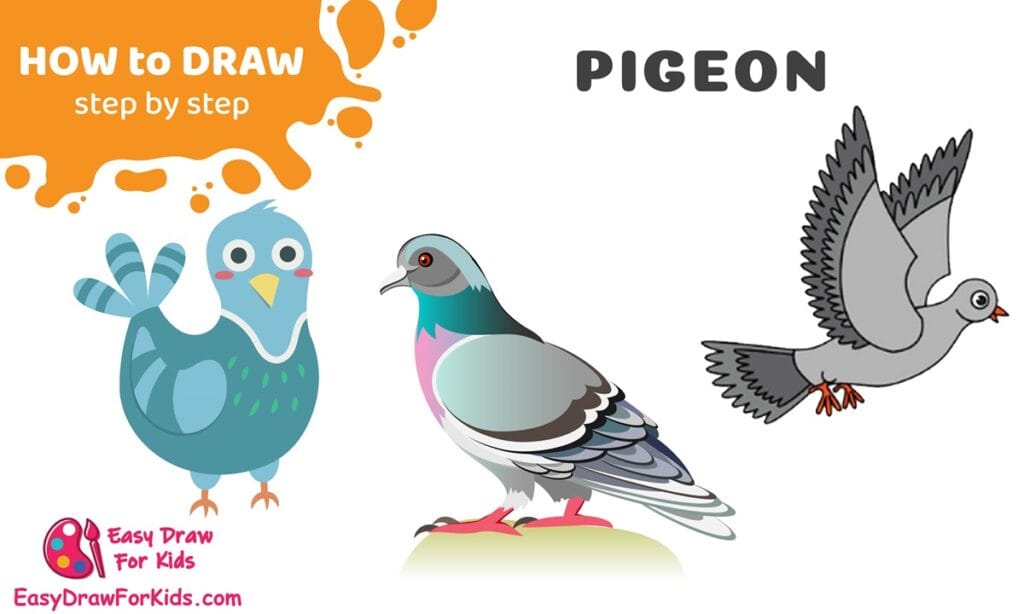
How To Draw A Pigeon – A Step by Step Guide
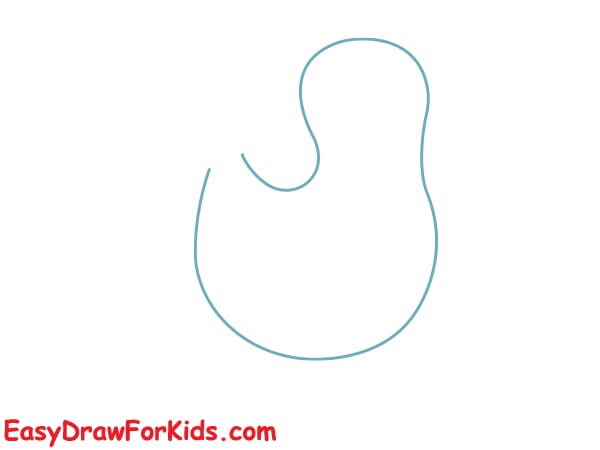
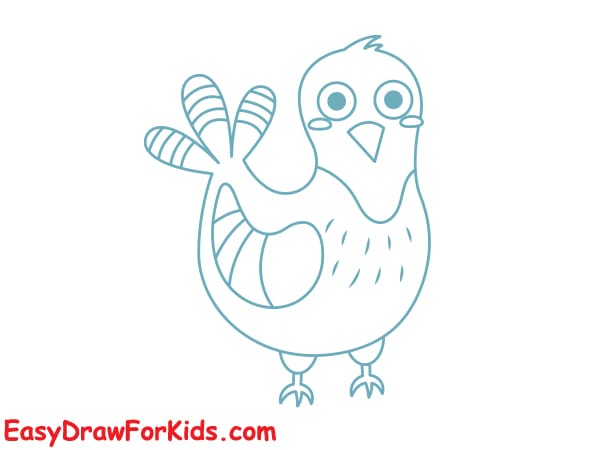
1. Simple Pigeon Drawing
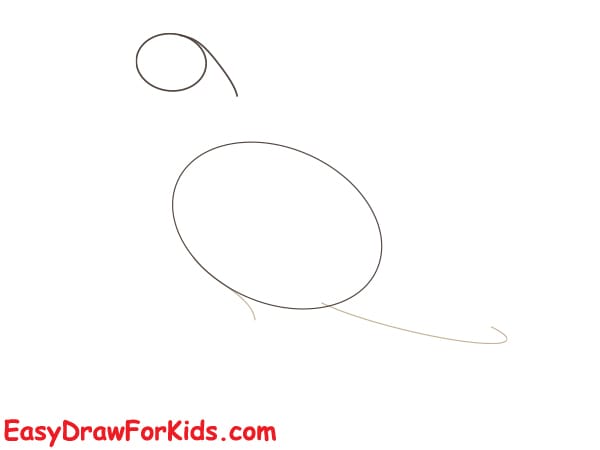
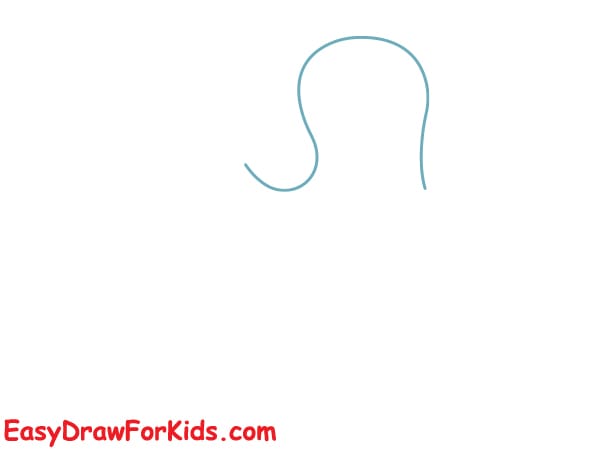
Step 1: Sketch an oval shape tilted slightly sideways for the main body of the pigeon.
Draw a small circle at the top of the oval, connecting the two shapes with a curved line for the neck.
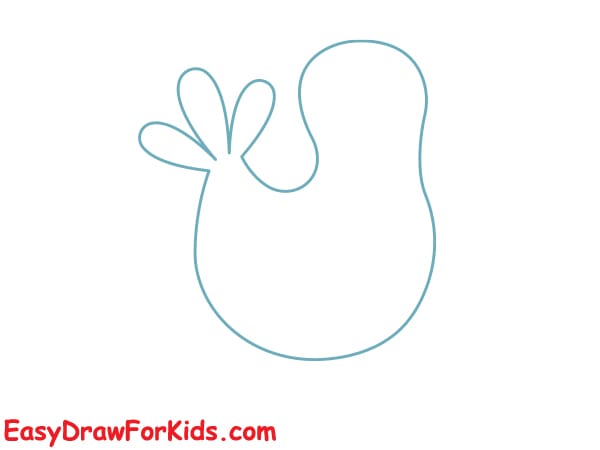
Step 2: At the front of the head, outline a small triangular shape for the beak.
Draw a small circle above the beak for the eye.
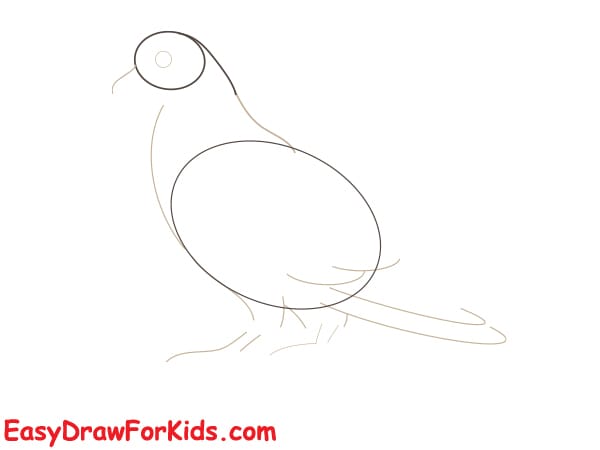
Step 3: Sketch two overlapping curved lines on each side of the pigeon’s body to represent folded wings.
Add a slightly fan-shaped tail at the back of the body, with 2-3 straight or slightly angled lines to show individual feathers.
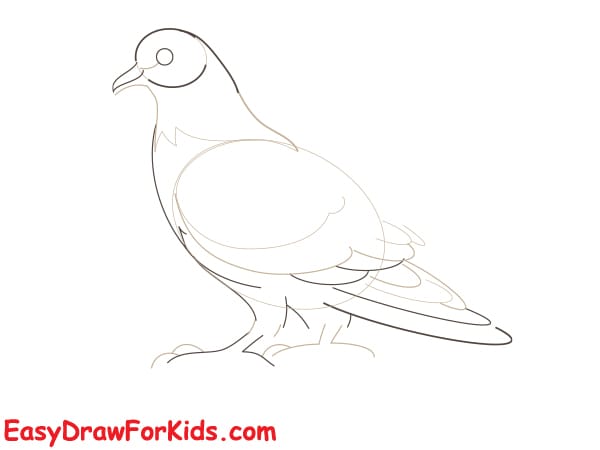
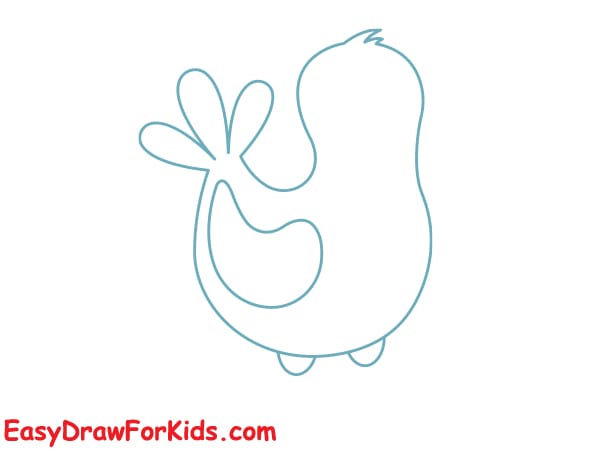
Step 4: Draw two thin vertical lines below the body for legs and add three toes at the bottom of each leg for claws.
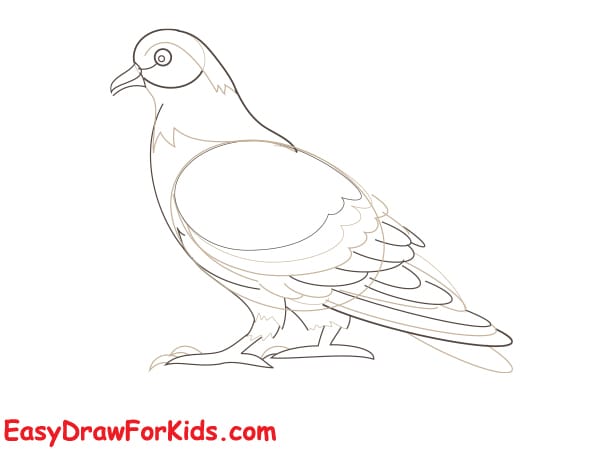
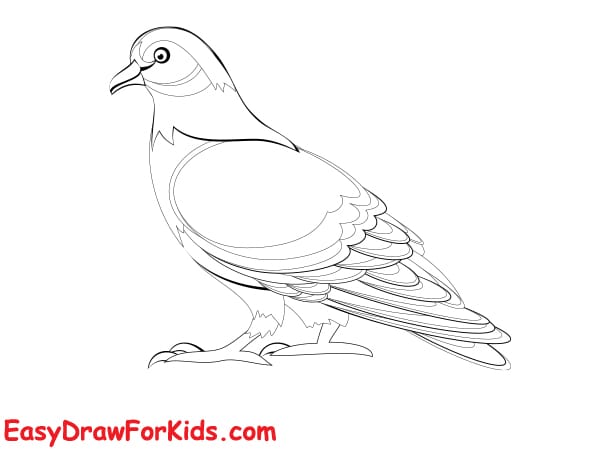
Step 5: Add simple curved lines on the wings and tail to create feather textures.
Erase any unnecessary lines and refine your drawing for a polished look.
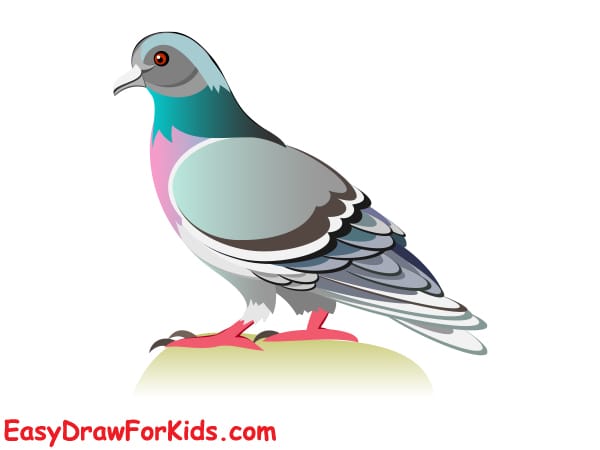
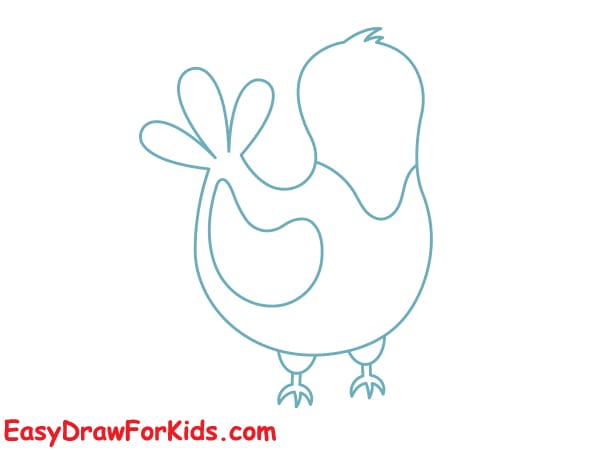
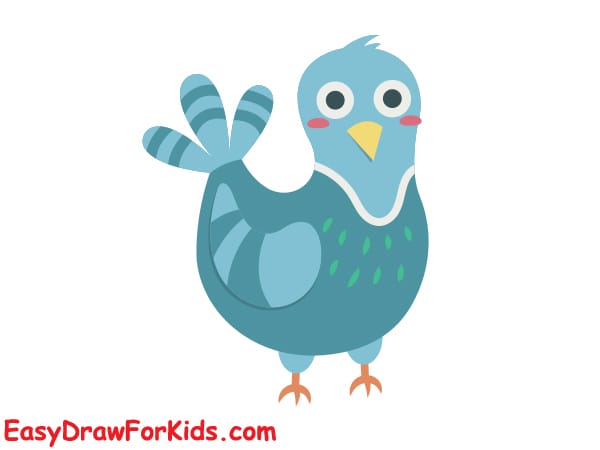
Step 6: You can color your pigeon using gray or add small variations like a white belly or darker wingtips for extra detail.
Keep it simple and enjoy the process!
2. Cute Pigeon Drawing
Step 1: Start with a simple oval for the head. Make it slightly wider at the bottom to give it a cute, rounded appearance.
Step 2: Draw a bigger circle on bottom of the oval for the body. Position it slightly to one side to give your pigeon a playful look.
Step 3: At the back of the body, draw a small fan-shaped tail. You can make it slightly rounded and add a few lines to indicate the feathers.
Step 4: Add a few more hairs on top, use a curved line that starts from the top of the body and curves downwards to form the wing. Make the wing slightly rounded at the tips to keep the cute look.
Step 5: For the legs, draw two short, thin lines coming down from the bottom of the body.
At the end of each leg, add small, rounded shapes for the feet. You can make the toes short and stubby for a cuter appearance.
Step 6: Add a small triangle shape at the front of the head for the beak.
You can make it slightly rounded at the tip to enhance the cuteness.
Draw two large, round eyes on the head. Leave a small white circle inside each eye to represent the reflection, which will make the eyes look more lively and cute.
You can also add small eyebrows above the eyes for extra character.
Add some feather details to the wings and tail by drawing short, curved lines.
Keep the lines soft and rounded to maintain the cute style.
You can also add a few small lines on the body to suggest feathers.
Step 7: Erase any unnecessary guidelines and refine your drawing.
Color your cute pigeon drawing. If you want, you can add a little blush on the cheeks by drawing two small circles or ovals on either side of the face.
3. Flying Pigeon Drawing
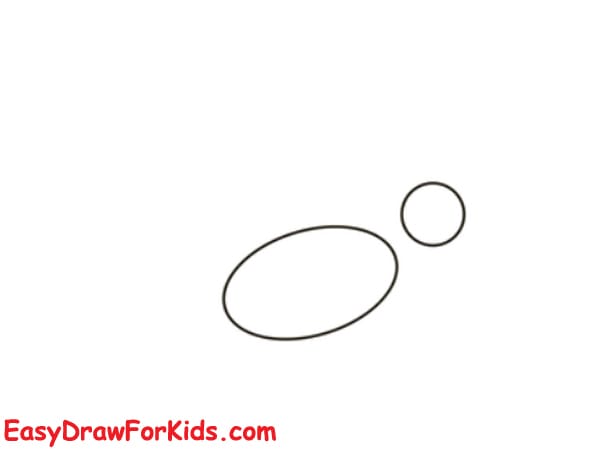
Step 1: Begin by sketching two simple shapes: an oval for the body and a circle for the head.
Position the body in a slightly tilted angle, as if the pigeon is mid-flight.
Add a small circle near the front of the body for the head.
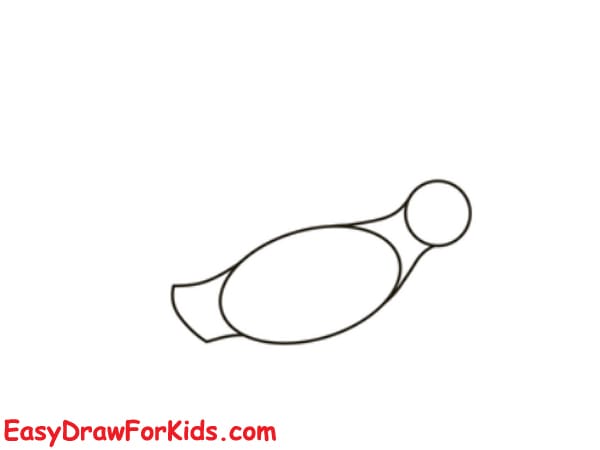
Step 2: Connect the oval and the head with a curved line to form the pigeon’s neck. Make the neck slightly long and smooth.
Refine the body to resemble a pigeon’s shape. Taper it towards the tail.
Step 3: Add details to the pigeon’s head. Draw a small, pointed beak at the front of the circle, and add a small, round eye.
The head may slightly tilt forward as the bird moves through the air.
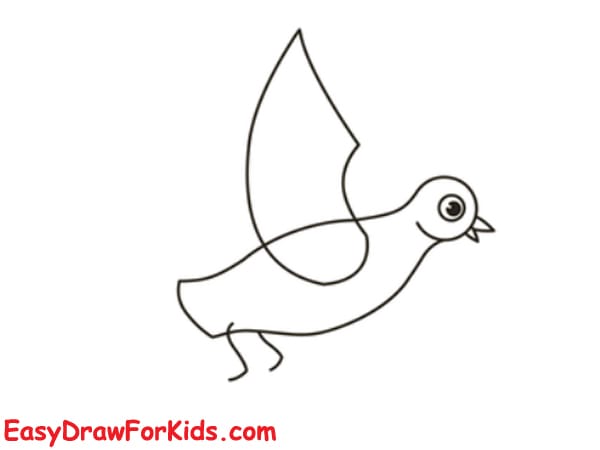
Step 4: Flying pigeons have large, spread-out wings.
Draw the wings on each side of the body, starting from the top and curving downward.
The wings should resemble long, pointed ovals, with the top feathers angled upwards and the bottom feathers tapering toward the tips.
The wing shape may curve slightly to represent the flight position.
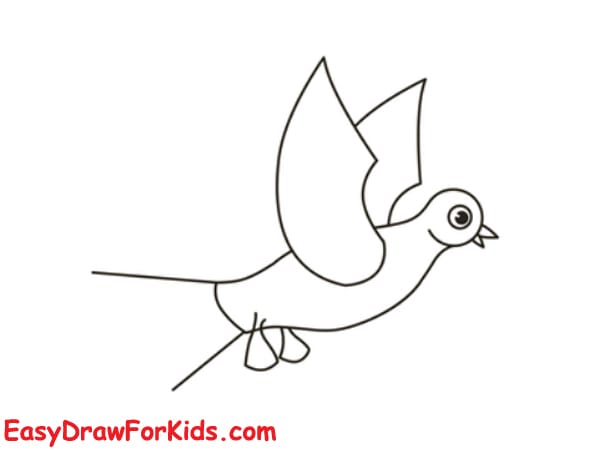
Step 5: For a flying pigeon, the legs are usually tucked underneath the body. Draw them short and thin, slightly bent under the pigeon’s belly.
Add the feet with little details for toes, as they are tucked and not fully visible during flight.
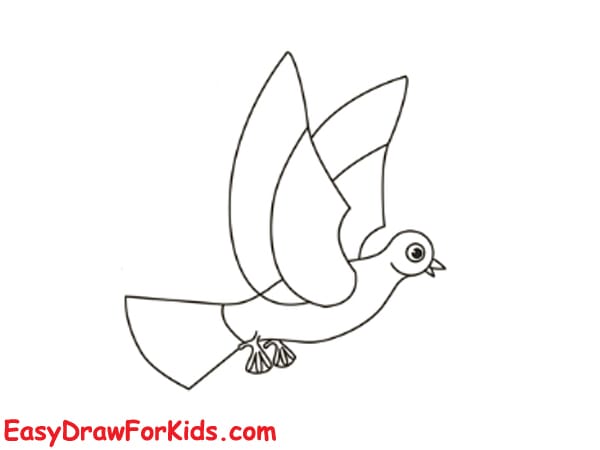
Step 6: Pigeon wings have layered feathers. Start adding feather details by drawing lines that follow the curve of the wing.
The feathers should look like elongated teardrops, and you can add small lines within each feather to show texture.
The top feathers may be longer and more prominent, while the lower feathers are shorter.
At the back of the body, draw a fan-shaped tail. Pigeon tail feathers spread out in a triangular or slightly rounded shape when flying.
Add a few lines inside the tail to indicate individual feathers.
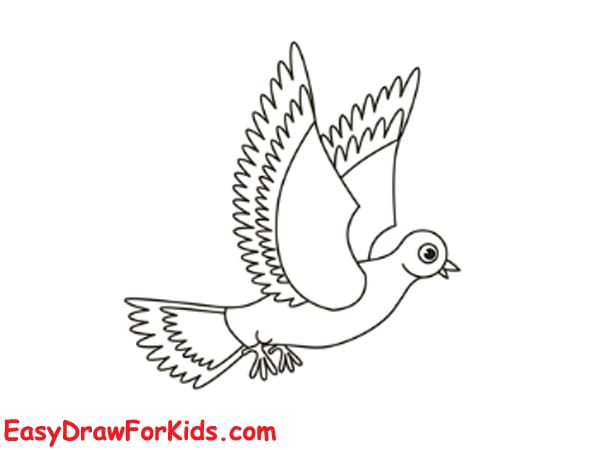
Step 7: Finally, color your pigeon! Use soft grays, whites, and pastel colors to enhance its cuteness.

In conclusion, creating a detailed and life like pigeon drawing involves observing its unique features, such as its smooth feathers and distinct shape, while carefully working through gradual steps to bring the artwork together.
Learning how to draw a pigeon not only enhances your technical skills but also deepens your appreciation for the beauty found in even the most common creatures.


