Hello, welcome to easydrawforkids.com
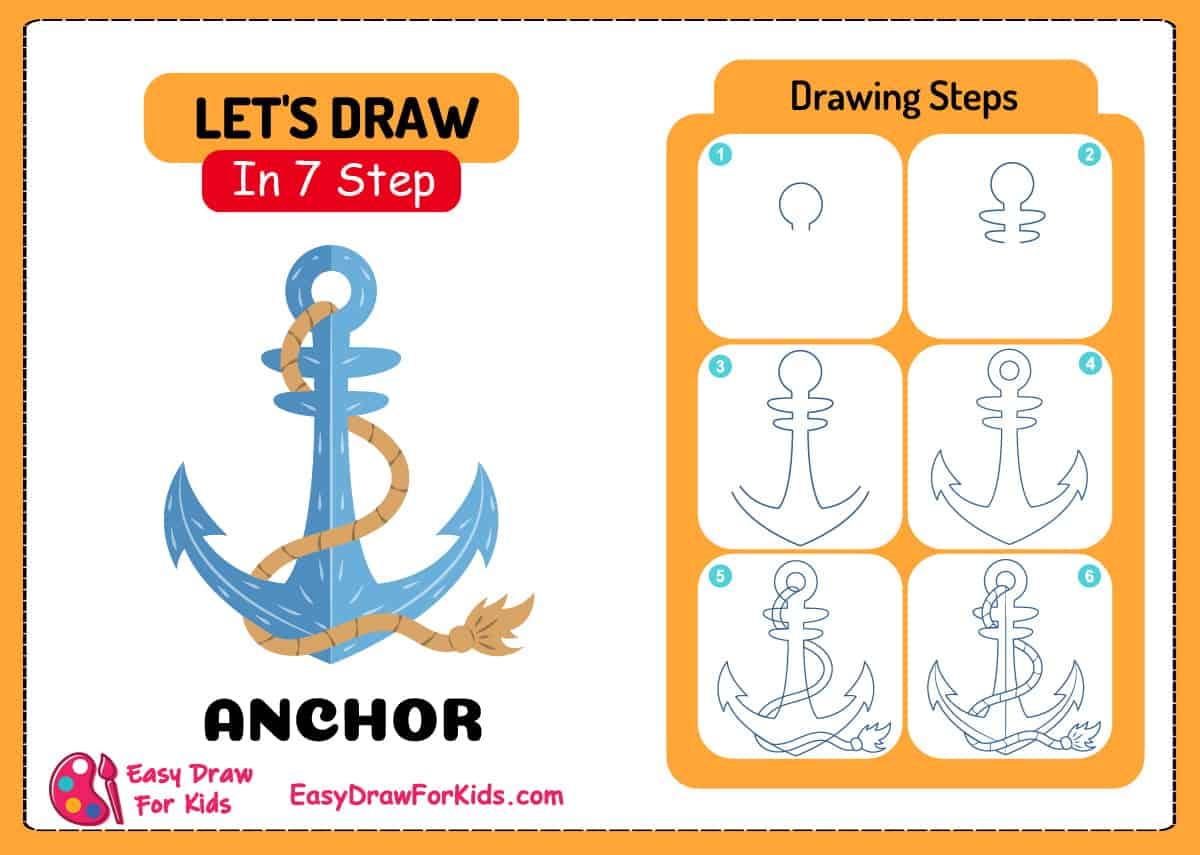
In this comprehensive guide, you’ll learn step-by-step how to draw an anchor, from sketching the initial shape to adding details like chains and coloring.
How To Draw An Anchor – A Step By Step Guide
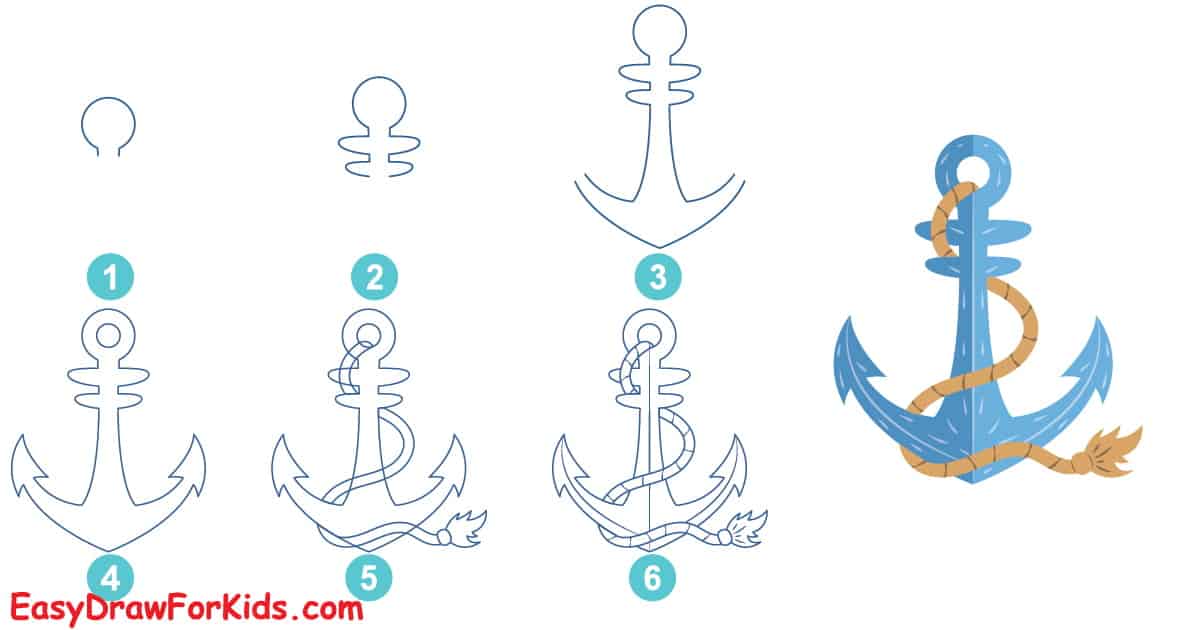
1. Simple Anchor Drawing
Step 1: At the top of the anchor, draw a circular shape that represents the crown.

Step 2: Extend the horizontal crossbar of the anchor by drawing two straight lines that protrude from either side of the vertical shank.
Add detail to the flukes by drawing smaller, curved lines within them to depict the division of the flukes into individual sections.

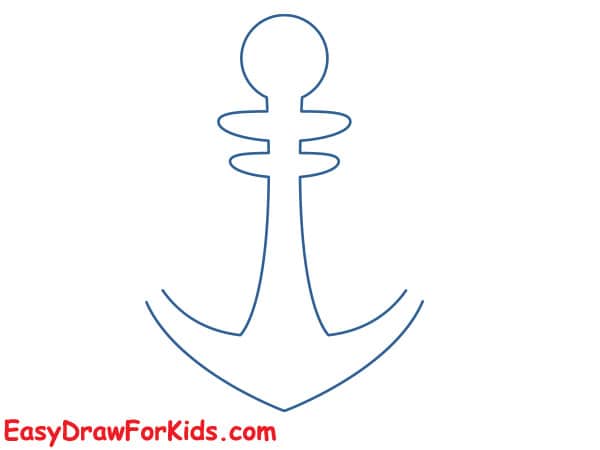
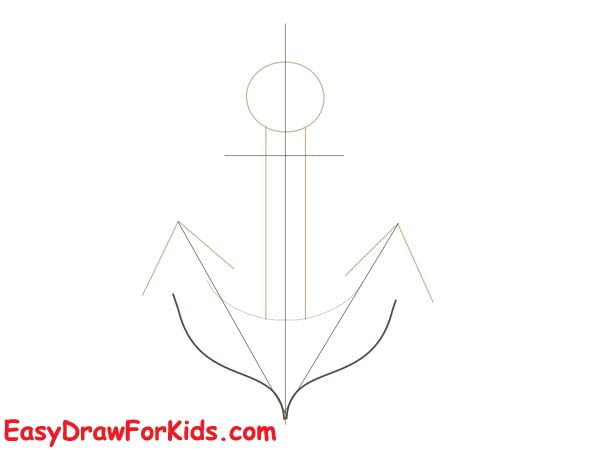
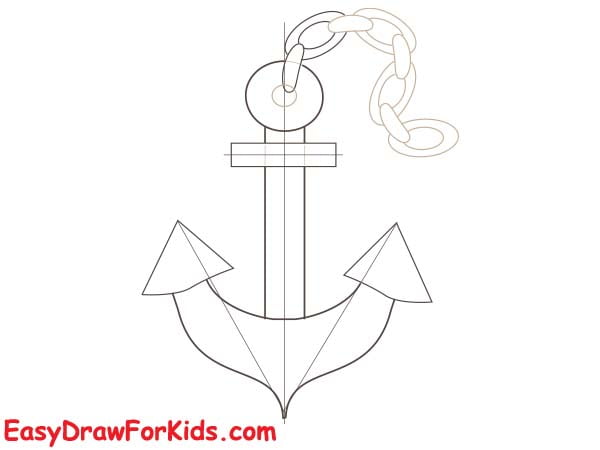
Step 3: Draw the Base of the Anchor
First, draw a capital letter “U” shape.
Next, add a center vertical line extending up from the bottom of the “U.” This will be the central shank of the anchor. It should be longer than the “U” is broad.
On the left and right sides of this line, draw two diagonal lines tapering in toward the vertical line. These will be the anchor’s arms.
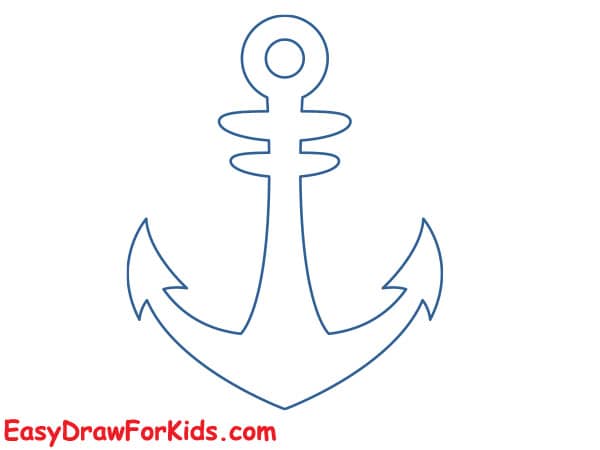
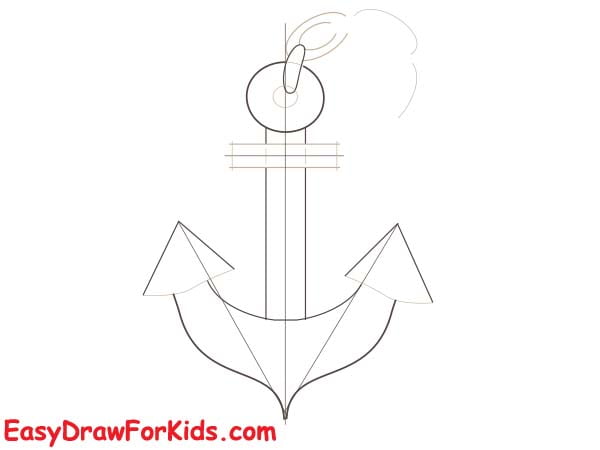
Step 4: Start by drawing a slightly wider “U” underneath the existing one.
Now, connect the ends of this larger “U” up to the existing curve ends.
Add another minor upside-down “U” shape inside the fluke outline. This adds thickness to create a solid mass at the base.
To finish the fluke form, round off the bottom outer corner of the main shape.
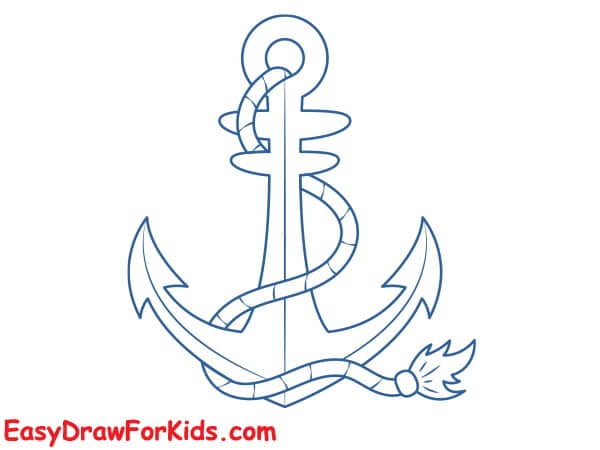
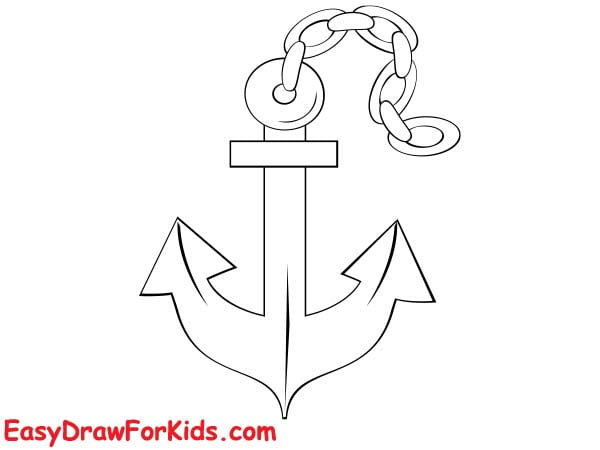
Step 5: Draw a rope wrapped around it
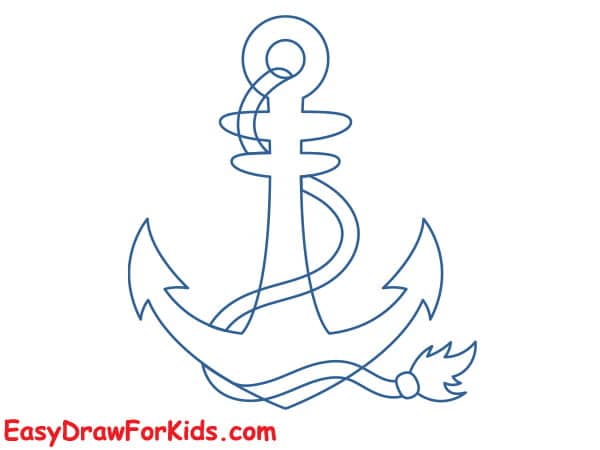
Step 6: Refining the outlines and ensuring that all components are well-defined.
Step 7: Once your anchor line drawing is ready, add color to make it pop!
Use metallic colors like silver, steel gray, blue or bronze to capture the anchor’s nautical vibe.
For a rusty anchor, use browns and reds and avoid clean edges.

2. Easy Anchor Drawing
Step 1: Start with a large inverted “V” shape for the top of the anchor.

Step 2: Draw the shank (the long straight part) of the anchor. Make it thick and sturdy looking.
Step 3: Add the crown (the curved part) at the bottom of the shank. This should have a smooth, rounded shape.
Step 4: Draw the stock (the horizontal bar at the top) with a rectangular shape. Sketch the eye (the round loop at the top) as well.
Step 5: Carefully erase any remaining stray lines or construction marks that are no longer needed, ensuring that your anchor illustration appears clean and polished.
Step 6: Color your anchor drawing to complete

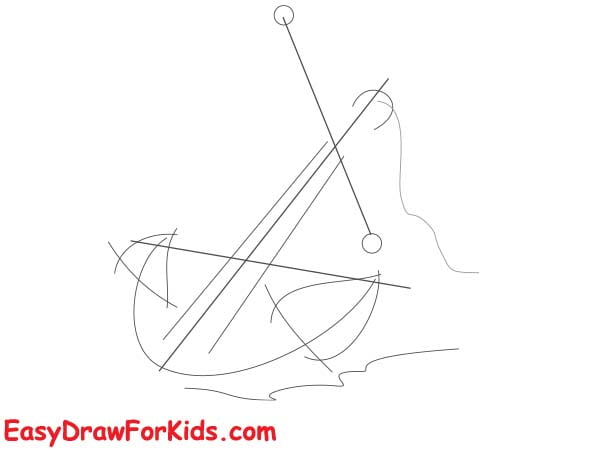
3. Realistic Anchor Drawing
Step 1: Start by drawing a straight vertical line that represents the anchor’s shank. Next, draw a horizontal line near the top of the vertical line to create the crossbar of the anchor.

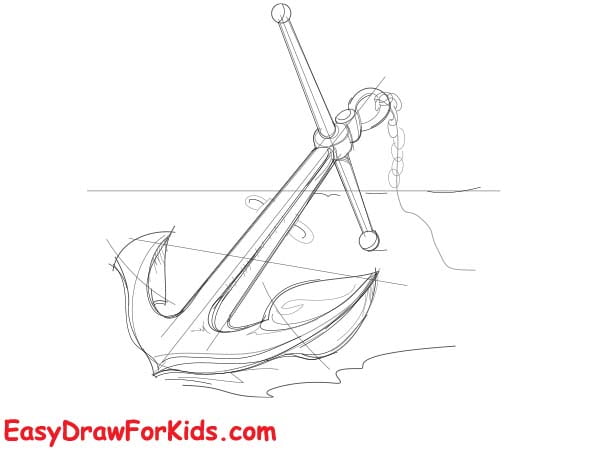
Step 2: Add the arms and flukes
Step 3: Draw the stock and crown

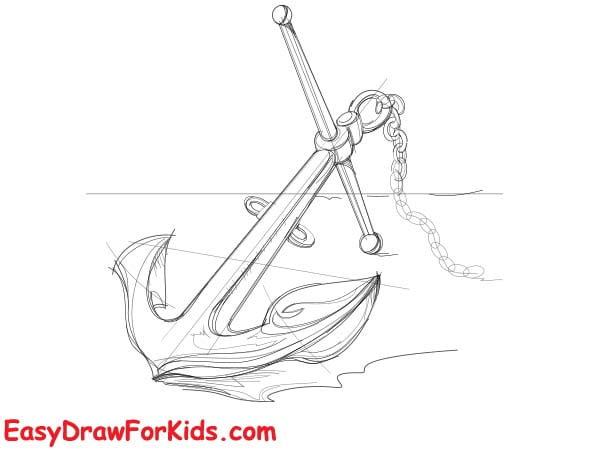
Step 4: Add texture and grooves to the anchor’s surface.
Step 5: Darken and refine the lines of the anchor.
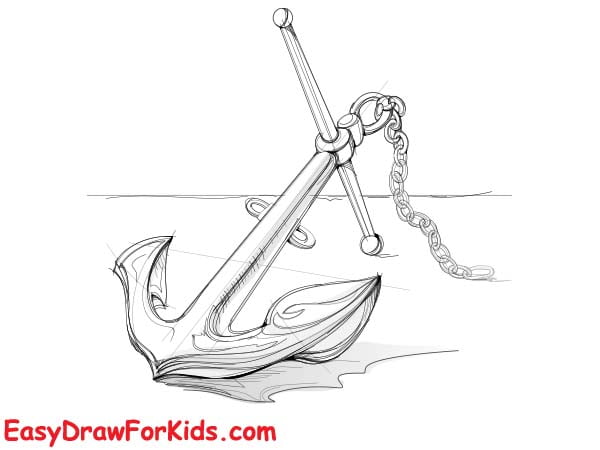
Step 6: Shade the anchor to give it a 3D, realistic look.
Now you can confidently draw an anchor on your own.
Just take it step-by-step using basic shapes and lines.
Build up the form gradually with rectangles and curves.
With practice you can sketch anchors of any size for artwork, logos, designs, and more.