In this tutorial, easydrawforkids.com will guide you learn how to draw a seahorse.
How To Draw A Seahorse – A Step By Step Guide
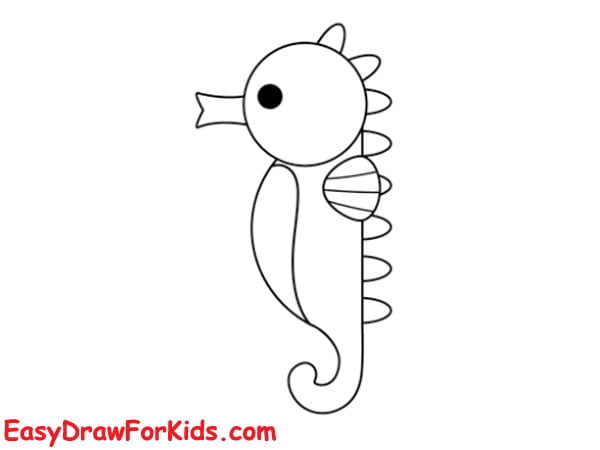
1. Cartoon Seahorse Drawing
Step 1: Draw a small oval shape for the head of the cartoon seahorse.

Step 2: Draw a half-circle below the head to form the body, add a snout that tapers to a point.

Step 3: From the end of the body, draw a long curved line that tapers towards the end to present the seahorse’s tail.
Draw a dot inside the head to form the eye.

Step 4: Add some oval shapes towards the end of the body for the dorsal fin.

Step 5: On the underside of the body, draw a slightly curved line that connects the head to the tail to form the belly
Draw a small triangular shapes on the side of the body near the head for the pectoral fins.

Step 6: Erase any overlapping or unnecessary lines
Step 7: Get creative with your colour choices for different parts of the seahorse’s body.

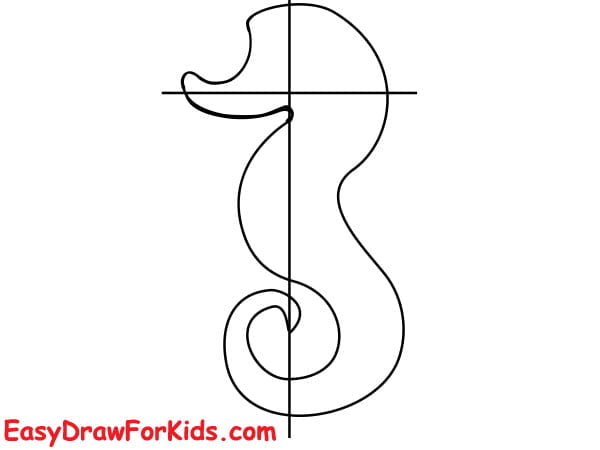
2. Realistic Seahorse Drawing
Step 1: Start with Basic Shapes
Draw a horizontal line that intersects with the vertical for the guideline.
Sketch a long, curved line to form the basic shape of a seahorse.

Step 2: Extend a long, curved line from the end of the body to create the tail.

Step 3: Draw a snout that tapers to a point
Step 4: Add gentle contours to create a realistic shape.

Step 5:
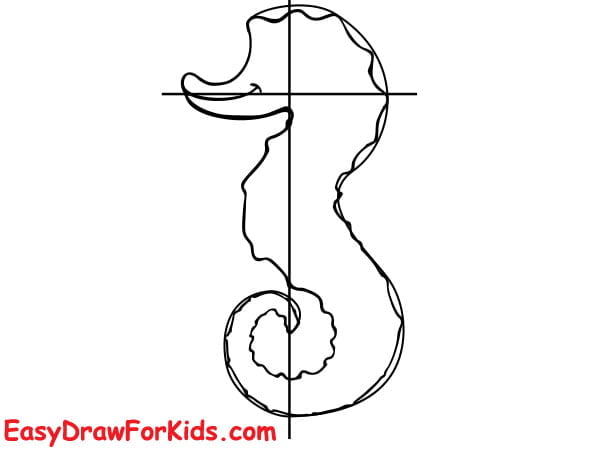
Step 6: Draw small, curved lines to represent the scales and bony plates that cover the seahorse.
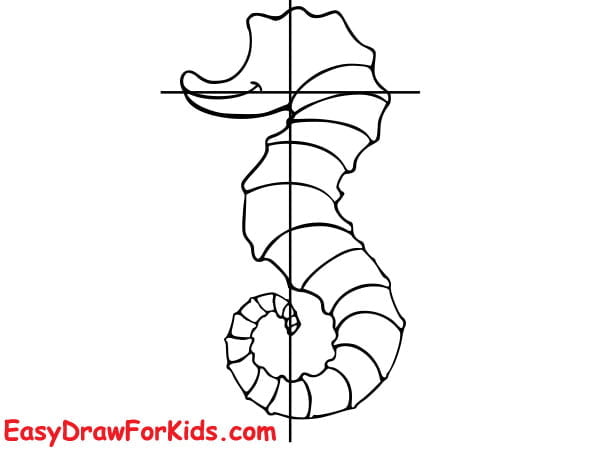
Step 7: Add the fin, mouth, eye for your seahorse
Step 8: Select your desired colours to bring your seahorse to life.
3. Simple Seahorse Drawing

Step 1: Start by depict the head and eye

Step 2: Add a small bump for the nose

Step 3: Seahorses have very long, slender bodies, so start by drawing a long, thin mooth lines as shown in the picture.

Step 4: Draw the belly by connect the outlines of the head and torso as shown in the picture

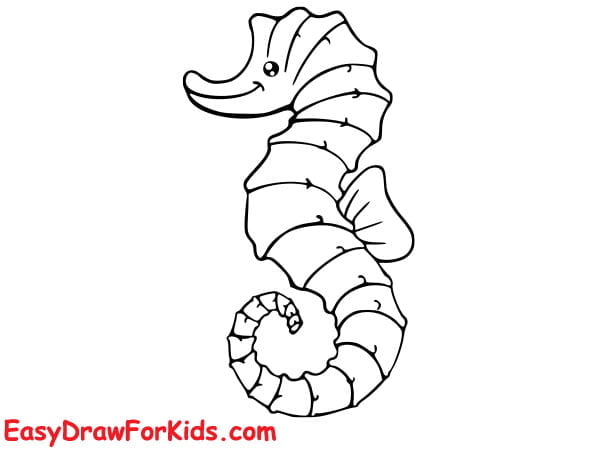
Step 5: Depict the scales on the seahorse’s back.
Draw them along the back of the fish, using long rounded line.

Step 6: Draw straight lines at belly as shown in the picture

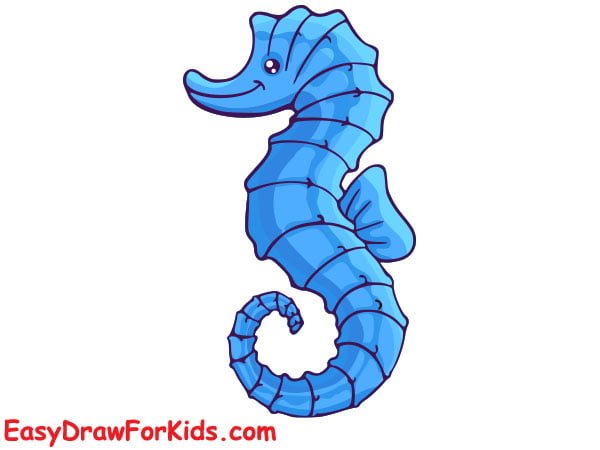
Step 7: Coloring the Seahorse
Now, it’s time to add some colour to your seahorse drawing. Start by colouring the seahorse’s body light blue. Then, colour the seahorse’s belly red.
Next, colour the seahorse’s fins red. Finally, colour the seahorse’s eye black.

4. Cute Seahorse Drawing
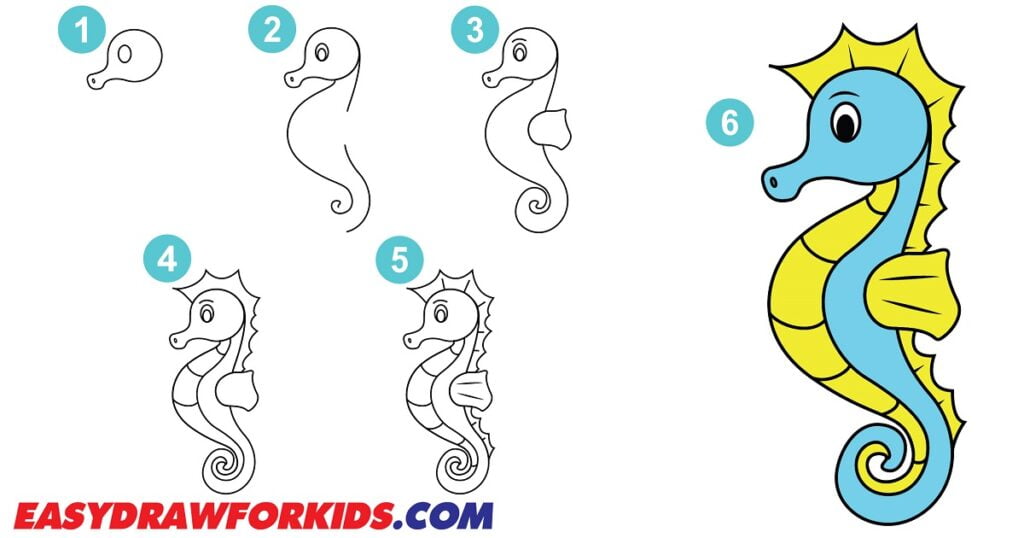
This guide, which includes six steps for drawing a seahorse, will help you learn how to draw a seahorse with ease!
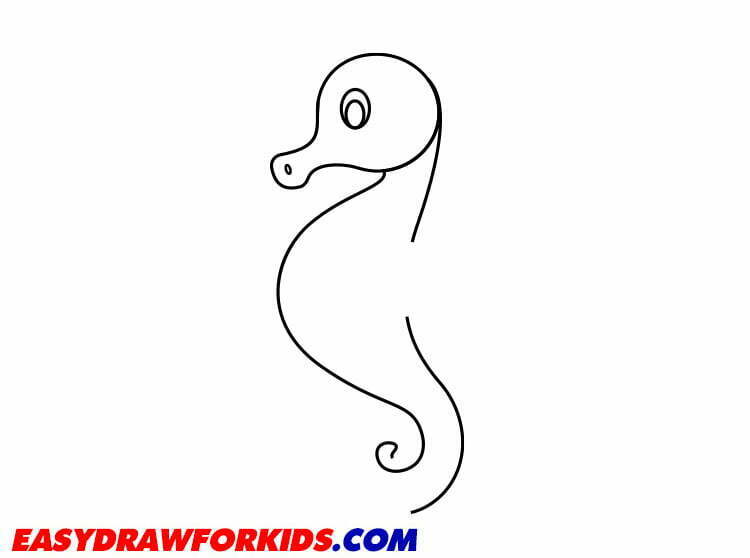
Step 1: Sketch out the seahorse’s head
Seahorses have long, narrow heads, so start by drawing a small oval.
Add in the seahorse’s eye by drawing a small circle near the top of the seahorse’s head
Then, add a small bump for the nose.

Step 2: Depict the torso
First, draw a curved line for the seahorse’s back
Nex, draw a curved line for the seahorse’s belly
Then, draw the seahorse’s tail by drawing a curved line from the back of the seahorse’s body to its tail.
Step 3: Draw the tail and fin
Seahorses have long, curved tails, so start by drawing a long, thin curve.
Draw a fin on the side of the seahorse’s torso by using curved and rounded lines.
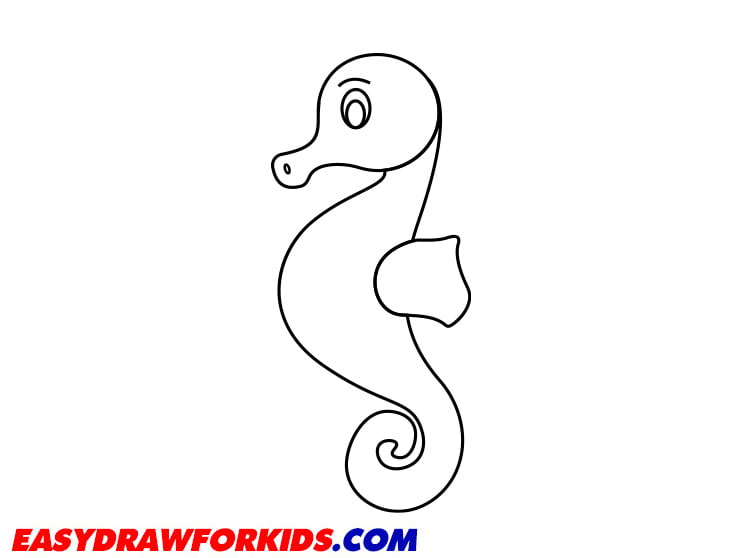
Step 4: Sketch out the scales on the seahorse’s back.

Step 5: Seahorses have many intricate details, so take your time to add your seahorse details.

Step 6: Color your seahorse by your style or as shown in the picture

Now you know how to draw a seahorse step by step.
When drawing a seahorse, there are a few key things to remember.
First, seahorses have a very unique shape.
Second, they have a lot of intricate details.
Share a seahorse drawing with your friend when you complete it.


