Hello!
Today, easydrawforkids.com will walk you through the steps to drawing owls in an easy-to-follow, step-by-step process.
With seven ways, you can learn how to draw an owl with ease.
How To Draw An Owl – A Step By Step Guide

1. Cartoon Owl Drawing
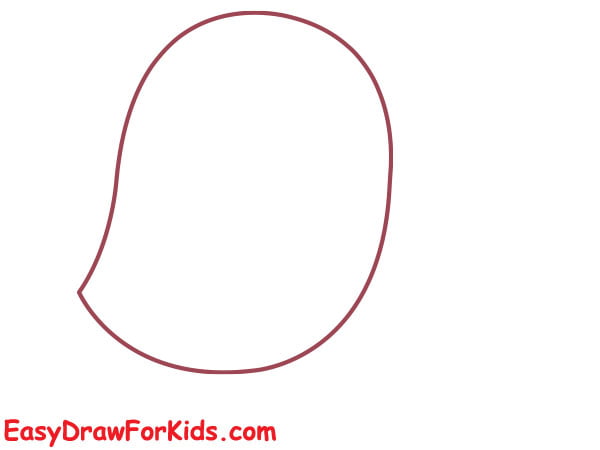
Step 1: Start by drawing a curved line for the top of the head.
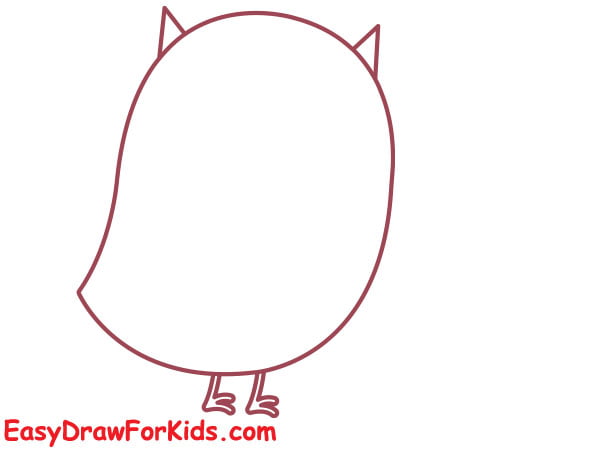
Then, draw the ears to look like two triangles, as you can see in the picture.

Step 2: Now, you draw a curved line to connect two points on step 1 to complete the owl head

Step 3: Sketch a curved half-diamond shape for the wings.
Use some curved lines on the outer edge to form the wings as they appear in the picture.

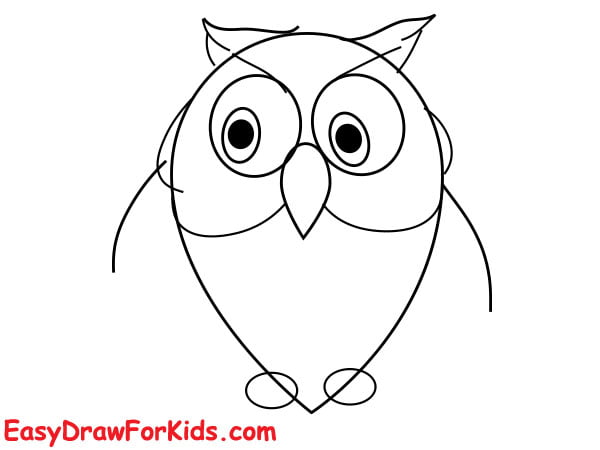
Step 4: Draw a wide “U” shape for the owl’s feet, peeking out from the underside of the body.

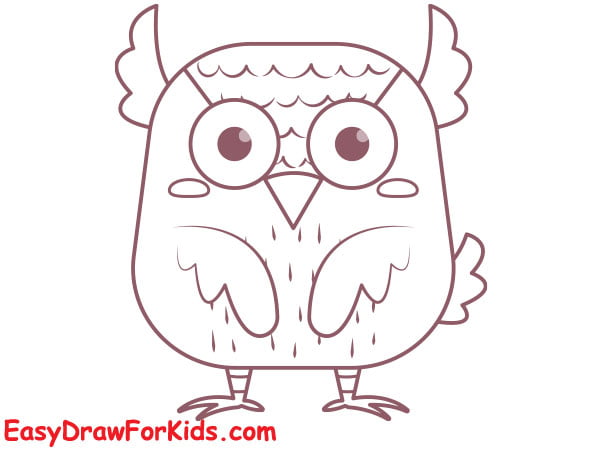
Step 5: Next, draw in the face of the owl

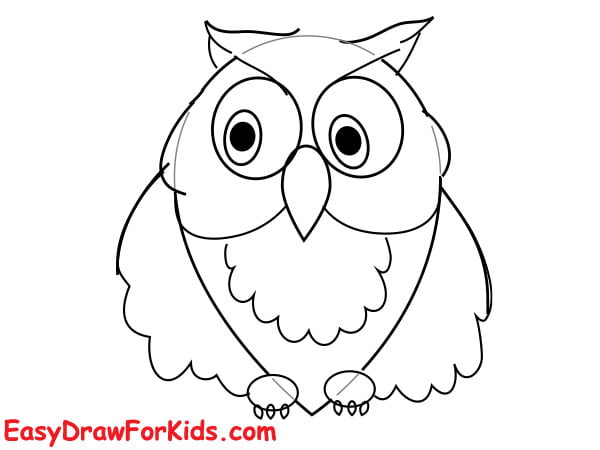
Step 6: Now, add feathers by using messy curved lines radiating outward.

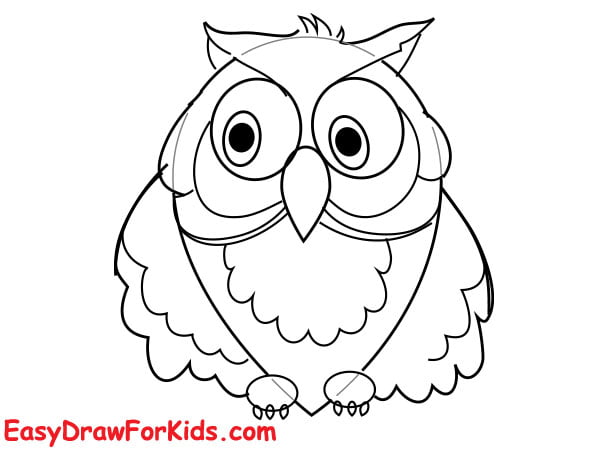
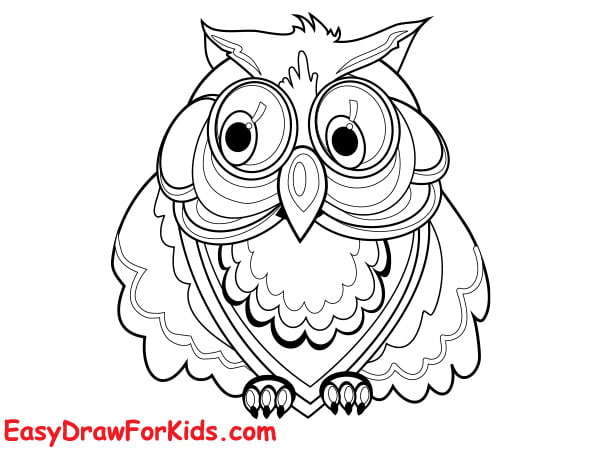
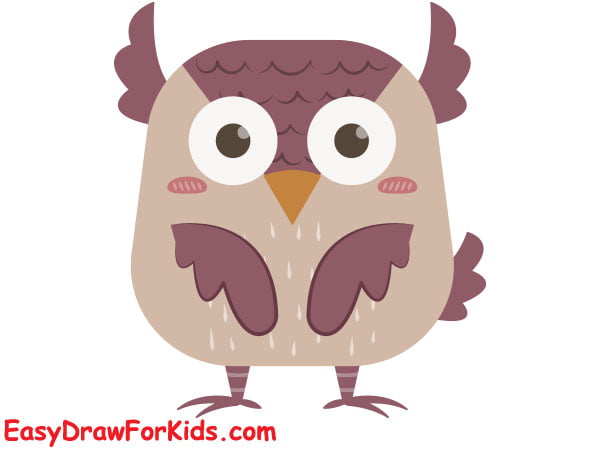
Step 7: Color cartoon owl drawing

2. Cute Owl Drawing
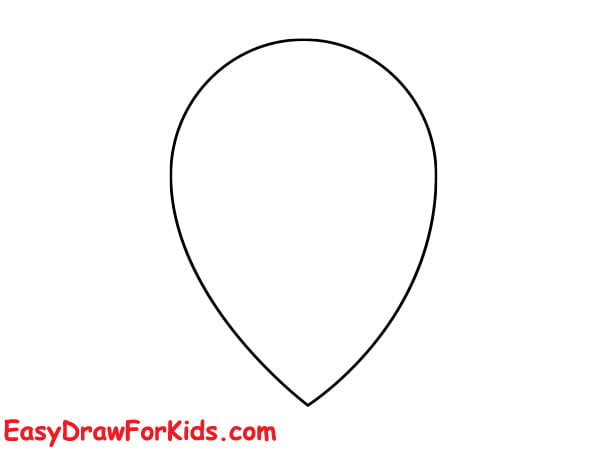
Step 1: First, you draw a large water drop shape for the body of the owl, as shown in the picture
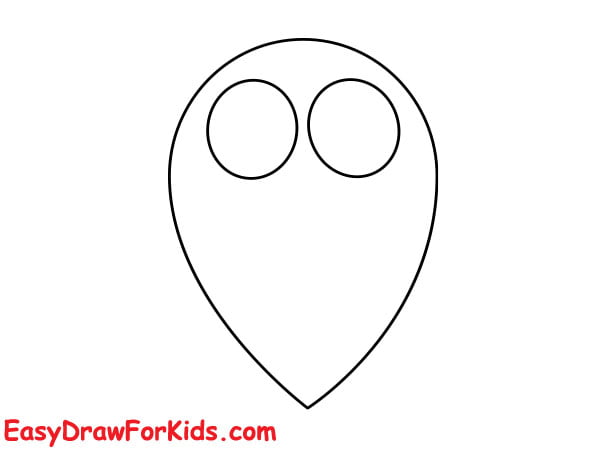
Step 2: Inside the body, draw two circle for the eyes.
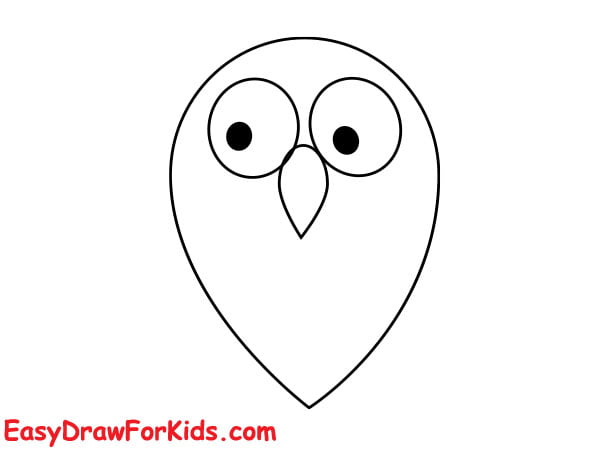
Step 3: Adding a small water drop shape below the eyes for the beak
Step 4: Sketching two oval shape below the body for the feet
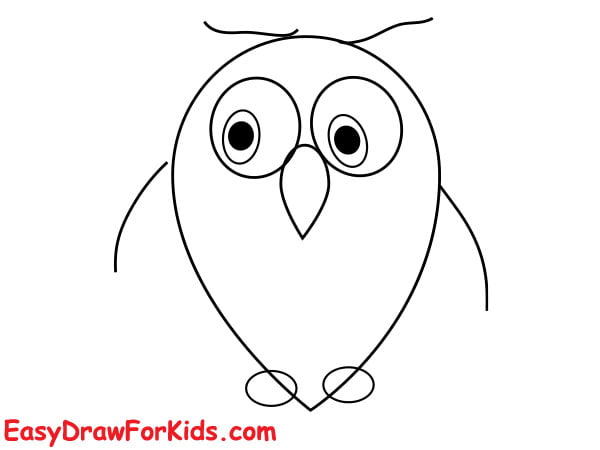
Step 5: Creating the ears on the top of the head
Step 6: Drawing the wings and feathers
Step 7: Creating the owl’s feet and talons
Step 8: Adding final touches and shading
Step 9: Coloring the cute owl

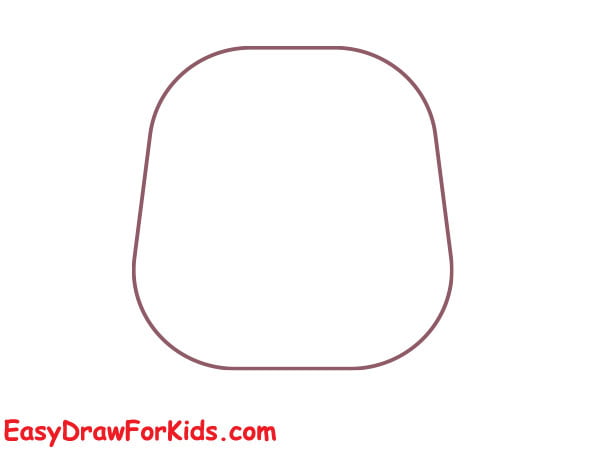
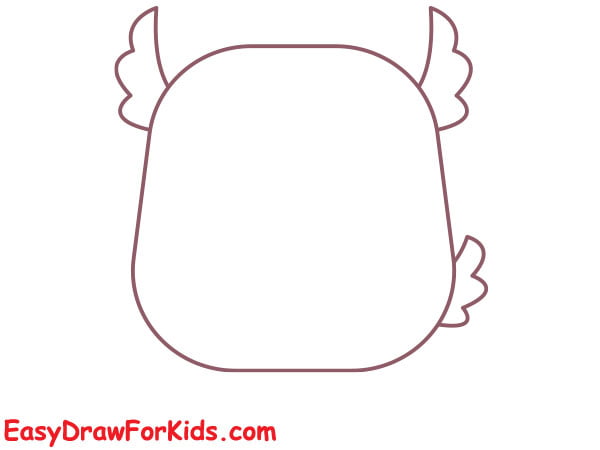
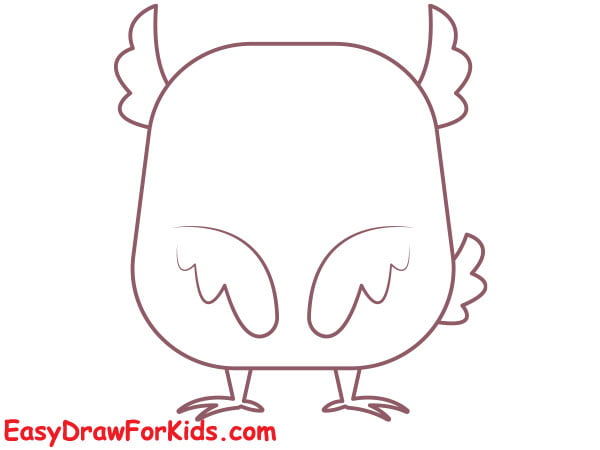
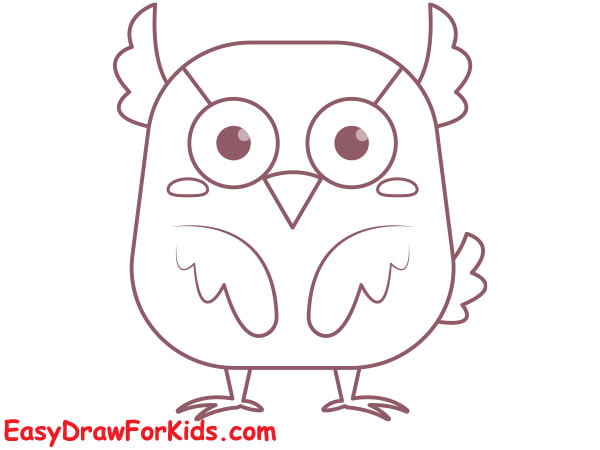
3. Fat Owl Drawing
Step 1: Draw a curved trapezoid for the body of the fat owl
Step 2: Creating the ears and tail of the owl
Step 3: Now, you drawing the wings and feets of the fat owl
Step 4: Drawing the facial features of the fat owl
Step 5: Add details to the owl’s body and wings
Step 6: Coloring the fat owl
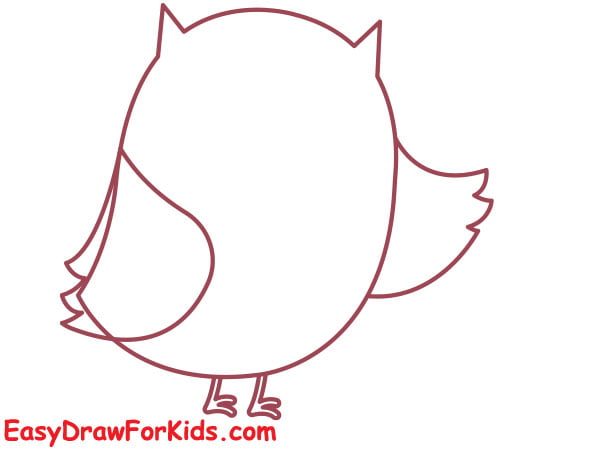
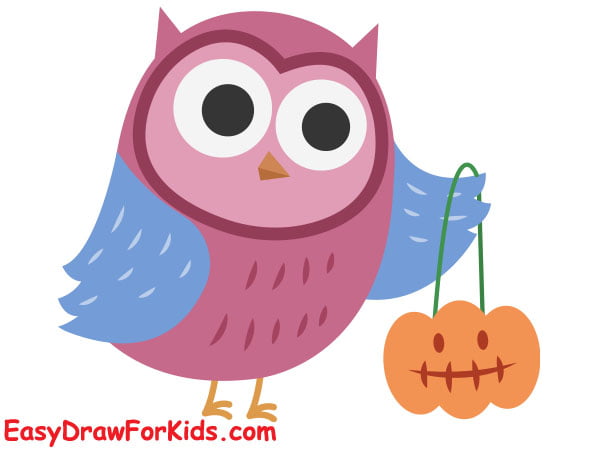
4. Halloween Owl Drawing
Step 1: Sketching the basic outline of the owl
Step 2: Now, adding the ears and feet of your halloween owl
Step 3: Drawing the owl’s wings and feathers
Step 4: Now, you sketch the owl face
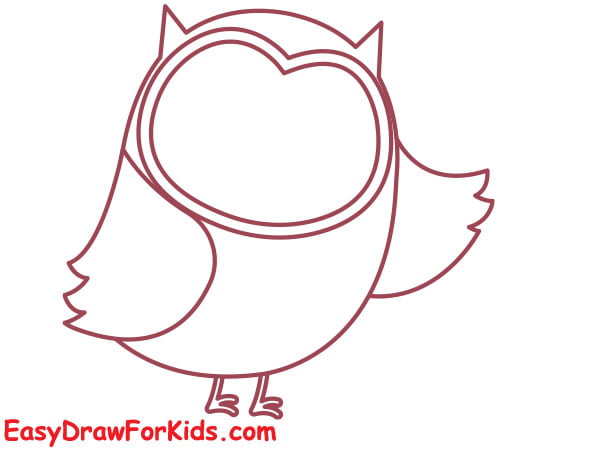
Step 5: Adding details to the owl’s face
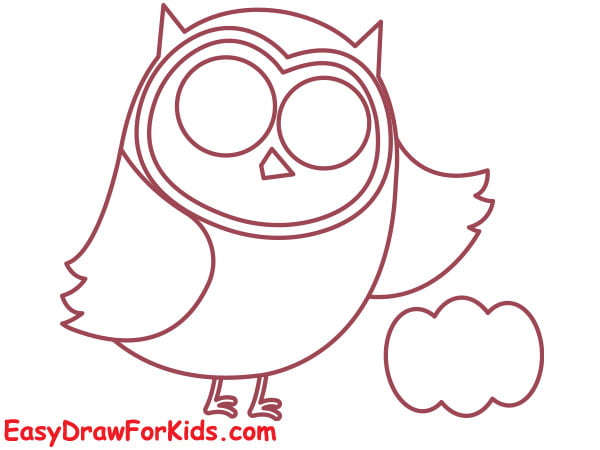
Step 6: Now, it’s time to draw a bucket pumpkin on the wing of the owl
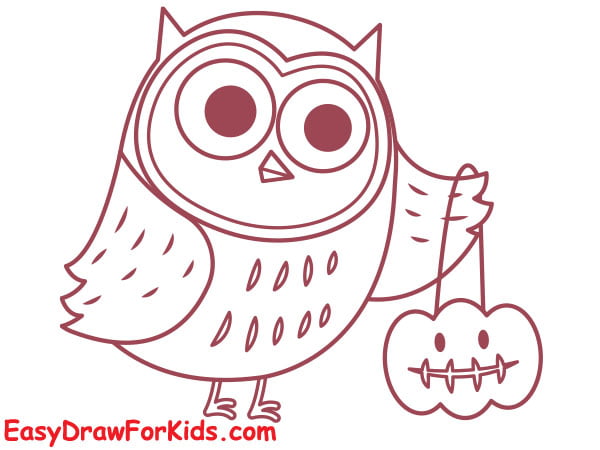
Step 7: Coloring halloween owl
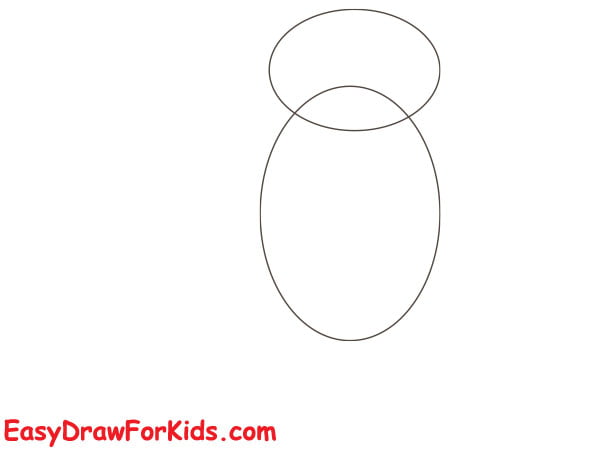
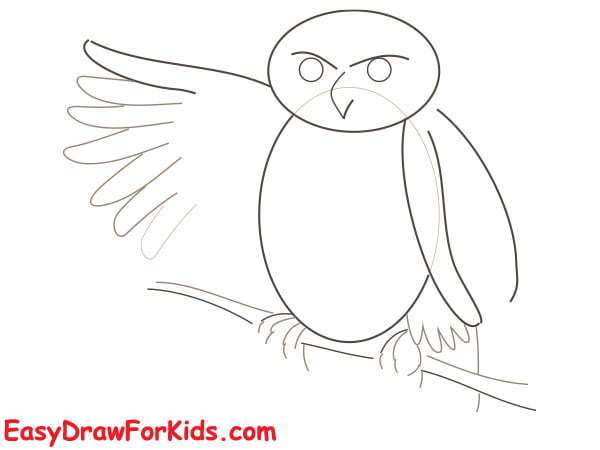
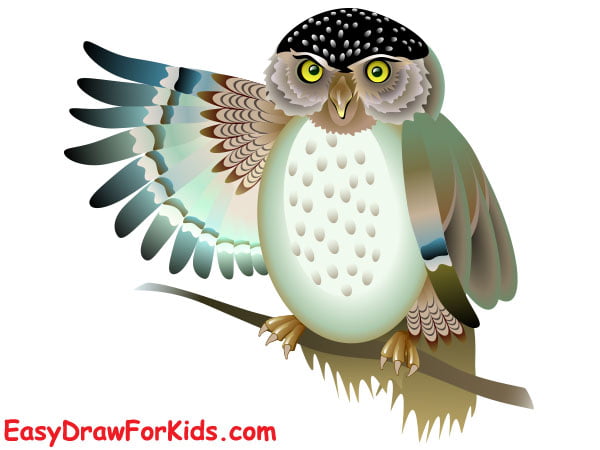
5. Realistic Owl Drawing
Step 1: Start with the vertical oval shape at the bottom, then a horizontal oval shape on top, as shown in the picture.
Step 2: Add the owl’s wings by drawing two curved lines extending from the sides of the body.
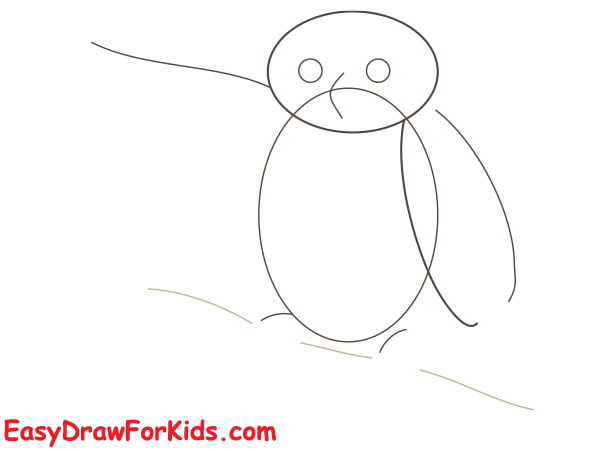
Step 3: Now, adding details to the owl’s face and the wings
Step 4: Draw the owl’s feet by adding two curved lines coming down from the body. End each foot with three talons.
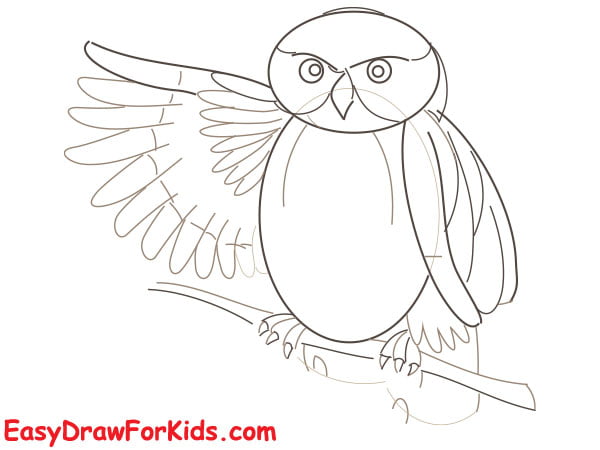
Step 5: In this step on guide how to draw an owl, sketch the feather patterns on the body, wings and feet using short, overlapping lines.
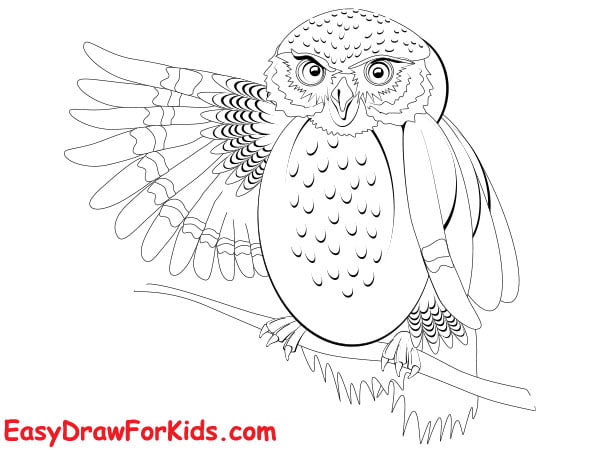
Step 6: Coloring
More Ways To Learn Drawing An Owl
In addition, I have developed various methods for drawing owls to provide you with ample practice opportunities.
6. How To Draw A Cute Owl
This drawing method offers a simplified approach to owl drawing, emphasizing basic shapes.

7. How to Draw a Simple Owl
This method is prevalent among children and beginners, as it offers simplicity and yields an endearing result.

This step-by-step tutorial gave you a helpful overview of how to draw an owl from start to finish!
With some practice following these seven ways, you’ll be creating charming owls in your style.


