If you’re looking for a simple yet rewarding drawing project, sketching a book is an excellent choice.
In this guide on how to draw a book, you’ll learn how to accurately portray a book’s form, texture, and details, creating a realistic or stylized interpretation.
Explore this easy-to-follow guide, packed with helpful tips for illustrating books in various styles.
How To Draw A Book – A Step by Step Guide
1. Cute Book Drawing
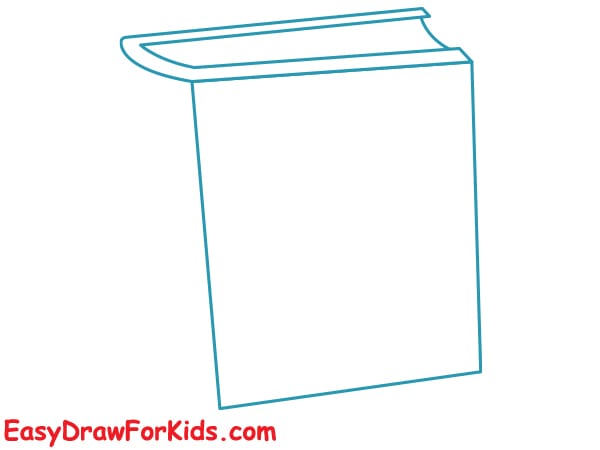
Step 1: Draw the Top of the Book
Draw a horizontal curved rectangle that slants slightly upward on the left side.
Add a second curved line below it to form the thickness of the top book cover.

Step 2: Draw the Body of the Book
From each corner of the top, draw two long vertical lines downward (left line is more curved).
Close the shape at the bottom with a curved line to form a slanted 3D body.
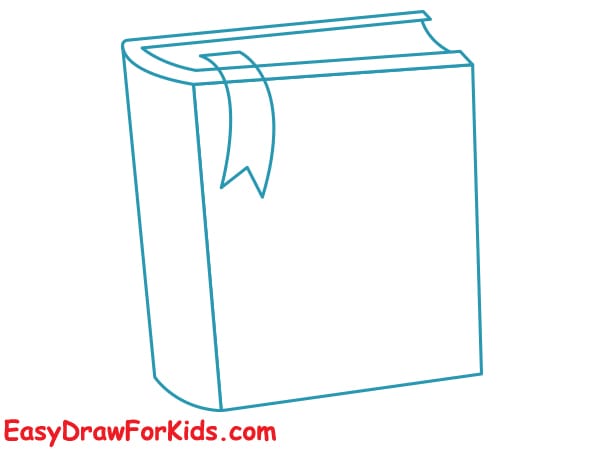
Step 3: Add Bookmark and Spine Details
Add a wavy ribbon coming down from the top of the book, slightly tilted to the left.
Add two short horizontal lines along the left edge and connect them with a vertical curve.
Step 4: Add the Face and Text
- Eyes: Two large circles with curved lines inside for smiling eyes.
- Mouth: A small curved smile below the eyes.
- Glasses: Draw two large round glasses around the eyes connected by a small bridge.
- Write “READ ME” near the bottom right part of the book’s cover using playful, bold letters.

Step 5: Color the drawing, add shadows and highlights if desired to give the book more depth and cuteness.

2. Simple Book Drawing
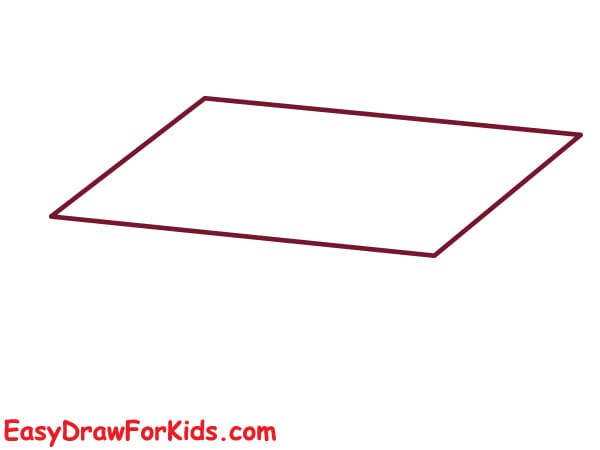
Step 1: Draw the Top Surface
Draw a slanted rectangular shape to represent the top face of the book.
This creates the illusion of depth and sets the perspective.
Step 2: Draw the Front Cover Curve
From the bottom-right corner of the parallelogram, draw a slightly curved vertical line downward.
This line curves outward, suggesting the rounded edge of the book cover.

Step 3: Draw the Full Book Shape
In this step on guide how to draw a book, connect the end of the curved line with a horizontal slanted line to form the bottom edge.
Add another short curved line on the left to show the book’s spine and thickness.
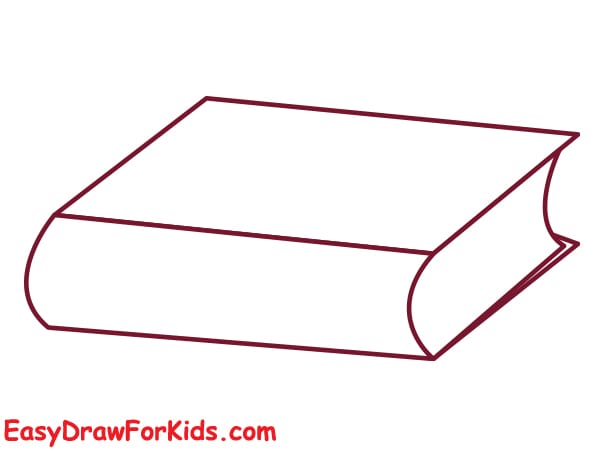
Step 4: Add Page Lines and Details
On the right edge, add several curved horizontal lines to represent page layers.
Add a small rectangle on top for a title plate or label.

Step 5: Color and finish the book:
Leave the pages white with shading on the sides for depth.
Color the book cover with dark red or maroon.
Color the spine stripes with yellow or gold.

>>>Read more: How To Draw A Pencil – 2 Ways (With Pictures)
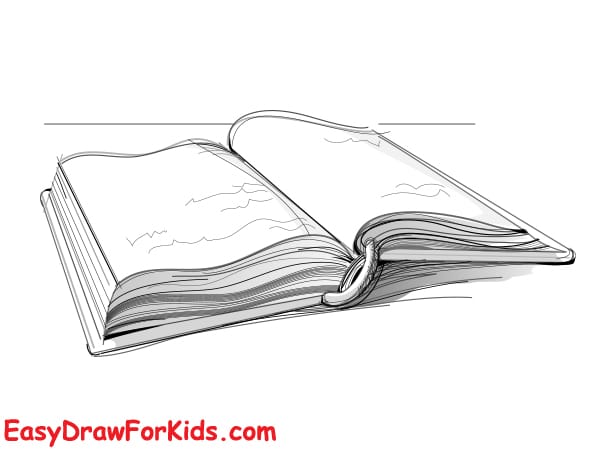
3. Open Book Drawing
Step 1: Sketch the Basic Guidelines
Draw two perspective guide lines, these lines indicate the top and bottom edges of the open book.
Add a gentle curved line between the guide lines to represent the dip in the open pages at the center.
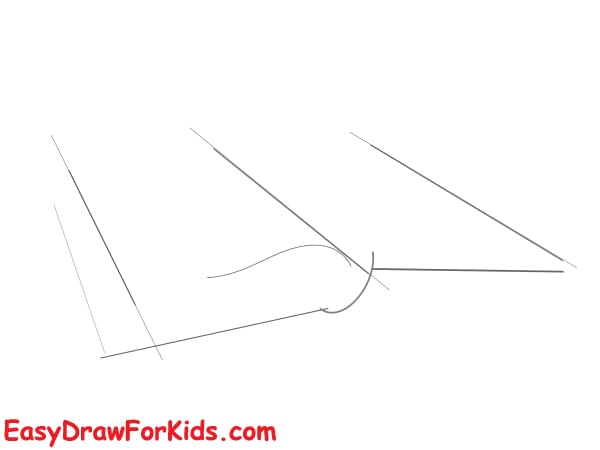
Step 2: Draw the Left and Right Pages
Add diagonal lines from each side of the curve going outward to form the general shape of the two open pages.
The lines curve slightly to emphasize that the pages are lifting and not flat.
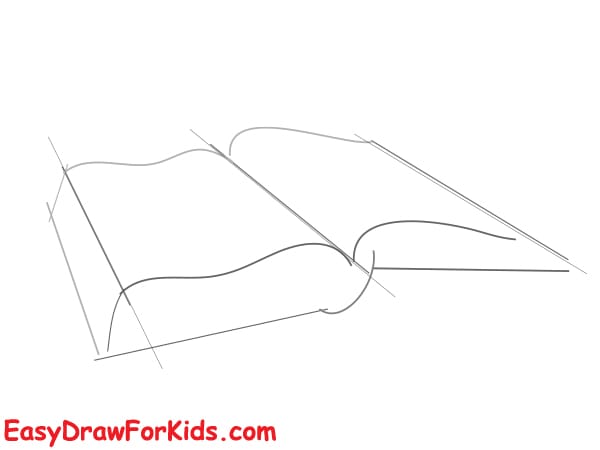
Step 3: Draw the Thickness
Draw a vertical line down from each page’s outer corner.
Connect the bottom with horizontal lines to complete the book block. These new lines help define the depth of the book.
Step 4: Add More Page Details
Draw internal curves for individual pages:
- Lightly sketch curved lines inside each page to show the paper layers.
- Add one or two page folds in the middle for realism.
Draw lines on the book block to show stacked pages.

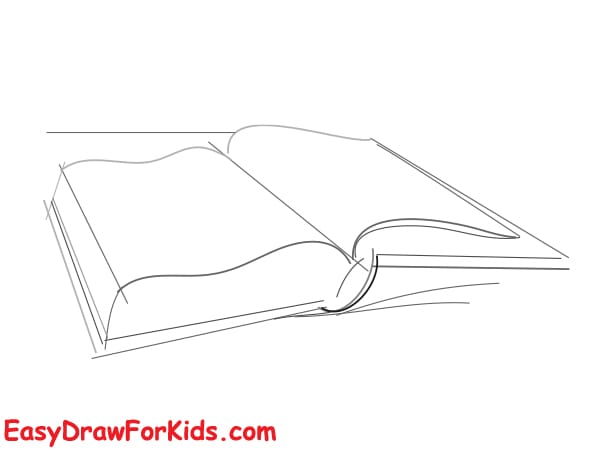
Step 5: Add more page lines and shading:
Emphasize the curves of the book and pages.
Add hatching or shadows between the pages and under the book for depth.
Draw additional details on the spine and outer edge.
Congratulations on bringing your book drawing to life!
By following these steps, you’ve successfully learned how to draw a book from start to finish.
Keep practicing and adding your personal flair to make every sketch stand out!


