Have you ever marveled at the beauty of coconut tree on a beach?
It’s no wonder that everyone are fascinated by these majestic trees.
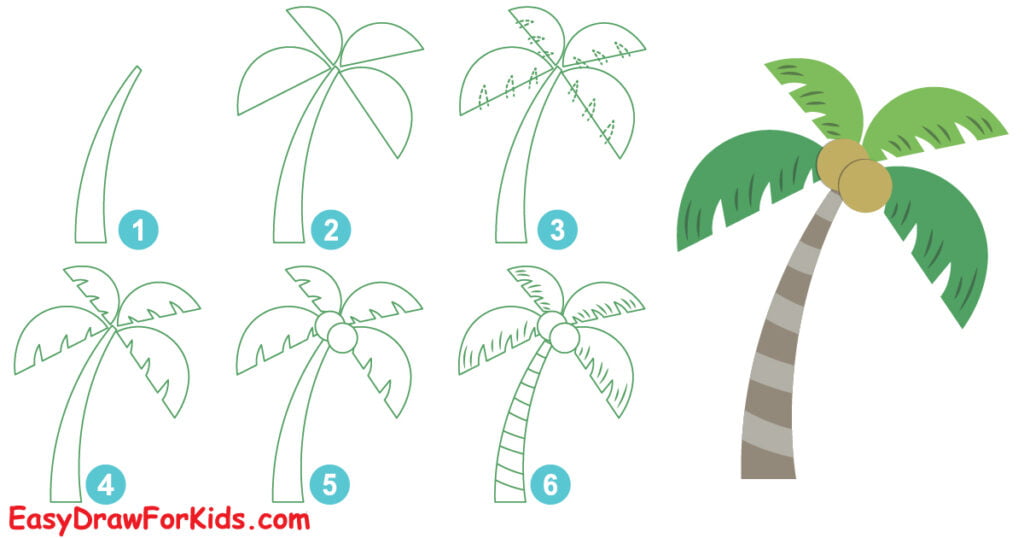
In this guide, we will help you learn how to draw a coconut tree in 7 steps with ease!
How to Draw a Coconut Tree – A Step by Step Guide

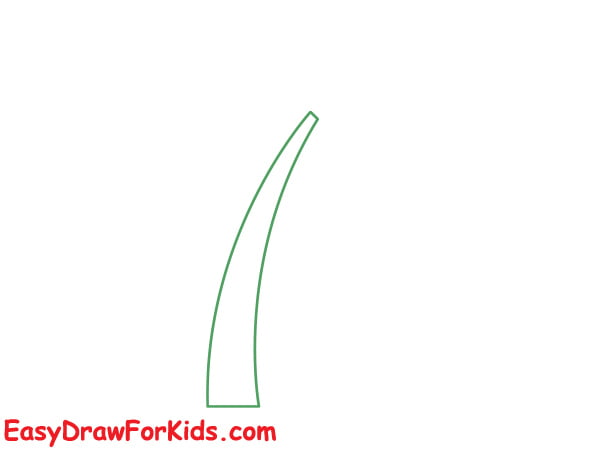
Step 1: Draw the trunk
Start by drawing a slightly curved vertical line for he trunk.
The trunk should be thin but slightly wider at the base.

Step 2: Adding the Leaves
One of the defining features of a coconut tree is its abundant foliage.
To depict this, draw several long, slender shapes radiating from the top of each branch.
Coconut tree leaves tend to droop downwards, so angle them accordingly.

Step 3: Draw the Frond Stem
Draw the leaves along both sides of each frond stem with short strokes.
Vary the lengths and sizes of the fronds so they don’t look too uniform.

Step 4: Erase any extra sketch lines

Step 5: Drawing the Coconuts
To draw coconuts, draw small oval shapes dangling from the ends of the branches.

Step 6: Add the Details
Draw a series of horizontal uneven lines along the trunk to form textured bark.
Use light, vertical strokes along the length of each leaf.

Step 7: Color the Drawing
Coconuts are usually brown, while the fronds and trunk can be shades of green or brown.
You can also add a beach or an island background to complete the scene.

>>>Read more: How To Draw A Beach – 10 Steps (With Pictures)
Tips for Drawing Coconut Trees
Observe photos of real coconut trees to note small details in the trunk, fronds, and coconuts.
Use smooth lines when sketching the natural curves of fronds and coconuts.
Trunks should be narrow at the top and slightly wider at the base where they meet the ground.
Your Coconut Tree Drawing is Complete!
Your drawing is now complete! Congratulations on learning how to draw a coconut trees.
By following the step-by-step process outlined on this guide, you can draw a unique coconut tree.
With time and practice, you’ll be able to draw a coconut tree like a pro.
>>>Read more: How To Draw A Palm Tree – 2 Ways (With Pictures)


