Welcome to today’s drawing tutorial! In this lesson, we’ll learn how to draw a koala — from its fluffy ears to its sleepy, cute face.
We’ll be drawing a koala, step by step — easy enough for beginners and fun for everyone!
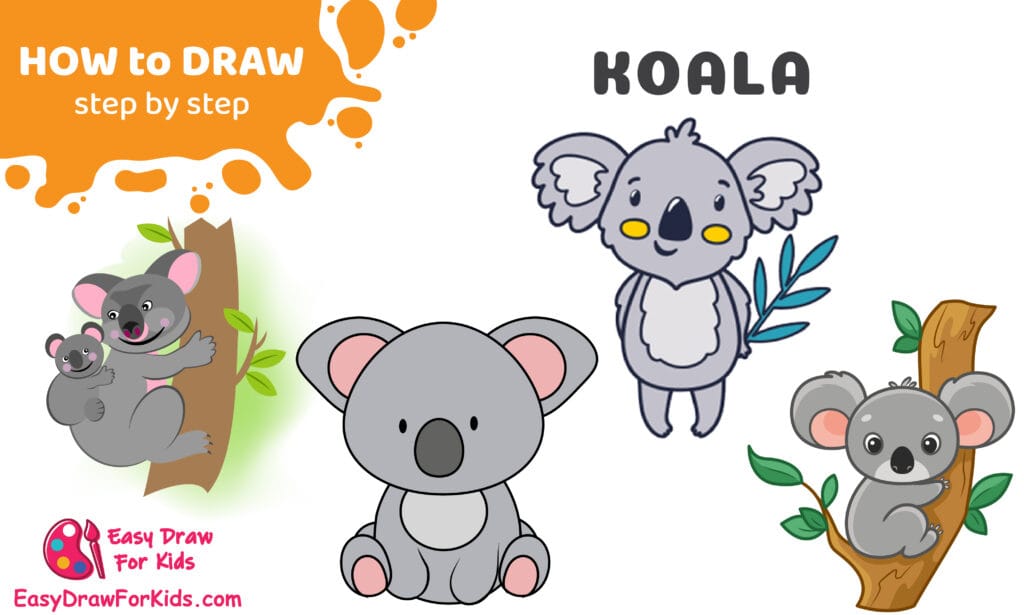
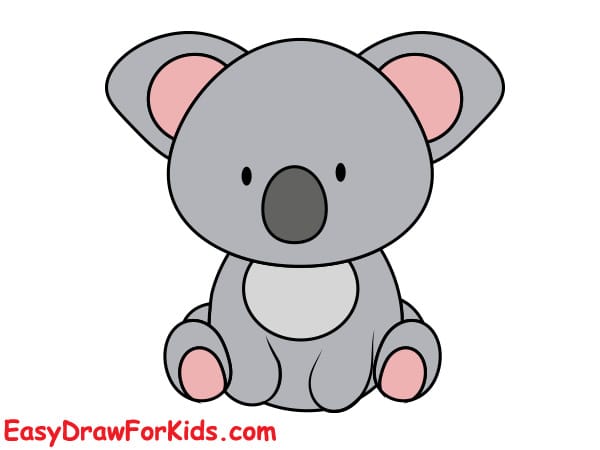
How to Draw a Koala – A Step by Step Guide
1. How To Draw A Cute Koala Easy
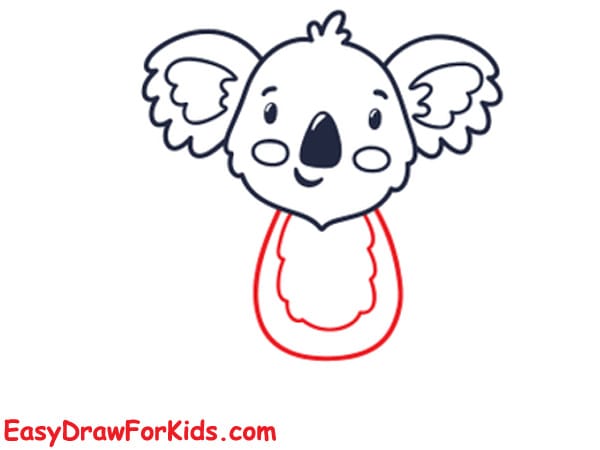
Step 1 — Draw a soft round head shape with a slight tuft at the top, wider at the top and gently narrowing toward the chin. Keep the outline smooth and slightly fuzzy.
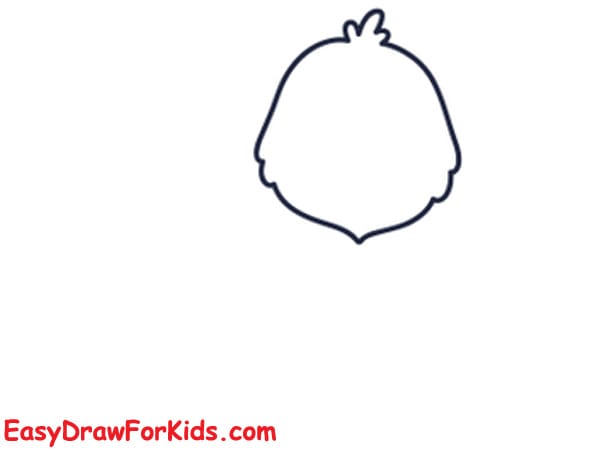
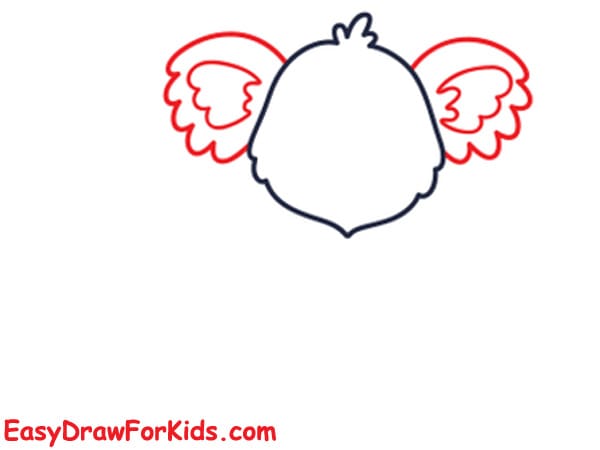
Step 2 — On both sides of the head, draw large, rounded koala ears. Make them fluffy: draw a rounded outer shape then a scalloped inner line to show fur texture.
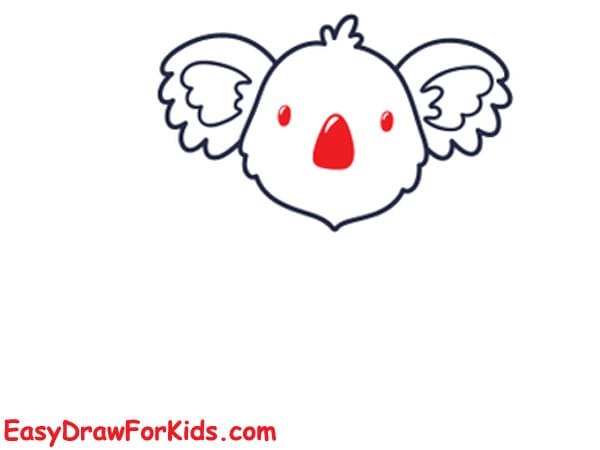
Step 3 — Place two small circles for the eyes about one third down from the top of the head.
Between and a little below the eyes, draw a big oval nose — koala noses are prominent and centered.
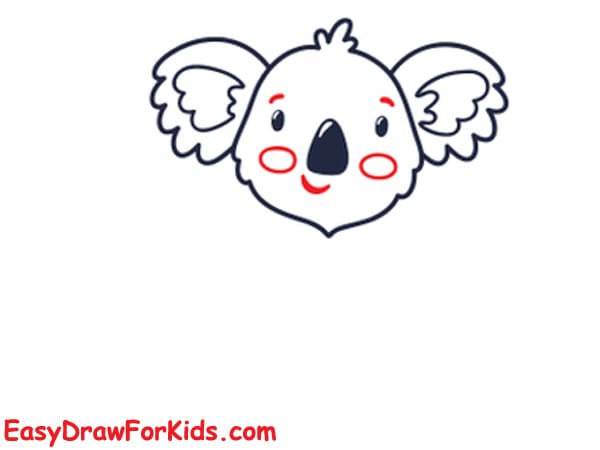
Step 4 — Add small round cheek spots or blush marks under each eye and a tiny curved mouth just under the nose.
Darken the pupils and leave a small white highlight to make the eyes sparkle.
Step 5 — Draw an oval or rounded patch on the lower center of the head that becomes the upper chest — a soft, slightly pointed oval that will be the koala’s belly fur patch.
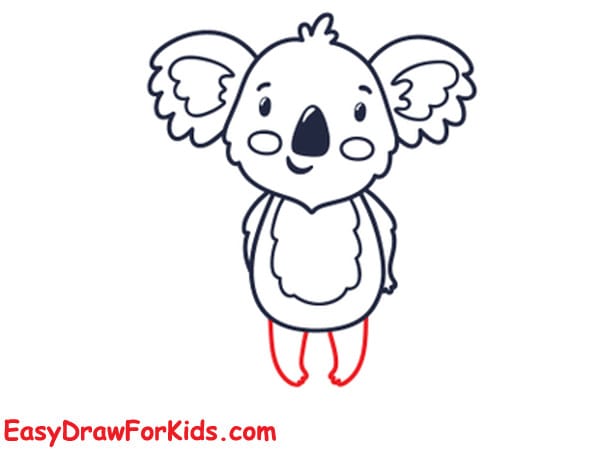
Step 6 — Refine the chest patch and extend two short legs downward from the bottom of the belly patch. Keep the limbs short and chubby for a cute look.
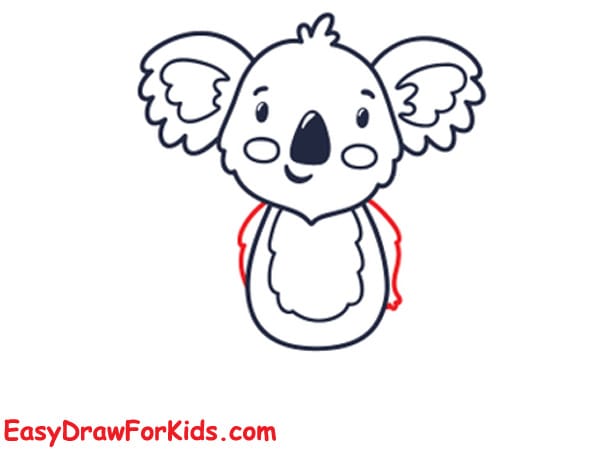
Step 7 — Sketch two small arms at the sides as if the koala is holding something or hugging itself. Make the pose relaxed and centered.
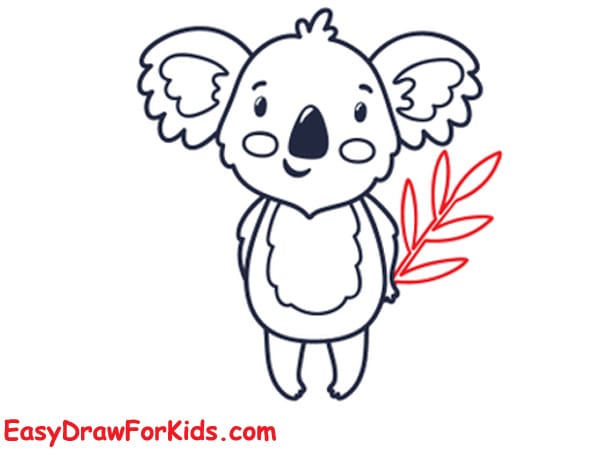
Step 8 — Draw a simple eucalyptus branch or leafy sprig near one side so the koala appears to be holding or standing next to it.
Add a few long leaves with a central vein for realism.
Step 9 — Ink the final lines, erase pencil marks, then color: light gray for main fur, slightly darker gray for ear edges and hair tufts, pale cream for the belly patch, black for the nose, and soft pink for cheek spots.
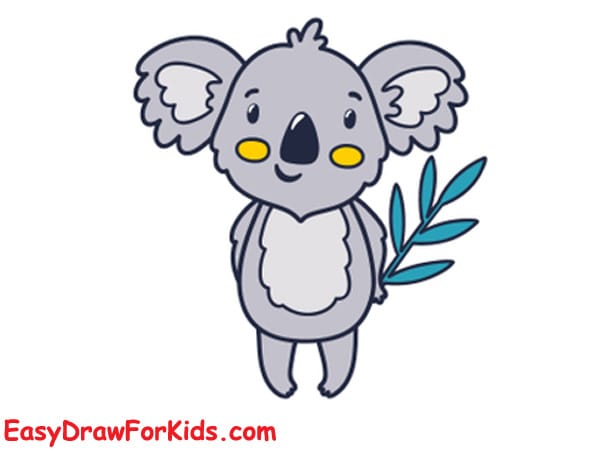
2. How to draw a Koala for Kids
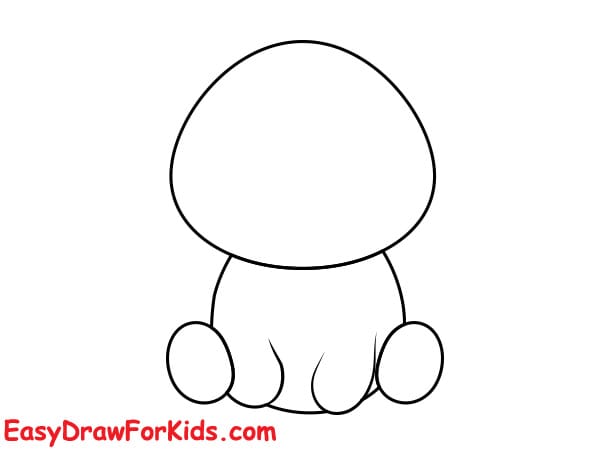
Step 1: Start by drawing a large oval shape with the wider part on top. This will be the koala’s head.

Step 2: Below the head, draw a small round body.
Add two oval shapes on the sides of the body for the feet.
Then, draw a curved line between the feet to form the belly.
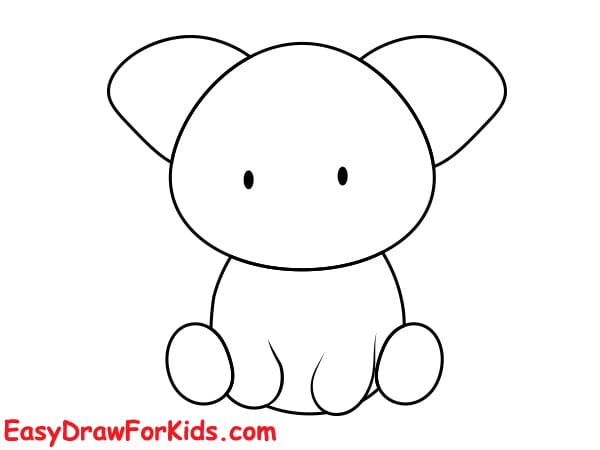
Step 3: Now draw two big rounded ears on each side of the head.
Inside the face, add two small dots for the eyes.
Draw a large oval nose in the center, slightly lower than the eyes.
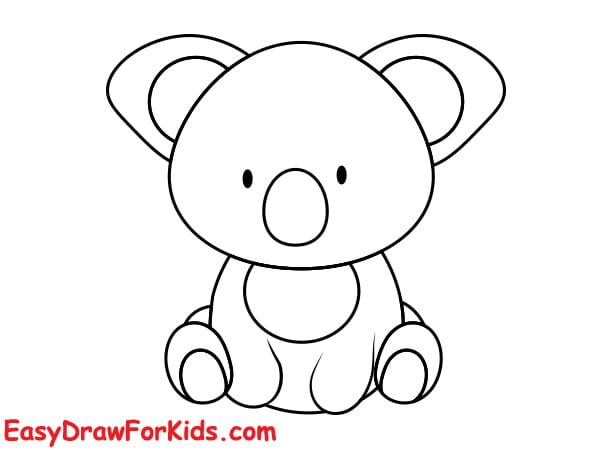
Step 4: Inside each ear, draw another smaller curved shape to show the inner ear fur.
Add a smaller oval inside the nose for detail.
Then, draw small curved lines on the feet to represent the toes.
Step 5: Now it’s time to color your koala!
Use gray for the head, body, and ears.
Color the inner ears and feet pads with light pink.
Make the nose black and leave a small white highlight for shine.
>>>Read more: How To Draw A Zebra – 2 Ways (With Pictures)
3. How to draw a koala on a tree easy
Step 1 — Draw a medium oval for the koala’s head. On each side add large circular ear shapes that slightly overlap the head. Keep the ear outlines soft and rounded.

Step 2 — Inside the head, draw two round eyes, a big rounded triangle or oval for the nose centered lower on the face, and two small cheek circles or blush dots under the eyes. Add a tiny mouth under the nose.

Step 3 — Under the head, draw a small curled body (like a soft “C” or bean shape) so the koala looks seated. Sketch one short hind leg peeking out at the bottom (a small rounded foot).

Step 4 — Add the near arm wrapping in front of the body (curved, ending in a rounded paw) and the far arm hugging behind the body (you’ll refine the paw shape later). The pose should read as “holding onto” something.

Step 5 — Draw a tall, slightly curved tree branch or trunk segment next to the koala; make it wide enough for the koala to grip. Position the branch so the koala’s arms naturally wrap around it.

Step 6 — Refine both paws so they grip the trunk. Add a few leaves attached to the branch.

Step 7 — Ink your final lines. Color: soft gray for the fur, light cream for belly patch and inner ears, black for the nose, pink for cheek blush, brown for the tree trunk, and green for leaves. Add subtle shading under the chin, beneath arms, and where body meets trunk.

>>>Read more: How To Draw A Snake – 5 Ways (With Pictures)
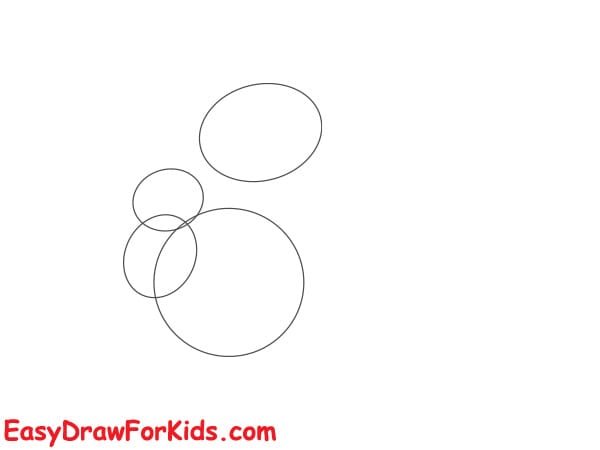
4. How to draw mom and baby koala
Step 1 — Draw three simple overlapping ovals to block the composition: one large oval for the mom’s body (lower right), one medium oval above/right for the mom’s head, and one small oval on the mom’s chest/left side for the baby’s body.
These guide shapes set size and position.
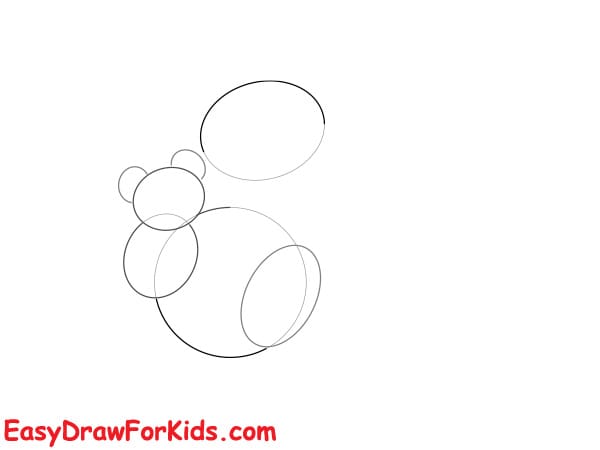
Step 2 — Inside the head ovals, add two small circles for ear placement on each head. Lightly mark the baby’s head on the small oval.
Sketch simple limb shapes — short rounded arms for mom reaching around the baby, and small stubs for the baby’s limbs.
Also mark where the tree trunk will be at the right edge.
Step 3 — Refine both faces: draw the mom’s and baby’s large round noses, two small round eyes with tiny highlights, and little curved smiles.
Draw fluffy ear outlines for both — an outer round ear and a scalloped inner ear line to show fur texture.
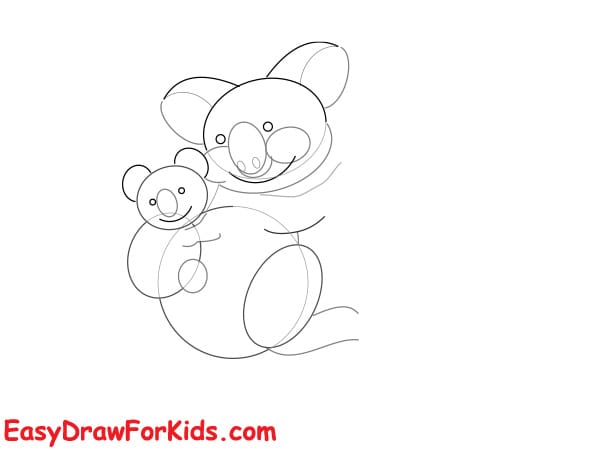
Step 4 — Turn the construction ovals into bodies: refine mom’s torso and round belly patch, shape mom’s arms so one arm wraps under the baby and the other grips the trunk.
Give the baby a curled, seated pose against mom’s chest with tiny feet visible.
Add the tail nub and the seam where mom’s belly fur patch meets the body.
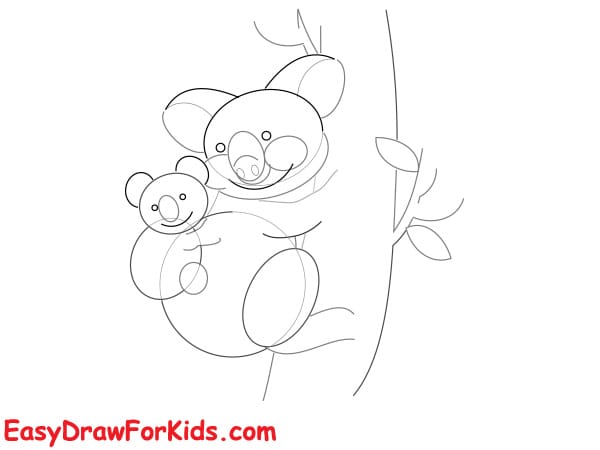
Step 5 — Sketch the tree trunk alongside the right edge, making it wide enough for mom to hug.
Add a branch or two and a few long eucalyptus leaves.
Adjust the position of mom’s hands so they realistically grip the trunk or rest on the baby.
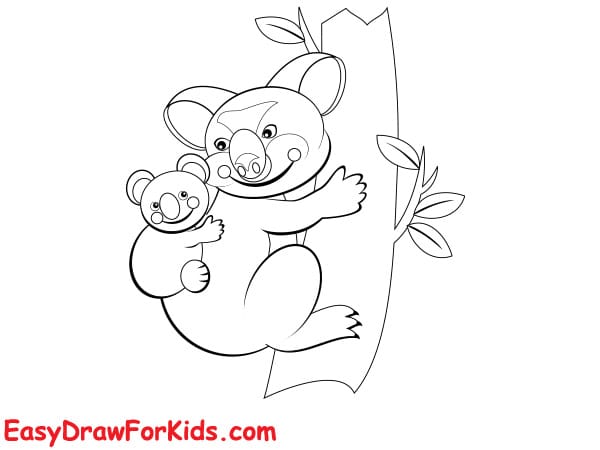
Step 6 — Ink the final lines with a pen; use heavier outer lines and finer inner details.
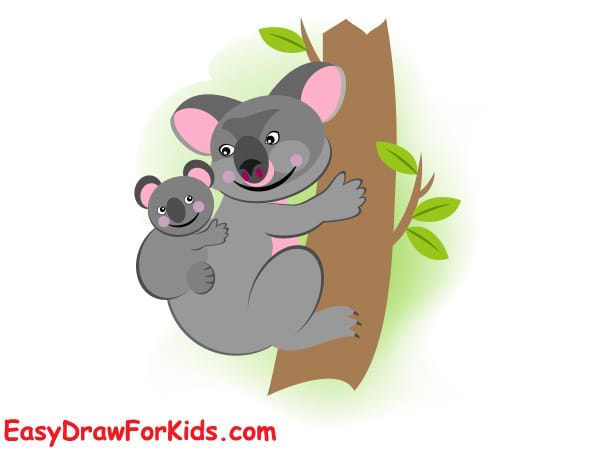
Color: soft gray for main fur, lighter cream for belly patch and inner ears, black for the nose, pale pink for cheek blush, brown for the tree, green for leaves.
>>>Read more: How to Draw a Ladybug – 5 Ways (With Pictures)
Thanks for drawing with me today!
You’ve created a sweet little koala that looks ready for a nap.
Until next time, keep your creativity flowing and your pencils moving!