Drawing a light bulb may seem simple, but making it look realistic requires some technique.
With this tutorial, anyone can learn how to draw a light bulb, regardless of skill level.
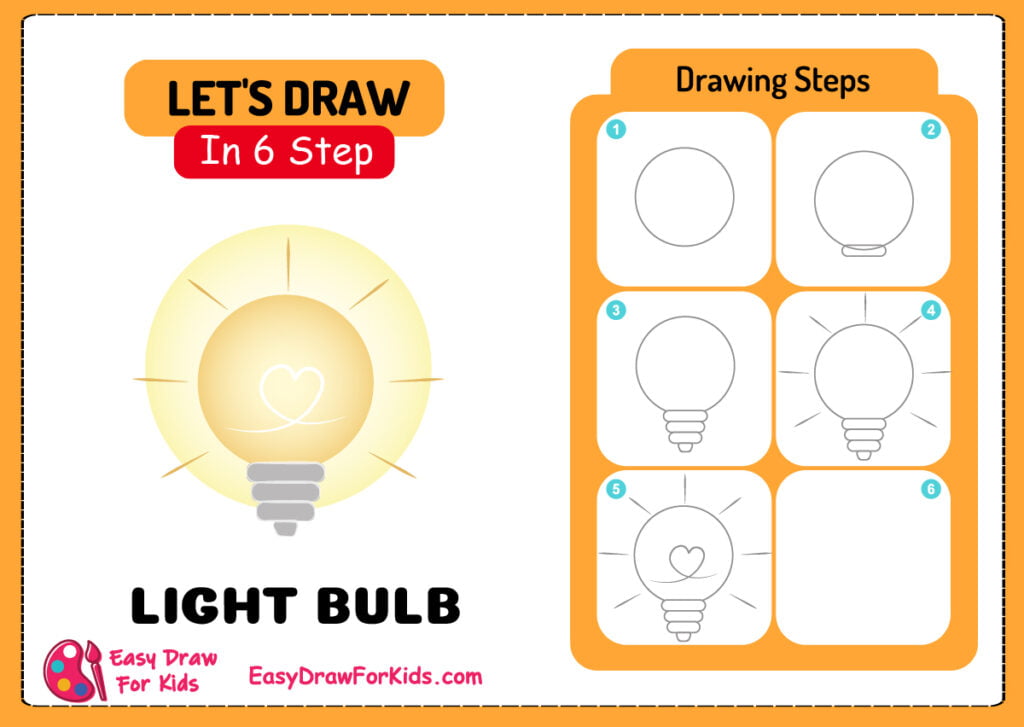
How To Draw A Light Bulb – A Step By Step Guide
1. Lightbulb Drawing Easy

Step 1: Draw a perfect circle to form the main body of the light bulb.

Step 2: With the outline on step 1 complete, shift focus to the base by drawing an oval shape for the first layer of the base

Step 3: Draw shorter rectangles inside, leaving small gaps on the long left and right edges to complete the light bulb’s base.

Step 4: Draw multiple vertical lines around the glass bulb to impression that the light bulb is glowing.

Step 5: For the filament, draw a long, slightly curved line with a heart shape through the centre of the bulb shape.

Step 6: Bring your bulb drawing to life with color!

2. Cute Light Bulb Drawing
Step 1: Draw a circle

Step 2: Extend two lines from the bottom of circle to formt the basic shape of the light bulb

Step 3: At the bottom of the light bulb, draw a series of oval shapes overlapping each other for the metal base.

Step 4: Draw a spiral form, with the coils more compact towards the centre of the bulb for the filament inside the bulb.

Step 5: Drawing a “love” on the filament

Step 6: Light bulbs are typically depicted with a bright yellow glow, so color the main body of the light bulb yellow.

Learning how to draw a light bulb is an enjoyable and rewarding exercise.
Keep shining bright with your creativity!