Polar bears have a robust build and white coats, and they live in the Arctic.
We just see them on the internet, in films, and in picture books.
In this tutorial, easydrawforkids.com will help you learn how to draw a polar bear with two ways.

How To Draw A Polar Bear – A Step By Step Guide!
1. Cute Polar Bear Drawing
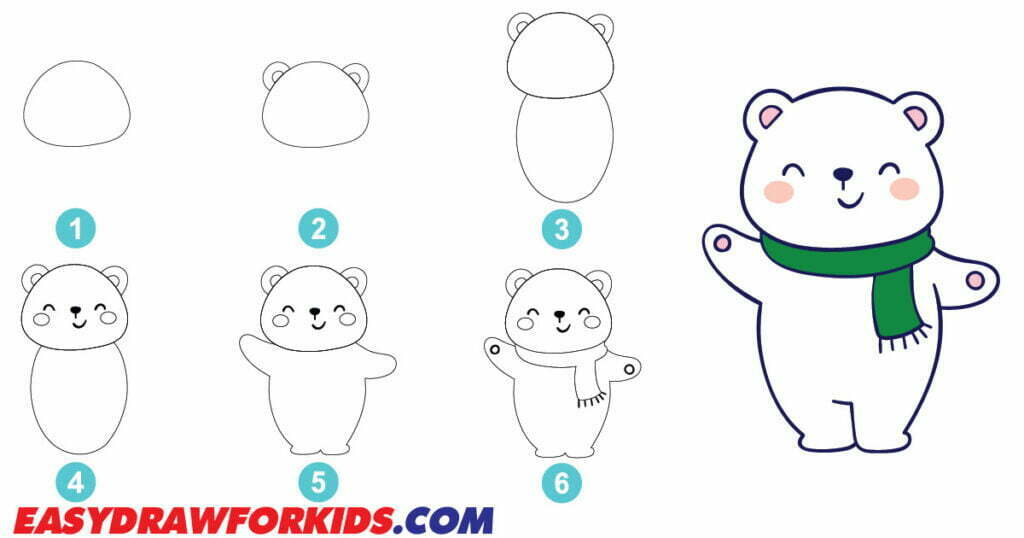
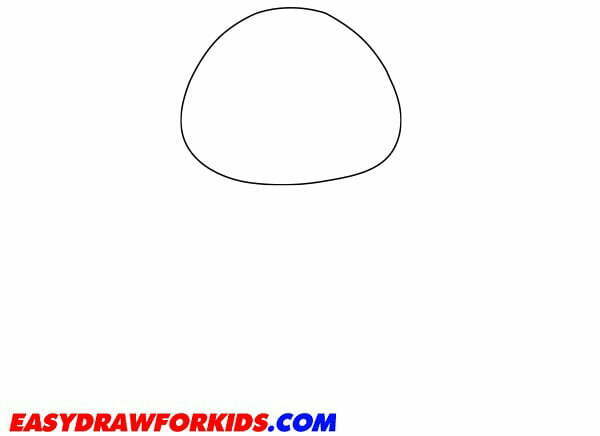
Step 1: Start by draw an oval shape for polar bear’s head in the centre of your paper.
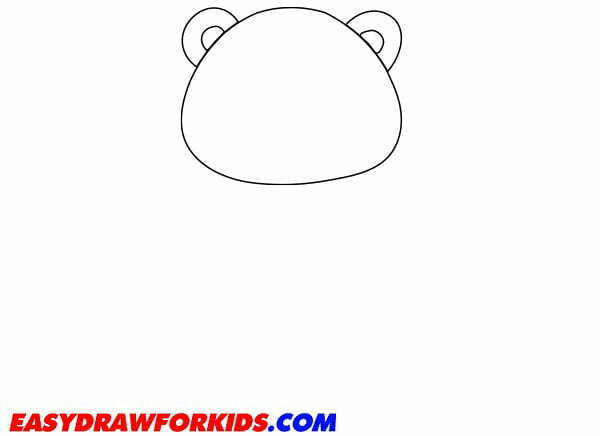
Step 2: On either side of the head, draw two rounded triangle shapes for the ears, add an inner outline using curved lines.
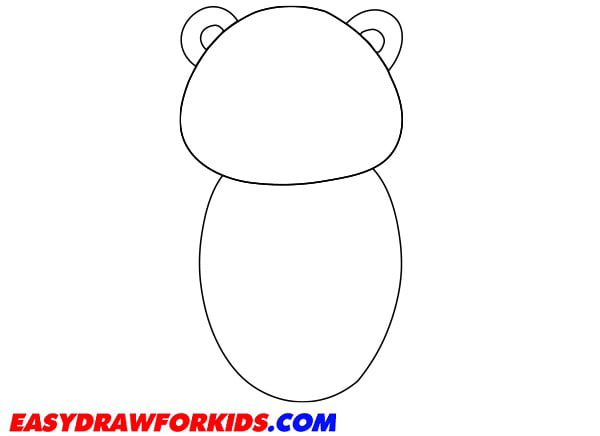
Step 3: From the bottom of the head, draw a slightly curved line that extends downward.
Step 4: Start with the smiling eyes by drawing two upside-down “U” shapes.
Below each eye, draw two oval shapes to give it rosy cheeks.
For the nose, draw a small irregular shape, add a C-shaped line for the mouth.
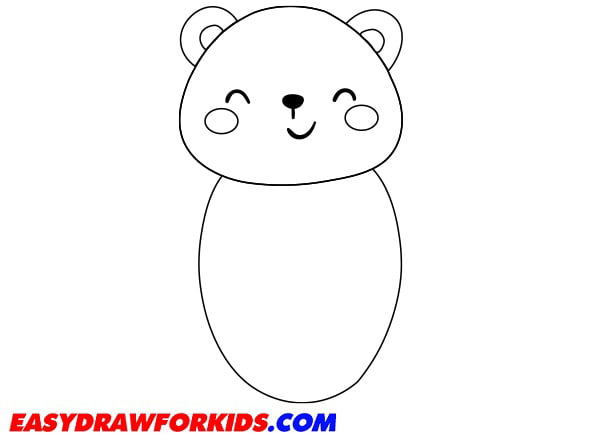
Step 5: Draw two curved lines below the head for the front limb.
Draw an oval for each leg, narrow at the paws.

Step 6: Below the head, draw a curved line around the neck for the scarf, as shown in the picture
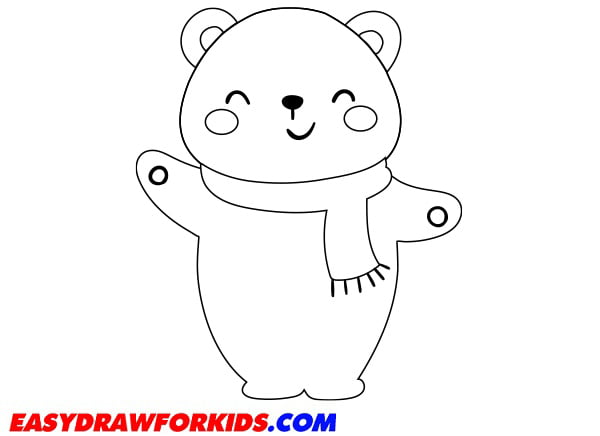
Step 7: Add white for the fur, black for the eyes and nose, and blue for the background.

2. Christmas Polar Bear Drawing
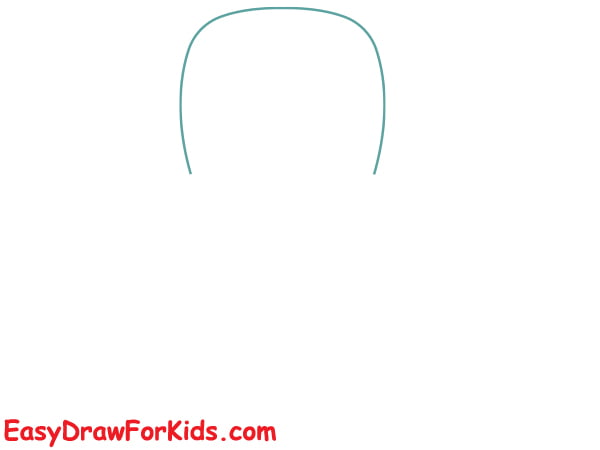
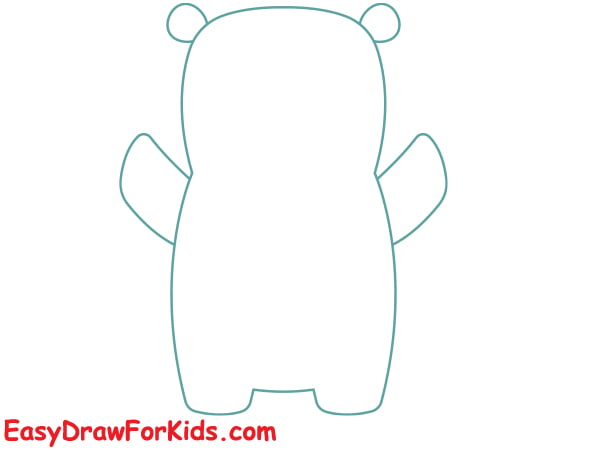
Step 1: Sketching an oval shape for the head.
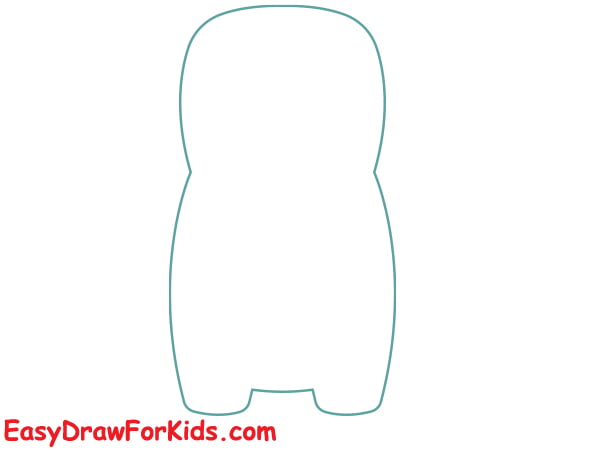
Step 2: Add a larger oval shape on the bottom of the head for the body.
Sketch four curved lines for the legs, two on each side of the body.
Step 3: Draw two small circles for the bear’s ears on top of the head.
Draw the front legs by extending two rectangular shapes beside the body.
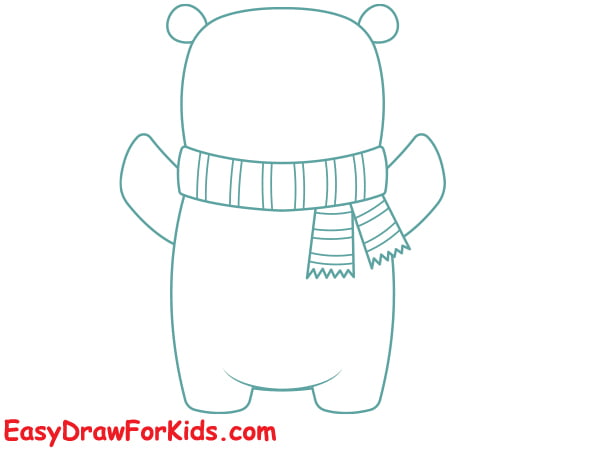
Step 4: Draw the scarf draped around the bear’s neck, with one end flowing down the front of the body.
Add texture and details to make it look realistic.
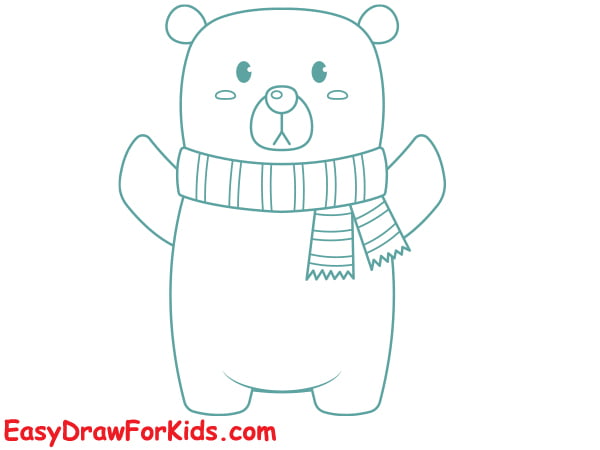
Step 5: Draw two oval shapes for the eyes. Add small circles inside the eyes to represent the pupils.
Below the eyes, draw a curved line to create the bear’s snout.
Draw an oval shape at the end of the snout for the nose and draw a curved line for the mouth.
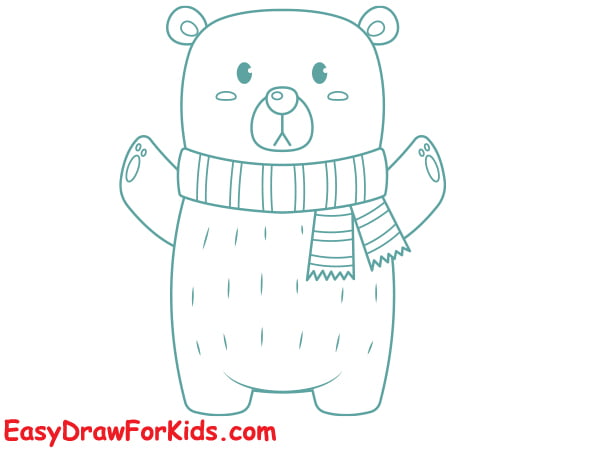
Step 6: Draw short, overlapping strokes on the body of polar bear for the fur.
Step 7: You can colour your polar bear drawing in your style or as shown in the picture.

Now you know how to draw a polar bear just a few step.
With some practice, you can master drawing beautiful polar bears.


