If you’ve ever admired the beauty of a swan and wanted to translate that onto paper, you’re in the right place.
Learning how to draw a swan is easier than you think! This guide provides straightforward instructions so you can craft an image that showcases the swan’s natural beauty.
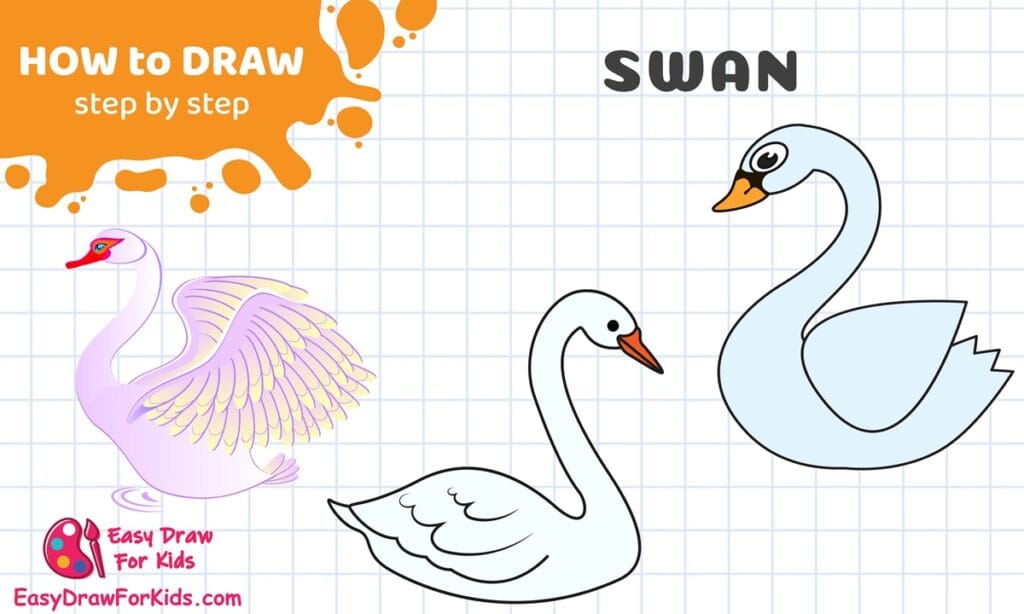
How To Draw A Swan – A Step by Step Guide
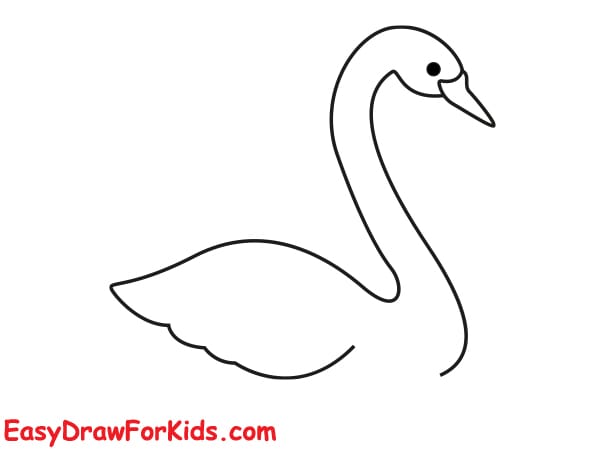
1. Simple Swan Drawing
Step 1: Start by drawing a small oval for the swan’s head near the top right of the page.
Then, draw a large curved shape like a rounded “W” or crescent for the body, wider at the bottom and tapering toward the neck area.

Step 2: Add a short, pointed triangle shape extending from the front of the head for the beak.

Step 3: From the bottom of the head, draw a graceful S-shaped curve going down and connecting to the body. This forms the long neck.
On the opposite side of the head, draw a smaller curve going downward to complete the back of the neck.

Step 4: On the body’s side, draw a large oval or teardrop shape to represent the wing.
Make the wing curve smoothly and follow the body’s shape.

Step 5: Add 2–3 zigzag or feather-like lines at the tip of the wing to show feather detail.

Step 6: Draw a large circle for the eye.
Inside it, add a smaller black circle for the pupil and a tiny white dot to make it shine.
Optionally, add a small black patch or line from the beak toward the eye to imitate real swan markings.
Step 7: Now you complete this method how to draw a swan, you can color the swan white with an orange beak and black markings.

>>>Read more: How To Draw An Eagle – 4 Ways (With Pictures)
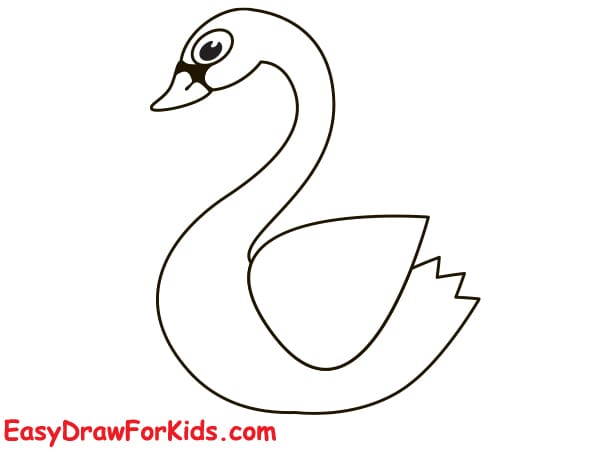
2. Cute Swan Drawing
Step 1: Draw the Head and Neck
Start by drawing a long, curved line that swoops downward and back up like an elegant “S”.
This will form the neck and top of the head. Add a small eye near the curve at the top.

Step 2: Complete the Neck and Add the Beak
Draw another curved line coming down from the head and connecting back upward—this completes the full neck shape.
At the tip of the head, draw a small triangular beak pointing outward.

Step 3: Sketch the Back and Chest
From the lower end of the neck, draw a smooth horizontal line curving slightly down and then up to form the chest and belly of the swan.
From the base of the neck behind the head, extend a sweeping curve to form the back of the swan.

Step 4: Add the Wing
On the body, draw a curved wing shape. It should have soft, wavy edges to suggest feathers.
The wing should sit centered on the swan’s back.
Step 5: Inside the wing, add a few curved feather lines to give it texture and volume.

Step 6: Color the beak orange with a black tip.
Add final outline adjustments, and make sure the eye stands out clearly.
The body can stay white or light blue with light gray shadows if desired.

>>>Read more: How To Draw A Pigeon – 3 Ways (With Pictures)
3. Beautiful Swan With Spread Wings Drawing
Step 1: Draw the Basic Body and Neck
The first step on guide how to draw a swan, draw a small oval for the swan’s head.
From the head, draw a long, elegant S-shaped curve downward and then looping up to form the neck.
Sketch a large circle beneath the neck to represent the body.

Step 2: Add the First Wing Outline
From the swan’s upper back area, draw a large curved line arching outward and up for the wing.
This wing should look like a curved crescent stretching outward from the body.

Step 3: Draw the Feather Layers on the First Wing
Inside the wing shape, start drawing feather layers:
- Begin with smaller feathers near the top edge.
- Gradually increase feather size as you move downward.
- Make each feather like a curved U or teardrop shape.
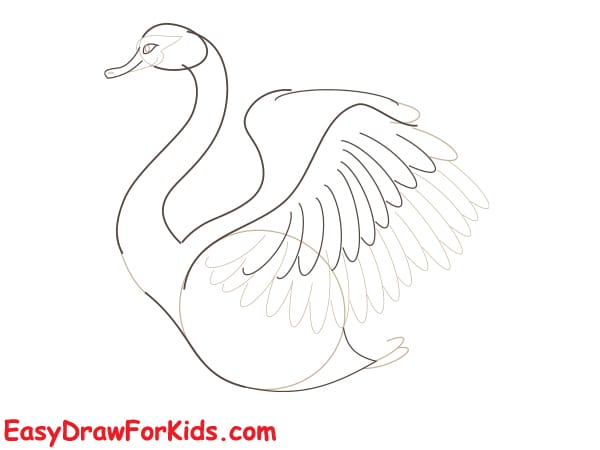
Step 4: Add the Second Wing and Tail
Behind the first wing, sketch a second wing peeking out on the other side of the swan’s back.
Draw its feathers in a similar layered style, slightly smaller due to perspective.
At the bottom back of the body, draw the tail with some fan-shaped short feathers.
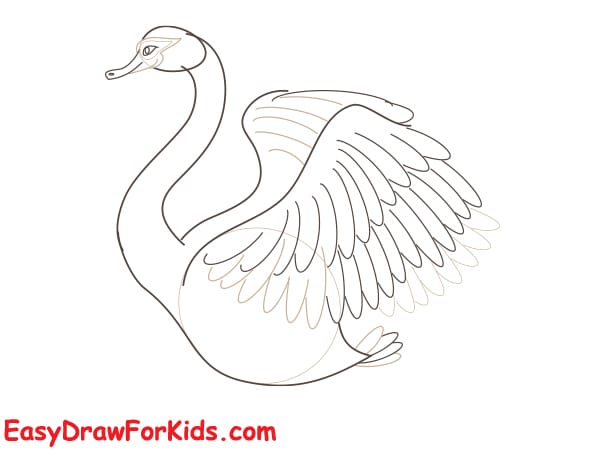
Step 5: Define the Swan’s Face and Beak
Go back to the head and:
- Add a curved beak pointing slightly forward.
- Draw a small eye slightly above the beak.
- Optionally, add a nostril and detail for the facial contour.
Sketch one or two webbed feet under the body, peeking out.

Step 6: Now you can color your swan drawing by your style

You’ve just completed a beautiful piece of artwork depicting a swan.
By following these steps on this guide how to draw a swan, you’ve successfully captured the beauty of a swan on your paper.
Keep practicing, and your creations will only grow more lifelike and refined over time.


