Mickey Mouse has been loved by millions for decades—and now you can learn how to draw Mickey Mouse too!
You’ll be surprised how simple drawing him can be with the right steps.
Let’s start drawing!
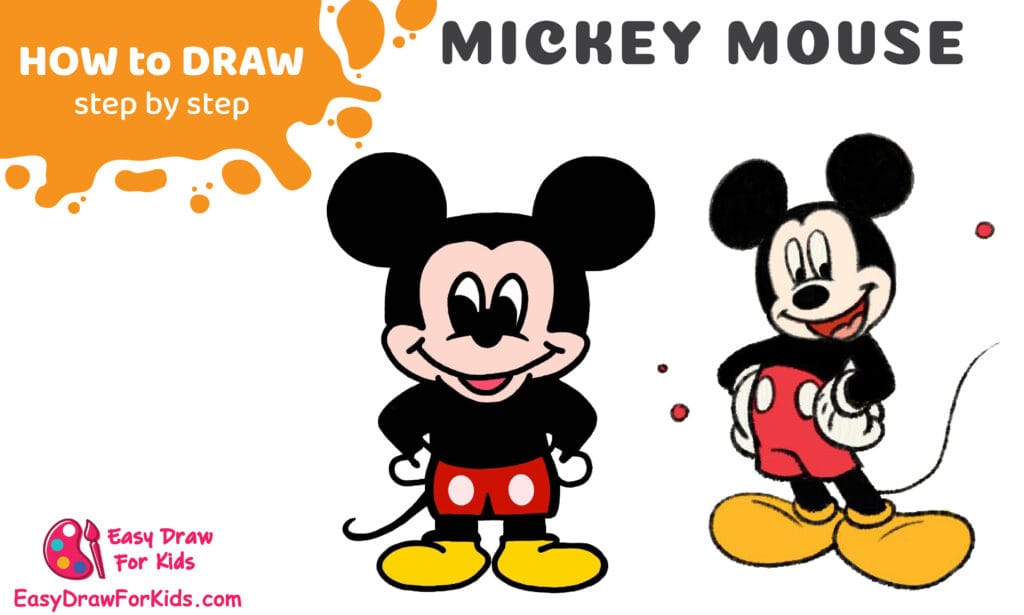
How To Draw Mickey Mouse – A Step by Step Guide
1. How to draw Mickey Mouse for kids easy
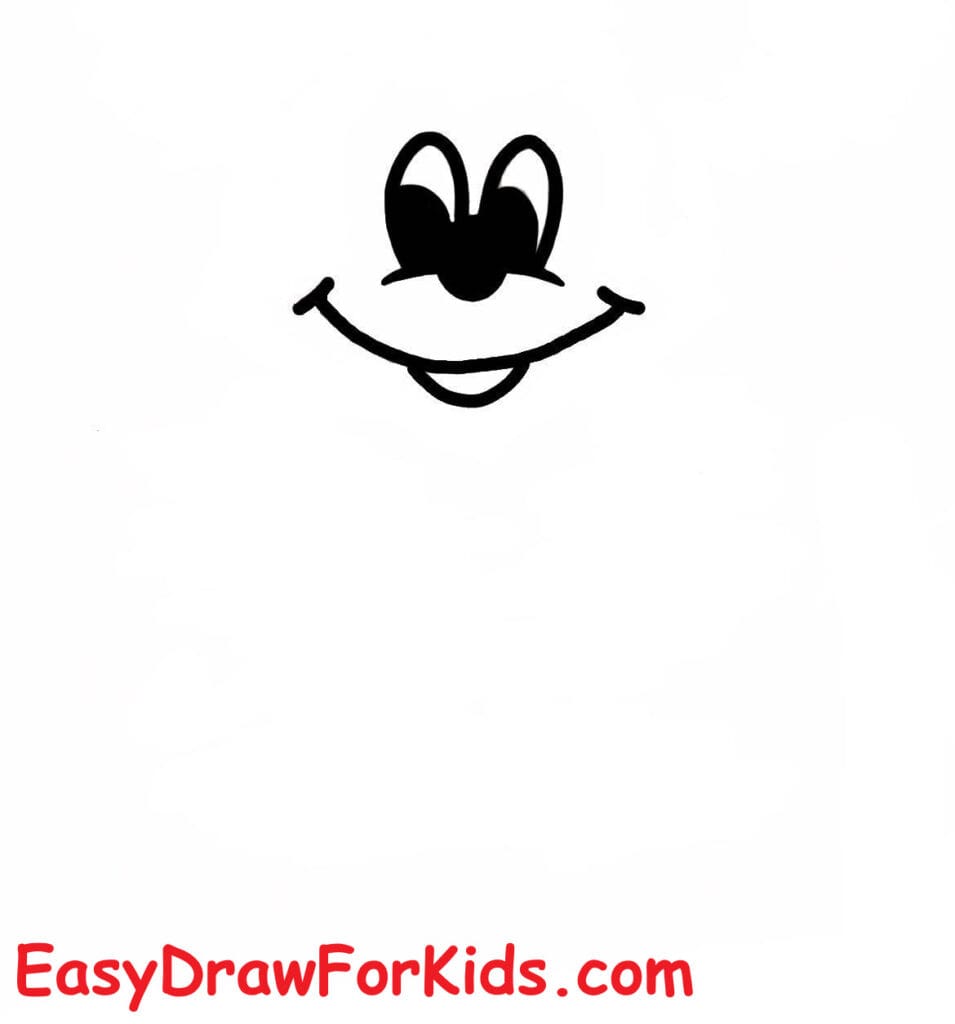
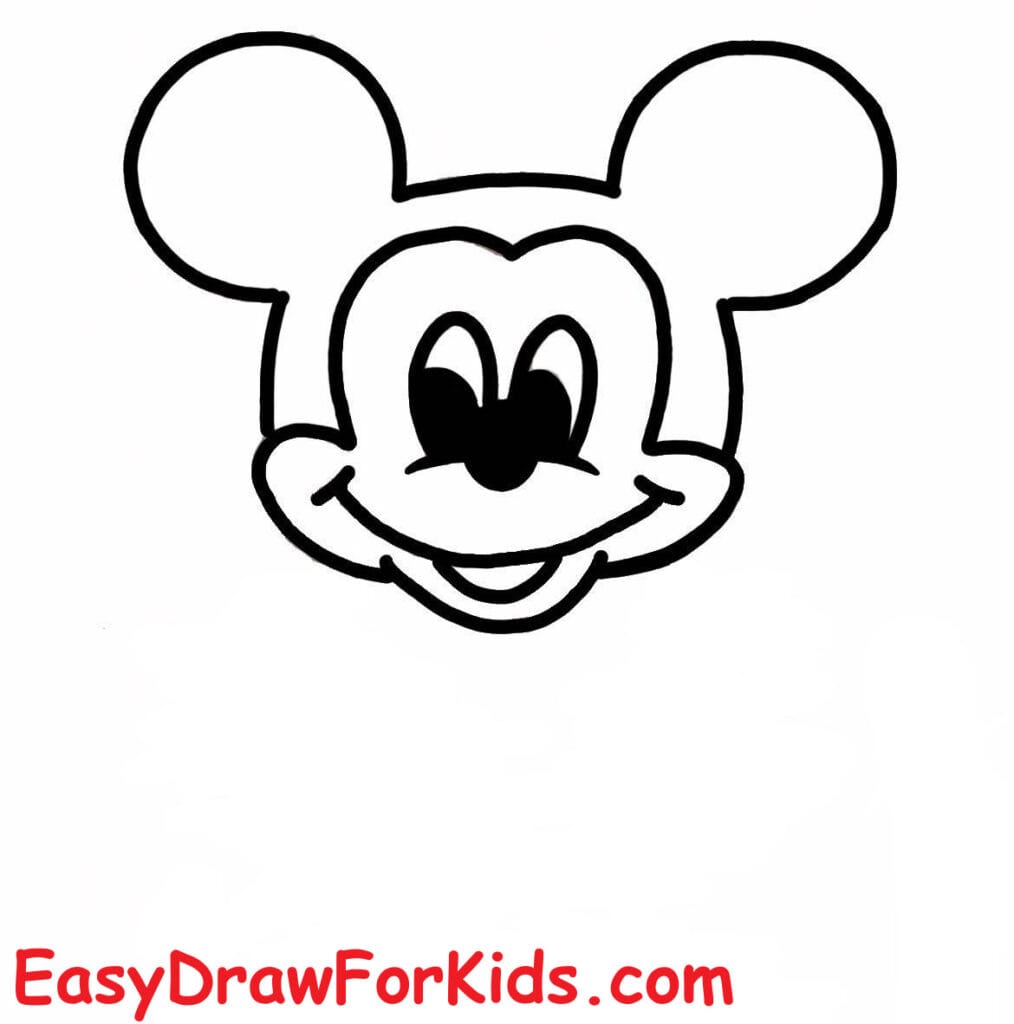
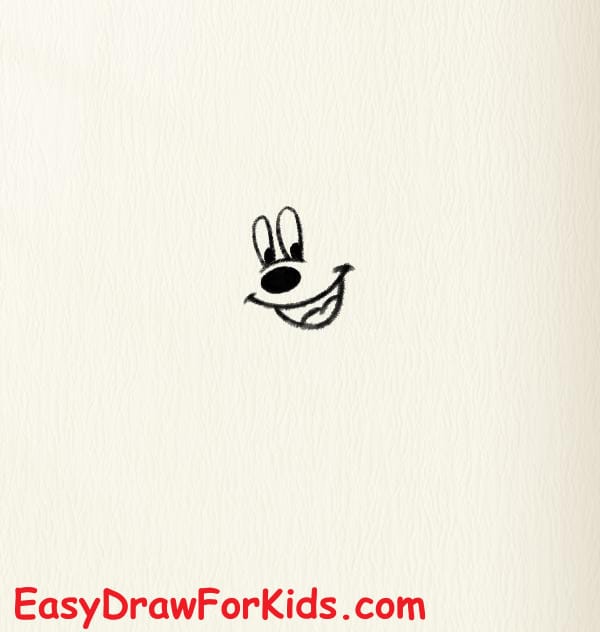
Step 1: Lightly draw two large vertical ovals close together for the eyes, inside each oval add a solid black pupil and a small white circle for a highlight.
Draw a wide curved smile line under the eyes, like a shallow “U”.
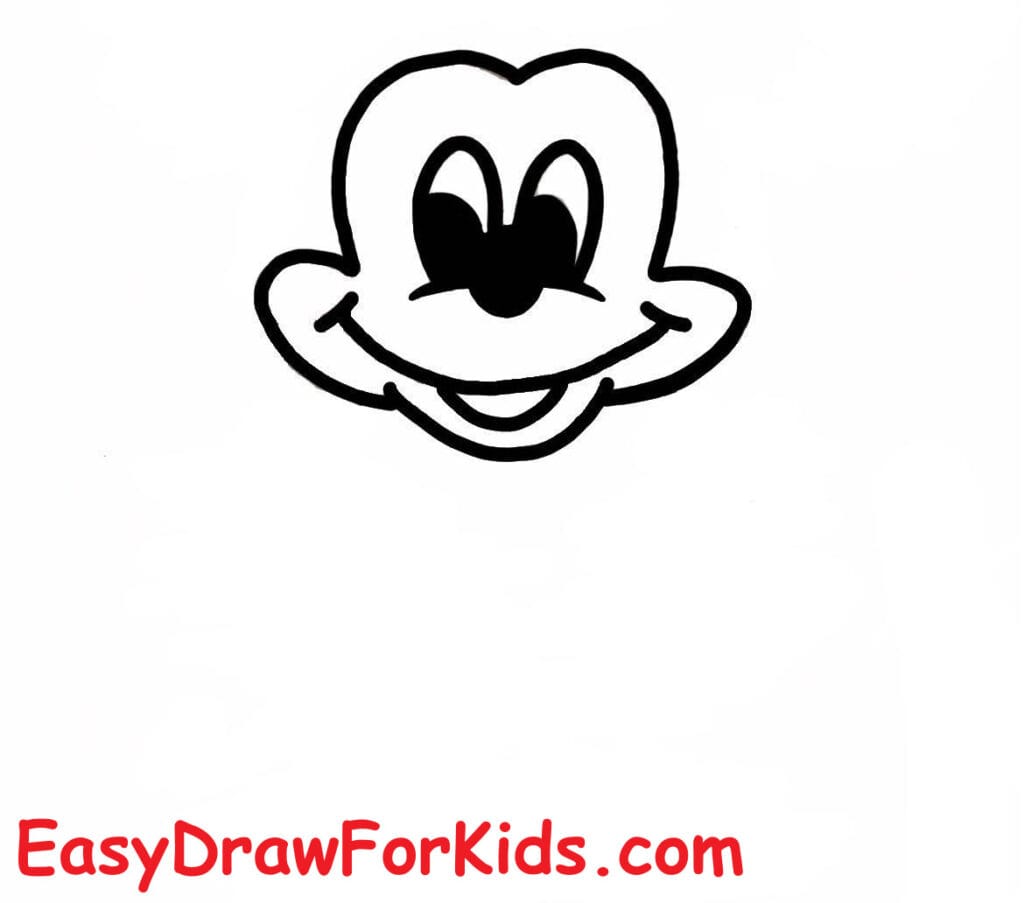
Step 2: Extend two curved cheek lines from the ends of the smile to form a rounded snout.
Add the upper lip line inside the smile and a tiny triangular notch at the top center of the smile for the nose area.
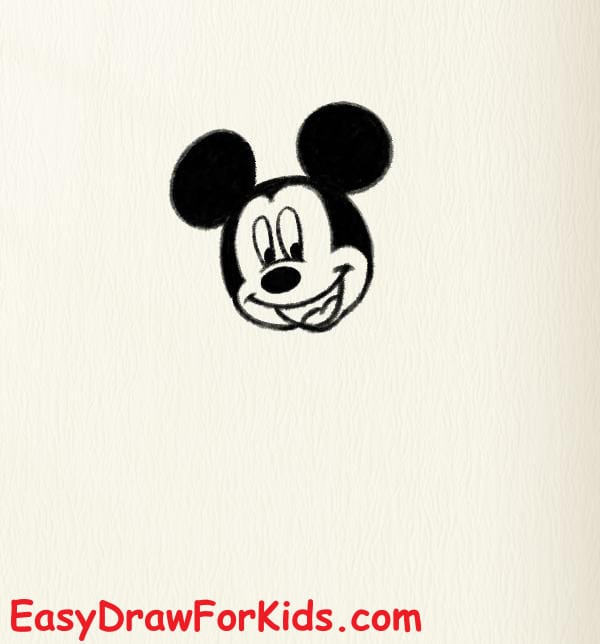
Around the face, draw a rounded head shape that follows the cheeks and leaves space on top for the ears.
Keep the jaw soft and slightly wider under the cheeks.
Step 3: On each side of the top of the head, draw two big round ears.
Place them symmetrically — they should be about the same diameter as the head’s width at the top.
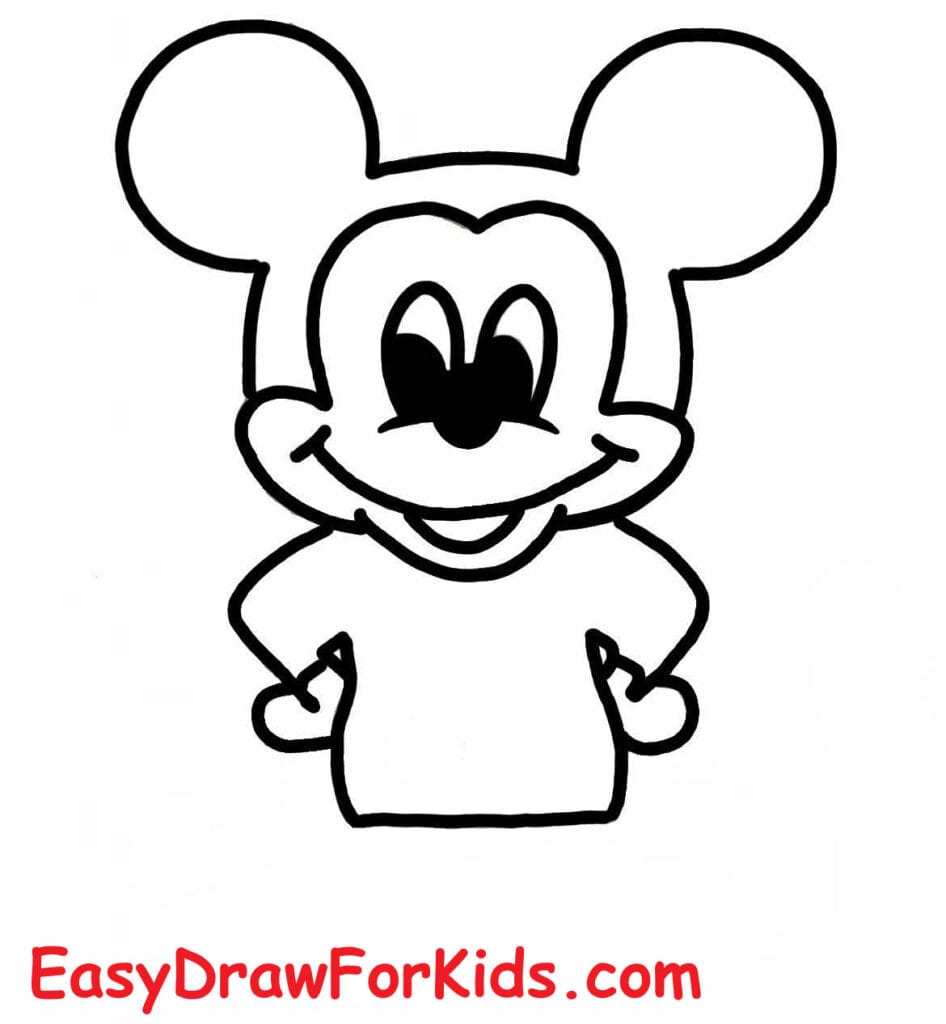
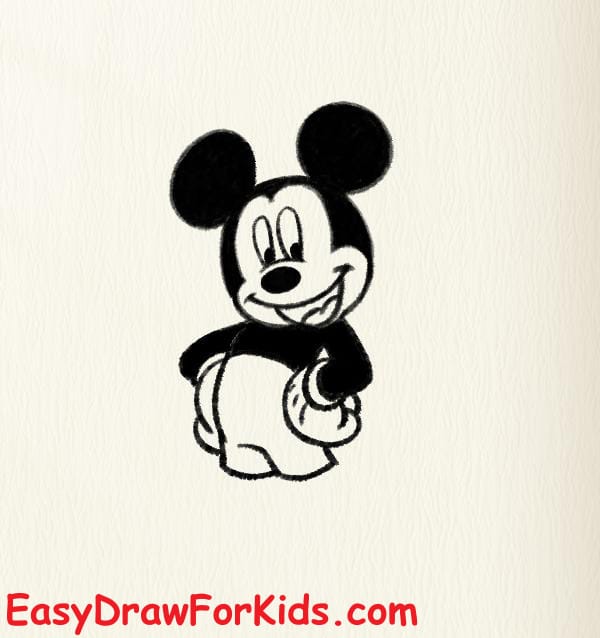
Step 4: Draw a rectangular torso directly under the head — short and wider than it is tall (like a squat T-shirt).
Keep the shoulders rounded; this is a simple cartoon body, so avoid long necks.
From the sides of the torso, sketch short sausage-shaped arms that curve slightly outward.
Add three simple fingers on each hand.
Position the hands on the hips or slightly forward for the pose in the image.
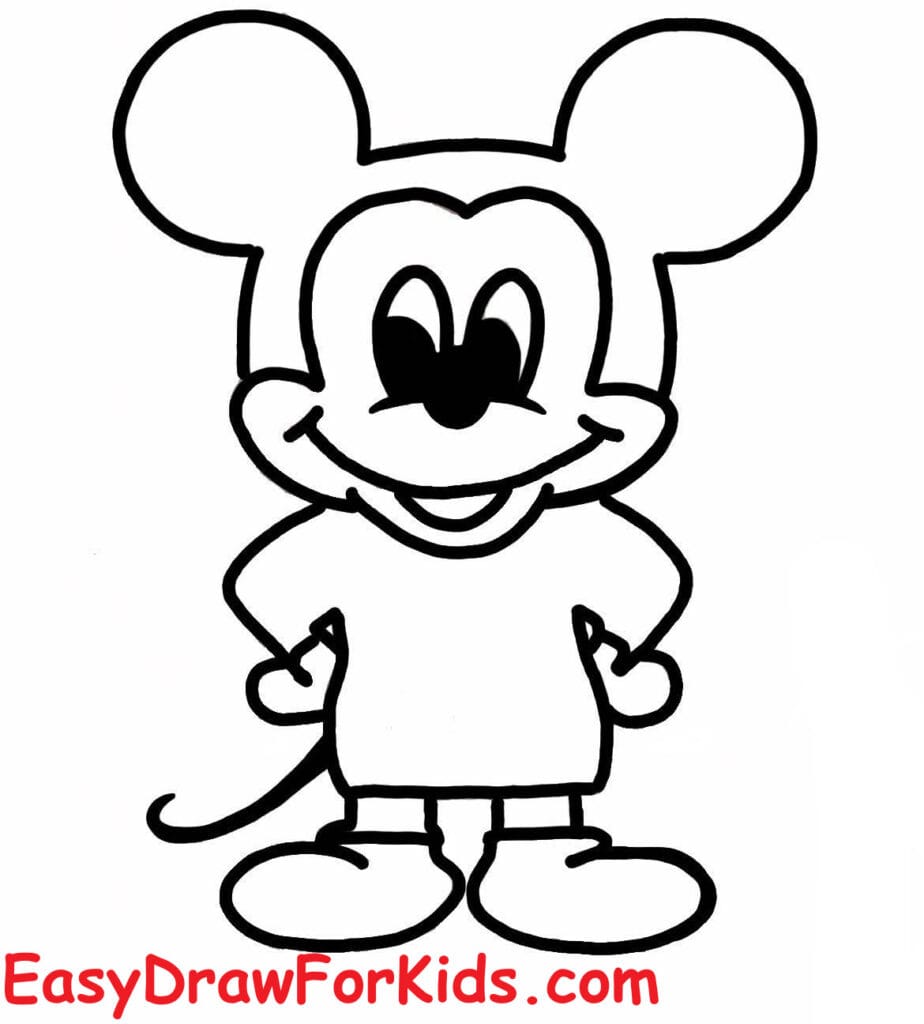
Step 5: Draw two short legs from the bottom of the torso — simple rounded shapes.
Add large rounded shoes: oval or bean shapes substantially bigger than the legs to create the classic cartoon look.
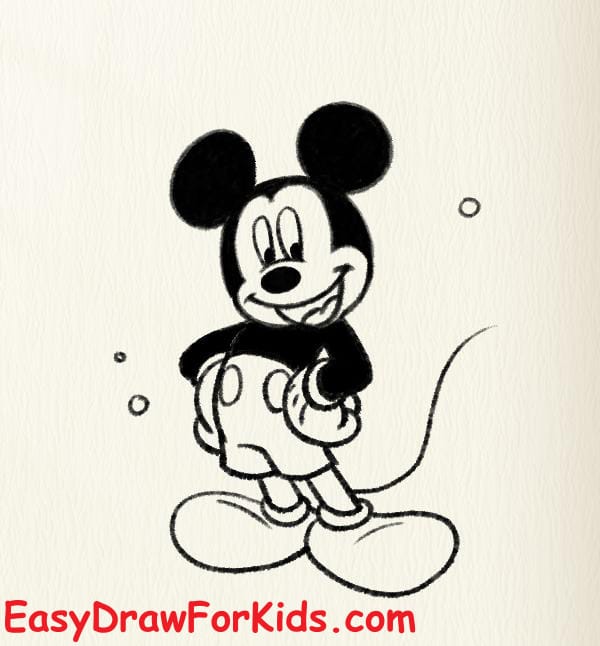
Draw a curved line behind the torso for the tail.
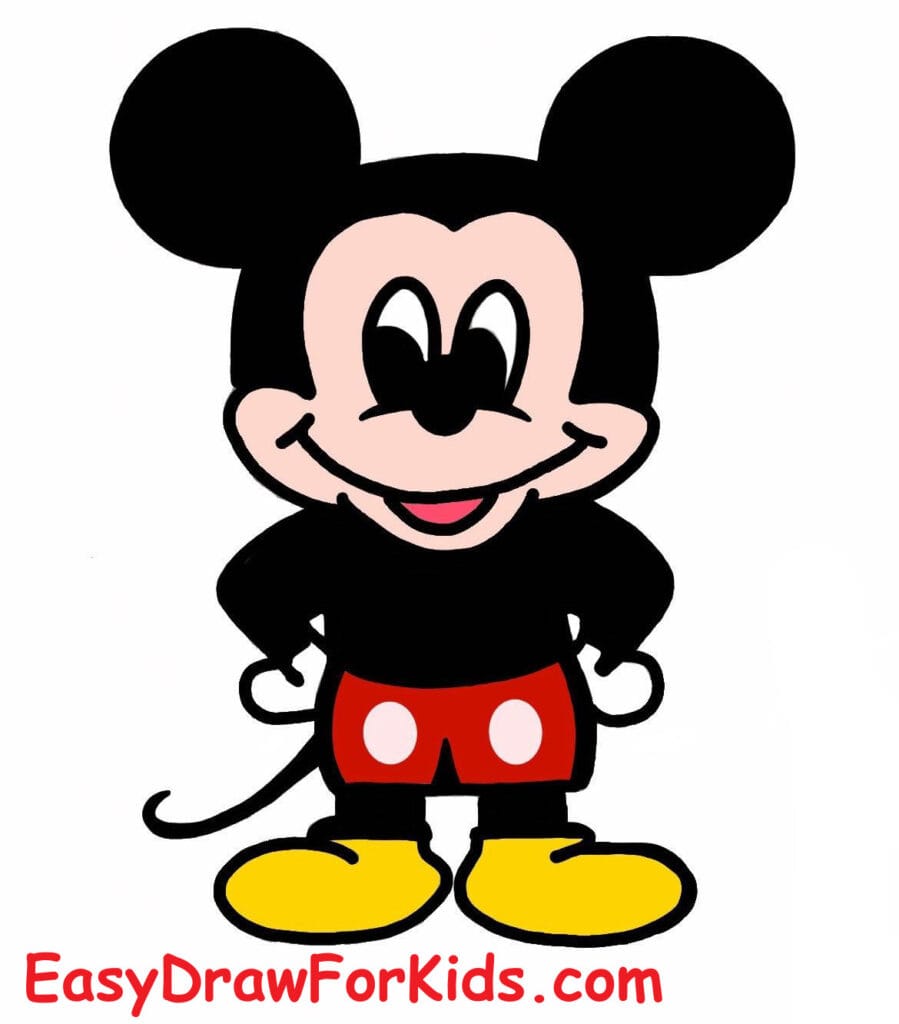
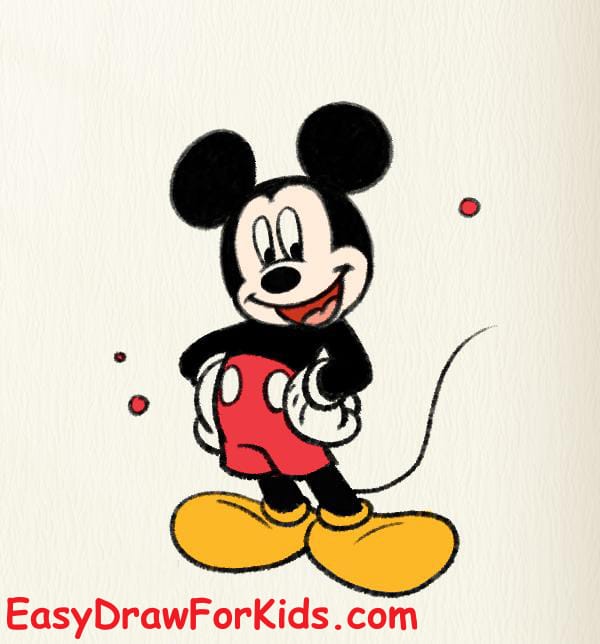
Step 6: Coloring
Head/face inner area: light skin.
Ears, torso, arms, legs: black.
Shorts: red with two white buttons.
Shoes: yellow.
2. How to draw Mickey Mouse full body
Step 1: Draw the face
Draw two large oval eyes, placing them close together. Draw small pupils inside the eyes.
Add a curved nose just below the eyes.
Draw a big friendly smile using two curved lines:
– One curved line for the top of the smile
– Another curved line below it to show the open mouth
Add a small curve inside the mouth to show the tongue.
Step 2: Add the ears and outline the head
Draw two large circular ears on top of the head—one on each side.
Refine the outline of the head by adding curves around the cheeks.
Add a small curved eyebrow above each eye.
Step 3: Draw the upper body and hands
Sketch a small oval shape under the head to form the body.
Draw two arms on each side of the body. Keep them short and slightly bent. Add gloves on the hands.
Draw rounded glove shapes with simple curved lines for the fingers.
Add two buttons on the front of the shorts.
Step 4: Draw the legs, feet, and tail
Draw two short legs extending downward from the body.
Add large rounded shoes at the bottom of the legs. Each shoe should look wide and cartoonish.
Draw a long thin tail curving behind the character.
Step 5: Color and shading
Base colors: face, inner head area use light beige; ears,torso, limbs use black; shorts use red with white buttons; shoes use yellow.
Add simple shadows: beneath the chin, under the shorts, and a small shadow under each shoe. Use a darker tint of each base color and blend lightly.
Add highlights: small white spot on each shoe and the pupils’ highlights.
Congratulations on finishing your Mickey Mouse drawing!
Now that you’ve learned the basic steps, try experimenting with different poses and expressions for Mickey Mouse.
Keep going and draw more Disney favorites.
>>>Read more: How To Draw Jerry Mouse – 7 Ways (With Pictures)
How to Draw Elsa – 2 Ways (With Pictures)