Have you ever wanted to draw one of the most recognizable anime heroes, Naruto Uzumaki?
With his bold personality, unique appearance, and vibrant energy, Naruto has captivated fans worldwide.
Stick with this tutorial, and you’ll confidently sketch his signature traits piece by piece.
This step-by-step guide how to draw Naruto simplifies the process so you can recreate his iconic look.
Let’s get started!
How To Draw Naruto – A Step by Step Guide
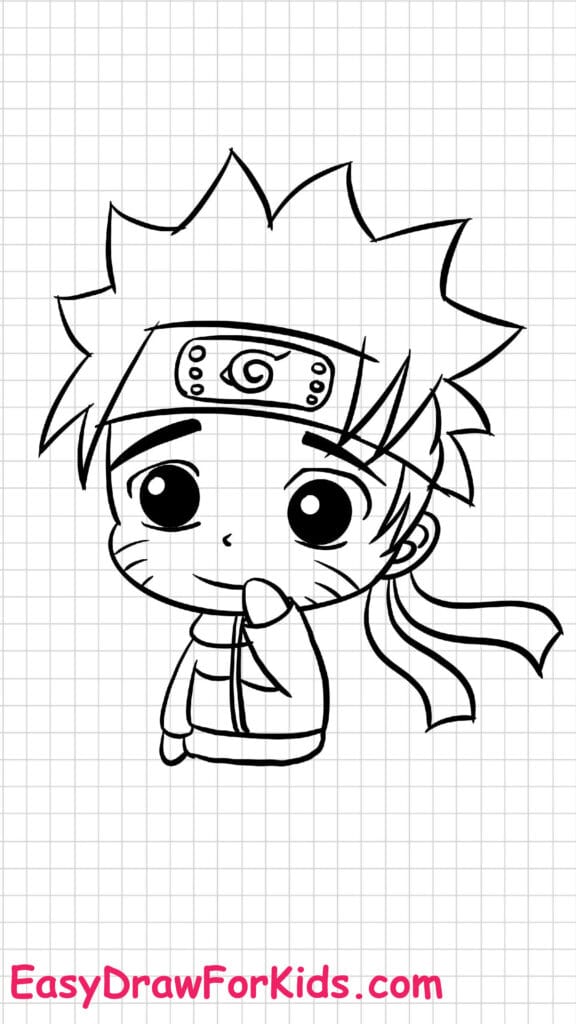
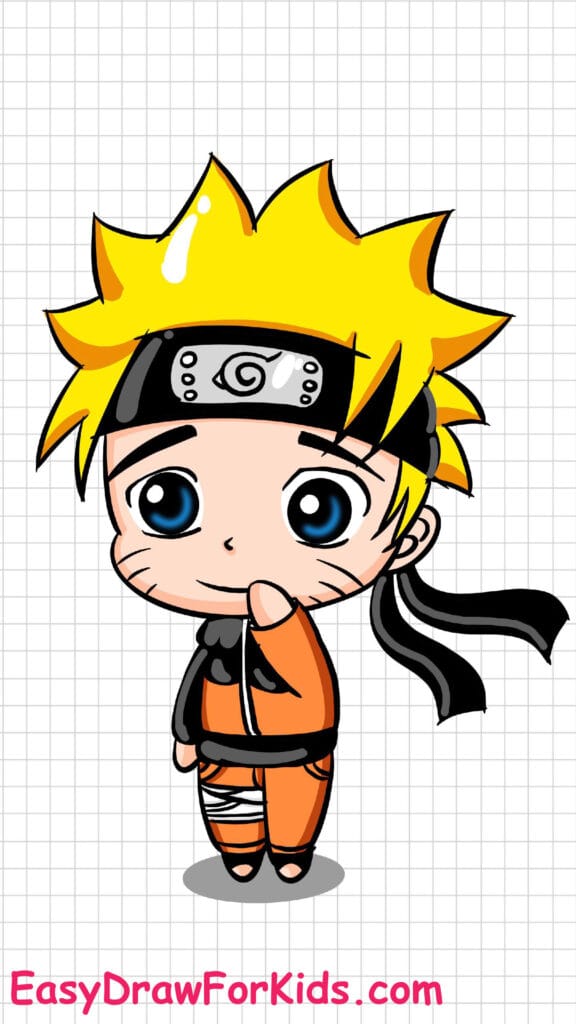
1. Naruto Full Body Drawing
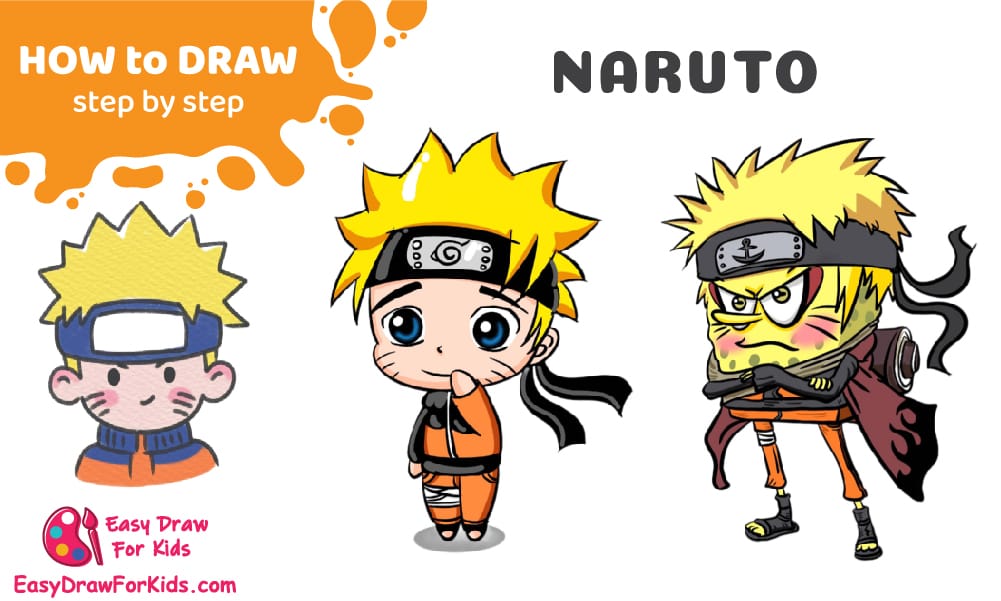
Step 1: Draw the Eyes
Begin with two large, round chibi-style eyes.
Fill them with highlights to make them look expressive.
These eyes are set wide apart for a cute look.
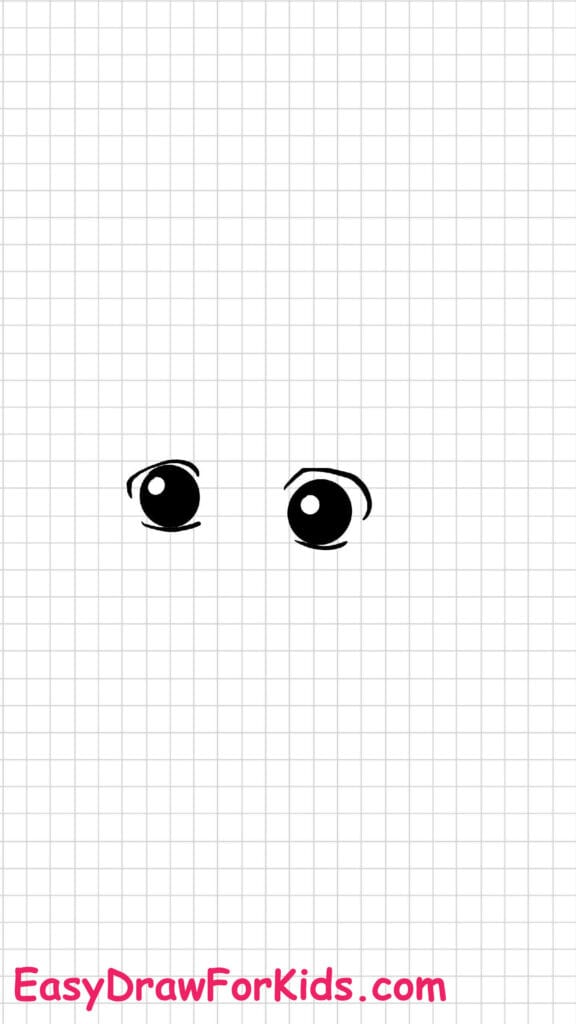
Step 2: Add Eyebrows and Mouth
Draw two small arched eyebrows above the eyes.
Sketch a small smiling mouth just below the eyes, centered.
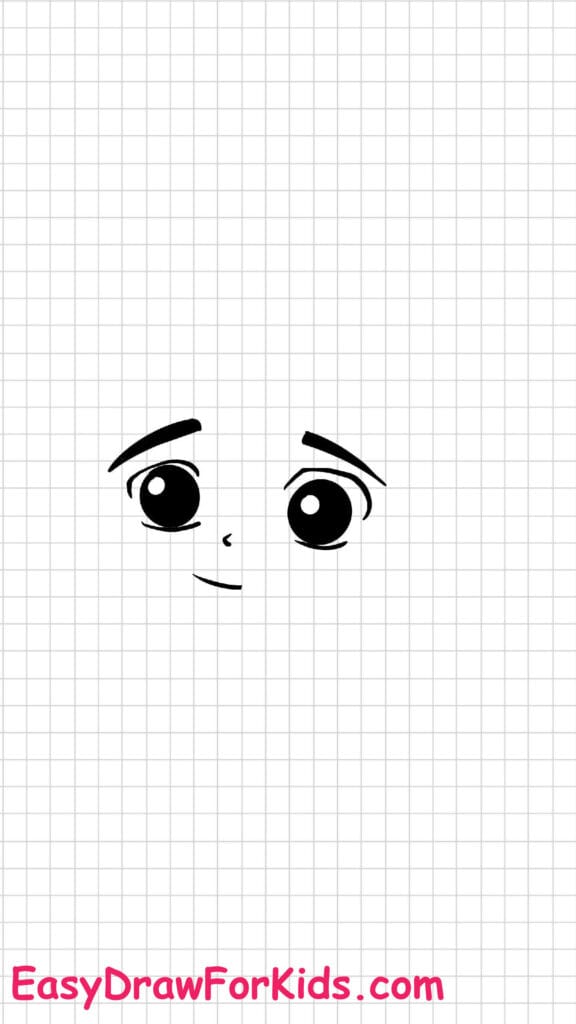
Step 3: Draw the Hair Outline
Start drawing Naruto’s spiky hair, which fans out around his head in sharp clumps.
Leave room for his headband across the forehead.
Step 4: Draw the Headband and Ears
Add the ninja headband, with the metal plate and the Leaf Village symbol (spiral leaf).
Draw two ears peeking out from both sides of the head.
Add Naruto’s iconic whisker-like marks on his cheeks.
Step 5: Draw the Arms and Upper Body
Sketch the arms raised in a heroic pose, one hand clenched near his chest.
Draw his jacket collar and upper chest area, giving it folds for detail.
Step 6: Draw the Legs and Headband Tails
Draw Naruto’s short legs, slightly spread for balance.
Add the tied headband tails flowing from the back of his head to the side.
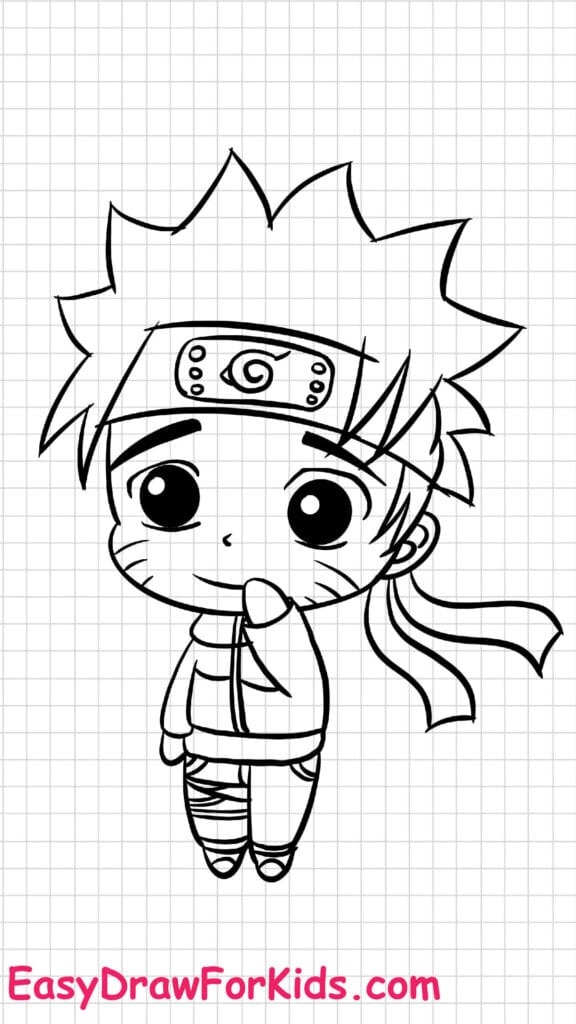
Step 7: Add Details
Add shinobi sandals, pant folds, and final outfit lines.
Emphasize the headband symbol and facial features.
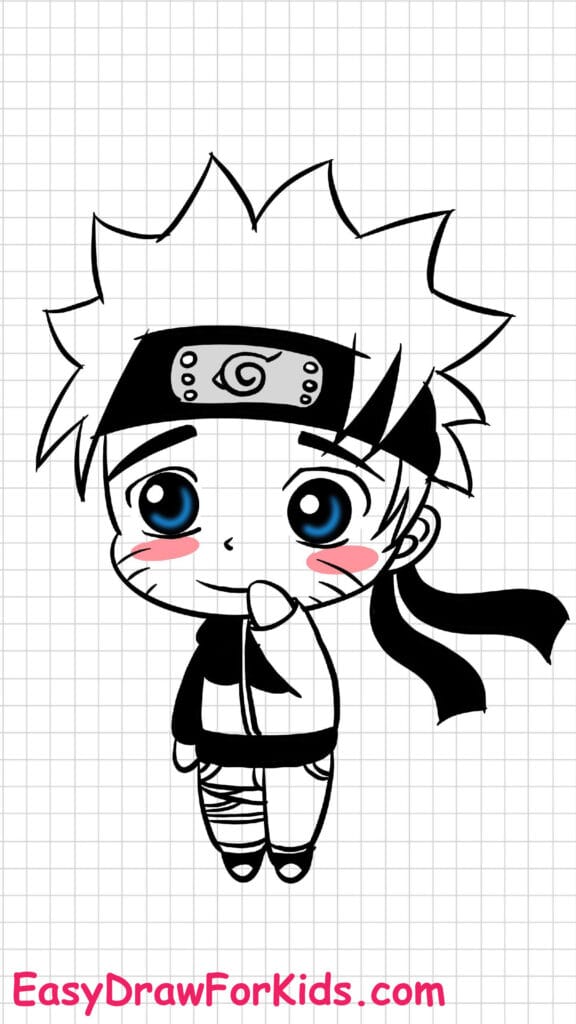
Step 8: Color the Drawing
Color the hair bright yellow (Naruto’s signature).
- Headband: dark blue strap, silver plate.
- Outfit: orange with black details.
- Skin: light peach, and eyes: blue.
>>>Read more: How To Draw Luffy – 3 Ways (With Pictures)
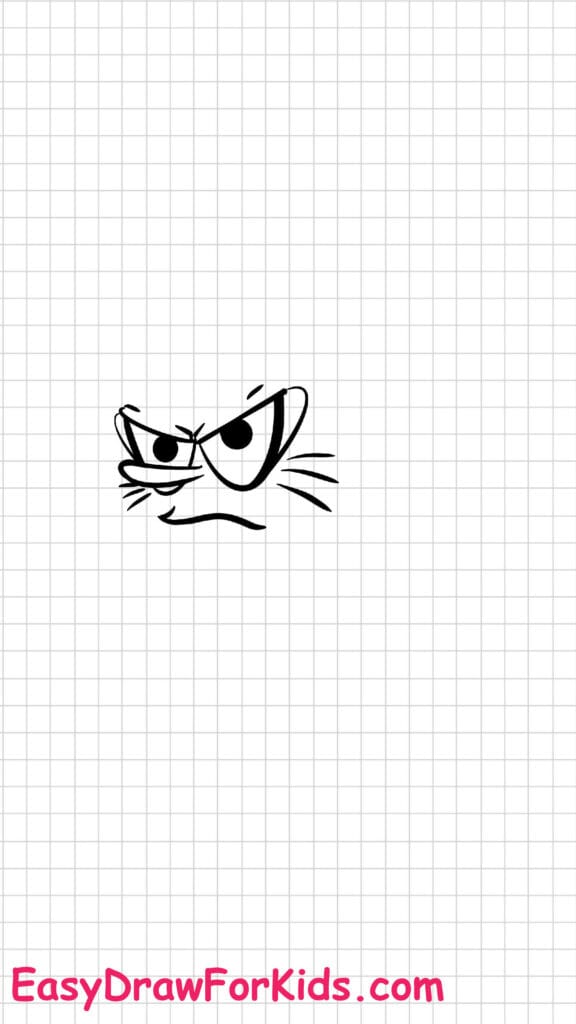
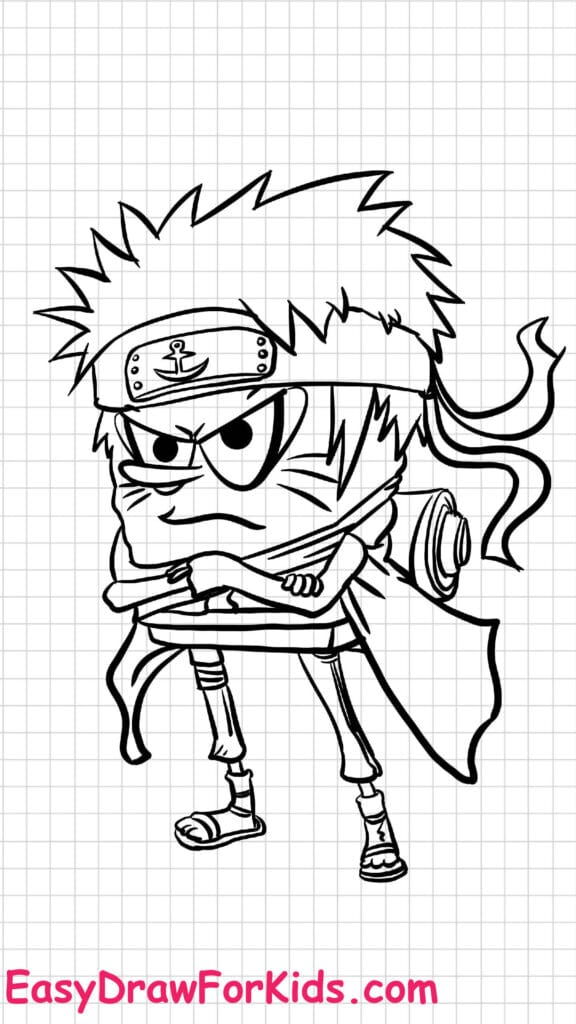
2. How To Draw Spongebob Naruto
Step 1: Draw the Eyes and Eyebrows
Start this method how to draw naruto with SpongeBob’s intense ninja eyes — two large oval eyes with sharp pupils.
Add the furrowed eyebrows above the eyes to give an angry, determined look.
Draw small expression lines near the eyes for added emotion.
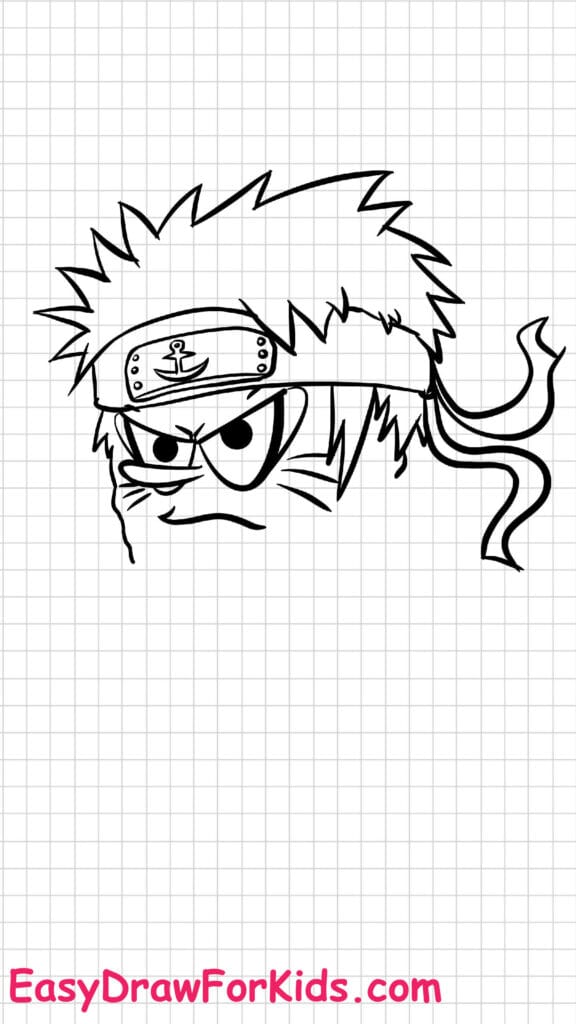
Step 2: Draw the Hair and Headband
Sketch spiky Naruto-style hair above the eyes.
Add the ninja headband with the Hidden Leaf Village symbol (Konoha swirl) across the forehead.
Draw the headband tails flowing to the right — long, wavy, scarf-like extensions that emphasize motion.
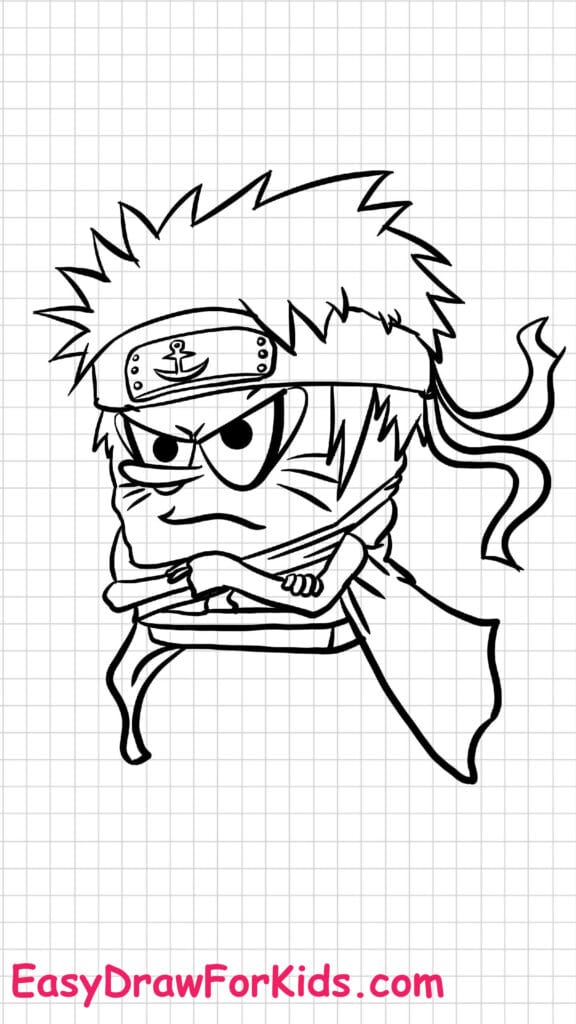
Step 3: Draw the Body and Arm
Begin drawing SpongeBob’s rectangular body.
Add one raised arm in front with a clenched fist, showing he’s ready for battle.
Include simple ninja-style clothing details on the torso, like folds and straps.
Step 4: Add Legs, Shoes, and Full Costume
Draw both legs — thin and angled to imply a dynamic, crouching pose.
Add SpongeBob’s boots with straps or soles.
Finalize ninja costume details like the belt, sleeves, and leg coverings.
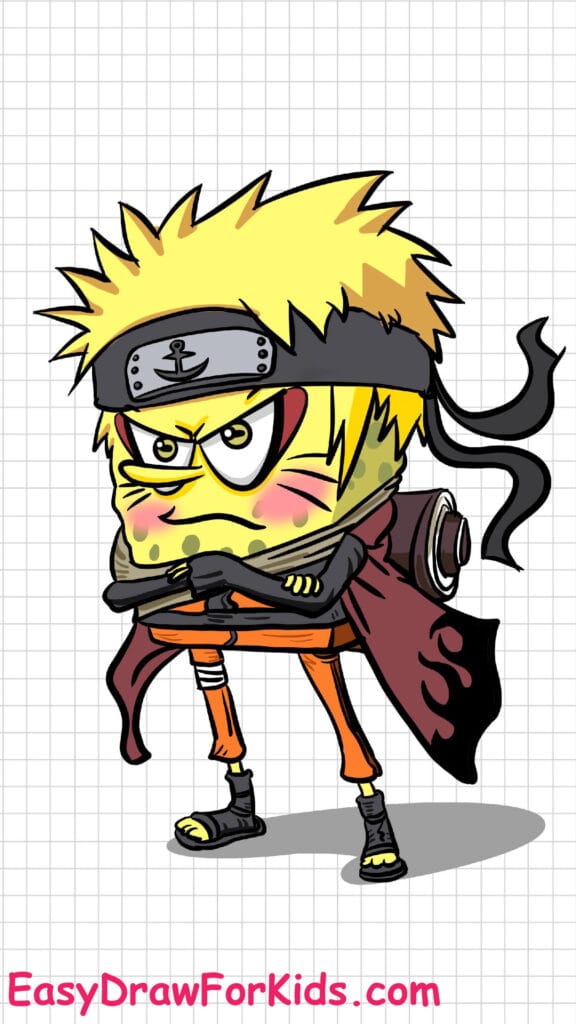
Step 5: Color the Drawing
Color the hair yellow like Naruto.
Color the headband dark blue, and the plate gray or silver.
Give SpongeBob his usual yellow skin with sponge holes.
Color the outfit in Naruto’s orange and black theme.
Add shading and highlights to enhance depth.
>>>Read more: How To Draw Goku – 4 Ways (With Pictures)
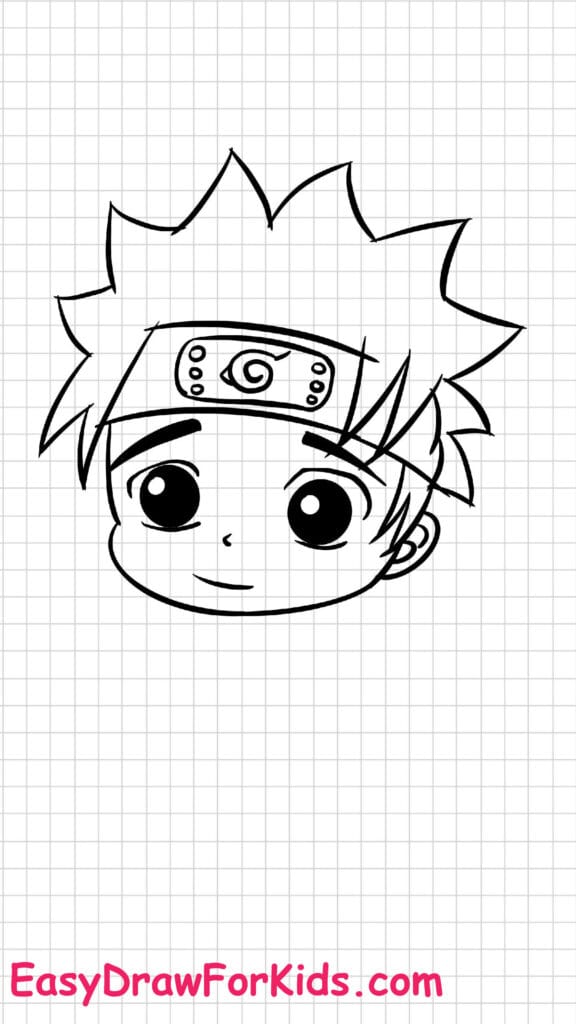
3. Naruto Face Drawing
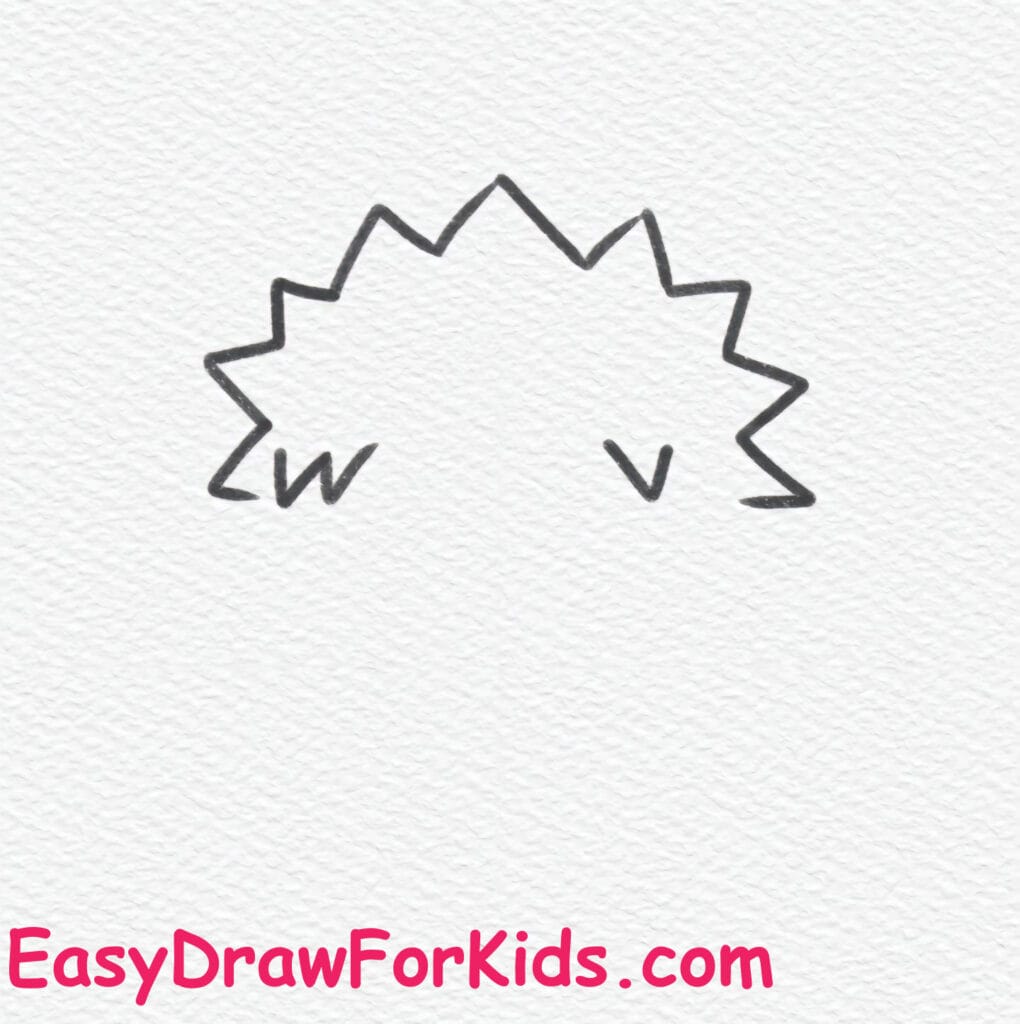
Step 1: Draw the Hair Outline
Begin with Naruto’s spiky hair — sketch sharp, zig-zag triangular shapes going outward.
Draw a small “V” shape below the hair to mark the center of the forehead and start of the face.
Step 2: Draw the Headband
Draw a curved rectangle under the hair for the ninja headband.
Add short horizontal ends on each side of the headband to represent the cloth tails.
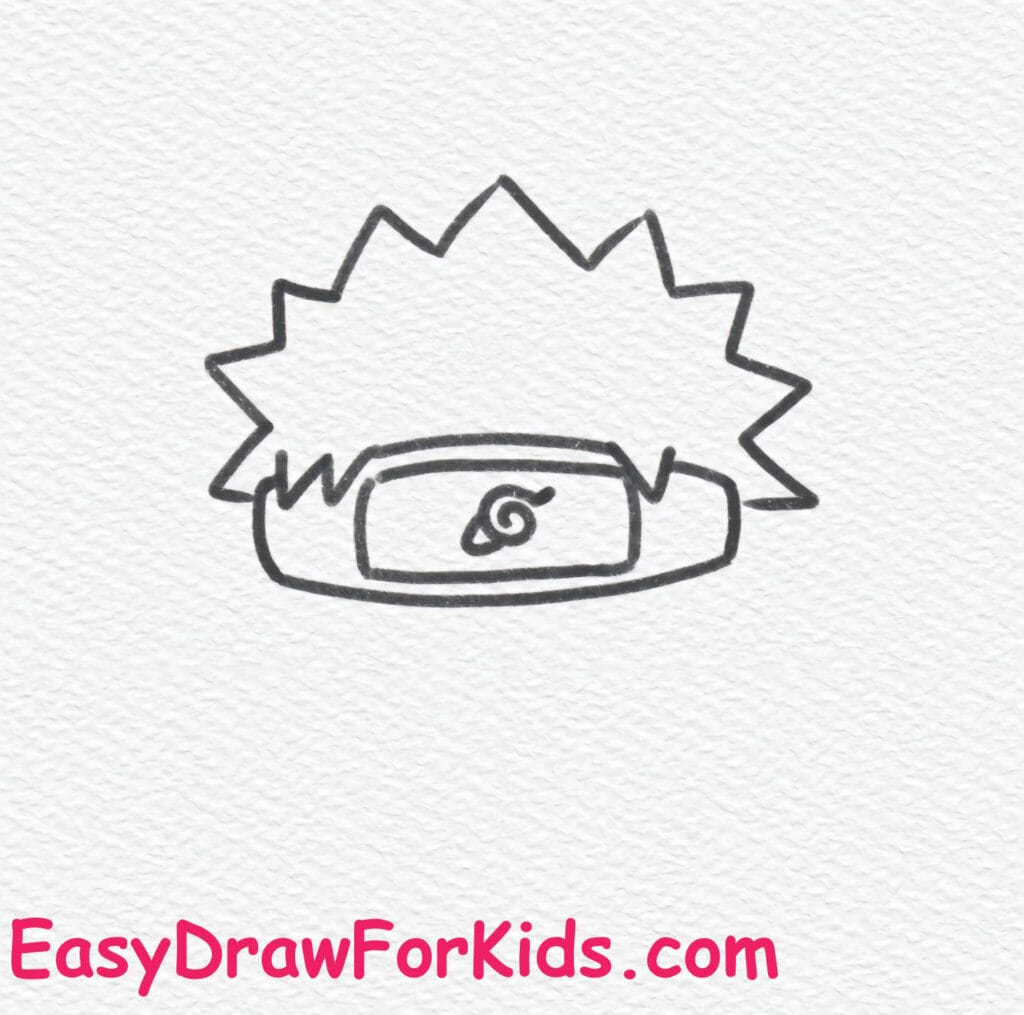
Step 3: Add the Leaf Village Symbol and Ears
Inside the headband, draw the Leaf Village (Konoha) symbol: a swirl with a tail and a small triangle on top.
Sketch both ears sticking out from under the headband.

Step 4: Draw the Face Outline and Neck
Draw a round curve for the bottom of the face (jaw and chin).
Add two short lines downward from the jaw to form the neck.

Step 5: Draw Facial Features
Add two circular eyes with dots in the center for pupils.
Draw the nose as a tiny dot or dash.
Add Naruto’s iconic whisker marks — three on each cheek.
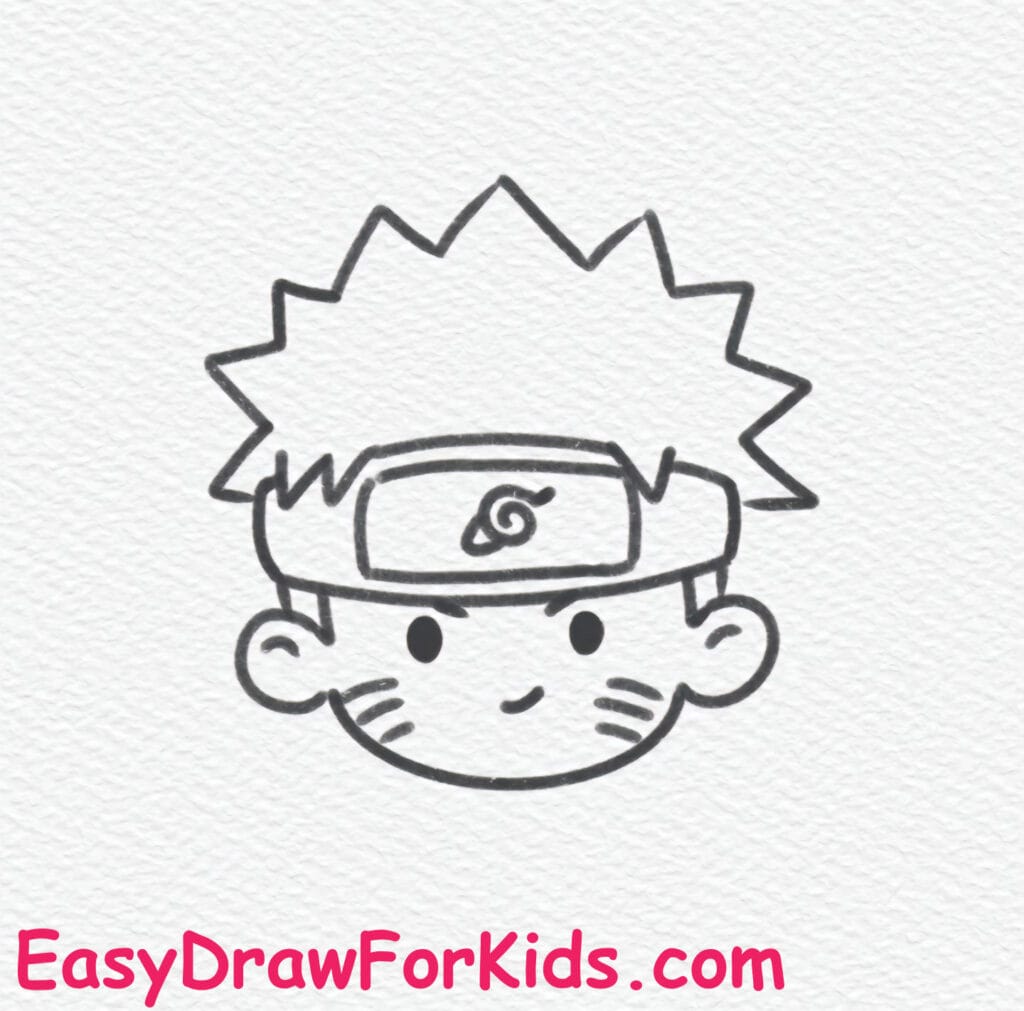
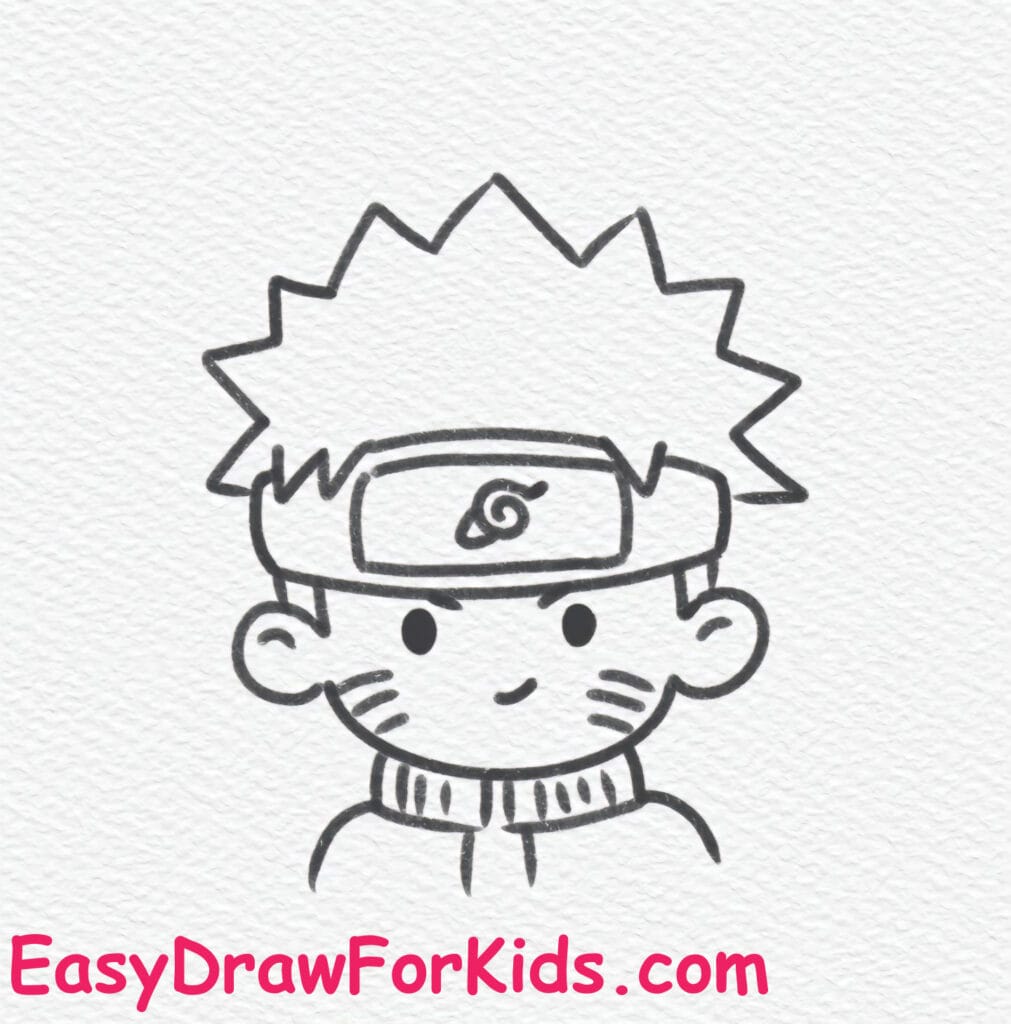
Step 6: Draw the Collar and Shirt
Draw the high collar of his jacket below the neck.
Add vertical stripes or folds for detail.
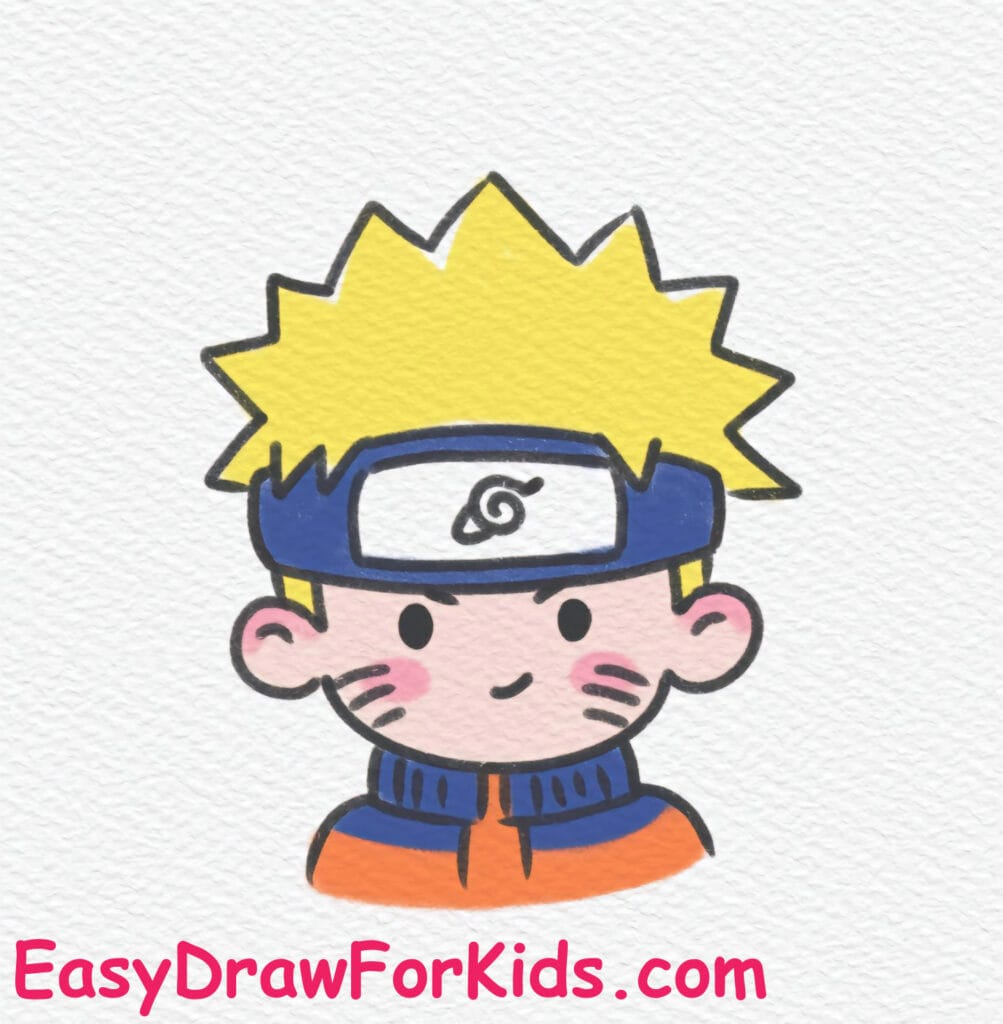
Step 7: Finalize with Color
Color the hair yellow.
Color the headband blue with a silver plate for the symbol.
Skin tone is light peach.
Jacket collar and shirt should be in Naruto’s classic blue and orange theme.
>>>Read more: How To Draw A Dragon – 3 Ways (With Pictures)
4. Easy Naruto Drawing
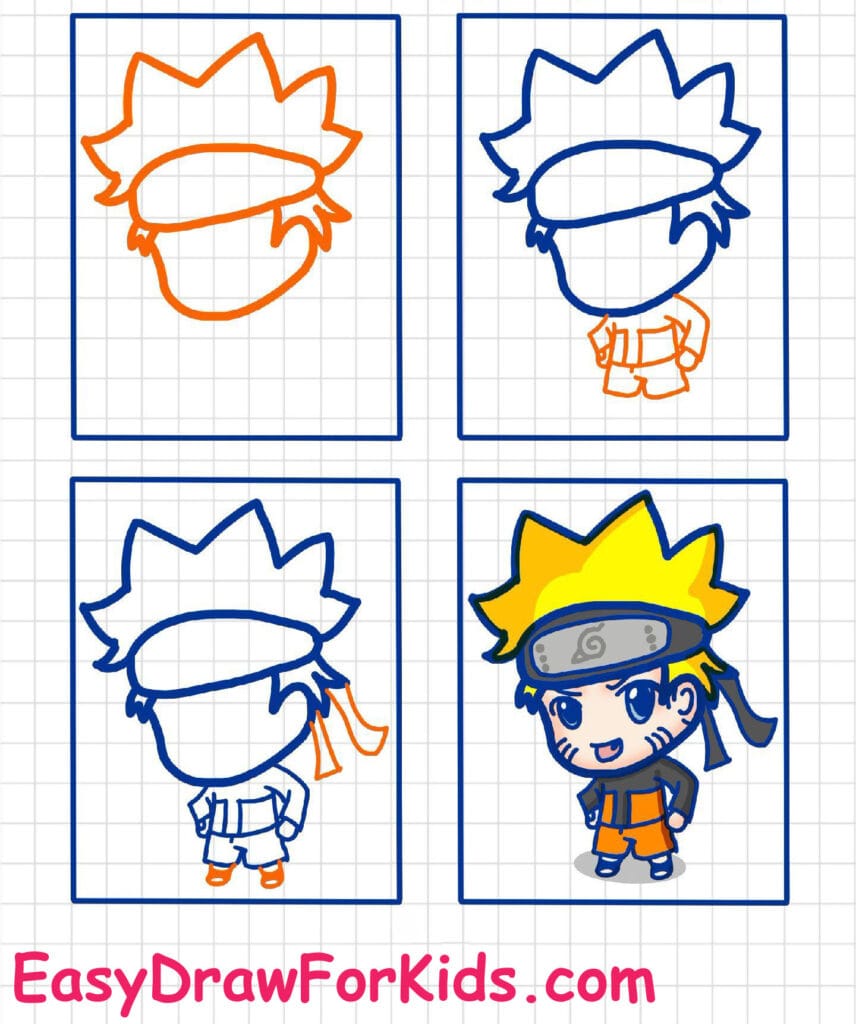
You’ve done it—your own version of Naruto is complete!
By following these step-by-step on guide how to draw Naruto, you’ve captured the essence of this spirited ninja.
Drawing takes patience and practice, so don’t hesitate to refine your work and try new techniques as you grow.
Keep honing your skills, and who knows—you might end up sketching the entire cast of Naruto before long.
Keep drawing, and enjoy your artistic journey!


