One of the most iconic symbols of Christmas is the Christmas tree.
Whether it’s a real or artificial tree, the Christmas tree is a key part of most people’s holiday decorations.
This step-by-step guide will show you how to draw a Christmas tree that you can use as a template for your holiday drawings.
How to draw a Christmas Tree: A Simple Step by Step Guide
In this guide, easydrawforkids.com will show you how to draw a Christmas tree in easy steps in five ways.
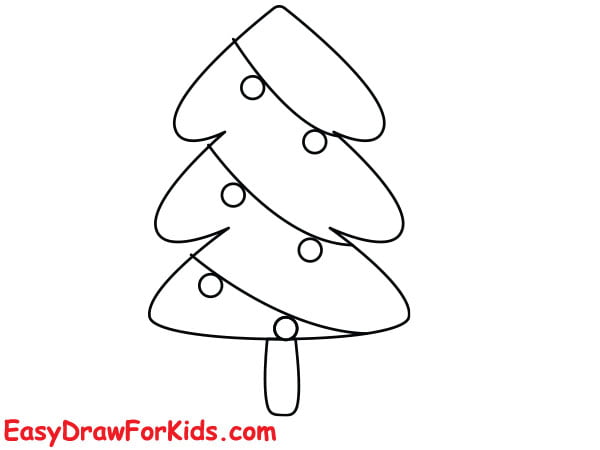
1. Cartoon Christmas Tree Drawing
A cartoon Christmas tree is perfect for adding a fun touch to your holiday decorations.
Kids especially will love this type of drawing!

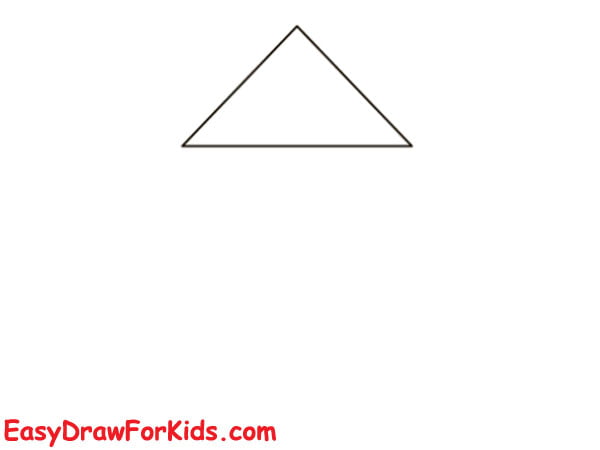
Step 1: Sketch the Top of the Christmas Tree
Draw a slightly inclined triangular shape to form the top of the tree.
Make it slightly rounded and uneven to give it a cartoonish appearance.

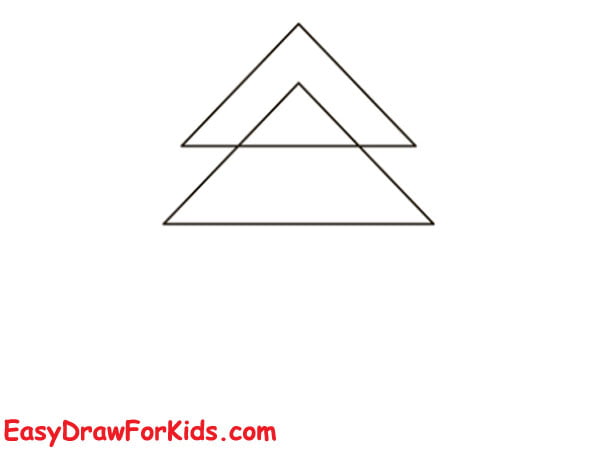
Step 2: Add the next section of the Christmas Tree
Now, you draw in the middle section of the Christmas Tree, which is similar to the first step.
The triangle from the previous step overlaps the top of this triangle.

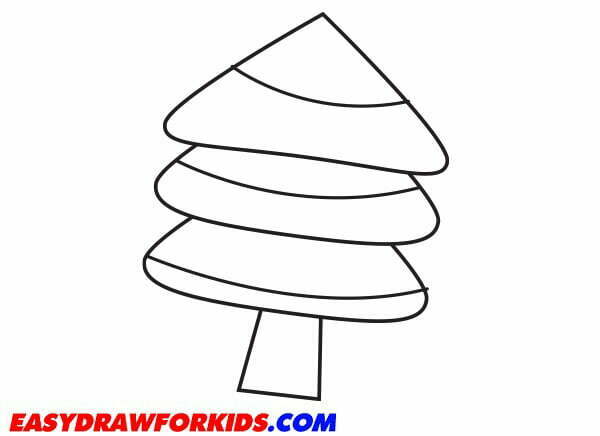
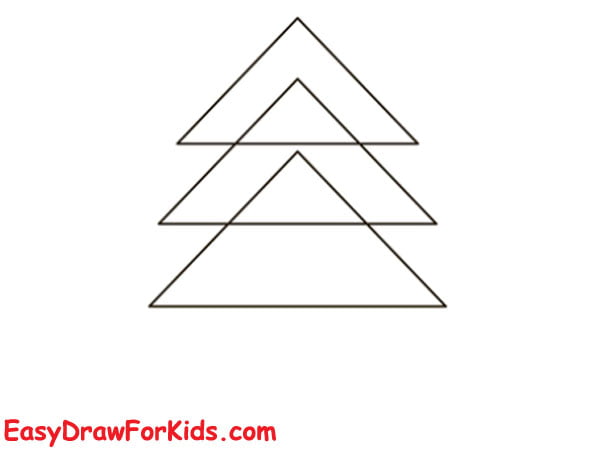
Step 3: Add another section, slightly larger than the second one.

Step 4: In this step on guide how to draw a christmas tree, draw a small rectangle shape at the bottom of the tree to create the trunk of the christmas tree.

Step 5: Draw curved lines around the tree trunk for strings of lights as shown the picture
Step 6: Draw various shapes, such as circles, stars, or rectangles, randomly along the branches.

Step 7: You can colour it in with green for the tree, brown for the trunk, and any other colours you desire for the decorations and background.

2. Minimalist Christmas Tree Drawing
If you prefer a minimalist look for your holiday decor, draw a simple Christmas tree with a few branches and minimal decorations.

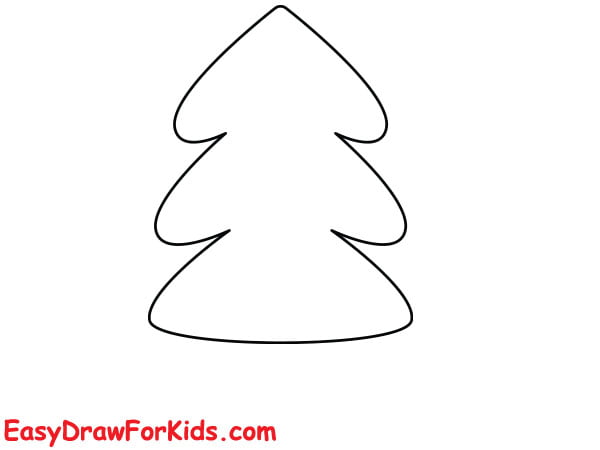
Step 1: Start this way on guide how to draw a christmas tree by drawing an upside-down “V” shape for the top of christmas tree.

Step 2: Complete the top of the Christmas Tree
Draw a wave line connecting the open ends of your shape, as shown in the picture.
Draw two small circles inside it for the snow.

Step 3: Draw a similar, yet slightly larger shape under the first one.

Step 4: Add another, slightly larger than the second one.

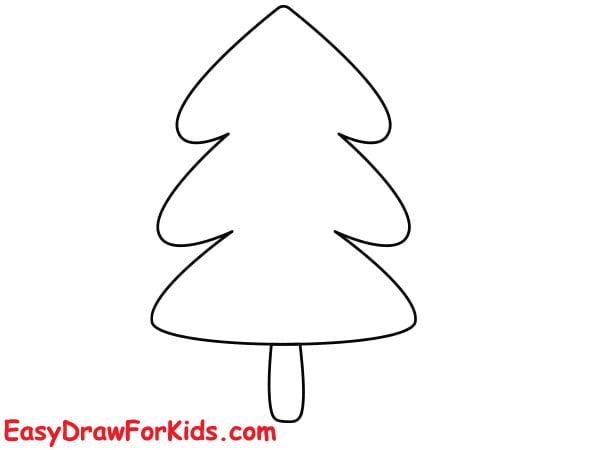
Step 5: Drawing a “U” shape at the bottom to create the tree trunk.

Step 6: Use green for the tree’s branches and a light blue or white for the background.

3. Simple Christmas Tree Drawing
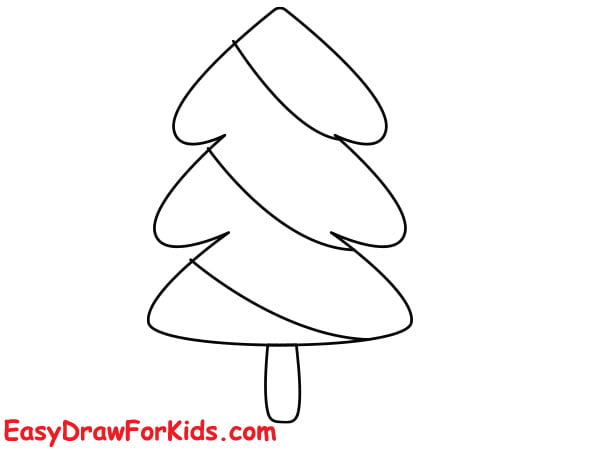
Step 1: Draw curved lines to represent the branches of the tree

Step 2: Repeat this step to complete the branches of the tree
Step 3: Add a Tree Trunk
Step 4: Draw small lines to represent tinsel
Step 5: Decorate the Tree
Step 6: If you wish, you can color your Christmas tree drawing.

4. Cute Christmas Tree Drawing
Step 1: Draw a triangle for the main shape of the Christmas tree.
Inside the triangle, draw several evenly spaced horizontal lines to form the layers of branches on the tree.

Step 2: Draw a small rectangle as the trunk of the tree, place it to the pot.

Step 3: At the top of the tree, draw a simple five-pointed star or any other design that you like.

Step 4: Draw small circles, hearts or other cute shapes on the branches to represent ornaments.

Step 5: In this step on guide how to draw a christmas tree, add details to the pot.

Step 6: Consider using shades of green for the tree, and vibrant colors for the ornaments and decorations.

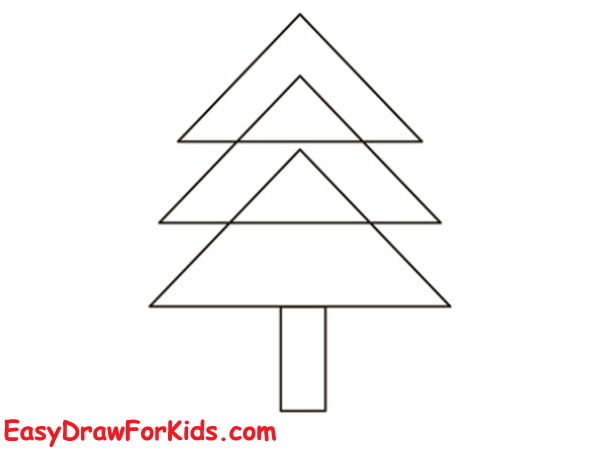
5. Easy Christmas Tree Drawing
Step 1: Start by drawing an upright triangle for the top tree branch
Step 2: Draw another triangle overlapping the first triangle, as shown in the picture
Step 3: Next, draw the third triangle below it
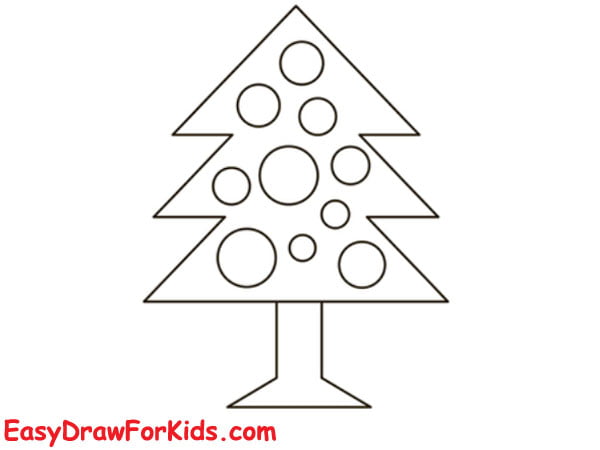
Step 4: Beneath the triangle, draw a small rectangle as the trunk of the tree.
Step 5: Draw a triangle at the base of the trunk to form the tree skirt.

Step 6: Erase unnecessary lines

Step 7: This step guide on how to draw a Christmas tree will add some decorations to your tree.
Step 8: Color your christmas tree
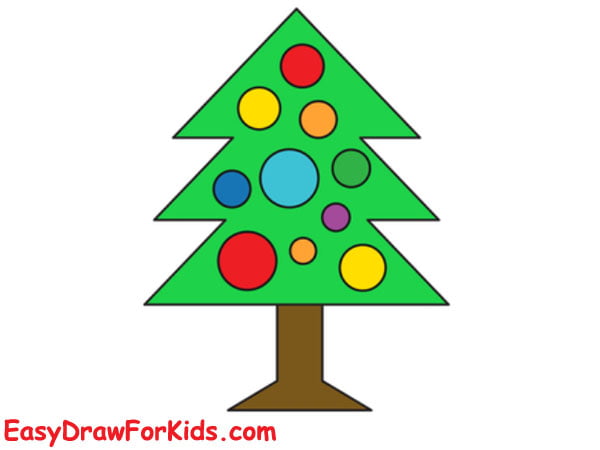
Remember, drawing is all about creativity, so feel free to personalize your Christmas tree drawing and make it unique.
Get creative and see what other Christmas trees you can come up with.
Merry Christmas!