Dolphins are one of the most popular animals to draw, with their cute faces, curved bodies, and playful nature.
In this tutorial, easydrawforkids.com will guide youl earn how to draw a dolphin from start to finish using basic shapes and lines.
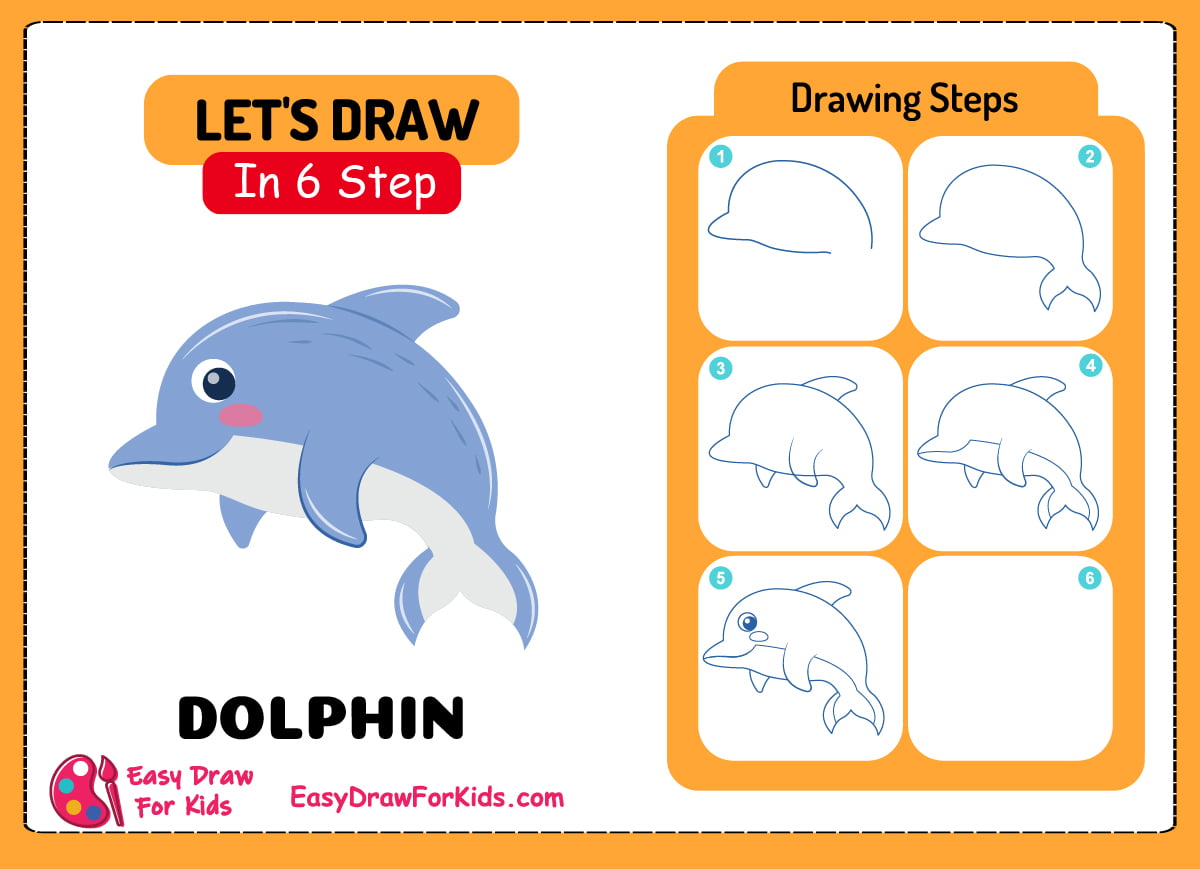
How to Draw a Dolphin – A Step By Step Guide
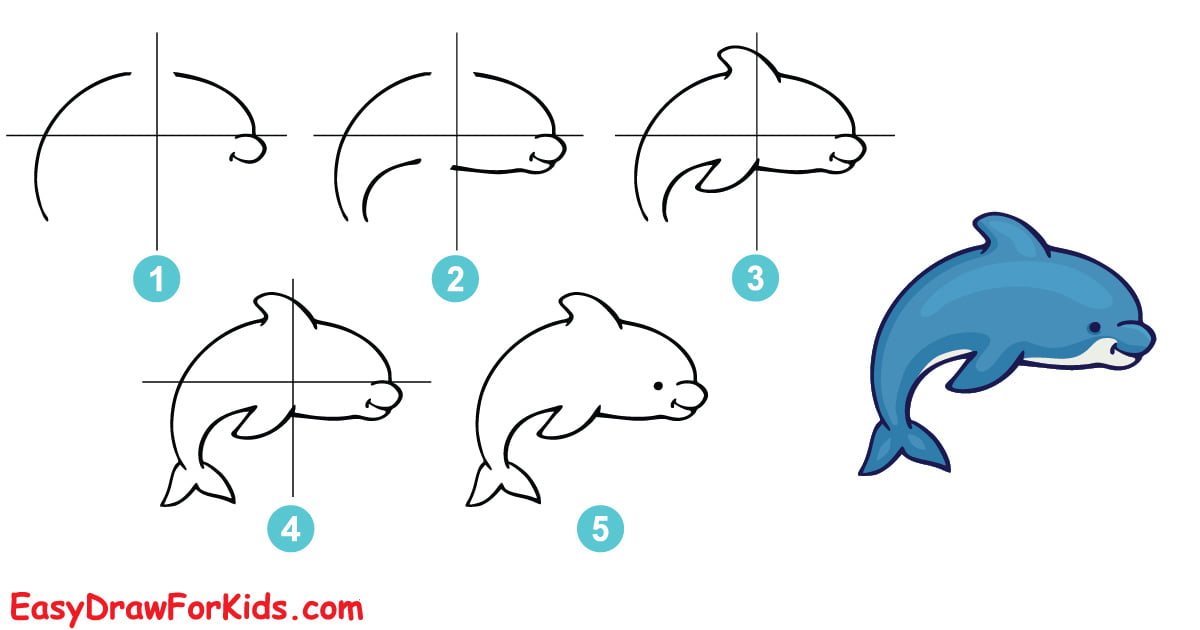
1. Cartoon Dolphin Drawing
Step 1: Draw a sizeable horizontal oval for the body, add a smaller overlapping oval for the head.

Step 2: Divide the curved tail into two segments, extend each segment into an enormous or forked tail shape.
Draw a teardrop shape into a paddle, add curved indentation lines across the flippers
Look at dolphin reference photos to see how the flukes and flippers should appear.

Step 3: Add a curved line on the right side of the body to create the dorsal fin.
On each side of the body, sketch a curved line to for the pectoral fin.

Step 4: Add a curved line down the center of the central body oval for the dolphin’s underside

Step 5: Add one large and one small circle side-by-side for the eyes.
Draw a curved line above for a smiling mouth.
Shade a circular pattern on the forehead for melon contours.

Step 6: Start with a mid-tone gray or blue on the back and go lighter toward the belly area.
The fins can be slightly darker gray for definition.

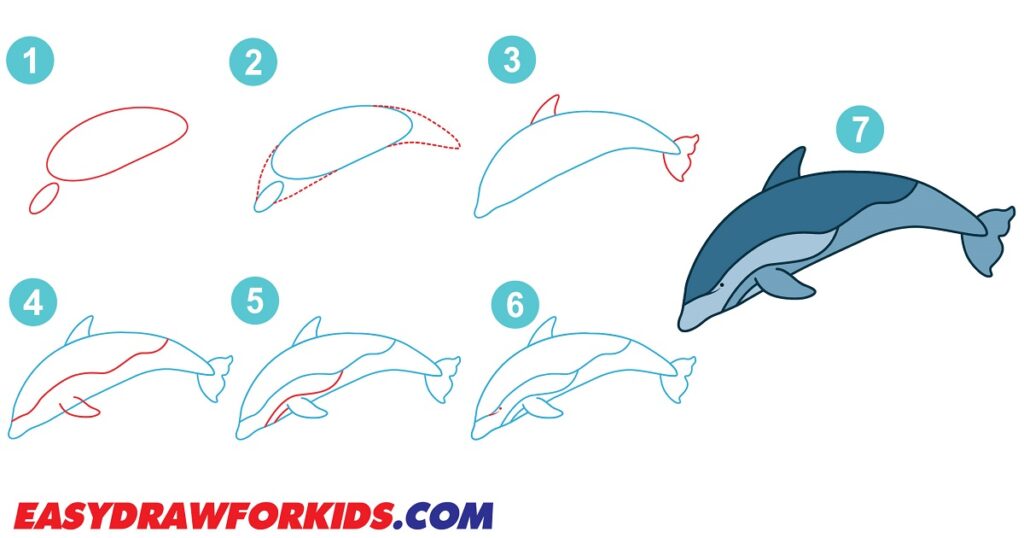
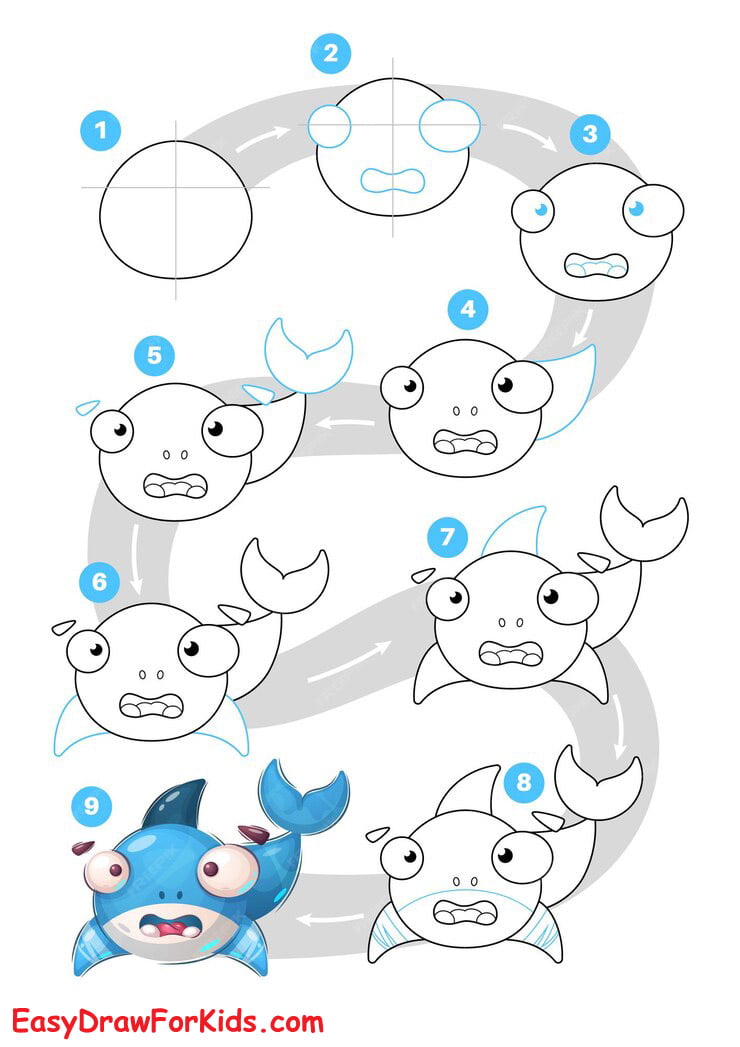
2. Easy Dolphin Drawing

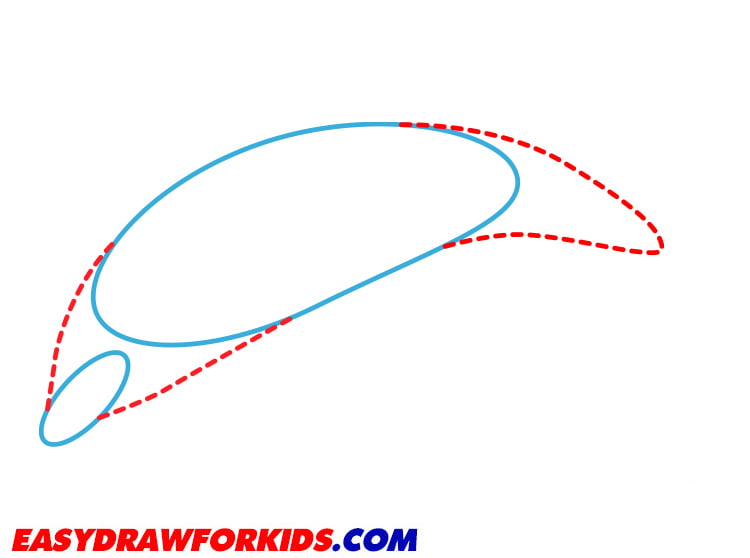
Step 1: Draw a circle for the head and a small circle at the top of the head for the eye

Step 2: Add a curved line for the mouth, as shown in the example.

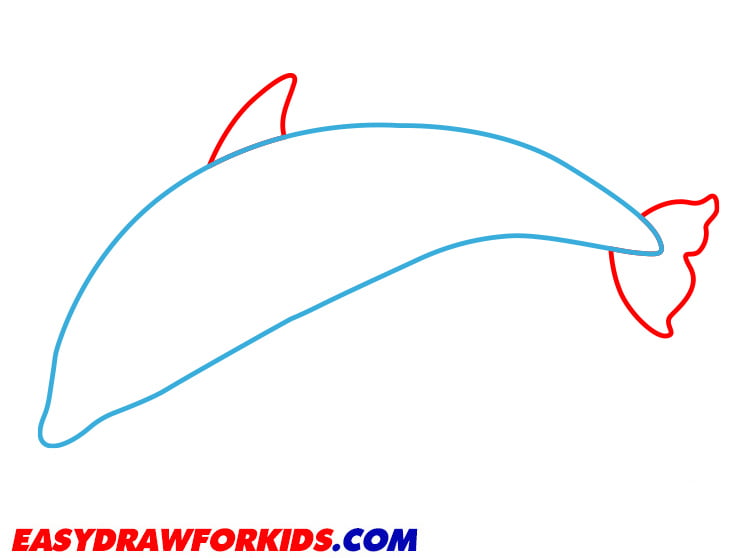
Step 3: Draw a smooth curved line from the top of the head.

Step 4: Continue drawing the outer outline, and with one smooth line, draw the belly as shown in the picture.

Step 5: Now it’s time to draw a curved line for the fins on the back
Next, in the lower part of the body, draw smooth lines to depict the two lower fins.

Step 6: Draw a curved line for the dolphin’s tail, as shown in the picture.
Finally, use an eraser to erase all extra lines in the drawing.

Step 7: Use light blue, pink, and black to color the dolphin.

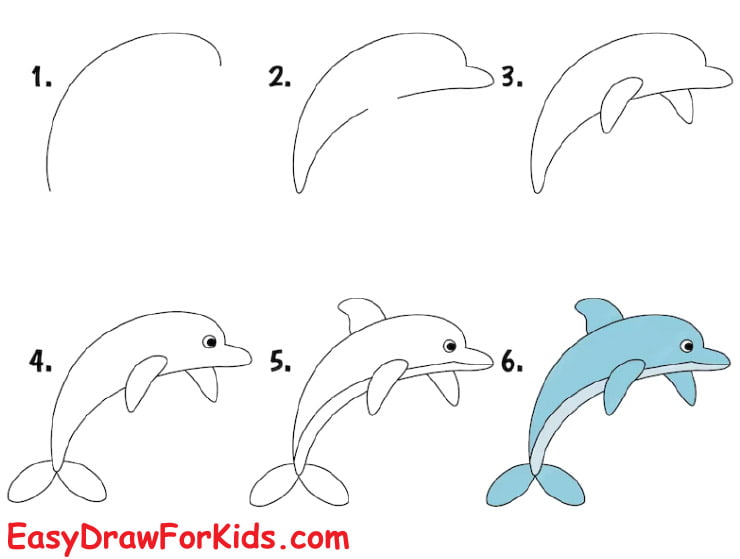
3. Simple Dolphin Drawing
Step 1: Depict two oval-shaped at some distance from each other, as shown in the picture.

Step 2: Draw smooth lines connecting the head and torso
Then, draw a triangle line for the tail
Use eraser (eraser) to erase the excess lines
Step 3: Next, add a small dorsal fin near the top of the back
Draw a curved line from the base of the spine to the top of the tail.
Then, add a small triangle at the top of the tail.
Step 3: Draw a curved line from the head to the body. This will be the dolphin’s belly.
On either side of the body, draw a small curved line. These will be the dolphin’s flippers.

Step 5: Add some lines to the belly to give them some texture.

Step 6: In this step, guide how to draw a dolphin; we will use a dot to draw a dolphin’s eye.

Step 7: Use blue and black to color the body of the dolphin.

More Ways to Learn Drawing a Dolphin
4. Dolphin Drawing Idea 1
5. Dolphin Drawing Idea 2
6. Dolphin Drawing Idea 3
Now you have a cute cartoon dolphin ready to leap, play, and swim in the ocean!
In this tutorial teach you how to draw a dolphin’s friendly nature in an effortless cartoon style.
If you want to learn how to draw other animals, such as sharks, frogs, and whales… be sure to check out my other drawing tutorials.


