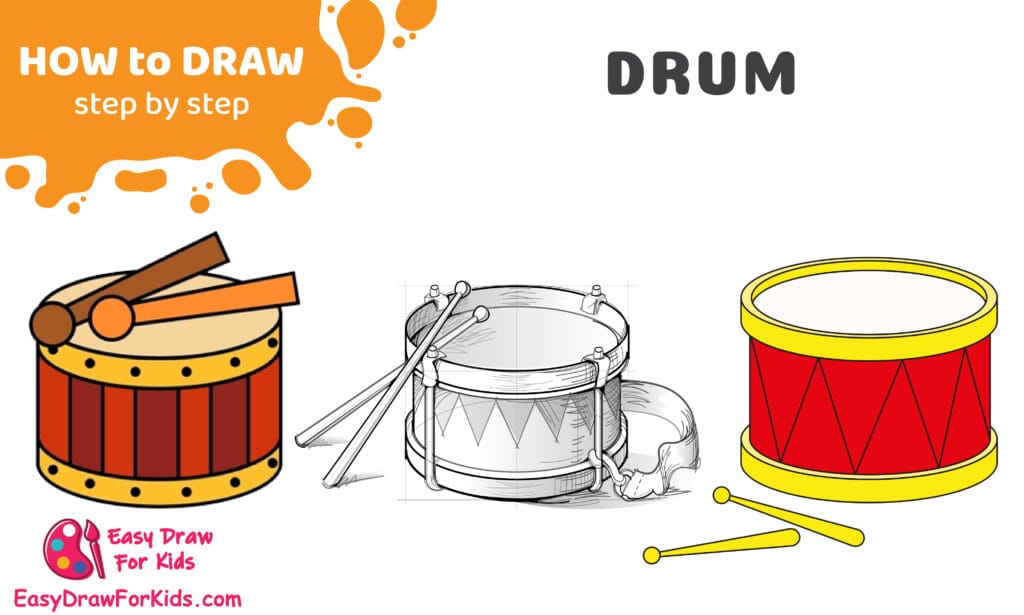
Want to add a musical touch to your artwork?
Follow along as we learn how to draw a drum in just a few quick steps.
Drums are some of the most expressive instruments in music — and they’re surprisingly easy to draw.
Let’s get started!
How to Draw a Drum – A Step by Step Guide
1. How to Draw a Drum for Kids
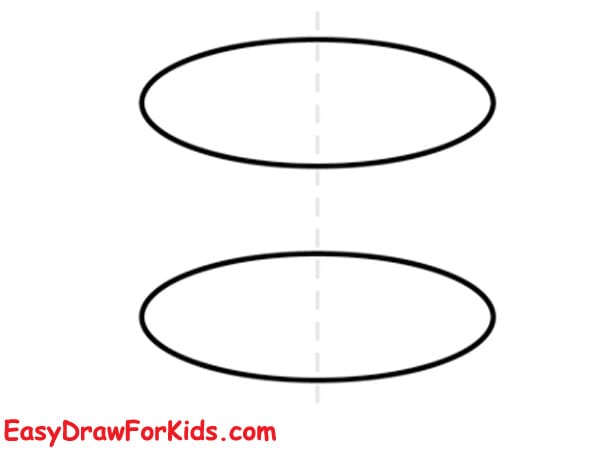
Step 1: Start by drawing two horizontal ovals, one near the top of the page and the other directly below it.
These will form the top and bottom edges of the drum.
Make sure both ovals are roughly the same size and aligned vertically.
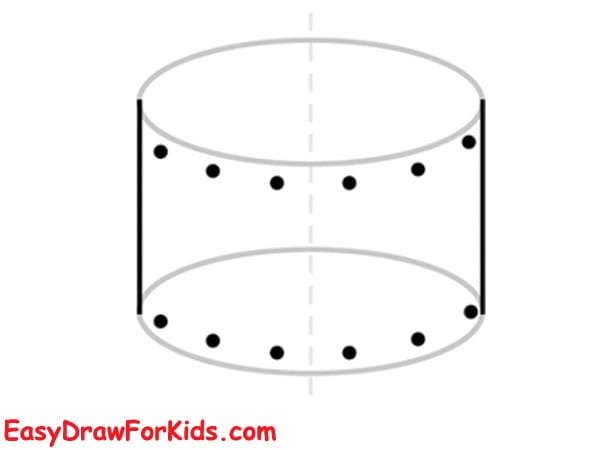
Step 2: Draw two straight vertical lines connecting the left sides of the ovals and another two lines connecting the right sides.
Now the drum looks like a 3D cylinder.
Add small circles evenly spaced along the top and bottom edges—these represent the metal rivets around the drum.
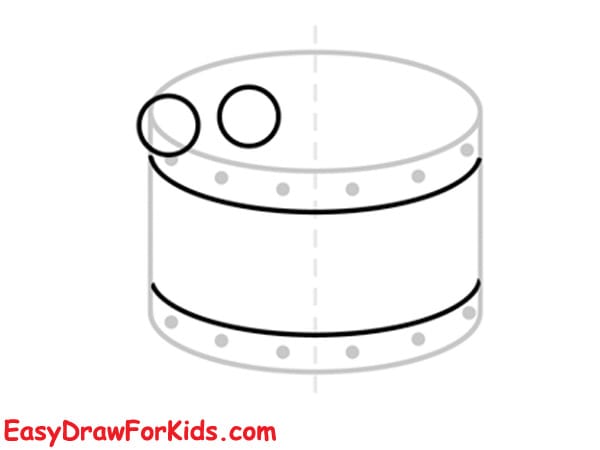
Step 3: Inside the top oval, draw a slightly smaller oval to create the drumhead ring.
On the left side of the drum, draw two small circles—these will become the rounded heads of the drumsticks.
Then, draw two long, slightly angled rectangular shapes attached to the circles. These form the drumsticks lying on the drum.
Step 4: Draw several long vertical rectangles evenly spaced on the drum’s body. These are the wooden slats or decorative panels.
Next, add a second ring around the top and bottom edges by drawing thin curved bands just below the top oval and just above the bottom oval.
Add more small circles inside these bands to complete the drum’s detail.

Step 5: Finish your drawing by adding bright colors:
Top ring: yellow or gold
Drumsticks: brown for the handles, orange for the sticks
Drum body panels: red or dark orange
Bottom ring: gold
Metal rivets: darker yellow or brown
Color everything smoothly, and the drum should look lively and fun—just like in the reference image!

>>>Read more: How To Draw A Violin – 2 Ways (With Pictures)
2. How to draw a Drum Set Easy
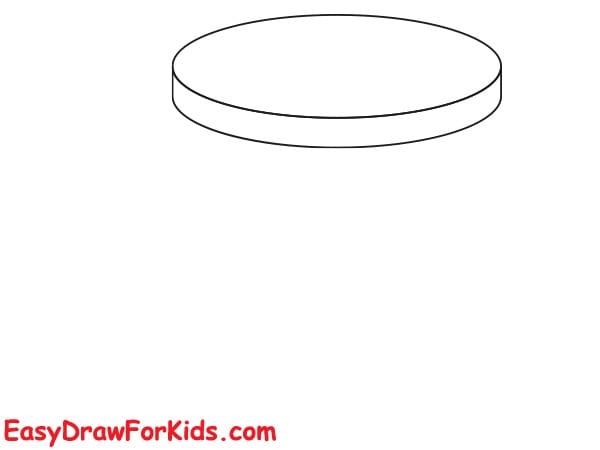
Step 1: Draw a wide horizontal ellipse — this is the drum’s top surface (the drum head).
Under that ellipse, draw a slightly thinner ellipse directly beneath it (this will help show the rim thickness).
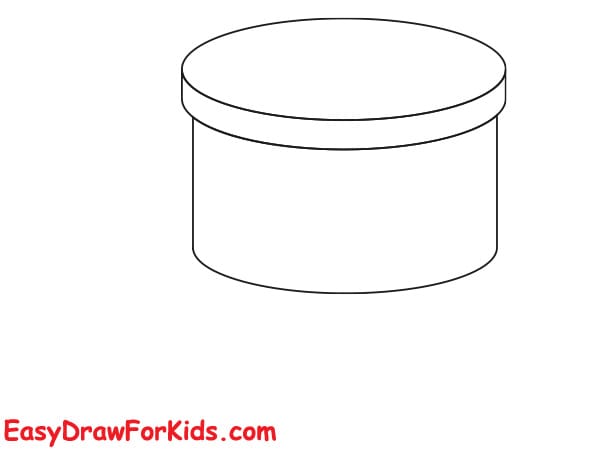
Step 2: From the edges of the lower ellipse, draw two vertical lines straight down. Connect their bottoms with a curved line (a slightly bowed line) to form a cylinder.
Draw a thin horizontal band near the top of the cylinder to show the rim.
Step 3: Inside the top ellipse, draw another smaller ellipse to indicate the inner rim of the drum head.
To the side of the drum, draw two drumsticks: each is a thin tapered stick with a small rounded tip. Place them slightly crossed or parallel on the ground beside the drum. Add short shadow lines under the sticks to suggest they rest on the surface.

Step 4: Add a simple pattern around the drum body (for example, diagonal triangles, zigzags, or horizontal lines).
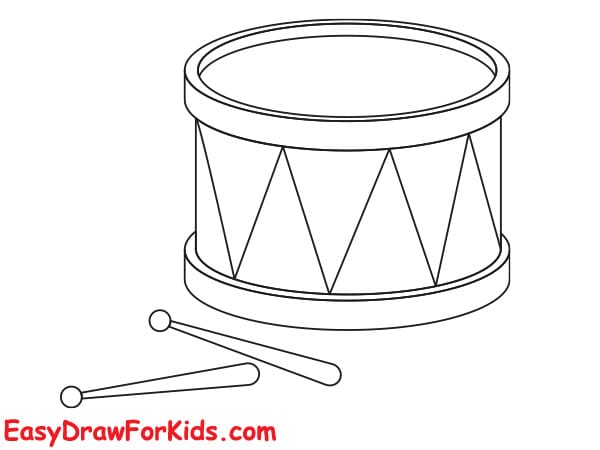
Step 5: Shade lightly under the drum and under the rim to show depth. Use short strokes around the cylinder edges to suggest roundness.
Color red for the drum body, yellow/gold for the rim, light gray for the drum head, and brown or yellow for the drumsticks.

>>>Read more: How To Draw A Guitar – 2 Ways (With Pictures)
3. How to Draw a Drum Realistic
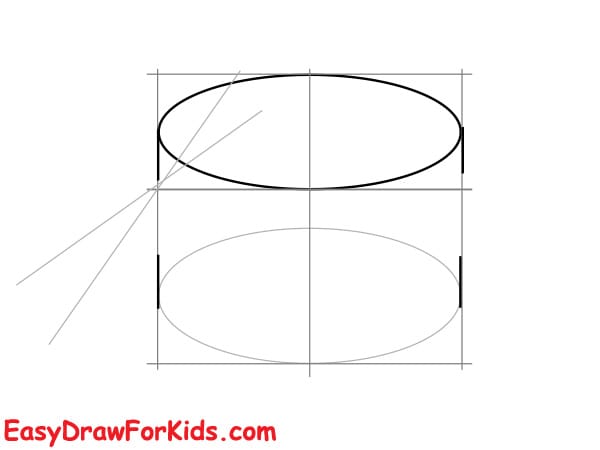
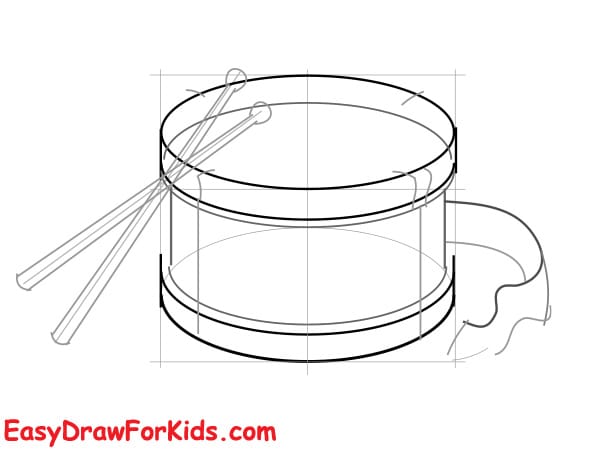
Step 1: Draw a rectangle guide to define the drum’s height and width.
Inside the top part, sketch a wide horizontal ellipse for the drum head.
Draw a vertical centerline and a horizontal centerline through the rectangle to keep everything symmetric.
These guides will keep your perspective correct.

Step 2: Using the vertical guides, draw a matching lower ellipse where the bottom of the drum will be (same center, smaller or shifted down depending on height).
Lightly connect the left and right edges of the two ellipses with straight vertical lines to create the cylindrical body.
Add a thin band near the top ellipse to indicate the top rim and another thin band below the top rim for the drum shell edge.
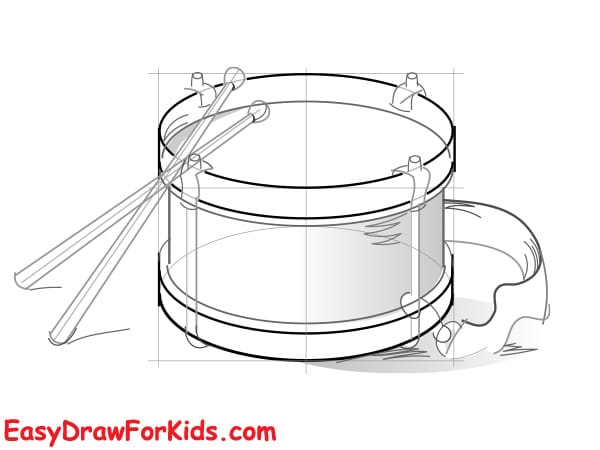
Step 3: Darken the top rim by drawing a second, slightly smaller ellipse inside the top ellipse — this shows rim thickness.
On the shell, place a few small vertical lugs or posts around the circumference.
To the side of the drum, sketch two drumsticks resting across the rim; draw them as tapered cylinders with rounded tips.
If the model includes a cloth or rag beside the drum, sketch its basic shape with flowing lines.
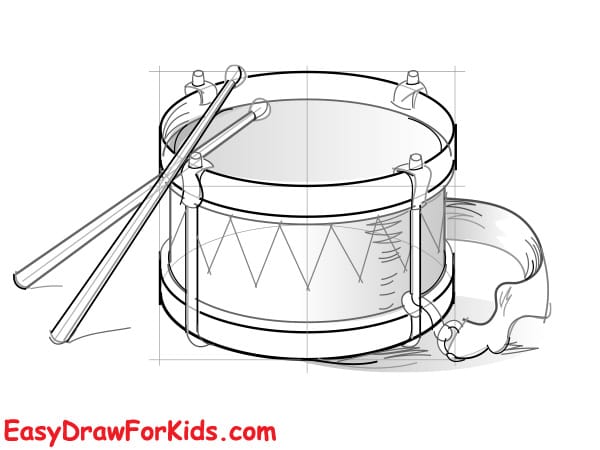
Step 4: Refine each lug with small connecting lines to the rim.
If the drum has decorative rope or a patterned band around the shell, draw that now — for example a zig-zag pattern or diagonal ropes.
Add the inner rim detailand small screws or bolts around the rim’s inner circle.
Step 5: Shade the drum shell with gentle, curved strokes that follow the cylinder’s contour: darker on the side away from the light.
Shade under the top rim and around each lug for depth.
Add cast shadows under the drum, under the drumsticks, and where the cloth touches the ground.
Step 6: Darken the strongest outlines you want to keep (rim edges, lugs, drumstick tips).
Put small bright highlights on the rim and on any glossy hardware.
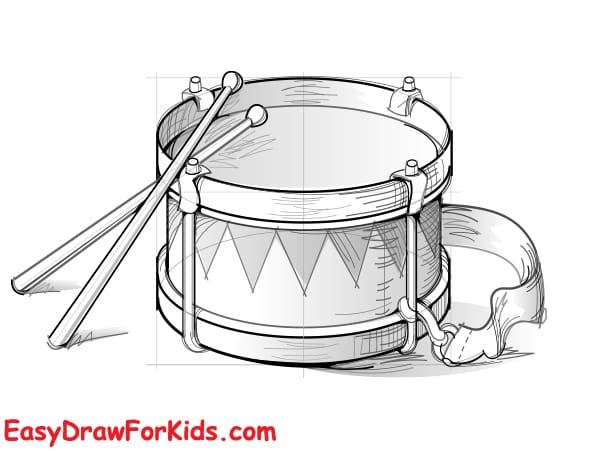
And that’s it!
With just a few simple shapes, you’ve created a bold, musical drum drawing.
Learning to draw a drum is just the beginning — what musical instrument will you try next?