Hello!
Today, easydrawforkids.com will help you learn how to draw a fish with ease!
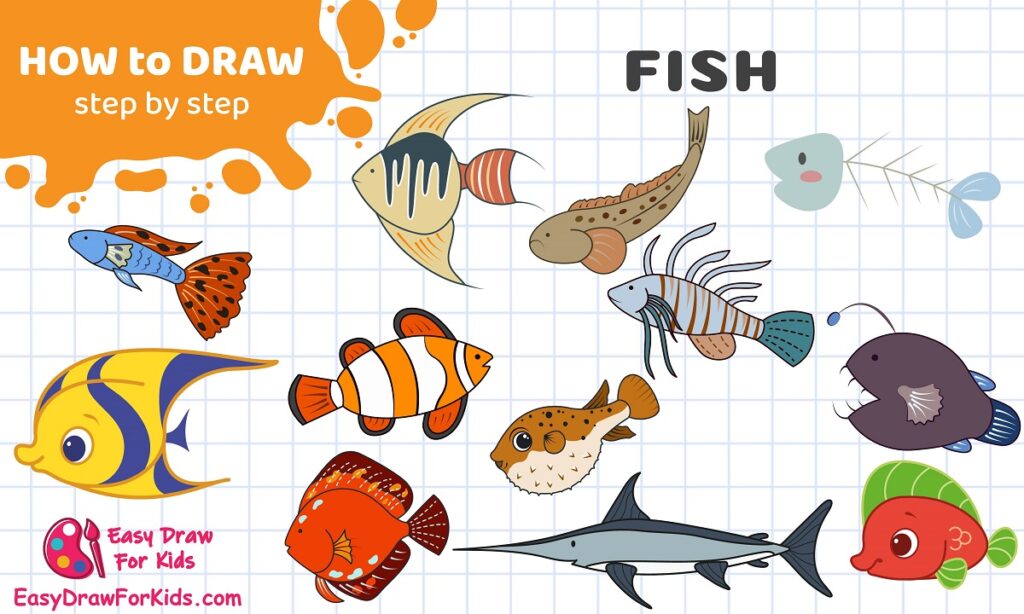
How To Draw A Fish – A Step By Step Guide
Here is a step-by-step guide to learn how to draw a fish with 14 ways.
1. Angelfish Drawing
Step 1: Draw a tall, thin oval shape with a pointed snout at the front.

Step 2: Sketch two pectoral fins near the front of the body, and a small, rounded caudal (tail) fin.

Step 3: Draw a long, triangular dorsal fin at the top of the body, and a matching anal fin at the bottom.

Step 4: Draw the angelfish’s distinctive pattern around the body.

Step 5: Draw soft, flowing lines to indicate the webbing of the dorsal, anal, and caudal fins.
Then, add a small dot for the eyes and curved line for the mouth.

Step 6: Add color. Angelfish are usually silvery-gray with black, yellow, or white accents.

2. Angler fish Drawing
Step 1: Draw a wide, bulbous shape with a slightly pointed snout at the front.

Step 2: Sketch the angler fish’s wide, gaping mouth.
Sketch a small, rounded dorsal fin on top of the body, and a matching anal fin underneath.
Draw a large, fan-shaped caudal (tail) fin at the very end.

Step 3: Draw a pectoral fins near the front of the body.

Step 4: Draw rough, uneven skin with bumpy protrusions all over the angler fish’s body.

Step 5: Draw a thin, curving line extending from the top of the head. This is the lure, which the angler fish uses to attract prey.
Sketch the individual teeth in the gaping mouth.

Step 6: Color the angler fish. Typical angler fish coloration includes shades of black, brown, or gray, with pale underbellies.

3. Aquarium Fish Drawing
Step 1: Draw an oval shape for the fish’s body.

Step 2: Draw a curved lines for the fish’s mouth. Angle it slightly downwards.

Step 3: Draw an oval near the top of the head for the eye.

Step 4: Draw a flowing, curved line from the top of the head down to the middle of the body. This will be the fish’s top dorsal fin.
On the opposite side, sketch a smaller, more triangular shape for the bottom dorsal fin.

Step 5: At the very back, draw a fanned-out tail fin.

Step 6: Draw scales all over the fish’s body using a variety of shapes and patterns.

Step 7: Color to complete your aquarium fish drawing

4. Clown Fish Drawing
Step 1: Sketch an oval shape with a rounded belly and a pointed snout.

Step 2: Draw a tall, triangular dorsal fin on top, and a matching anal fin underneath.

Step 3: Draw the pectoral fins near the front of the body and a fan-shaped caudal (tail) fin.

Step 4: Add a small, circular eye near the front of the head

Step 5: Draw three thick, black vertical stripes across the body, with white or yellow bands in between.

Step 6: Color the clownfish. Typical clownfish coloration includes orange, white, and black.

5. Discus Fish Drawing
Step 1: Draw a tall, rounded oval shape with a slightly elongated, flattened profile.

Step 2: Add the discus fish’s fins, as shown in the picture.

Step 3: Use soft, flowing lines to indicate the webbing and ray structure of the dorsal, anal, pectoral, and caudal fins.

Step 4:

Step 5: Add the discus fish’s eyes.

Step 6: Color the discus fish. Typical discus coloration includes shades of blue, green, brown, orange, and red.

6. Easy Fish Drawing
Step 1: Start with a large, rounded teardrop shape for the main body of the fish.

Step 2: Sketch the pectoral fin and tail fin.

Step 3: Draw a few curved lines along the body.

Step 4: Add small dot for the eye and a small, curved line underneath the eyes for the fish’s mouth.

Step 5: Add some simple details

Step 6: Color your fish drawing

7. Fish Bone Drawing
Step 1: Draw an oval shape to form the head of fish bone.

Step 2: Add slightly curved line to form the bone of the spine.

Step 3: Draw two oval shape to form the tail bones.

Step 4: Sketch a series of V-shaped lines extending from the vertebrae

Step 5: Add a small dot on the head for the eye.

Step 6: Coloring

8. Guppy Fish Drawing
Step 1: Draw a long, slender oval shape with a rounded belly

Step 2: Draw the tall, fan-shaped dorsal fin on top, and the guppy’s distinctive forked caudal fin.

Step 3: Add the anal fin and pectoral fin.

Step 4: Add fin rays within the webbing of the dorsal, anal, and caudal fins.

Step 5: Sketch the guppy’s eyes and mouth.

Step 4: Color the guppy. Guppies come in a wide variety of vibrant colors, including yellows, oranges, blues, greens, and reds.

9. Nemo Fish Drawing
Step 1: Draw an oval shape for the head, add round circles near the top of the head for the eyes.

Step 2: Add a triangular shape at the back for the body.

Step 3: Add a single, curved fin shape on the top of the body.
Extend small, paddle-like shape from the side of the body for the pectoral fins.
At the back, draw a large, flowing tail fin.

Step 4: To add Nemo’s signature colorful stripes, draw a series of horizontal bands across the fish’s body.

Step 5: Now you complete this guide on how to draw a fish, it’s time to color!

10. Puffer Fish Drawing
Step 1

Step 2

Step 3
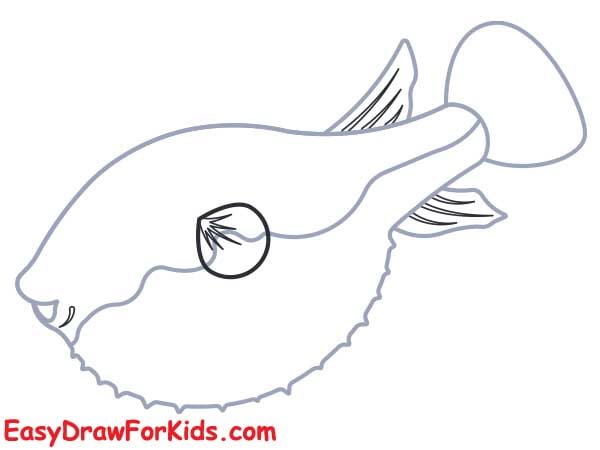
Step 4

Step 5

Step 6

11. Sword Fish Drawing
Step 1: Draw a long, streamlined oval shape with a pointed, elongated snout at the front.

Step 2: Add the swordfish’s fins.

Step 3: Add the crescent-shaped caudal (tail) fin.

Step 4: Add the details of the fins.

Step 5: Color the swordfish by blue, gray, and black on the top, with a white or silvery underside.

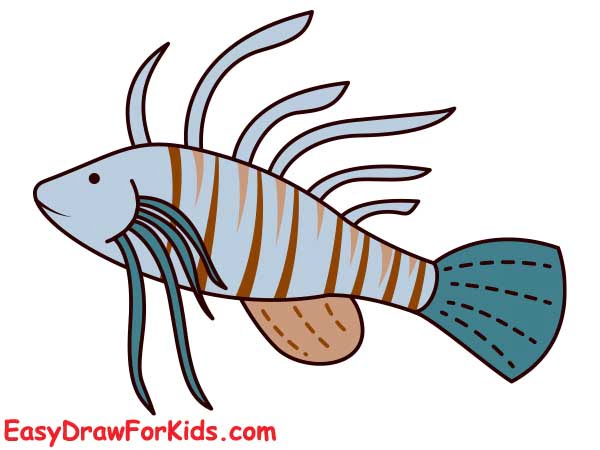
12. Zebra Fish Drawing
Step 1: The first step on guide how to draw a fish, sketch the basic shape of the zebrafish’s body.

Step 2: Add the anal fin and the forked caudal (tail) fin.

Step 3: Draw a series of evenly spaced, parallel lines to form the fins, as shown in the picture.

Step 4: Add the zebrafish’s eyes and mouth.

Step 5: Sketch the zebrafish’s distinctive striped pattern.

Step 6: Color the zebrafish by blue, green, yellow, and black.
13. Koi Fish Drawing
In this article on how to draw a fish in 7 steps to help you drawing a koi fish with ease!
Step 1: Draw a large, rounded oval shape with a wide, curved belly and a blunt, rounded snout.

Step 2: Draw a small, circular eye near the front of the head, with a dot in the center for the pupil.

Step 3: Draw a pair of short, thin lines extending from the corners of the koi’s mouth to form the koi’s barbels.

Step 4: Add the pectoral fins.

Step 5: Draw the large, flowing dorsal fin on top

Step 6: Draw a series of large of spots along the koi’s body.

Step 7: Color the koi by orange, white, black, yellow, and red.

14. Betta Fish Drawing
Step 1: Draw a long, slender oval shape with a narrow, tapered abdomen and a small, pointed snout.

Step 2: Draw a wide, fan-shaped caudal (tail) fin at the back of the body to form the betta’s tail.

Step 3: Draw the pectoral fins near the front of the body.

Step 4: Sketch the large, flowing dorsal fin on top, which should be the longest and most prominent feature.

Step 5: Add the betta’s mouth and eyes.

Step 6: Color the betta. Use a variety of vibrant, saturated colors to bring your betta fish to life.

Now you know how to draw a fish, fish come in a wide variety of shapes, sizes, and colors, making them an engaging subject to capture on paper.
Whether you want to draw a vibrant tropical fish or a more subdued freshwater species, the basic steps are quite similar.


