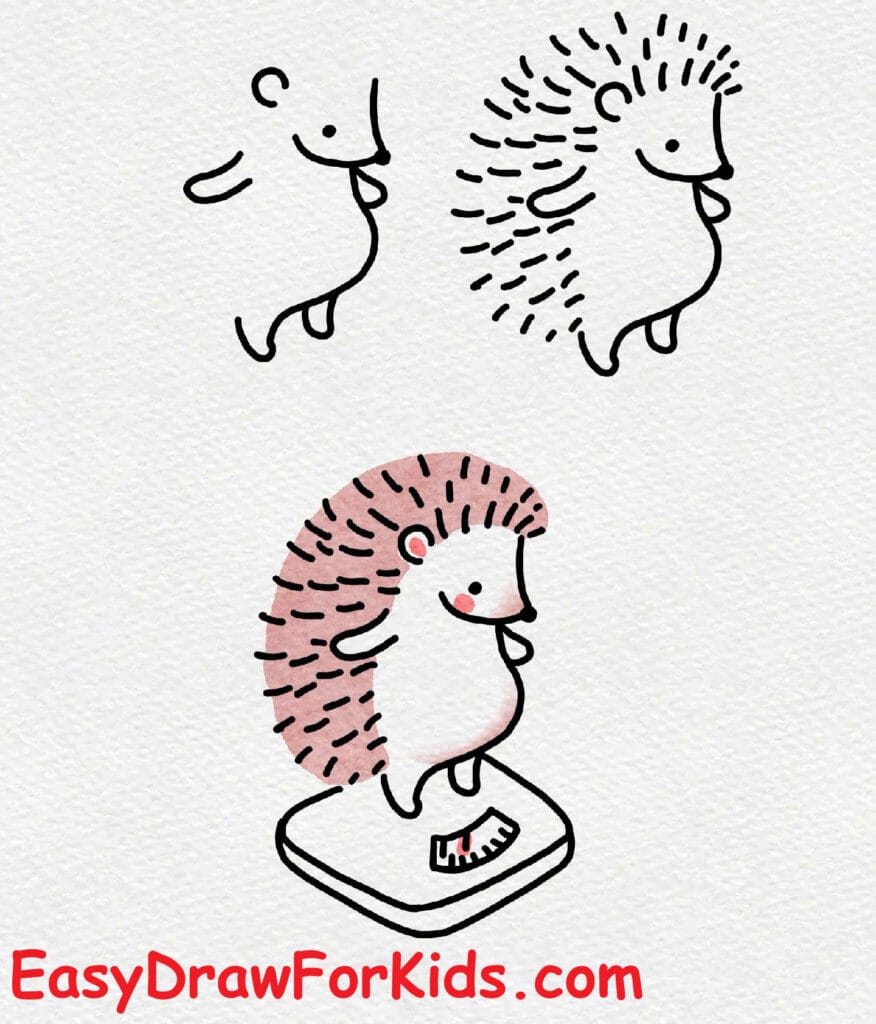
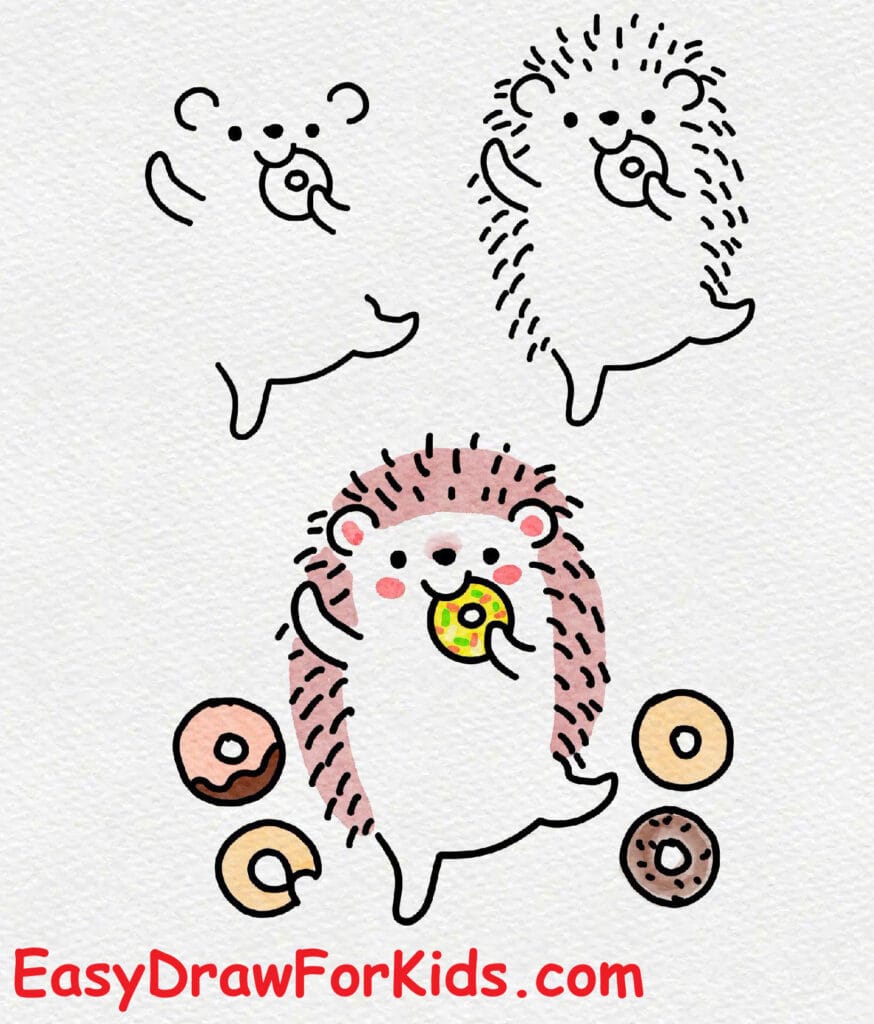
Ready to draw one of the cutest forest animals?
Hedgehogs may look spiky, but drawing them is super simple!
In this tutorial, I’ll show you exactly how to draw a hedgehog in the simplest way possible.
Follow along as we create a cute and friendly hedgehog.
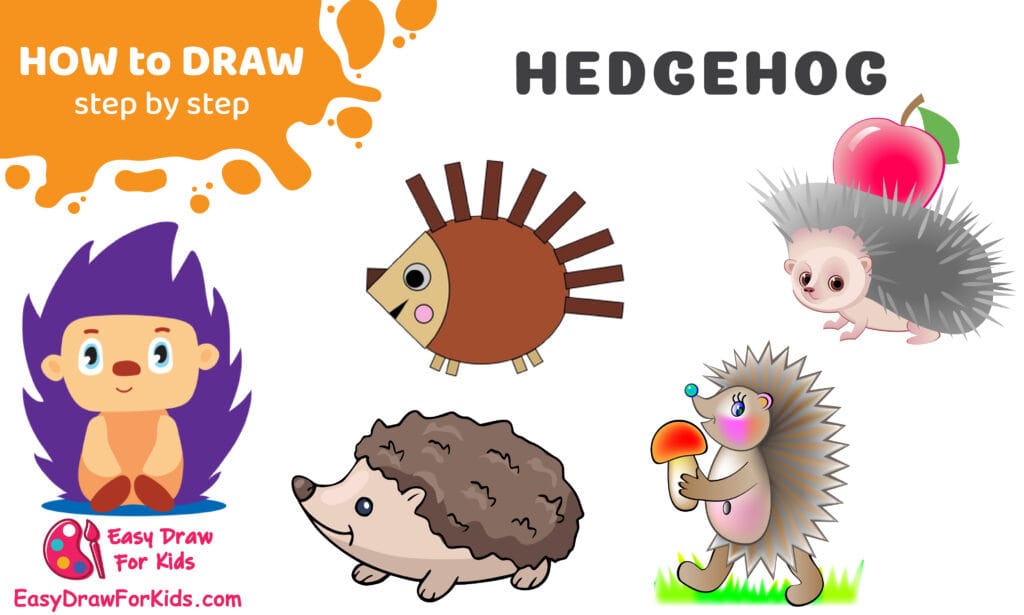
How to Draw a Hedgehog – A Step by Step Guide
1. How to Draw a Baby hedgehog
Step 1: Lightly sketch a rounded rectangle for the head with slightly rounded corners.
Below it, draw a rounded teardrop or soft pear shape for the body.

Step 2: Draw two short, rounded arms that come down from the sides of the neck area and meet near the center front of the body (as if the hedgehog is holding its paws together).
Sketch two small curved legs at the bottom of the body — simple rounded shapes touching each other.
These should be short and stubby to keep the baby look.

Step 3: Around the back of the head and body, draw a large scalloped silhouette of spines — big, soft flame-like points that extend high above the head and curve around the sides of the body.
Make the spikes rounded at the tips so the character remains cute.
The spines should form a single continuous halo behind the hedgehog.

Step 4: Inside the head, draw two large round eyes spaced evenly and add small white highlights.
Add a small rounded nose centered low on the face and a simple curved smile beneath it.
On the front of the body draw a lighter belly patch and refine the paws so they appear resting on that patch.

Step 5: Color the hedgehog like a warm, stylized baby character:
Spines: darker tone (e.g., purple, dark brown, or deep gray)
Face & belly patch: lighter tone (peach, cream, or light tan)
Eyes: dark with white highlights
Nose: small dark brown or black dot

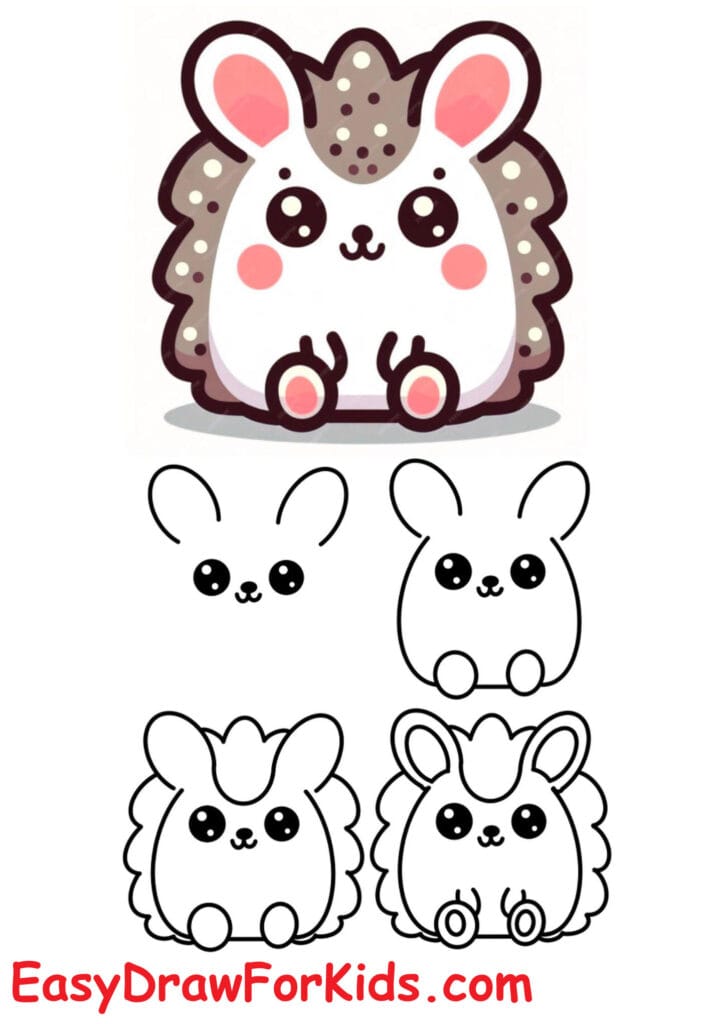
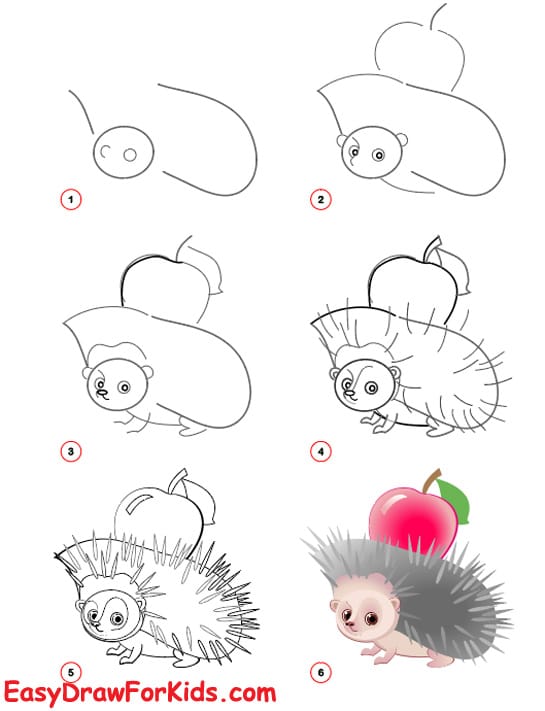
2. How to Draw a Cute Hedgehog
Step 1: Lightly sketch a soft rounded oval for the head — slightly wider than tall.
Inside the oval, mark three small dots across the center for the two eyes and the nose position.

Step 2: Draw two small round eyes on the outer dots and a tiny round nose at the center dot.
Add a small curved mouth below the nose.
Sketch two little semicircular ears at the upper sides of the head — keep them slightly rounded and cute.

Step 3: Under the head, draw a rounded, slightly tapered body .
Make the neck short so the head sits close to the body for a chibi look.

Step 4: Around the back of the head and body, draw the spines outline — a scalloped zigzag line forming a rounded, leaf-like halo.
The spikes should be large, soft points to keep the cute style.

Step 5: Sketch a small apple inside the belly, simple oval with a small stem and leaf.

Step 6: Add tiny stubby arms at the sides of the belly patch held an apple — short curved lines ending in small rounded hands.
Add two small rounded feet peeking from the bottom of the body.

Step 7: Coloring
Fur/spines: warm brown or chestnut for the outer spines, slightly darker for the tips.
Face & belly patch: pale cream or light beige.
Nose & eyes: black (leave a small white highlight in each eye).
Apple: red with a green leaf (or any object color you like).

>>>Read more: How to Draw a Ladybug – 5 Ways (With Pictures)
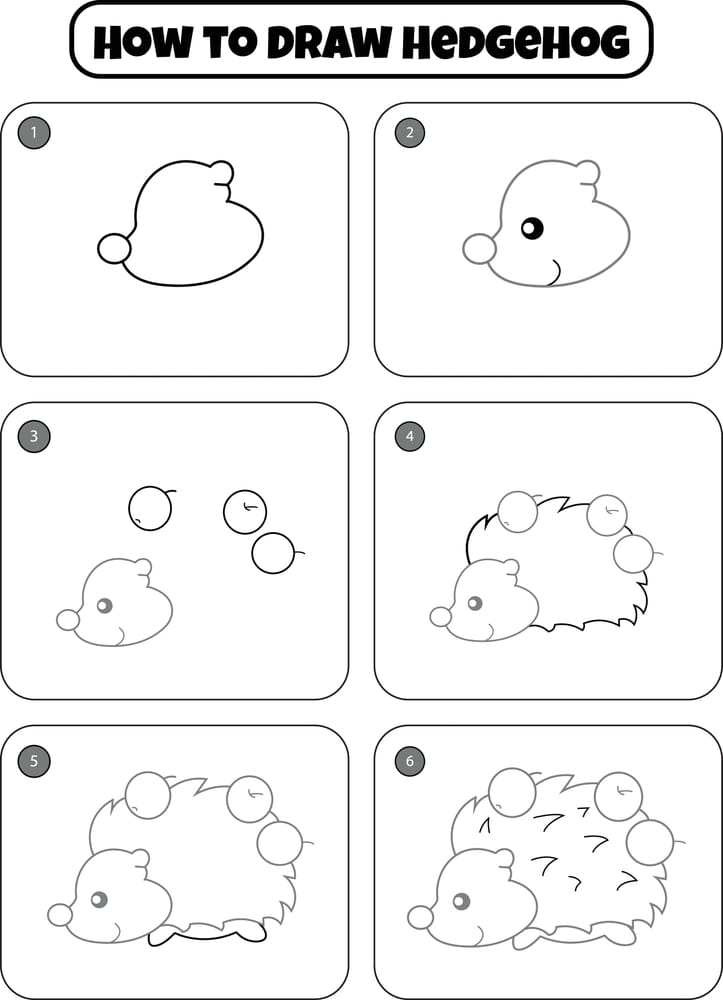
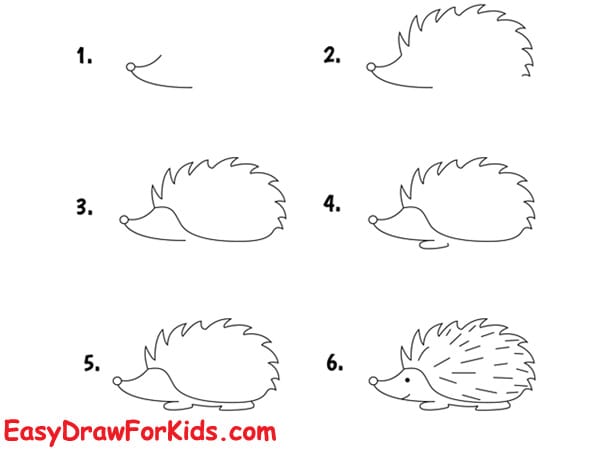
3. How to draw a Hedgehog for Kids
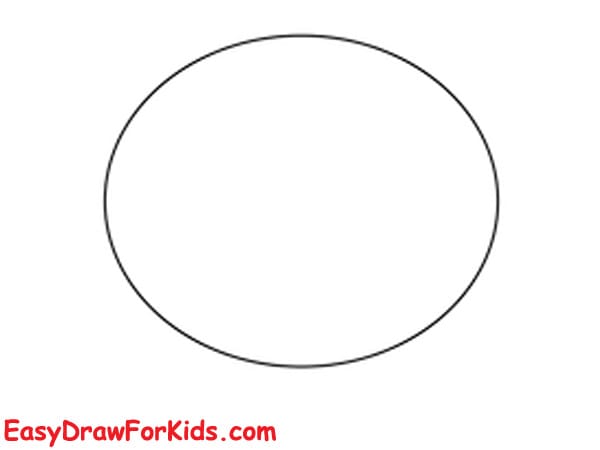
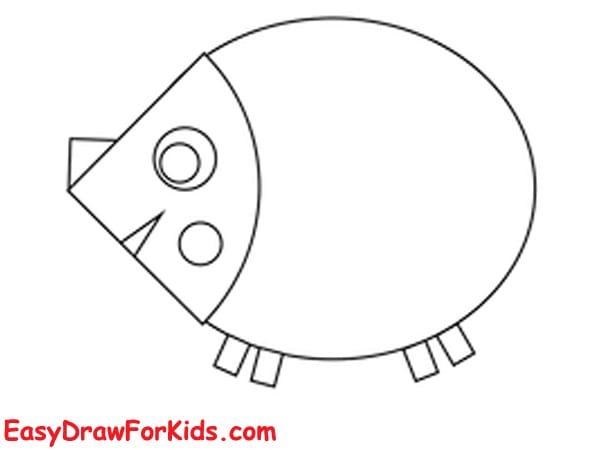
Step 1: Start by drawing a large oval. This oval will be the main body of the hedgehog, so make it big and smooth.
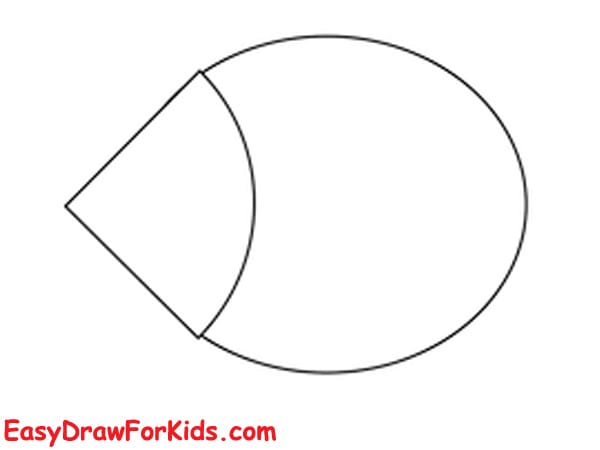
Step 2:On the left side of the oval, draw a triangle-like shape that is slightly curved where it connects to the oval.
The point of the triangle should face left — this will be the hedgehog’s snout.
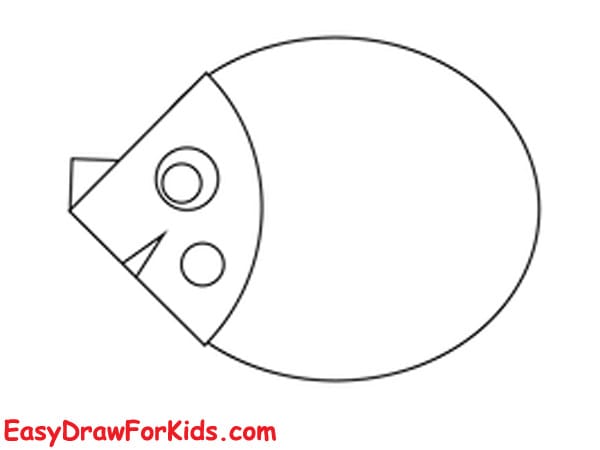
Step 3: Inside the head area:
Draw a circle for the eye.
Draw a small square-like shape for the ear.
Add a small triangle for the nose at the tip of the snout.
Step 4: Under the body, draw four short rectangular legs. Each leg should be slightly apart to show the hedgehog standing.
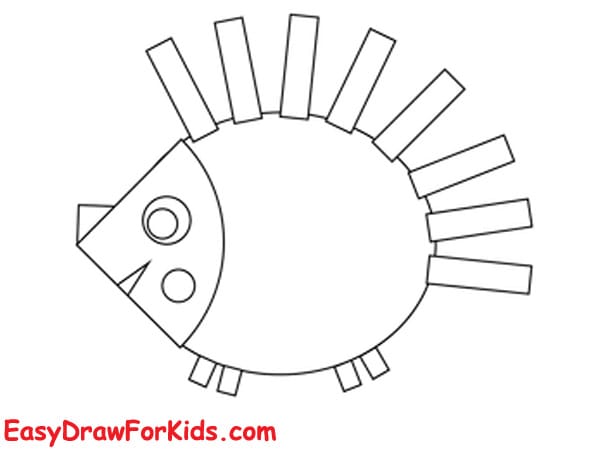
Step 5: On the top and right side of the body, draw several long rectangles pointing outward. These are the hedgehog’s spines.
Make them evenly spaced around the back of the oval.
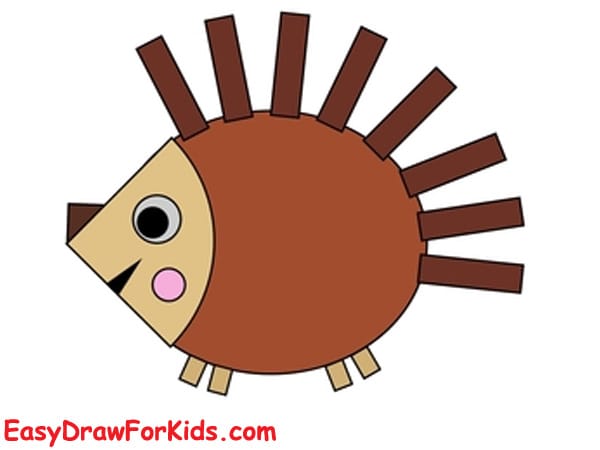
Step 6: Finally, color the hedgehog:
Dark brown for the spines
Light brown for the head
Beige for the snout area
Black for the nose and eye
Light brown for the legs
>>>Read more: How to Draw a Koala – 4 Ways (With Pictures)
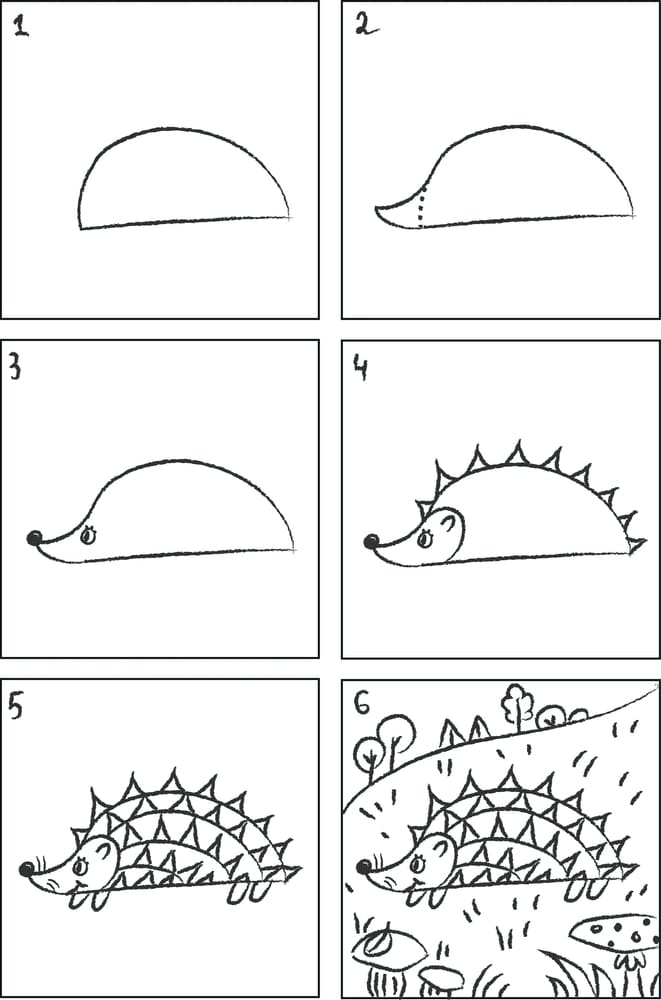
4. How to Draw a Hedgehog Realistic Easy
Step 1: Begin by drawing an oval tilted slightly to the right.
Then lightly sketch a vertical and a horizontal guideline through the oval.
These guidelines will help you place the facial features and the legs correctly.

Step 2: On the left end of the oval, draw a small, rounded snout that curves outward.
Add a tiny circle at the tip to mark the nose.
Then draw a gentle line connecting the snout back to the oval.
Step 3: Under the body, draw four small legs:
Two near the front
Two near the back
Each leg should be shaped like a small oval or rounded triangle and positioned along the bottom guideline.
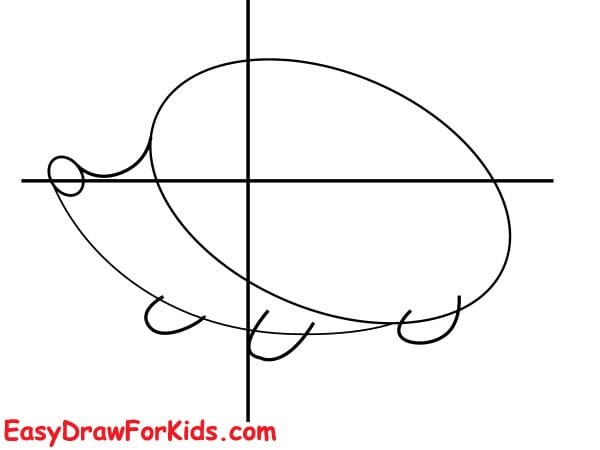
Step 4: At the top-left part of the oval, draw a small curved ear.
Then add a small circle for the eye slightly behind the snout.
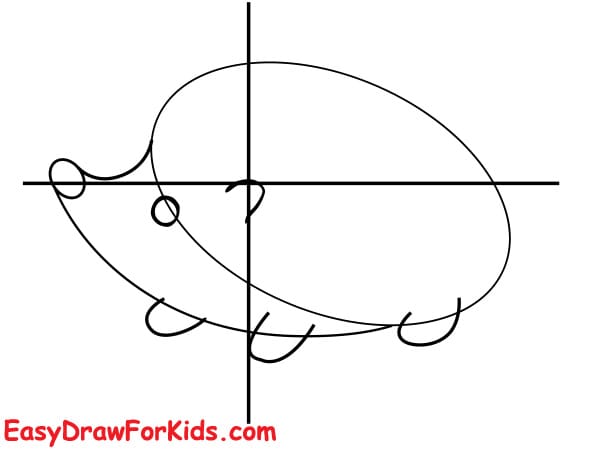
Step 5: Now outline the hedgehog’s back.
Use a wavy, bumpy line starting from the top of the head and curving all around the back of the body.
These large wavy shapes show the fluffy outer edge of the spines.
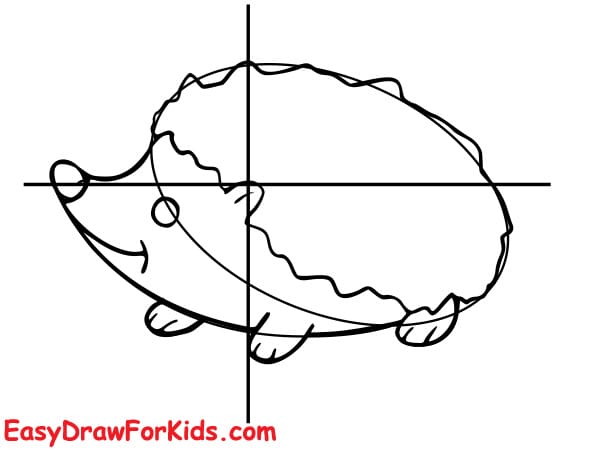
Step 6: Inside the spines area, draw several short curved lines to show texture.
These should follow the shape of the hedgehog’s back and make it look fluffy and realistic.
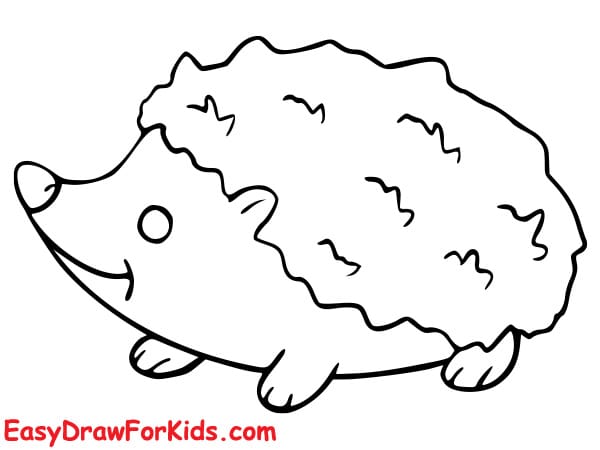
Step 7: Color the hedgehog:
Dark brown for the spines
Light beige for the face and body
Pink for the cheek
Dark brown for the nose and feet
Add shading to make it look soft and round
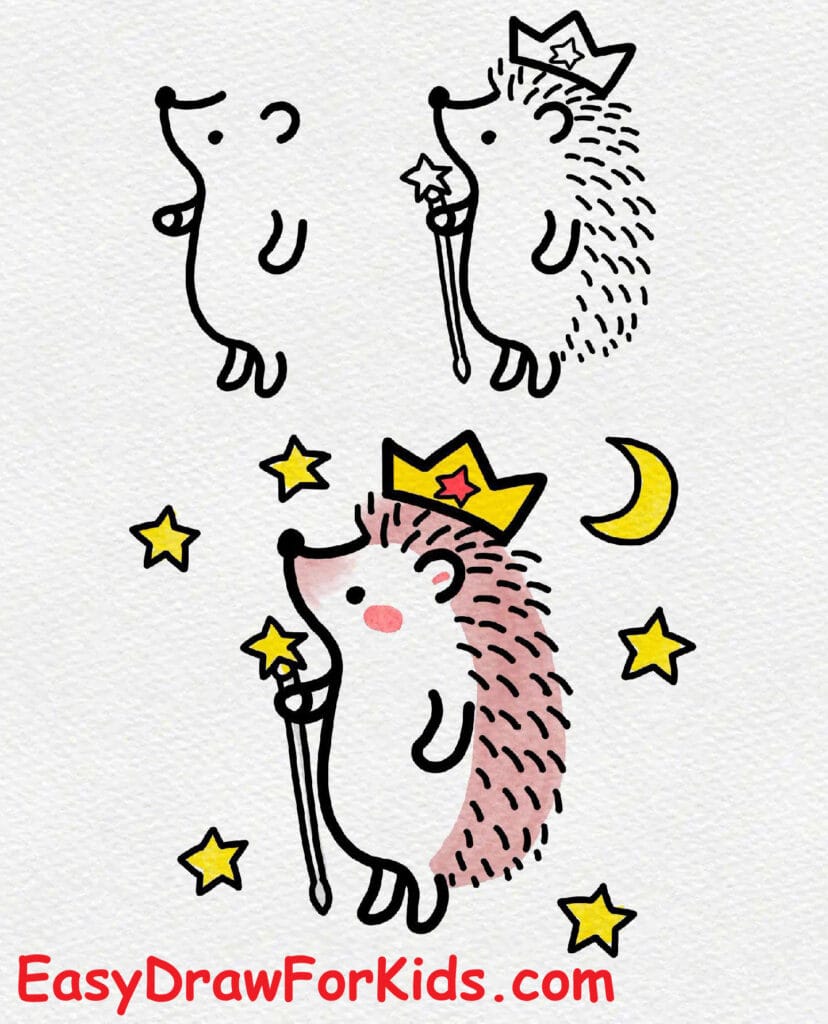
5. How to Draw a Cartoon Hedgehog
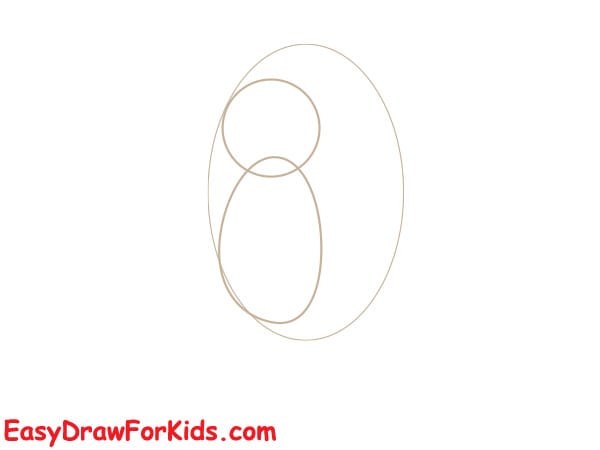
Step 1: Lightly draw two overlapping ovals: a smaller oval for the head sitting slightly above and in front of a larger oval for the body.
Surround both with a large outer oval. These simple shapes help keep proportions correct.
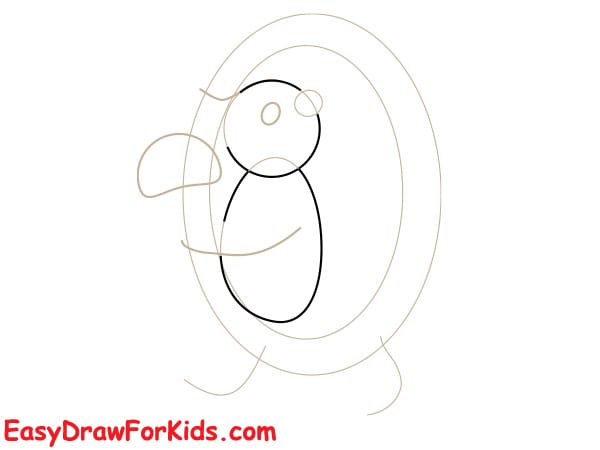
Step 2: Inside the head oval, mark two small circles for the eye placement and a dot for the nose.
Sketch a rounded snout projecting slightly from the head. Add simple arm and leg shapes: curved lines for the front paw reaching forward and a small rear leg.
Lightly sketch a mushroom shape (stem and cap) in the front paw area so you know where the hedgehog will hold it.
Step 3: Using the outer large oval as a guide, draw the jagged scalloped spine outline around the body — small triangular points all along the curve to represent the hedgehog’s quills.
Make the triangles regular but slightly rounded at tips so the character stays cute.

Step 4: Draw the eyes as round circles with small highlights, add a round nose and a smiling mouth.
Refine the front paw so it wraps naturally around the mushroom stem; refine the rear leg so it looks like the hedgehog is stepping or standing.
Detail the mushroom: rounded cap, a short thick stem and a tiny line or spot decor on the cap.

Step 5: Add small interior texture lines: short curved strokes inside the ears, a few lines on the belly patch, and a row of short strokes at the base of some quills to suggest fur depth.

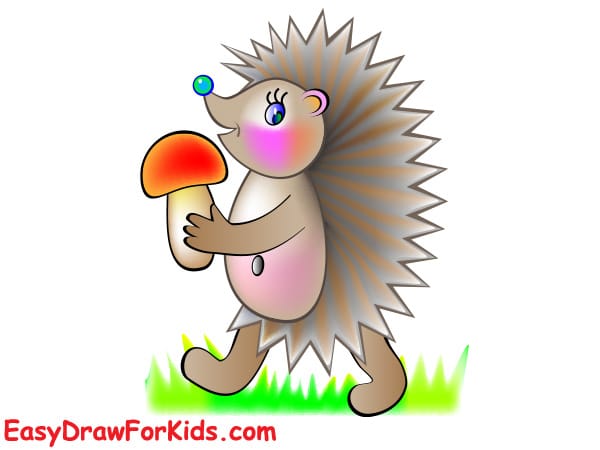
Step 6: Color the drawing: warm brown for the quills, lighter beige for the face and belly patch, pink blush on the cheeks, dark brown or black nose, and a bright color for the mushroom cap.
>>>Read more: How to Draw a Raccoon – 6 Ways (With Pictures)
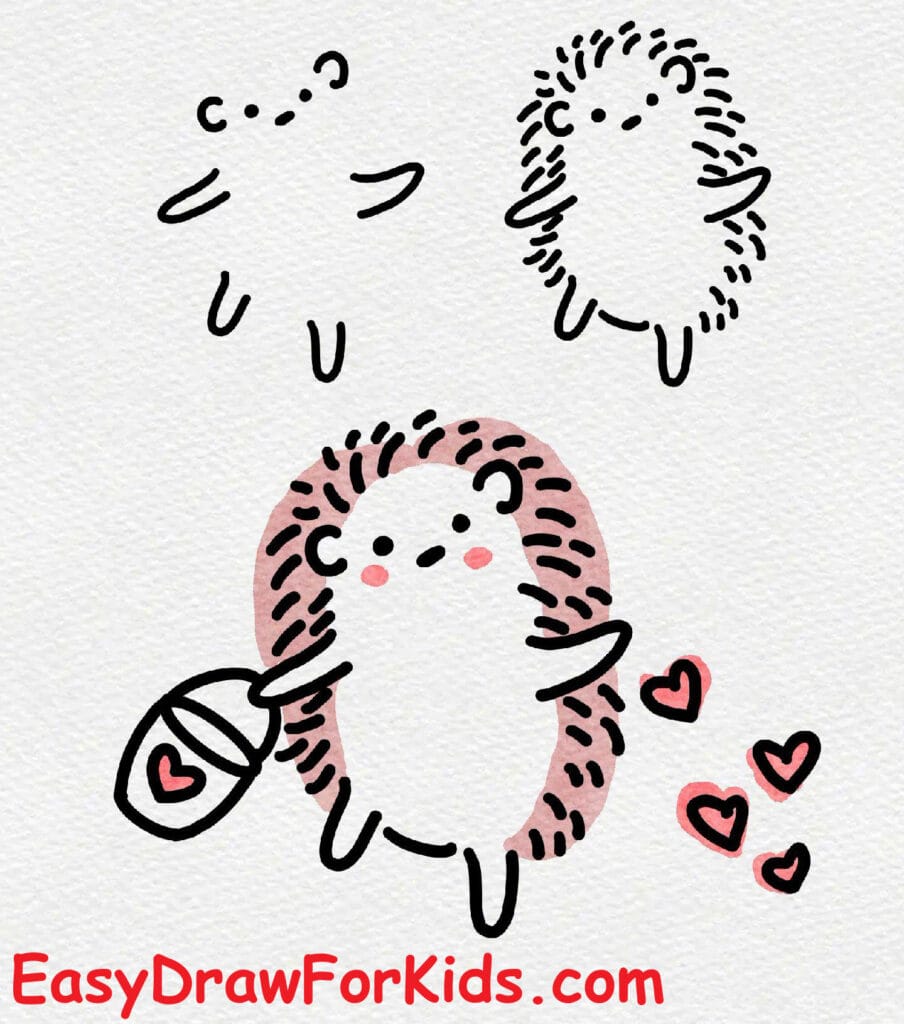
4. Another way Hedgehog Drawing


Great job! Now you’ve learned how to draw a hedgehog from start to finish. Add colors and backgrounds to make it even cuter!
Hope you enjoyed this hedgehog tutorial—come back for more fun drawing lessons.