If you’ve ever seen a ladybug in your garden, you know how beautiful they are!
This easy tutorial will show you how to draw a ladybug — from its round body to its adorable black spots.
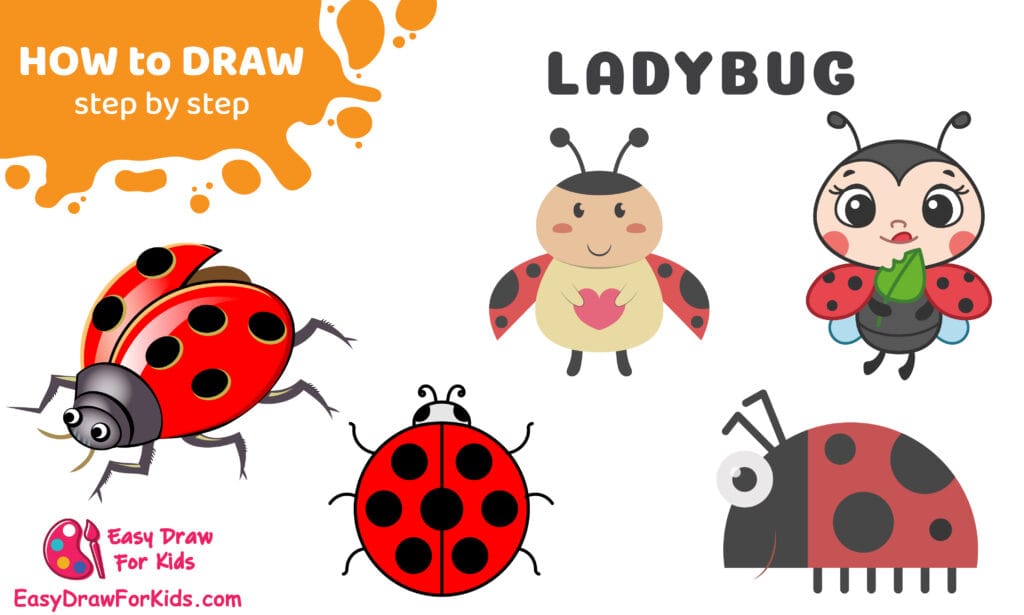
How to Draw a Ladybug – A Step by Step Guide
1. Cartoon Ladybug Drawing
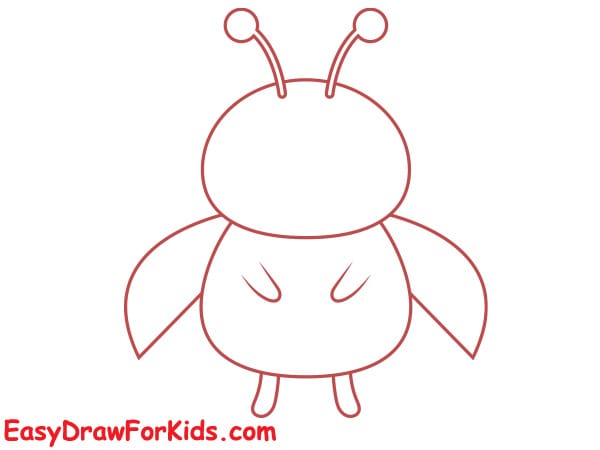
Step 1: Start by drawing two oval shapes — one smaller oval on top for the head and a larger one below it for the body.
Make sure they slightly overlap so your ladybug looks round and soft.

Step 2: On each side of the body, draw two curved shapes for the wings.
They should look like small, rounded triangles pointing downward — these will form the ladybug’s outer shell.

Step 3: On top of the head, draw two long, thin lines that curve slightly outward.
Add a small circle at the end of each — these are the antennae!
Then, draw two tiny legs coming down from the bottom of the body to help your ladybug stand.
Step 4: Now it’s time to make your ladybug come alive!
Draw two big round eyes, a small smiling mouth, and a blush on the cheeks.
Add a cute heart shape or pattern in the middle of its body, and don’t forget to draw the black spots on each wing.
These spots give your ladybug its iconic look!

Step 5: Finally, grab your colors!
Color the head and legs black, the body and wings bright red, and the face a light peach or yellow.
You can color the heart pink or red to make it extra adorable.

>>>Read more: How To Draw A Zebra – 2 Ways (With Pictures)
2. Easy Ladybug Drawing
Step 1: Step 1: Start by drawing a big oval shape — this will be the body of the ladybug.
Then, draw a straight vertical line down the middle of the oval to divide it into two equal halves.
Add a small curved line at the top to form the head.

Step 2: Inside the two halves of the oval, draw small circles to make the ladybug’s spots.
You can draw three spots on each side to make it look balanced.
Keep the circles about the same size and evenly spaced.

Step 3: Next, draw three curved lines on each side of the body — these are the ladybug’s legs.
Then, on the top of the head, add two short lines curving outward with small circles at the ends — these are the antennae.
Step 4: Color the Ladybug

>>>Read more: How To Draw A Mammoth – 2 Ways (With Pictures)
3. How to Draw a Cute Ladybug
Step 1: Start by drawing a large oval for the head.
Inside the oval, draw two big round eyes — leave a small white circle inside each eye for the sparkle effect.
Then, add eyelashes and a little smile underneath the eyes. This gives your ladybug a cute, friendly face.

Step 2: Draw two curved lines above the eyes to form the eyebrows.
Then, sketch a small oval or heart shape for the nose just below the eyes.
You can also add blush circles on the cheeks to make the expression more adorable.

Step 3: Below the head, draw a smaller oval for the body.
Make sure the body is centered under the head so it looks balanced.
This will be the main part of your ladybug’s body where you’ll add wings and legs later.

Step 4: On both sides of the body, draw two large, rounded wings.
They should look like petals of a flower — curvy and soft.
You can make the wings slightly open to give the feeling that the ladybug is ready to fly.

Step 5: Add two tiny legs under the body — short and simple.
You can make them slightly curved to show that the ladybug is standing cutely.

Step 6: Draw two thin lines coming from the top of the head, each ending in a small circle — these are the antennae.
Then, give your ladybug holds a flower between her hands, adding charm to the pose.

Step 7: Inside each wing, draw small round spots — three or four on each side.
These dots are one of the ladybug’s most recognizable features.
You can make the spots a bit uneven to keep them natural-looking.

Step 8: Color Your Cute Ladybug

>>>Read more: How To Draw Dragonfly – 4 Ways (With Pictures)
4. How To Draw A Realistic Ladybug
Step 1:Start by sketching a large oval shape for the ladybug’s body.
This will serve as the main part of the bug — its back

Step 2: Draw a small circle or half-oval attached to the front of the body — this is the ladybug’s head.
Next, sketch two curved lines across the main oval to divide it into two wings.
These lines show where the wings meet in the center when closed.
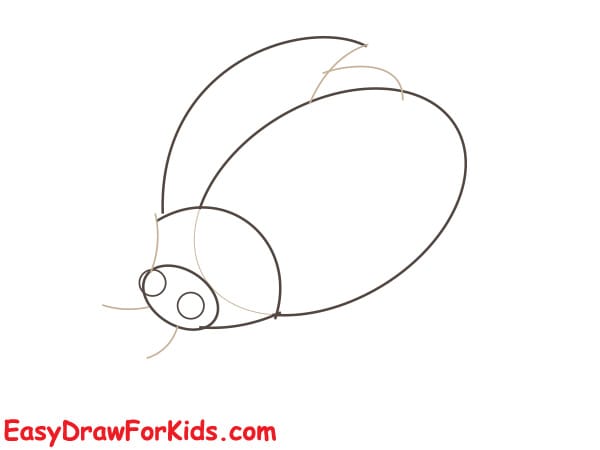
Step 3: Now, draw six legs — three on each side of the body.
Each leg should be thin and slightly bent, like small sticks with tiny joints.
Add a few round spots on the wings (about three on each side) to give the ladybug its iconic look.
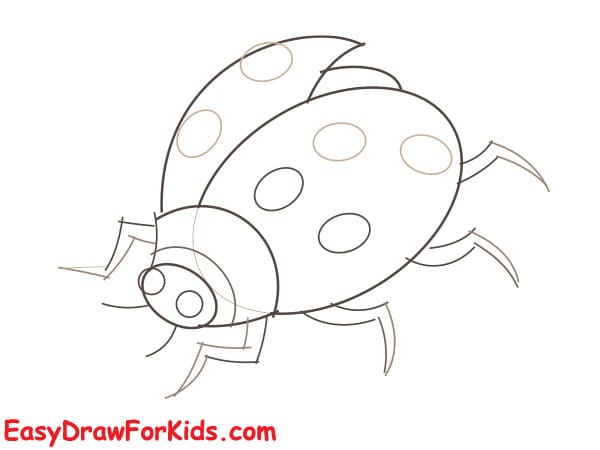
Step 4: Go over your drawing with smoother, darker lines to define the shape clearly.
Add small antennae on the head and a little mouth detail.
You can also refine the leg joints and smooth out the curves of the wings and body.
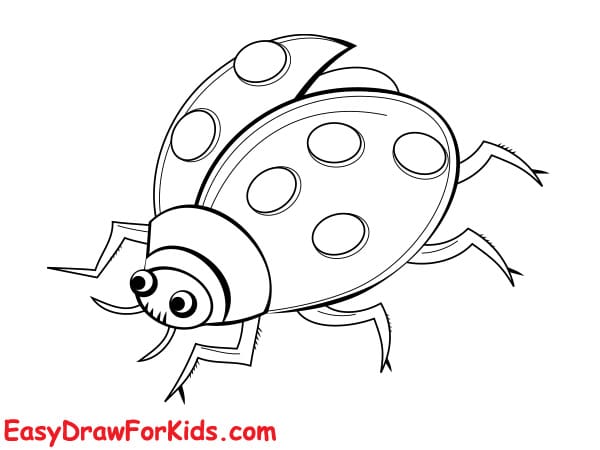
Step 5: Finally, color your ladybug!
Use bright red for the wings.
Color the head, legs, and spots black.
Add light gray shading under the legs and body for realism.
>>>Read more: How To Draw A Grasshopper – 2 Ways (With Pictures)
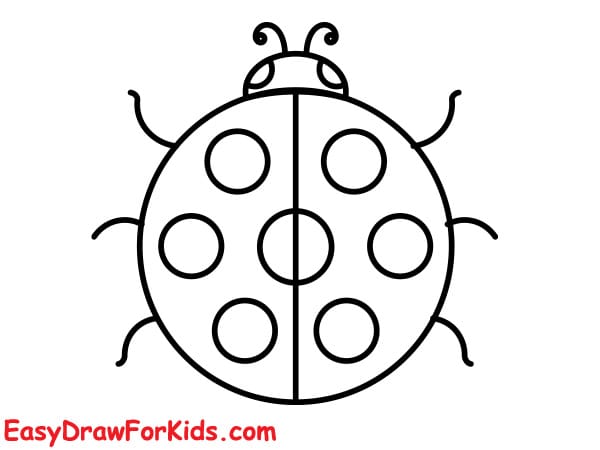
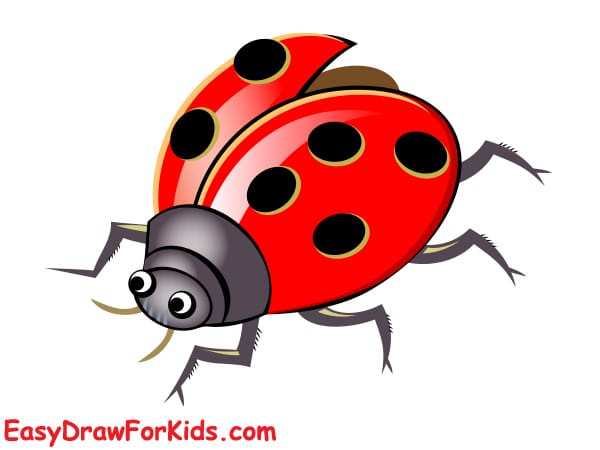
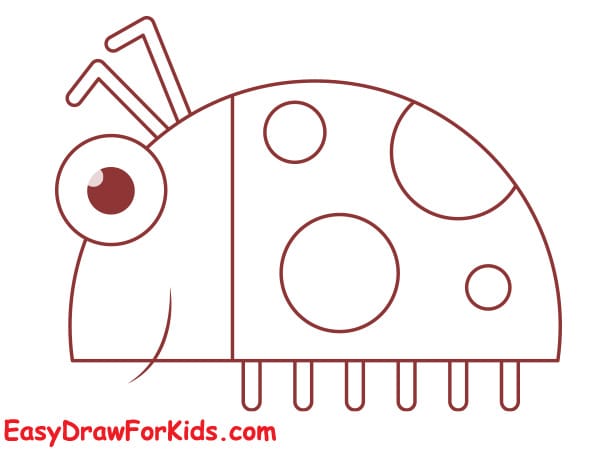
5. Simple Ladybug Drawing
Step 1: Start by drawing a large half circle. The half-circle is the main shape of the ladybug’s shell.
Then draw a straight vertical line from the middle of the flat side to the top — this will divide the ladybug’s body into two wings.

Step 2: Draw six small straight lines under the flat edge of the half-circle. These will be the ladybug’s legs.
Make sure they’re evenly spaced and about the same length.

Step 3: On the left side of the semicircle, add a small circle for the head.
Inside the head, draw a large dot for the eye.
Then, on top of the head, add two short curved lines with tiny circles at the ends — these are the antennae.

Step 4: Now draw three or four round spots on the body. Make them different sizes and spread them evenly across both wings.
You can also add a smaller circle pattern near the middle line if you like.
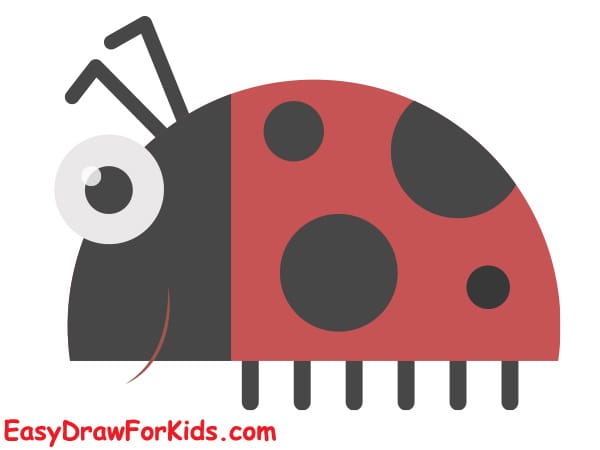
Step 5: Add Color
Color the head and body divider black.
Color the wings red, and fill in the spots black.
Keep the eye white with a small black dot in the middle for the pupil.
And that’s it!
You now know how to draw a lovely ladybug step by step.
Add some flowers or leaves to complete your masterpiece!
>>>Read more: How To Draw A Snake – 5 Ways (With Pictures)