If you love Marvel characters, you’re in the right place.
In this tutorial, you’ll learn how to draw Spider-Man, one of the most iconic superheroes of all time.
We’re turning simple lines into a superhero! Follow along as we draw the amazing Spider-Man from scratch.
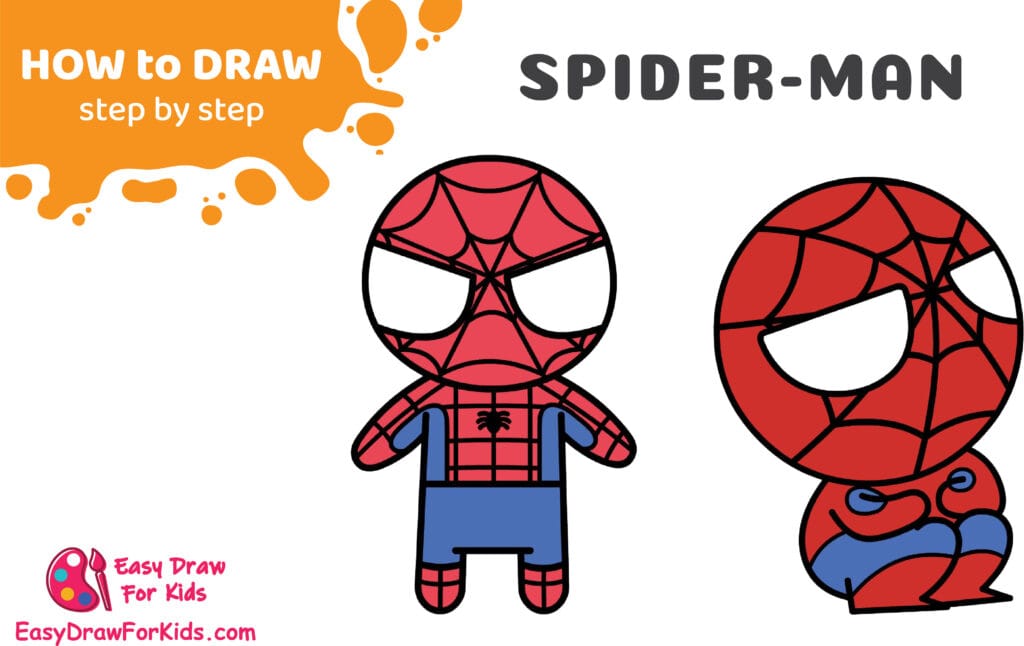
How to Draw Spider-Man – A Step by Step Guide
1. Spider Man Drawing Easy
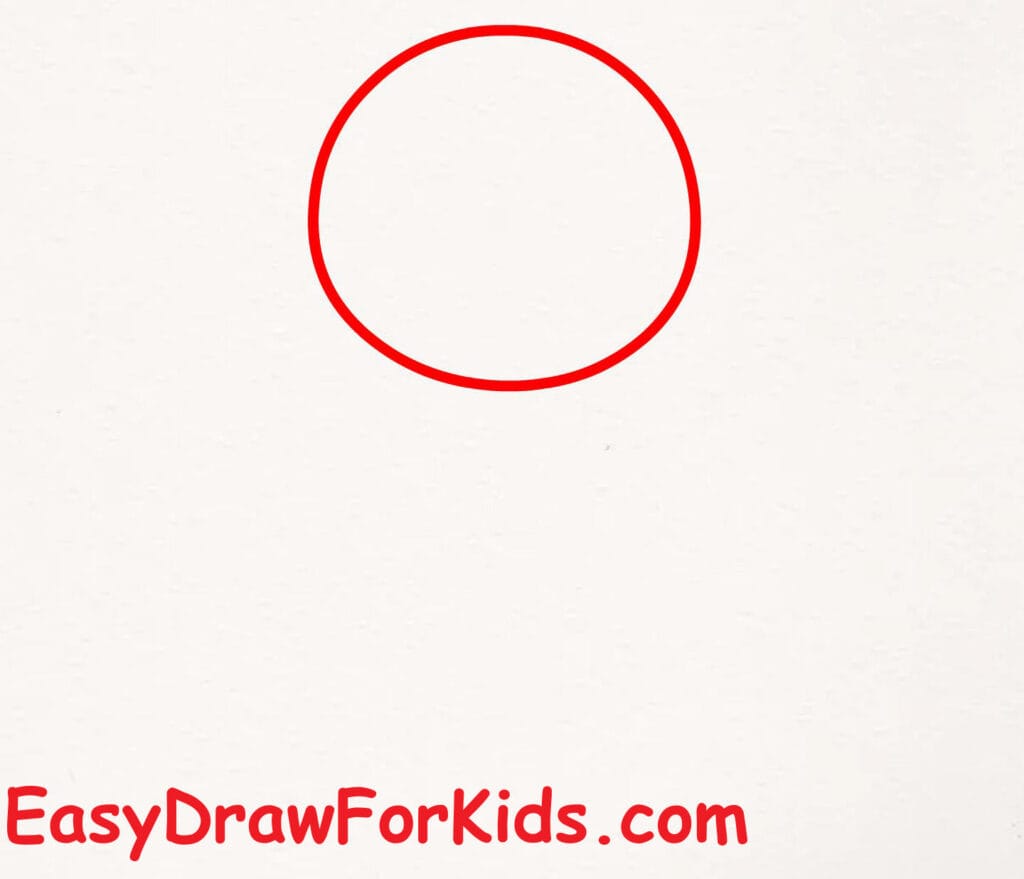
Step 1: Begin by drawing a large circle. This will be Spider-Man’s head.
Step 2: Below the head, draw two straight vertical lines that form the sides of the body. Connect them with a short horizontal line to create a simple rectangular torso shape.
It will look like the letter “H” under the circle.

Step 3: Inside the head, draw two large, sharp-angled eye shapes.
Each eye is shaped like a curved triangle with smooth corners, pointing slightly upward. These represent the iconic Spider-Man mask eyes.

Step 4: On each side of the body, draw curved lines coming downward and then slightly outward.
These form Spider-Man’s arms. Keep them short and rounded to match the cute, chibi style of the character.

Step 5: Under the body, draw two short legs. Start with two vertical rectangles, then add small curves at the bottom to make the feet.

Step 6: Draw a small simple spider symbol in the center of the chest.
It can be as easy as an oval body with tiny legs extending outward.

Step 7: Now begin drawing the web pattern.
Start with lines radiating outward from the center of the face like a starburst.
Add additional curved lines between them to form the classic web design.

Step 8: Continue the web pattern on the arms and upper body.
Follow the curves of the body to keep the webbing natural and symmetrical. Keep the lower part of the body plain since it will be colored blue.

Step 9: Finally, color your Spider-Man

>>>Read more: How To Draw Doraemon – 2 Ways (With Pictures)
2. How to Draw Spider-man for Kids
Step 1: Start by drawing a large circle for Spider-Man’s head.
Inside the circle, draw two curved shapes for the eyes:
One large curved shape on the left. One smaller curved shape on the right
These shapes should look like Spider-Man’s mask lenses.

Step 2: Now draw two small, curved lines under the head to mark the position of the legs.

Step 3: Begin drawing Spider-Man’s small body.
Draw two curved lines going downward from the head to form the torso.
Add two arms bent forward, as if he is holding his hands together.
Draw the legs folded in front of him, with both feet pointing outward.
This pose makes him look like a cute, sitting version of Spider-Man.

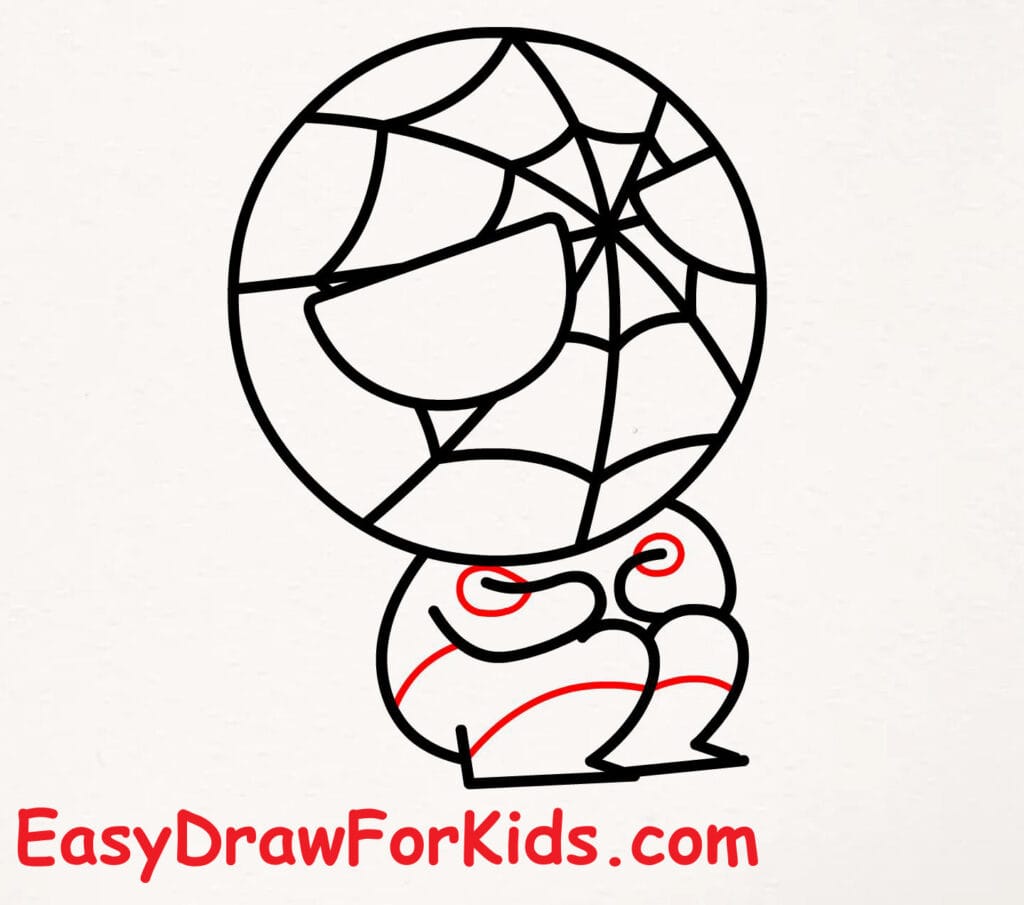
Step 4: Start drawing the web pattern on his mask.
Begin at the center of the face and sketch curved lines spreading outward like spokes of a wheel.
Then add curved lines connecting these spokes, forming Spider-Man’s signature web design.
Make sure the web pattern fills the entire head.

Step 5: Add small details on the hands.
Add a line dividing the red and blue parts of his suit.
Step 6: Now color your drawing.
Red for the head, arms, and upper body
Blue for the pants and lower body
Black for web lines and the spider logo
White for the eyes

Well done!
You now know how to draw Spider-Man step by step, challenge yourself with other Marvel heroes.
Come back for more superhero drawing lessons.
>>>Read more: How To Draw Hello Kitty – 4 Ways (With Pictures)