Ready to draw the Surgeon of Death?
He’s calm, clever, and deadly — yes, we’re talking about Trafalgar D. Water Law!
Today we’ll learn step by step how to draw Trafalgar D. Water Law from One Piece — one of the coolest and most mysterious captains in the Grand Line!
Let’s bring the Captain of the Heart Pirates to life on paper!

How to Draw Trafalgar D. Water Law from One Piece – A Step by Step Guide
1. Trafalgar Law Drawing Easy
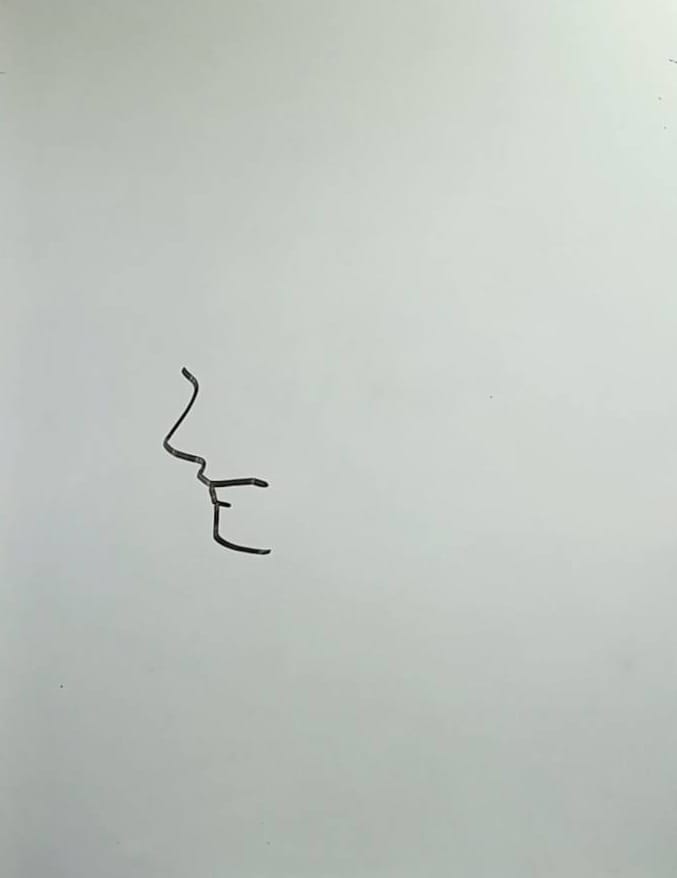
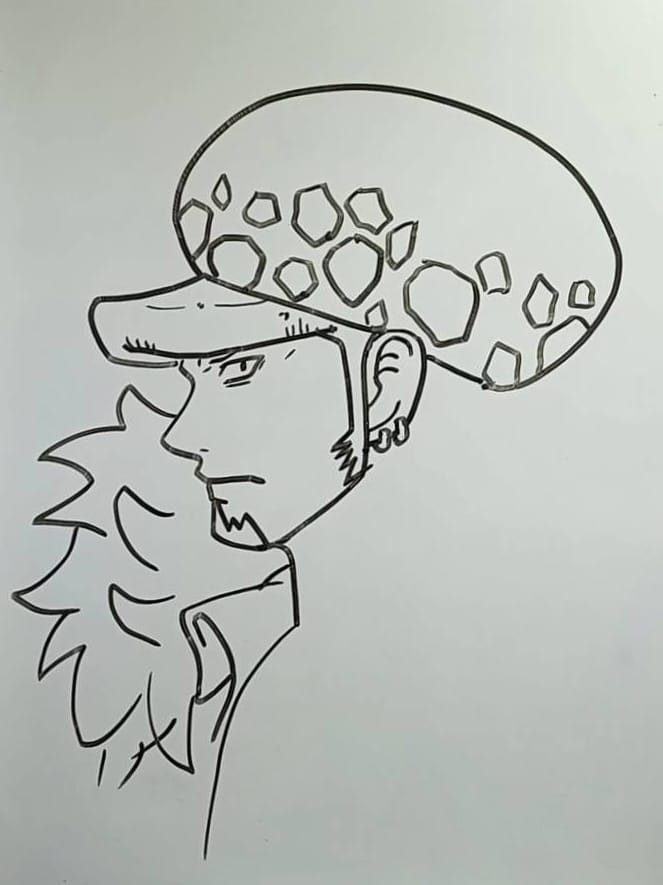
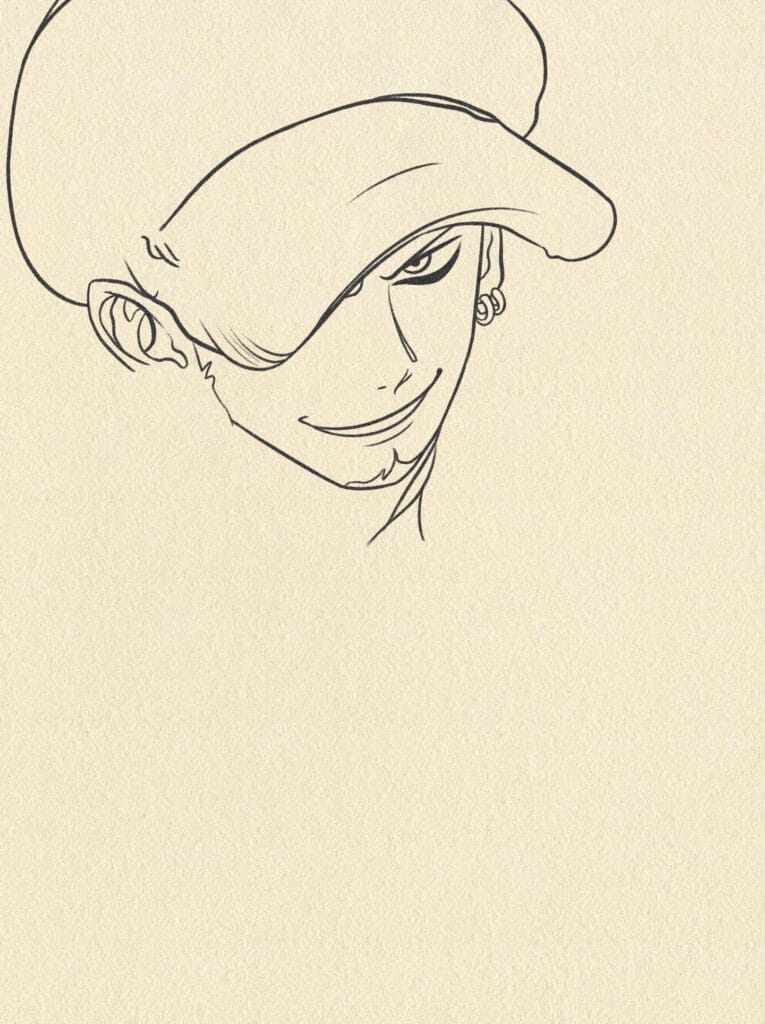
Step 1: Lightly sketch the face in profile (facing left).
Draw a smooth curve for the forehead, nose bridge and tip.
Add the mouth line and a small chin.
Keep the tilt subtle so his head slightly looks down as in the reference.
Step 2: Refine the nose and shape the mouth into a confident half-smile.
Add the short vertical line under the lower lip for Law’s small beard area.
Place a tiny mark for the lower jaw angle.
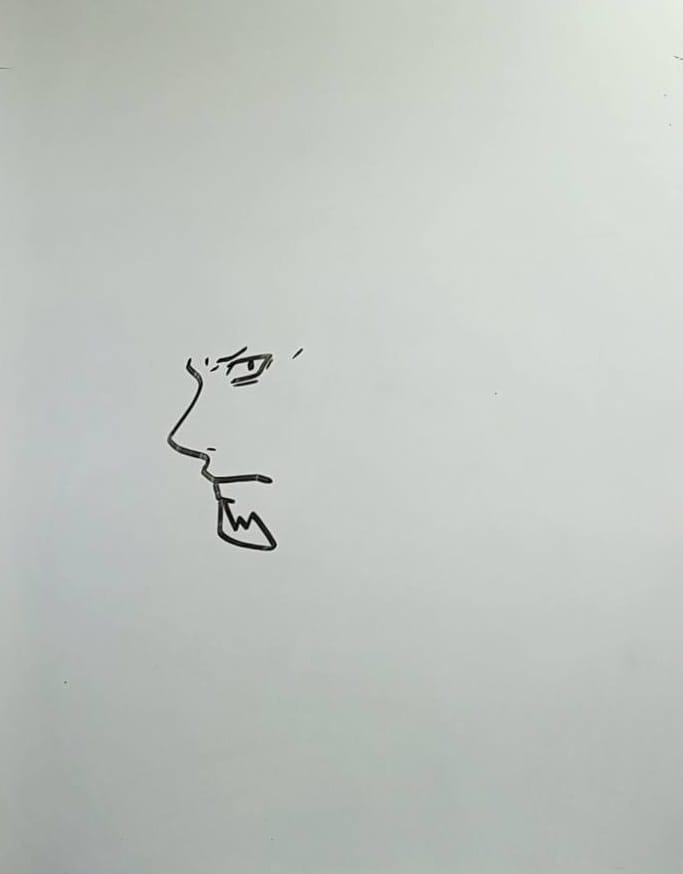
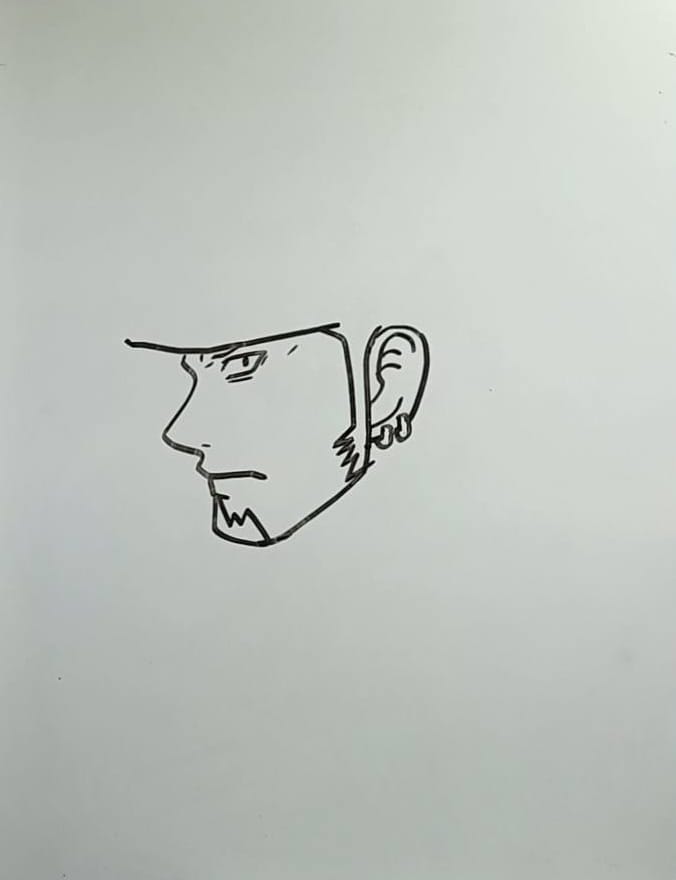
Step 3: Sketch the ear just behind the vertical of the face; include inner ear folds.
Clean up the jawline so it reads masculine and slightly squared.
At this stage the head contour and facial features should read clearly.
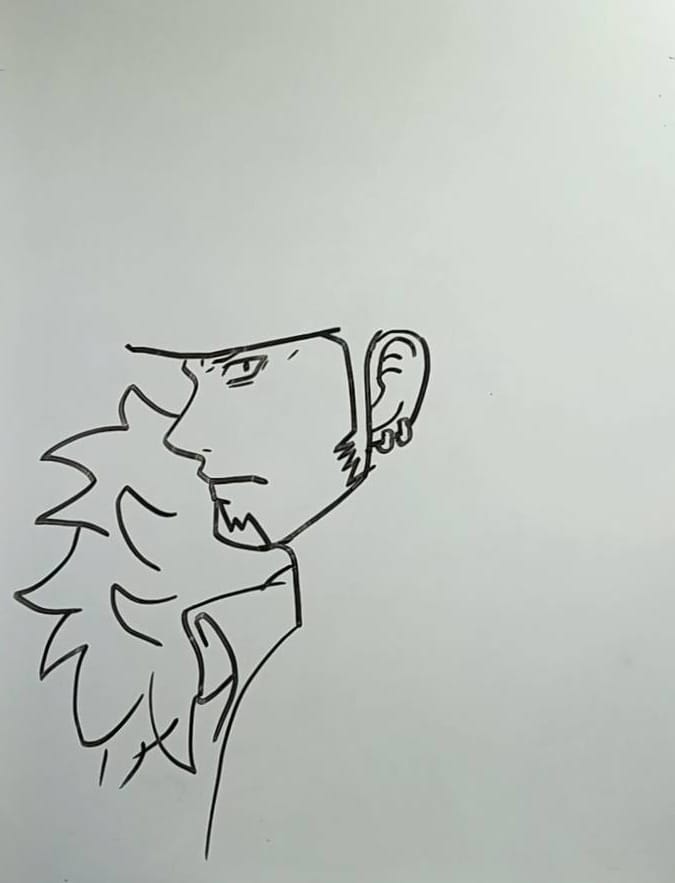
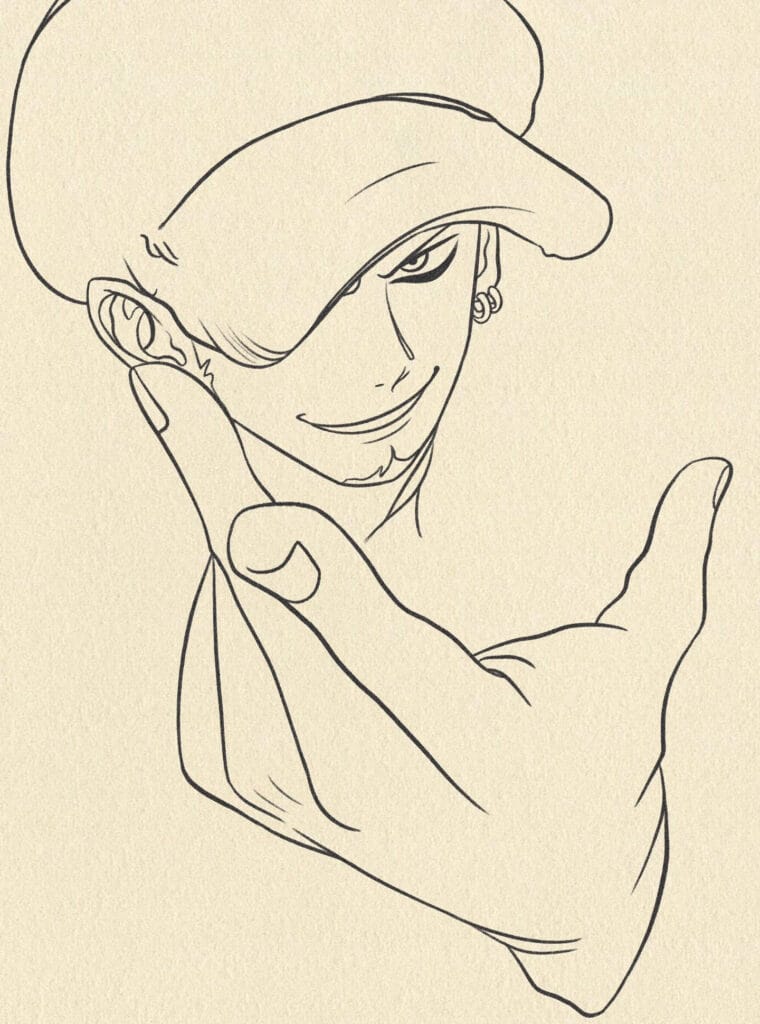
Step 4: Draw the fluffy fur starting from the neck area — loose, jagged clumps.
Sketch the basic hat silhouette above the head
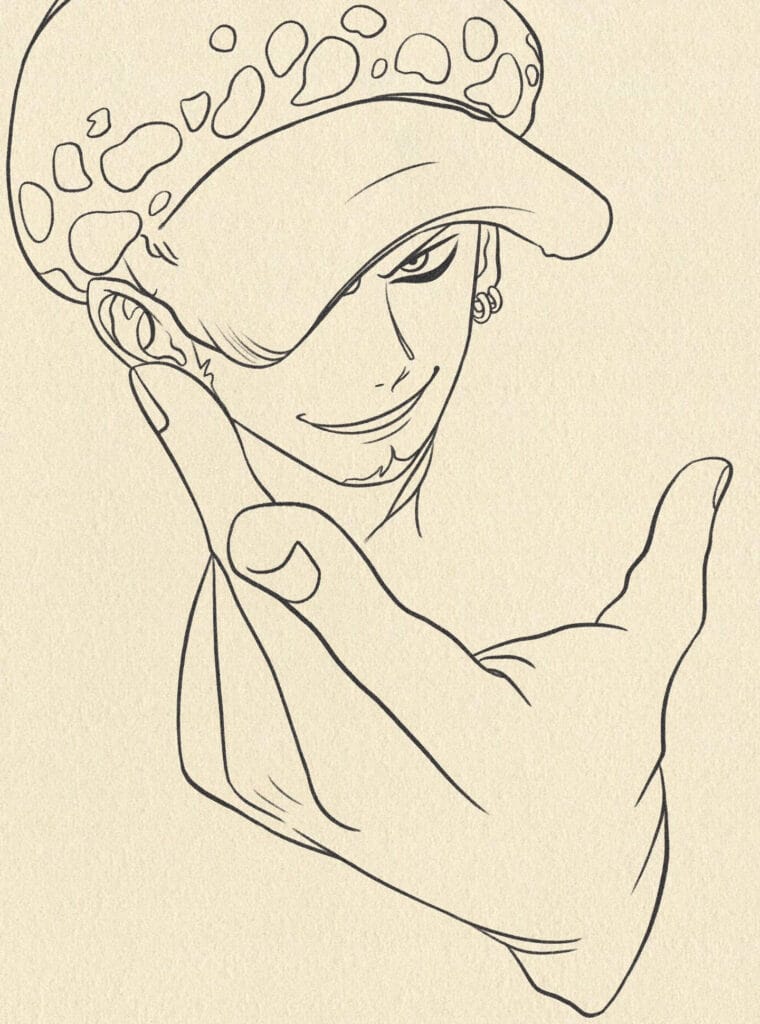
Step 5: Now detail the hat with its spotted pattern following the brim curve (spots get smaller toward the edge).
Refine the fur collar volume with layered clumps and short fur strokes to show texture.
Step 6: Sketch Law’s right hand raised in front of him.
Position fingers naturally, slightly foreshortened toward viewer.
Lightly mark the finger tattoos (letters) and any rings or marks on knuckles — keep them aligned with finger shapes.
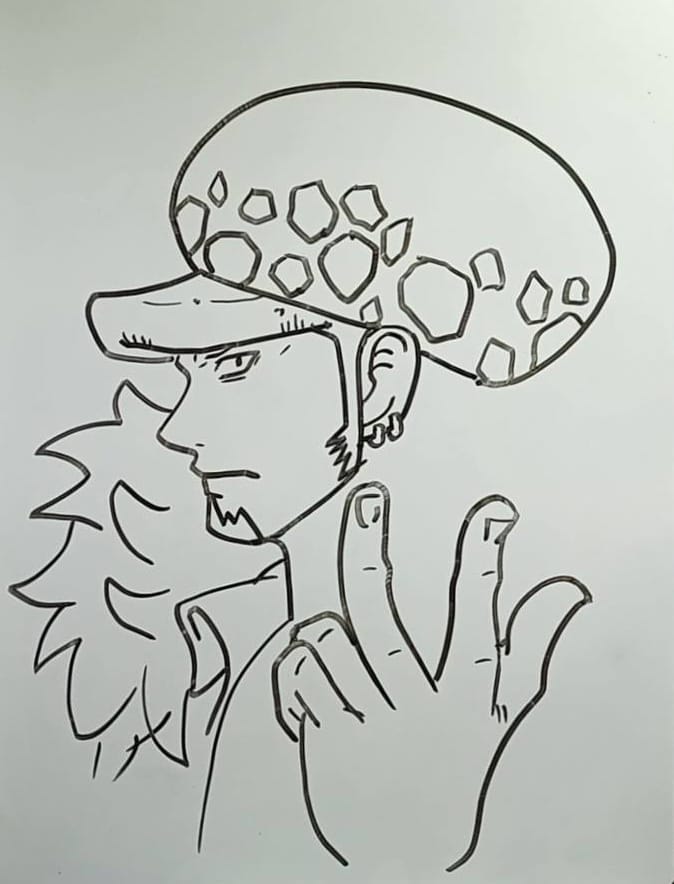
Step 7: Add hoodie/collar seams, folds and the visible pattern or logo on the sleeve if present.
Lightly sketch the sword handle or sheath behind the shoulder if visible in your reference.
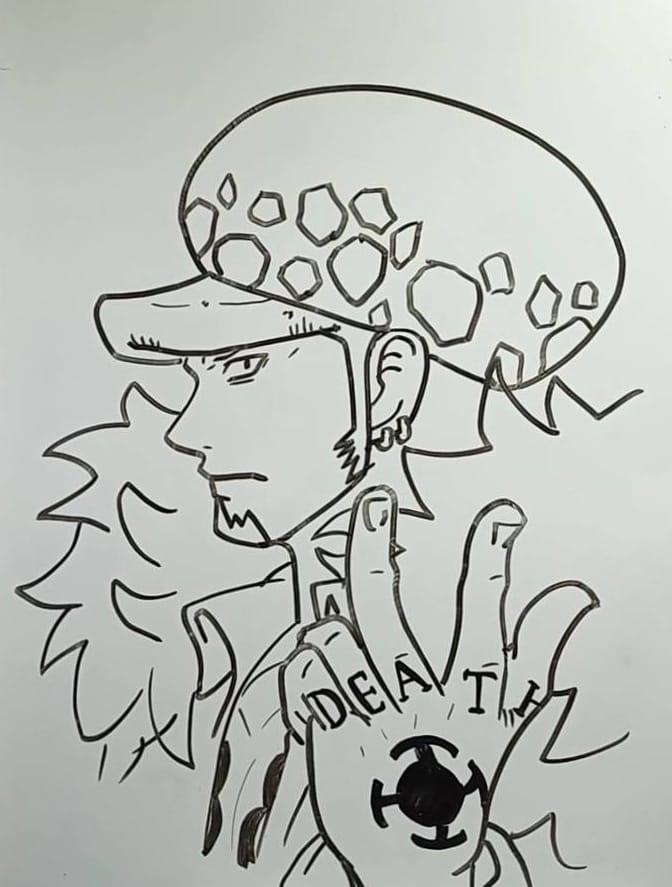
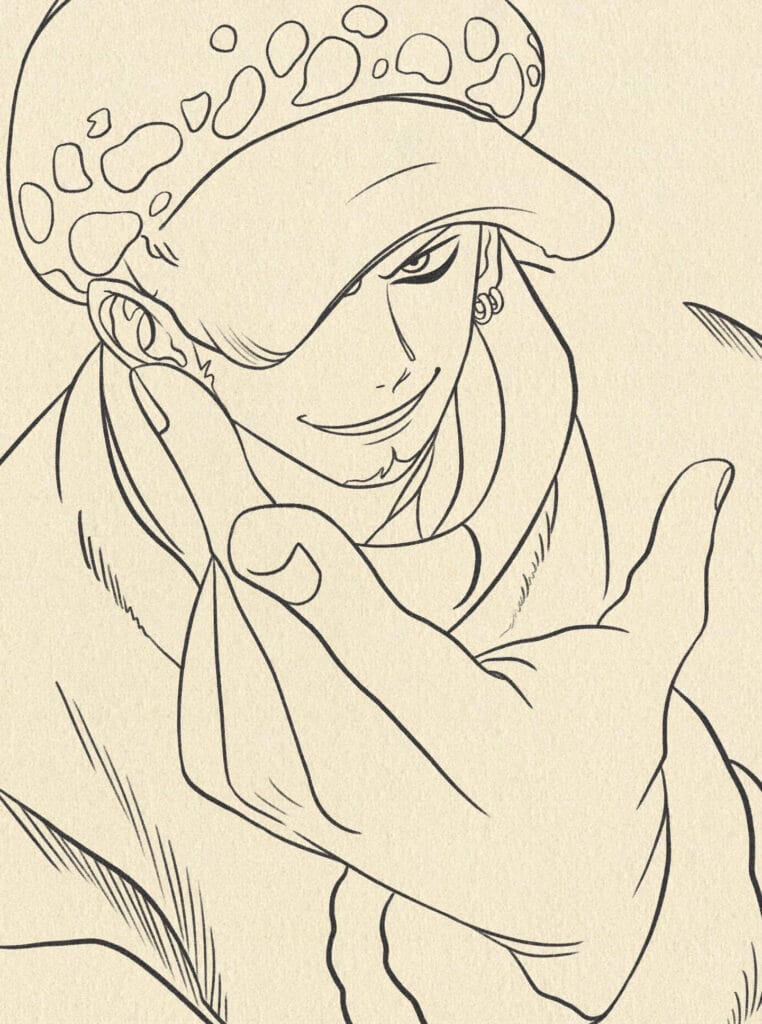
Step 8: Fill in solid blacks and cross-hatch for shadow under the chin, inside the collar and on clothing folds.
Darken the tattoos and any insignia.
Add final contrast so the face, hat pattern and raised hand read strongly.
2. How to Draw Trafalgar D. Water Law from One Piece
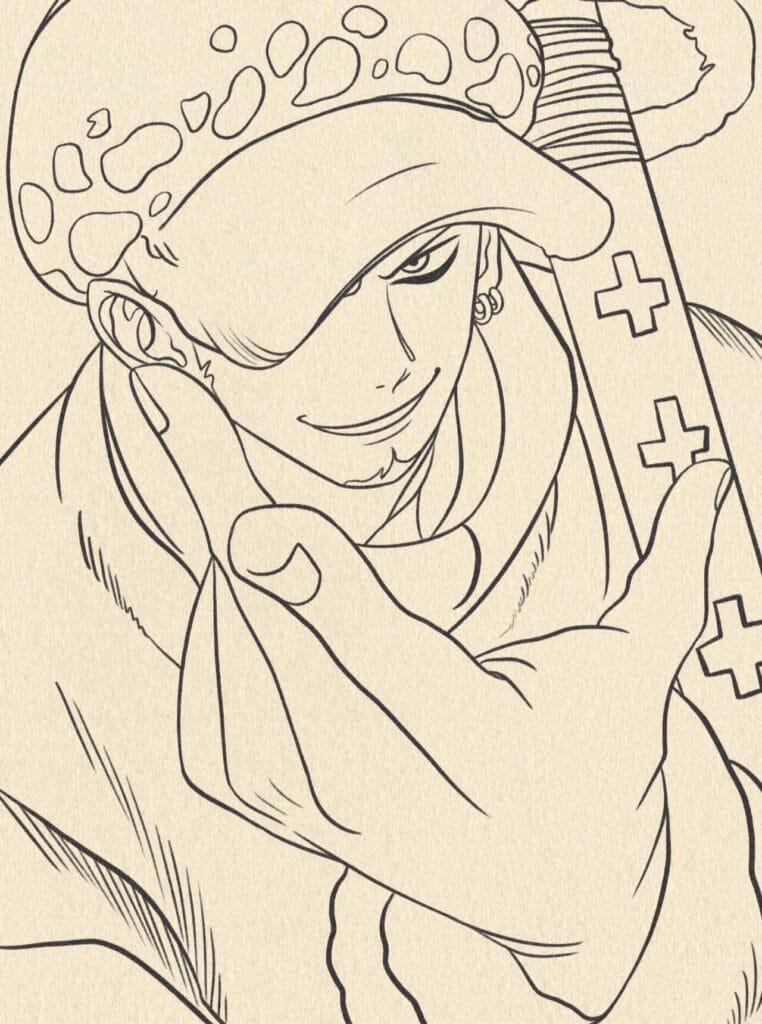
Step 1: Outline the Face and Hat
Begin by sketching Trafalgar Law’s face at a slight downward angle.
Draw a light oval for the head, then add his signature hat outline — a rounded cap with a wide brim curving slightly downward.
Add light guides for the eyes, nose, and mouth.
At this stage, focus on getting the overall shape and tilt of his head correct.
Step 2: Add Facial Details
Draw Law’s sharp eyes beneath the brim of his hat — narrow, confident, and slightly angled.
Sketch his nose and smirking mouth to capture his trademark expression.
You can also lightly mark his beard line and jaw shape to define his masculine look.
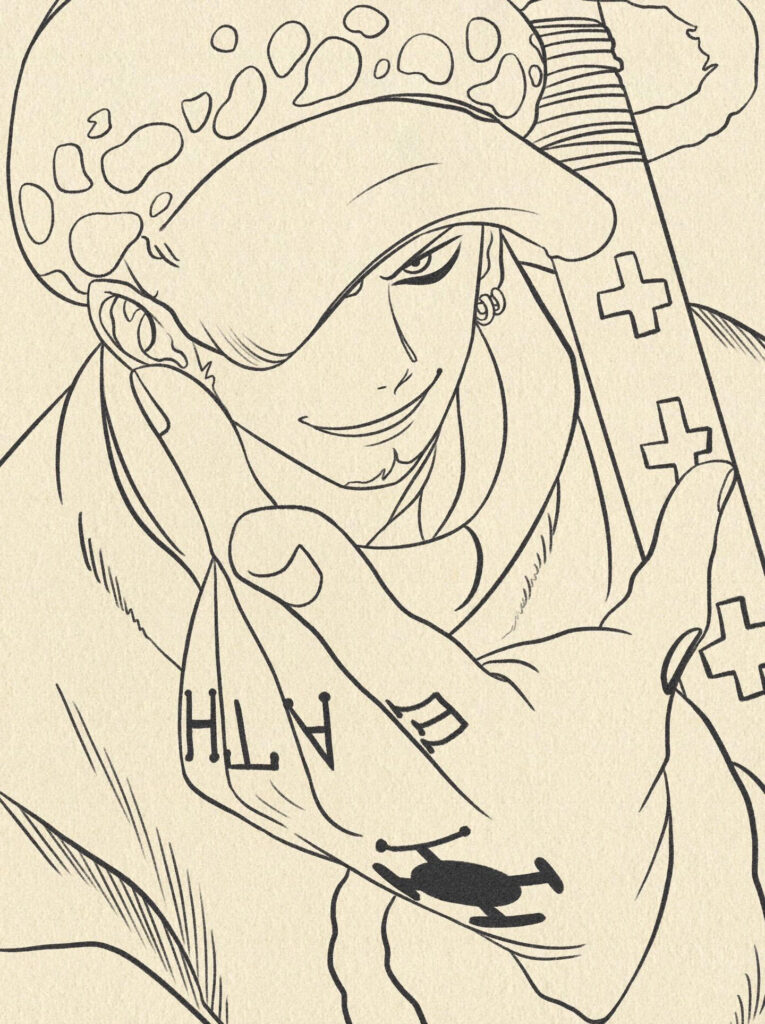
Step 3: Draw the Hat Pattern and Start the Neck
Add the distinctive pattern of black dots on the rim of Law’s hat.
Each spot should follow the curve of the brim to show perspective.
Then, sketch his neck and the upper collar of his shirt.
Draw his left arm lifted in front of his chest, forming a relaxed but confident pose.
Step 4: Sketch the Torso and Hand Gesture
Now move on to his torso and hand.
Outline his hoodie collar and chest area, then carefully draw his right hand in front of him, with two fingers raised — one of his most iconic poses.
Make sure to keep the hand proportional to the face and positioned slightly toward the viewer.
Step 6: Draw His Sword
Sketch the large sword (Kikoku) resting against his shoulder or back.
Add the handle with its wrapped texture and cross-like design.
Step 5: Add Details to the Outfit and Tattoos
Start adding the key elements that define Law’s character:
Draw the “Jolly Roger” logo pattern on his sleeve.
Add the visible tattoos on his fingers, especially the letters “D”, “E”, “A”, “T”, and “H.”
Refine the folds in his hoodie to make it look natural and realistic.
Refine the details of his hoodie and accessories, making sure everything connects smoothly.
This step defines the full silhouette and main elements of Trafalgar Law’s design.
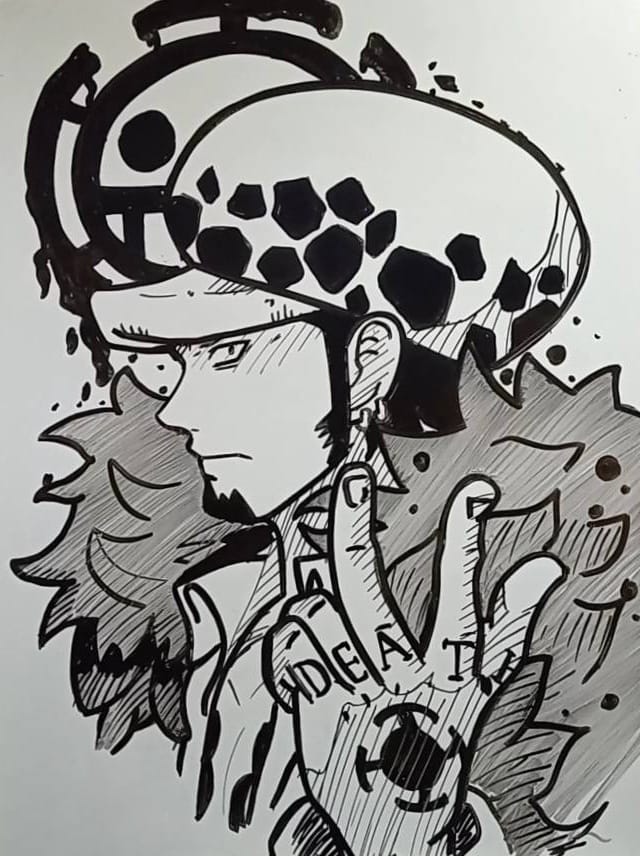
Step 7: Add Shadows, Patterns, and Final Touches
Once your outlines are done, go over them with darker, confident lines.
Fill in the dark parts of his hat, the shading on his clothes, and the patterns inside the sword handle.
Add some shadows under his chin, along his hoodie, and beneath the raised hand to give depth.
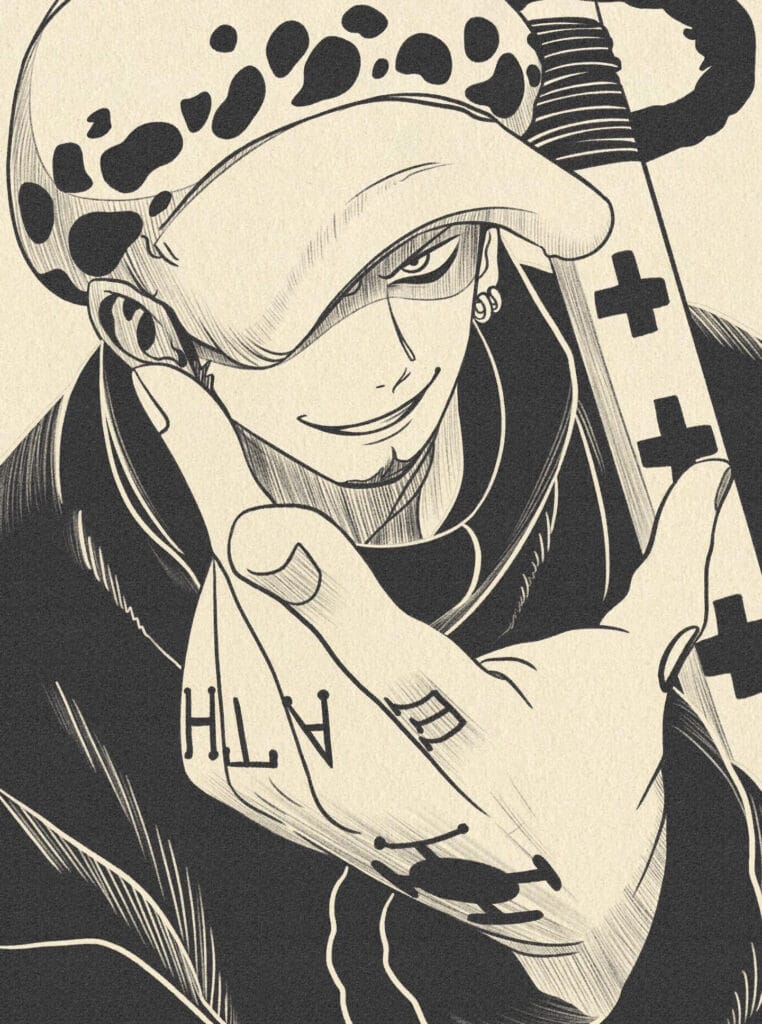
That’s the end of our tutorial! Now you can proudly say you know how to draw the Surgeon of Death himself — Trafalgar D. Water Law.
If you liked drawing Law, try sketching his sword “Kikoku” or a scene with Luffy next!