Hi artists!
Have you ever wondered how to draw a mammoth that looks both powerful and adorable?
Today, you’ll learn to sketch a woolly mammoth — with big curved tusks and thick hair that screams Ice Age!
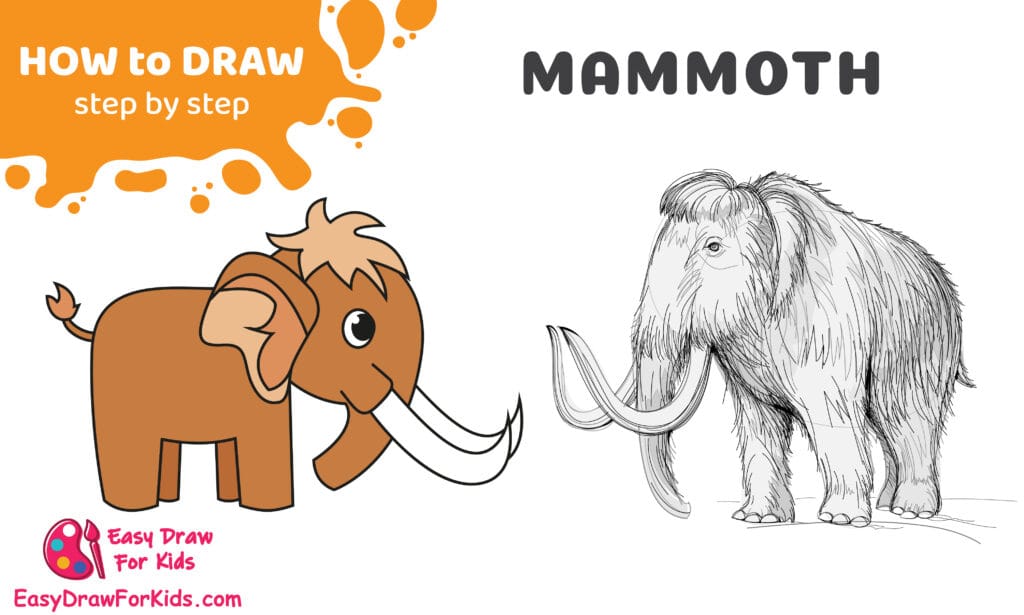
How to Draw a Mammoth – A Step by Step Guide
1. Easy Mammoth Drawing
Step 1: Draw the Hair on Top of the Head
Start by drawing a small tuft of fur or hair at the top of the mammoth’s head.
Make a few curved and jagged lines to give it a soft, fluffy look — this will show the mammoth’s thick fur.

Step 2: Outline the Head and Trunk
From the hair, draw a large curved line downward to form the forehead and long trunk.
Then curve it upward again to make the tip of the trunk.
Add a small curved line at the side for the cheek.

Step 3: Draw the Eye and Tusks
Add a large round eye near the center of the head and fill it in, leaving a small white circle to make it shiny.
Next, draw a long, curved tusk starting from under the trunk and pointing forward. You can also add a second tusk behind it for depth.

Step 4: Draw the Body and Legs
From the head, extend a large oval-like shape to create the mammoth’s body.
Draw two thick front legs below the body — short and slightly rectangular.
Don’t forget to connect the head and body with a smooth line for the neck area.

🦣 Step 5: Add the Back Legs and Tail
Now, draw the two back legs behind the front ones. Keep the shape similar so the mammoth looks sturdy.
Add a small tail at the back with a tiny tuft of fur at the end.
You can also refine the outline of the ear to make it more rounded and realistic.

Step 6: Color Your Mammoth
It’s time to bring your drawing to life!
Color the body with a warm brown shade and the hair a lighter beige or tan color.
Make the tusks a soft ivory white and the eye black with a tiny white highlight.

>>>Read more: How To Draw A Camel – 2 Ways (With Pictures)
2. Realistic Mammoth Drawing
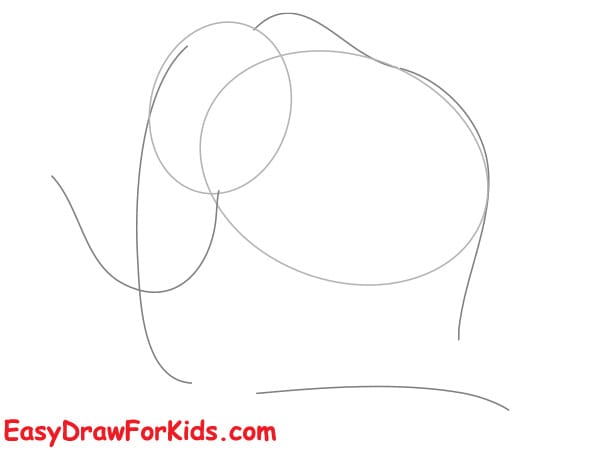
Step 1: Start by sketching two overlapping ovals — a large one for the body and a smaller one for the head.
Then, lightly draw a curved line extending from the head to represent the mammoth’s trunk, and a line under the body for the ground reference.
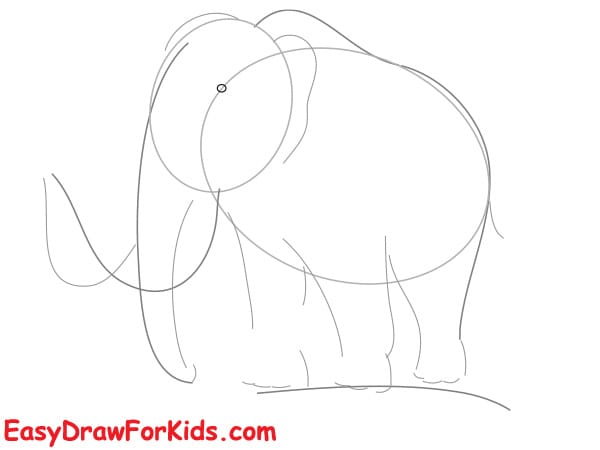
Step 2: Add the legs by drawing long, slightly curved shapes below the body.
Sketch the ears on the sides of the head and refine the trunk by giving it more shape and direction.
Now the mammoth should start to look like a rough outline of an elephant-like figure.
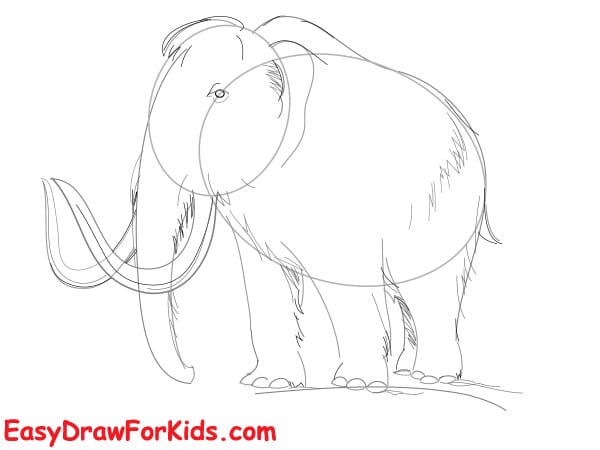
Step 3: Go over your sketch to define the trunk, tusks, ears, and legs.
Add the eyes and begin shaping the head and body contours more realistically.
You can start to erase some of the basic construction lines from Step 1 and Step 2.
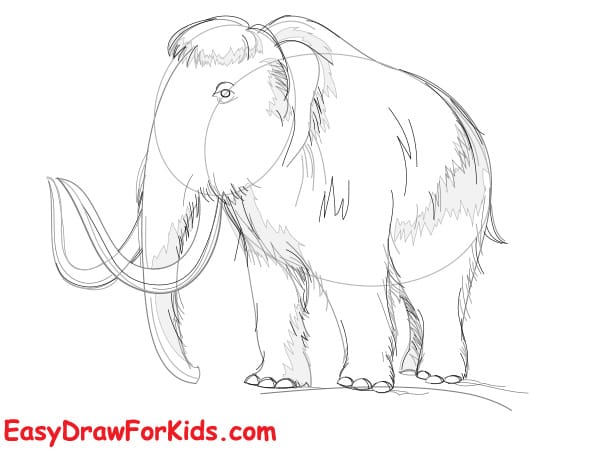
Step 4: Now start drawing the fur details all over the mammoth’s body.
Use short, curved strokes to create a shaggy texture, especially around the head, back, and legs.
Outline the tail and refine the ears to look hairy.
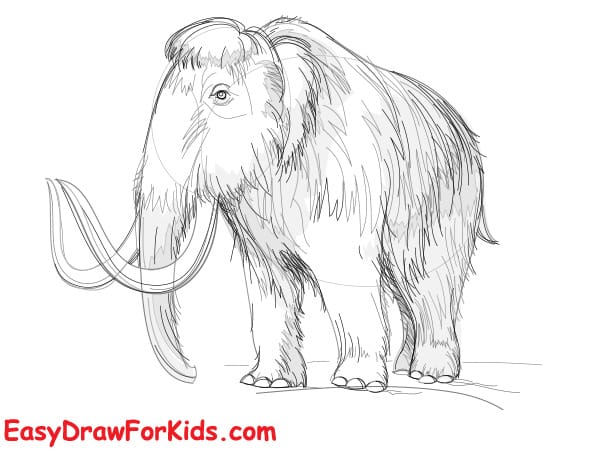
Step 5: Deepen the fur texture and add shading to give the drawing volume.
Focus on darker areas — under the belly, inside the ears, and along the legs.
Emphasize the tusks’ curves with smooth, clean lines.
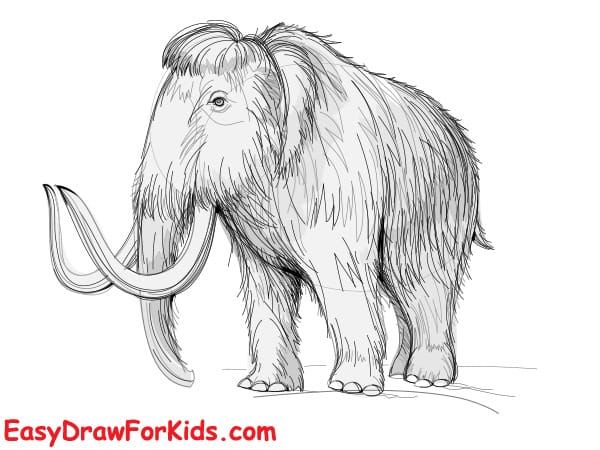
Step 6: Finish by enhancing the fur, shadows, and facial features.
Make sure the mammoth’s body looks full and covered in long, thick hair.
Add the final touches to the eyes, tusks, and legs to make everything stand out.
You can clean up any extra lines and darken your final outline.
Awesome job, everyone!
You’ve finished your drawing — now give your mammoth some color and maybe even a baby mammoth beside it!
You can make it realistic or cartoon-style — either way, it looks great.
>>>Read more: How To Draw A Yak – 2 Ways (With Pictures)