Welcome to the world of imagination and creativity!
Are you ready to draw something out of this world?
Monsters don’t have to be scary — they can be silly, cute, or completely wild!
In this fun drawing tutorial, you’ll learn how to draw a monster using your unique ideas.
No rules here — just creativity and fun!
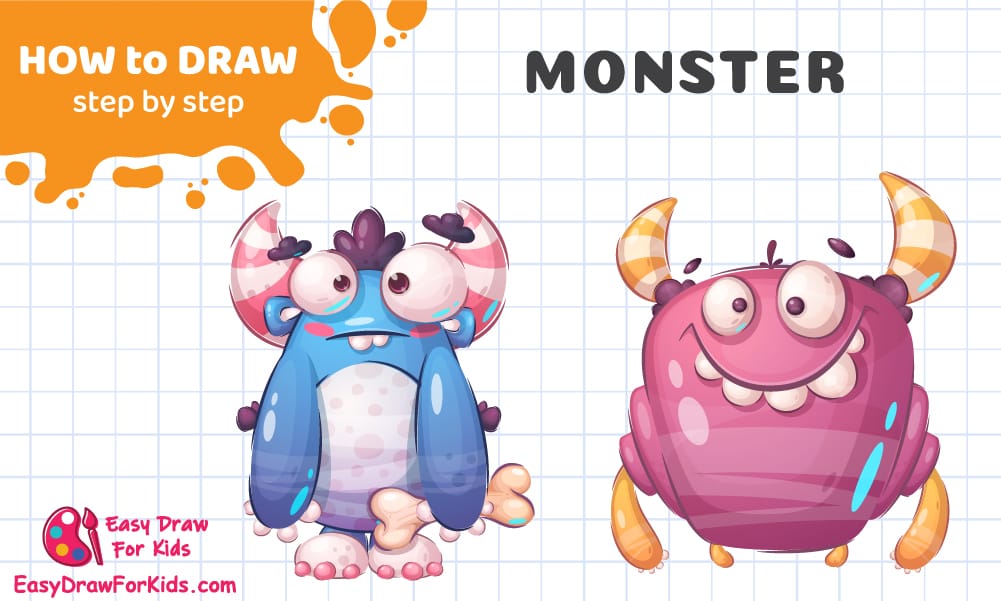
How To Draw A Monster – A Step by Step Guide
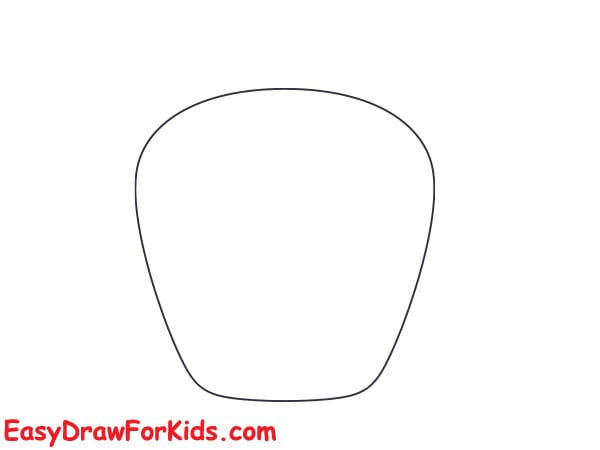
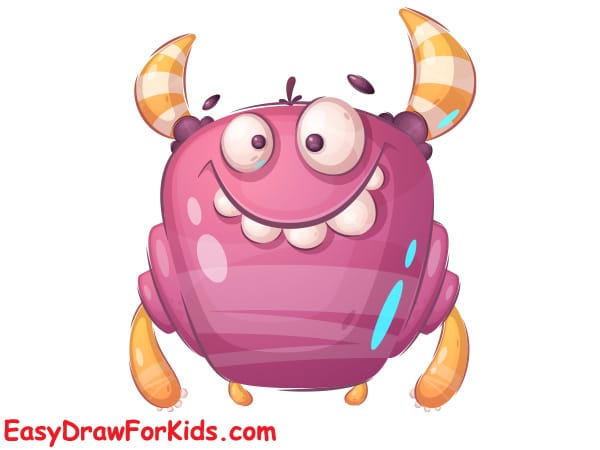
1. Cartoon Monster Drawing
Step 1: Draw the Body Outline
Start with a rounded trapezoid or inverted bell shape – wider at the top, narrower at the bottom. This will be the monster’s body.
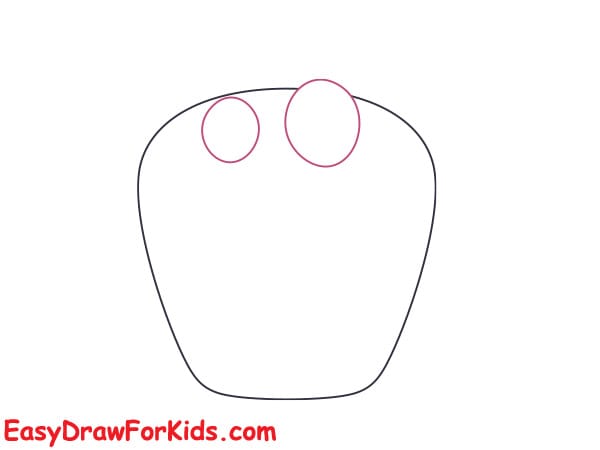
Step 2: Add Eyes and Eyebrows
At the top center of the body, draw two large ovals for the eyes. Add arched eyebrows just above the eyes.
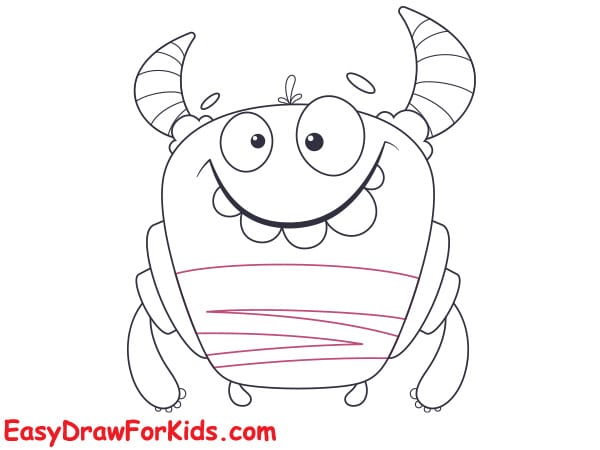
Step 3: Draw the Mouth and Smile
Draw a large curved smile under the eyes. Add a curved tongue inside and a line for the teeth at the top of the mouth.
Inside the eyes, draw two small circles to form the pupils.

Step 4: Add Ears and Teeths
Add little oval ears on the top sides of the head. Draw some wrinkles or texture lines around the mouth and eyes to add personality.
Draw big teeth sticking out from the bottom of the mouth.

Step 5: Draw the Arms
Sketch out two curved arms on either side of the body. Each arm ends in a simple rounded hand or paw.

Step 6: Add the Horns and Legs
From the bottom of the body, draw two short legs ending in rounded feet or toes.
Draw two spiral or curved horns on top of the head, one on each side.

Step 7: Add Belly Stripes
On the monster’s belly, draw horizontal curved lines to create a striped or segmented belly look.
Step 8: Color the Monster
Use vibrant colors like purple, red, or pink for the body.
Horns and belly stripes can be colored in lighter tones or contrasting colors (like blue, yellow, or white).
Add highlights and shadows for a 3D effect.
>>>Read more: How To Draw Godzilla – 3 Ways (With Pictures)
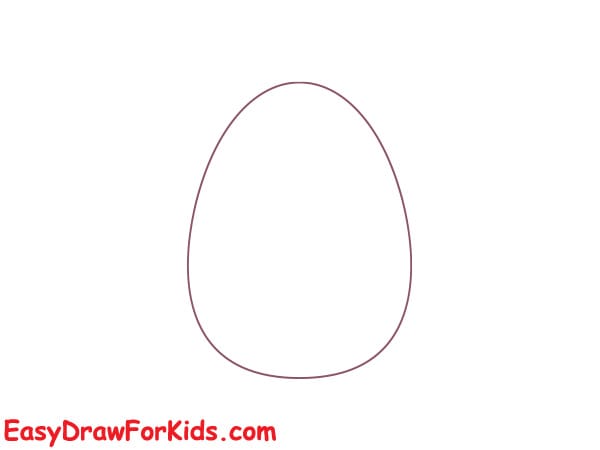
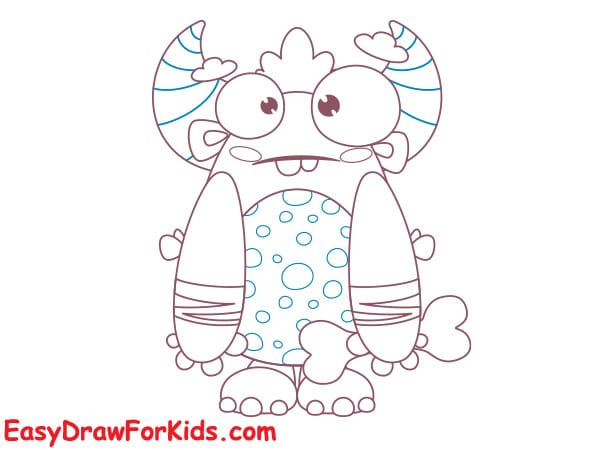
2. Big Foot Monster Drawing
Step 1: Draw the Body Shape
Start with a large egg-shaped oval pointing upward. This will be the monster’s body.
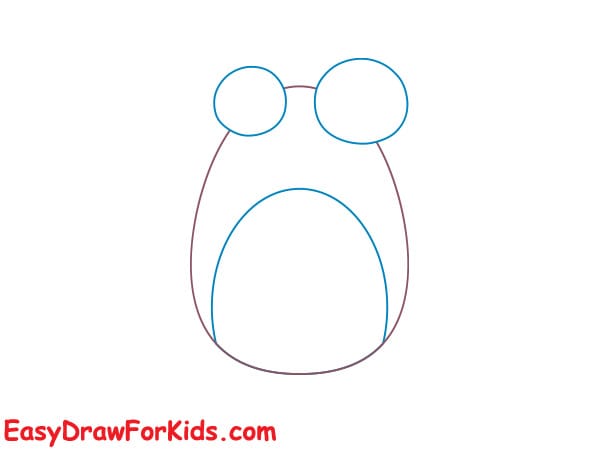
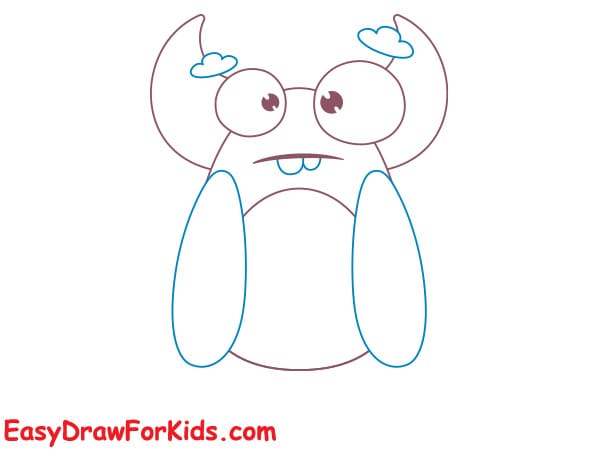
Step 2: Draw the Eyes
On top of the body, draw two circles (one on each side) for the eyes.
Keep them slightly overlapping the top of the body oval for a cute look.
Inside the body, draw an oval shape for belly as shown the picture.
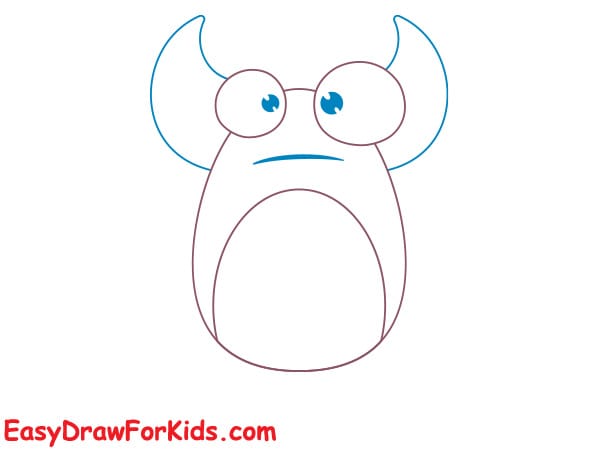
Step 3: Add Horns and Pupils
Add two curved horns on the sides of the head, just above the eyes.
Inside each eye, draw a black dot (pupil).
Add a line for the mouth just below the eyes.
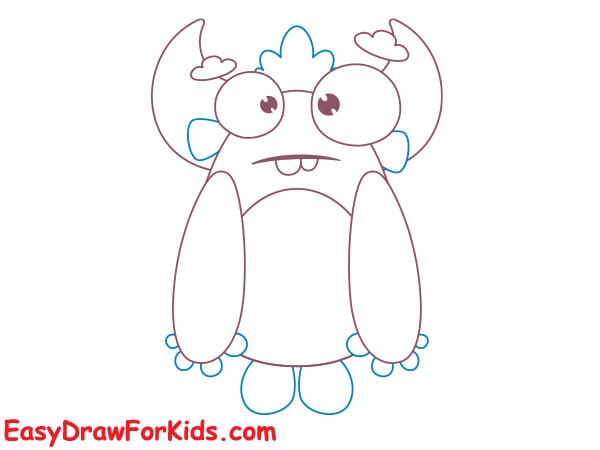
Step 4: Add the Arms and Teeth
Draw two rounded arms on the sides of the body. These arms should curve slightly inward.
Draw two curved lines from the mouth to present the teeths.
Step 5: Draw the Legs and Feet
Add two thick legs under the body.
Draw toes/claws at the bottom of each foot using three small circles or bumps.
Add small spikes near the arm and leg joints.
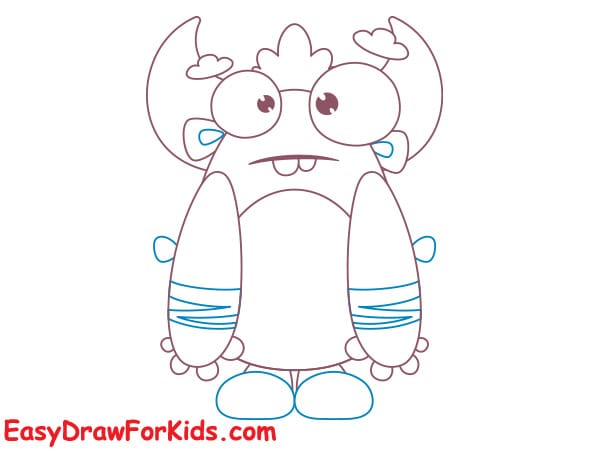
Step 6: Draw the Tail and Details
Add a curly tail sticking out from the monster’s right side.
On the body and limbs, draw patches or spikes to give it a more monster-like texture.
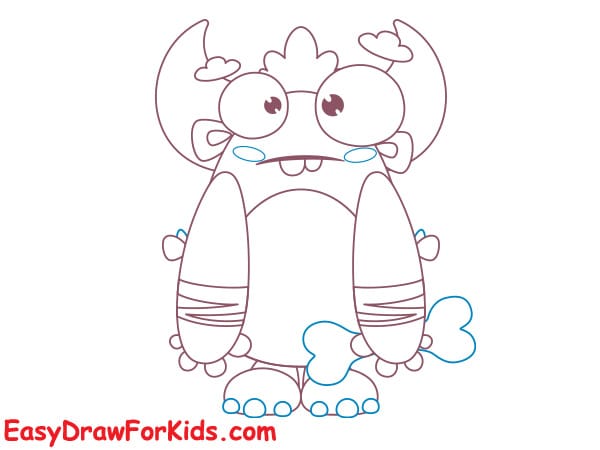
Step 7: Add More Spikes and Texture
Draw more spikes on the arms and legs, especially on the sides and elbows.
Outline small dots and shapes to represent rough or fuzzy texture. Draw bone inside hand monster
Step 8: Add Stripes and Final Details
Draw stripes or scales on the horns and tail.
Add small patterns or dots on the body to give the monster extra personality.
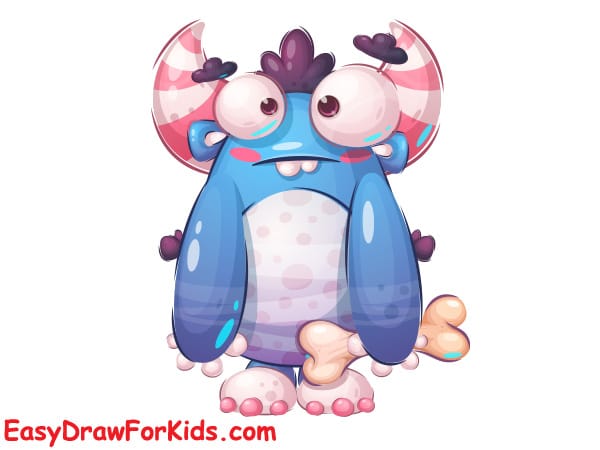
Step 9: Color the Monster
Use blue or purple for the main body.
Color the horns, tail, and feet spikes with lighter or contrasting colors like pink or light blue.
Color the eyes, nose, and mouth to complete the character.
Add shading and highlights to bring it to life!
>>>Read more: How To Draw A Devil – 3 Ways (With Pictures)
How To Draw A Ghost – 4 Ways (With Pictures)
And there you have it — your monster is complete!
From big eyes to sharp claws, you’ve created something totally unique.
Remember, monsters don’t follow the rules — so feel free to get even weirder with your next designs.
Keep sketching more creatures, experimenting with expressions, and building your own monster universe.