Are you fascinated by the spooky that Halloween brings?
Do you want to learn how to create your hauntingly beautiful artwork?
Look no further!
This step-by-step tutorial will help you learn how to draw a skeleton in 3 ways.
How To Draw A Skeleton – A Step By Step Guide
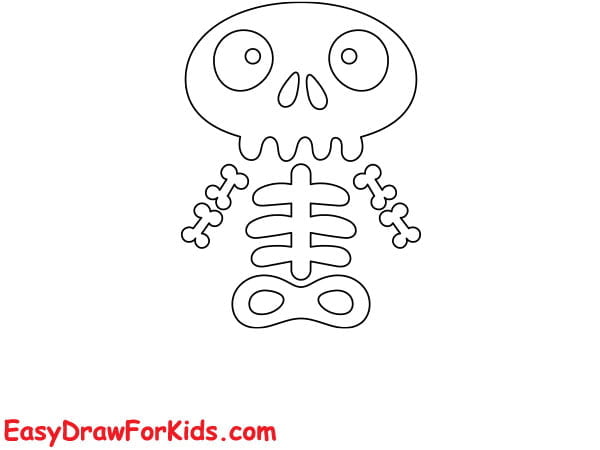
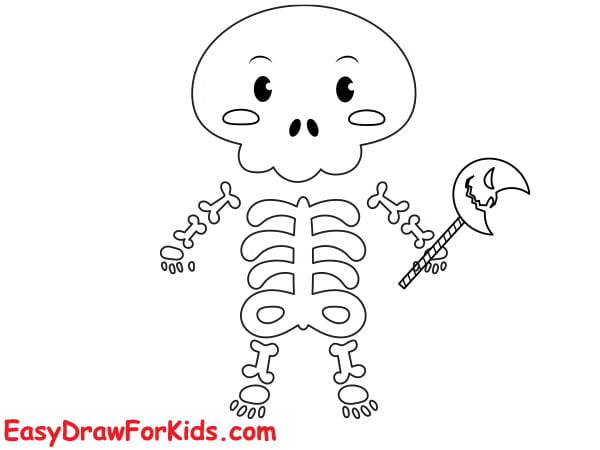
1. Simple Skeleton Drawing
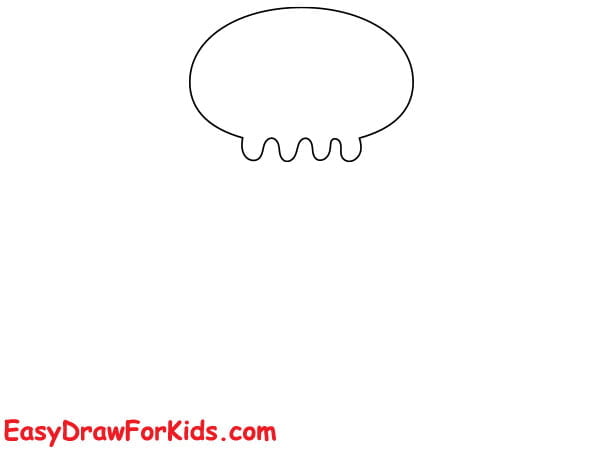
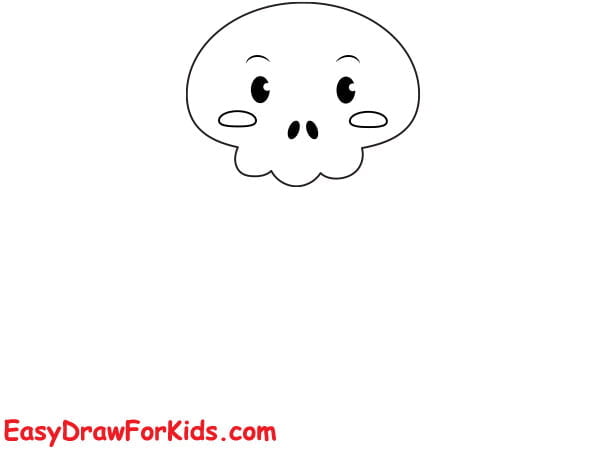
Step 1: Start by drawing a curved line and add a wavy line below it to form the skull.
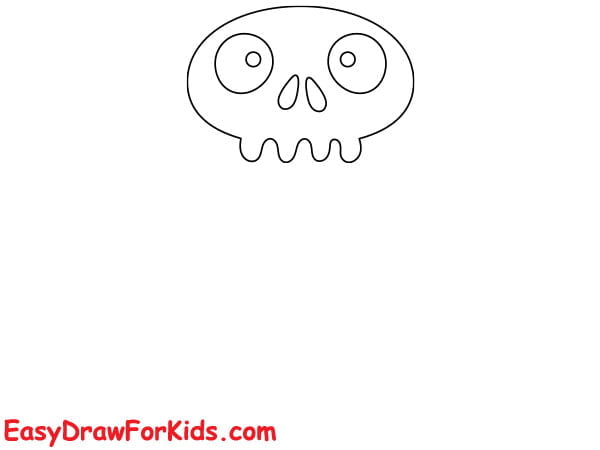
Step 2: Add the facial features
Inside the skull, draw two large eye sockets as elongated ovals.
Place a smaller circle in the center of each eye socket to represent the eyes.
Below the eyes, draw two small, upside-down triangles for the nose.
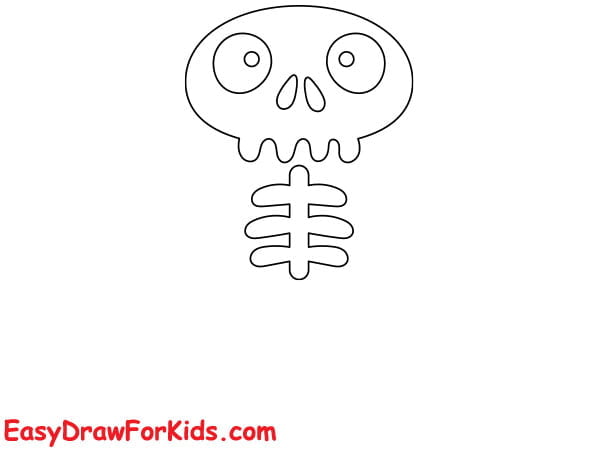
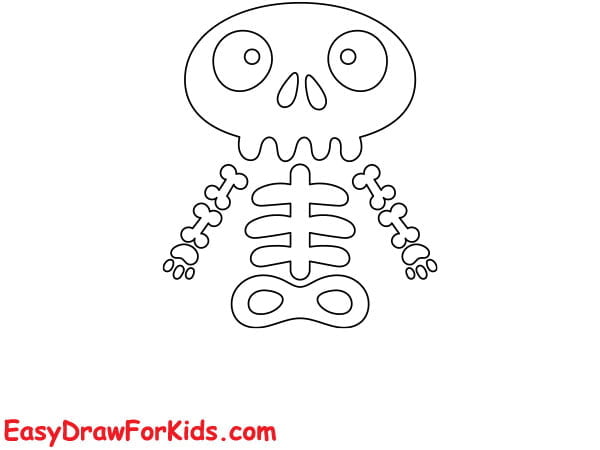
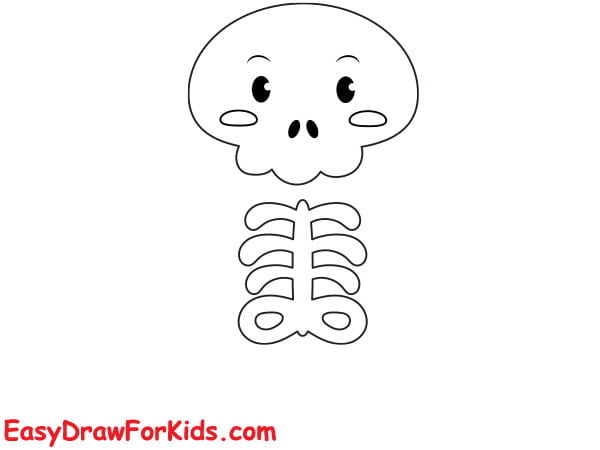
Step 3: Sketch the Spine
Below the skull, draw a long, vertical line that extends downward for the skeleton’s spine.
On both sides of the spine, draw a series of curved lines that extend outward to form the skeleton’s ribs.
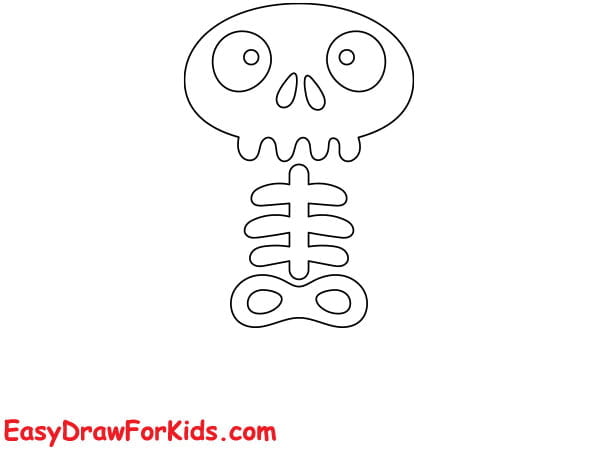
Step 4: Below the spine, Draw a large “8” horizontal shape to form the pelvic bone.
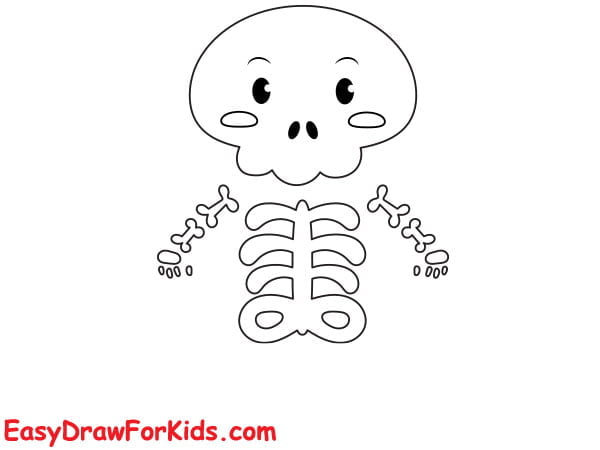
Step 5: Draw two bones outward from the shoulder to form the arms.
Step 6: Draw oval at the end of each arm to represent the hands. Below each hand, sketch lines to depict the fingers.
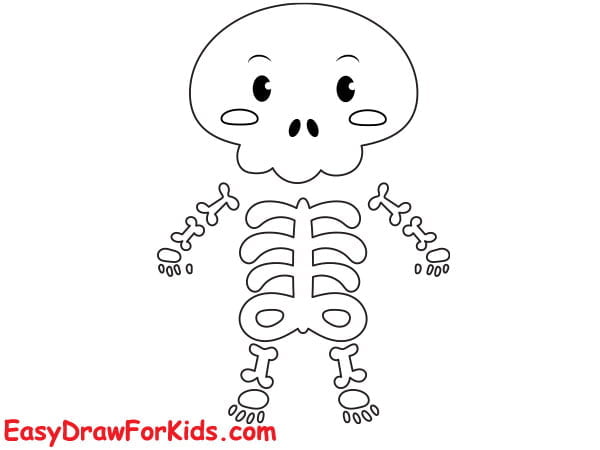
Step 7: Sketch bones downward from the bottom of the pelvic bone to form the legs
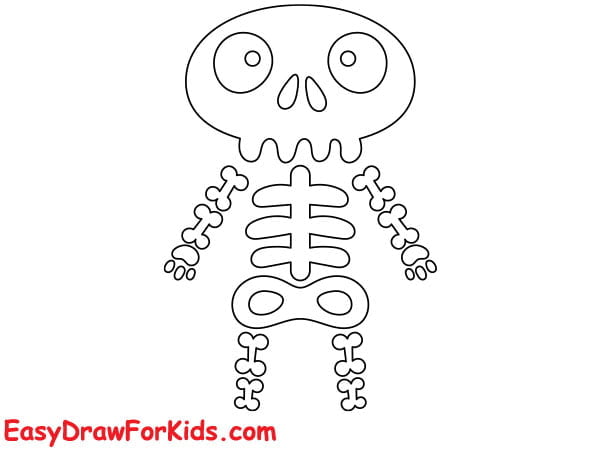
Step 8: Draw ovals at the end of each lower leg to indicate the toes.
Step 9: Color your skeleton drawing

2. Skeleton With Pumpkin Bucket Drawing
Step 1: Sketch the skull

Step 2: Add the facial features
Step 3: Sketch the skeleton’s spine, ribcage and pelvis.
Step 4: Outline the arms and hands
Step 5: Draw the legs and feet
Step 6: Draw a magic stick on the left hand
Step 7: Draw a pumpkin bucket on the right hand
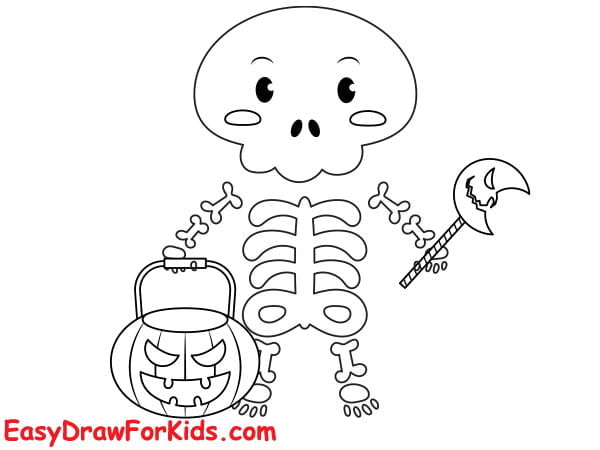
Step 8: In this step on guide how to draw a skeleton, add candies to the pumpkin bucket.
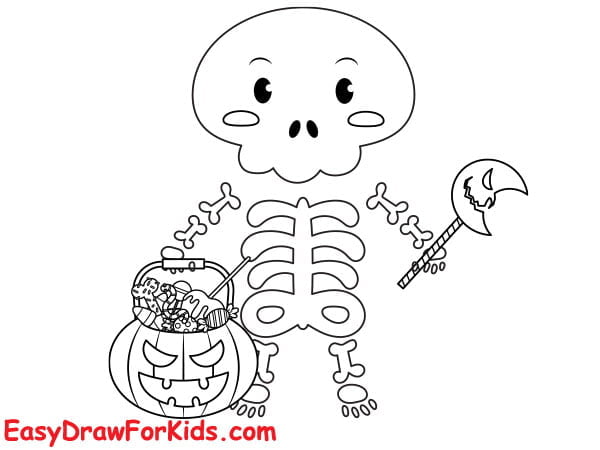
Step 9: Use Halloween-themed colors such as oranges, blacks, and purples to give it a spooky vibe.

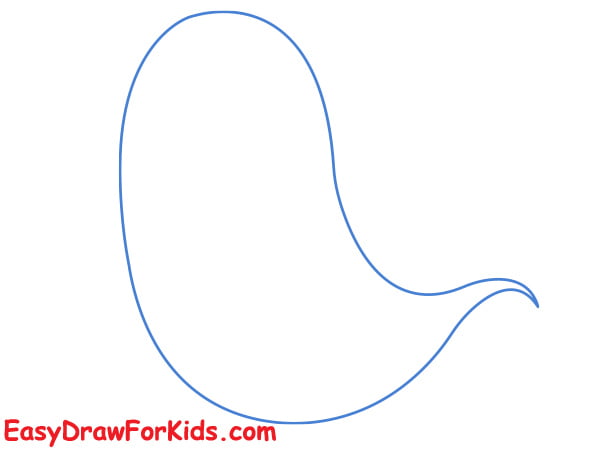
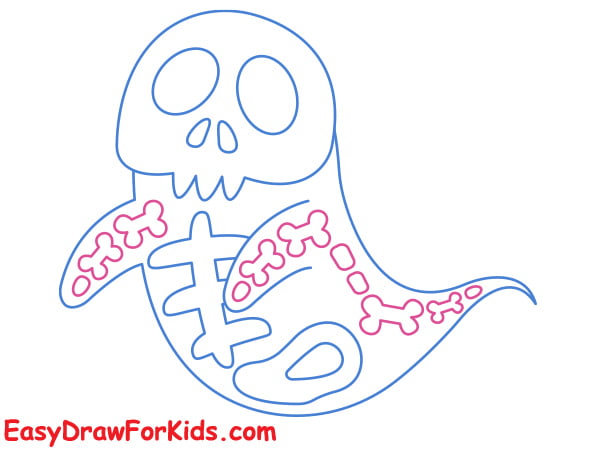
3. Skeleton Ghost Drawing
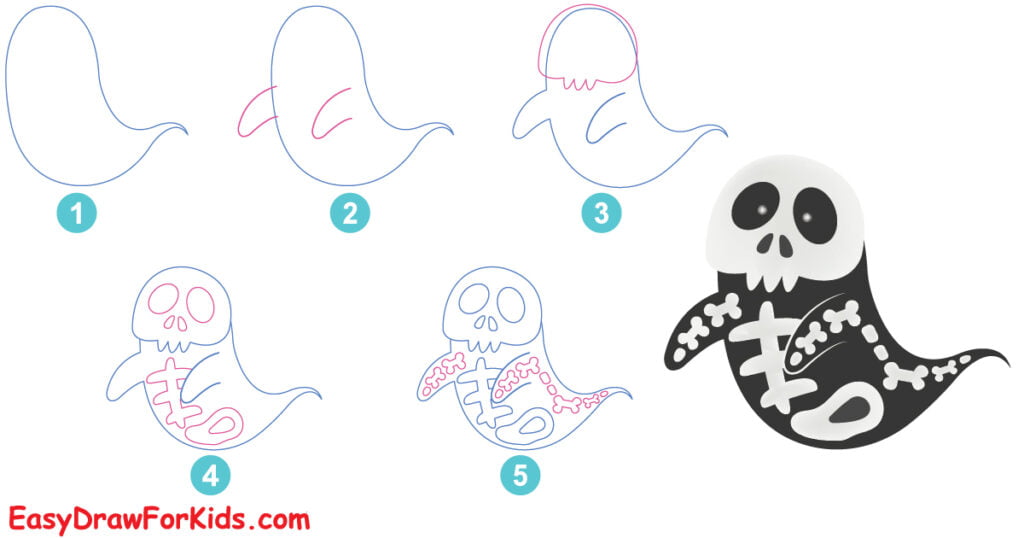
Step 1: The first step on guide how to draw a skeleton ghost by sketching the basic ghost shape
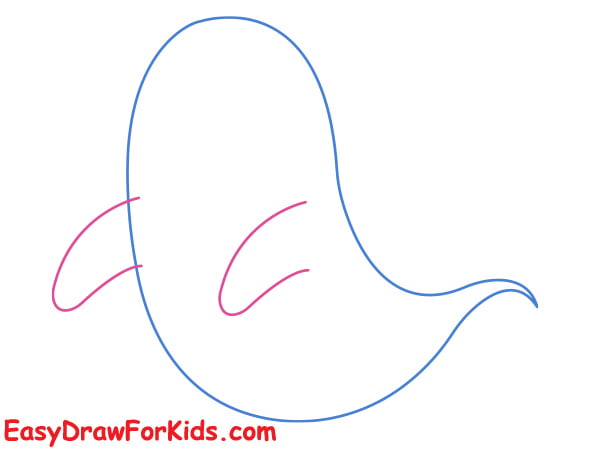
Step 2: From the sides of the body draw two long, curved lines downward to represent the arms of the skeleton ghost.
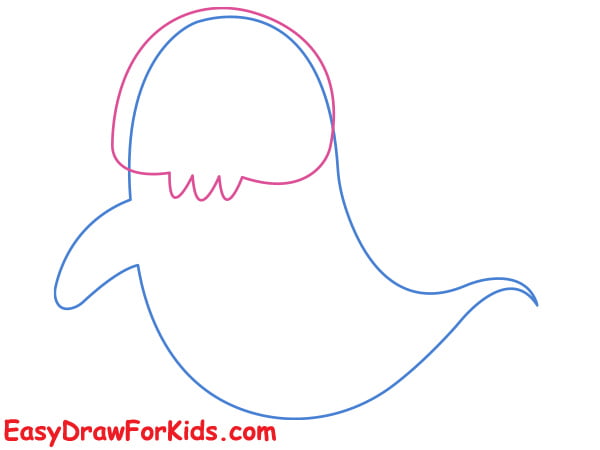
Step 3: Draw a circle for the cranium, then draw jagged shapes for the teeth inside the mouth to give it a creepy look
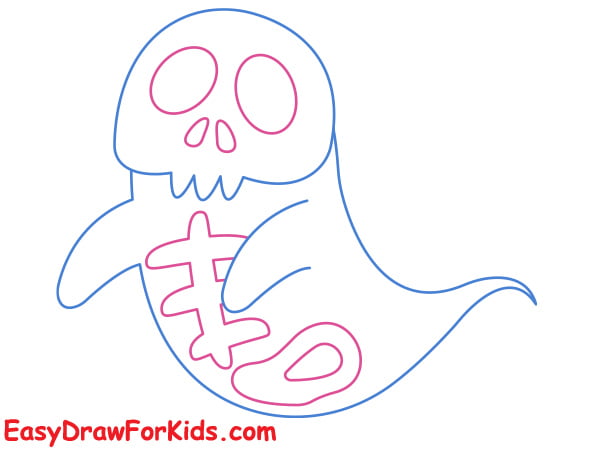
Step 4: Draw the eye sockets and ribs
Draw a pair of large, empty eye sockets within the head.
Below the eye sockets, draw two triangle for the nasal cavity.
Draw a sideways oval shape around the chest and add short lines branching upwards for the ribs.
At the hips, sketch a sideways O shape for the kneecaps.
Step 5: Draw thin, curved lines to represent the arms and spine. add small circles at the ends of each bone to represent the joints.
Step 6: Use dark or muted colors to enhance the ghostly and skeletal appearance.

There you have it – an easy way to draw a cute skeleton with simple steps!
Learning how to draw a skeleton is easier than you think.


