Do you want to learn how to draw a snake from start to finish?
In this tutorial, easydrawforkids.com will show you how to break down the snake’s body into simple shapes and lines, helping you capture that flowing motion and scaly texture with ease.
Let’s learn how to draw a snake today!
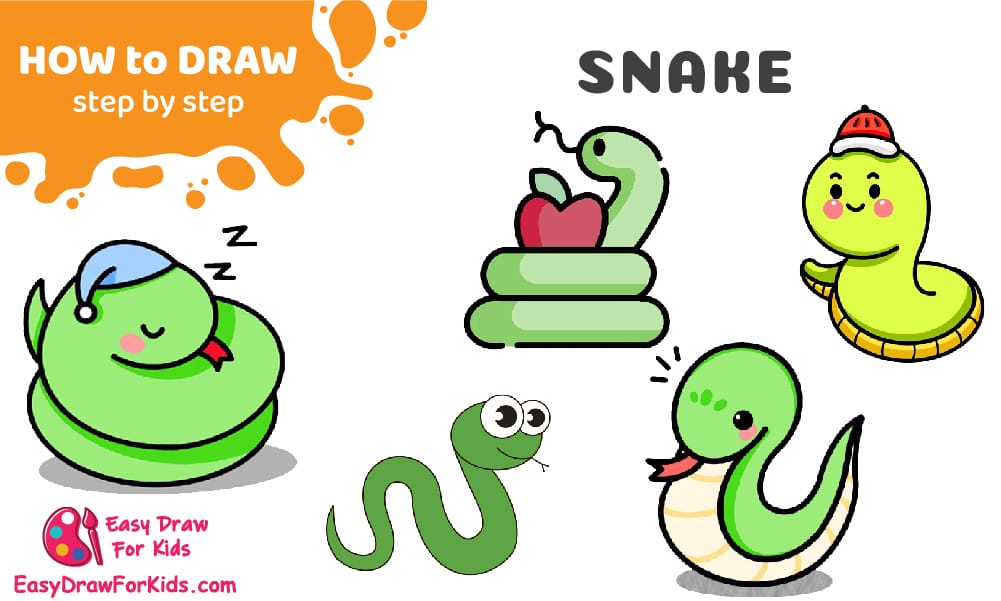
How To Draw A Snake – A Step by Step Guide
1. Easy Snake Drawing
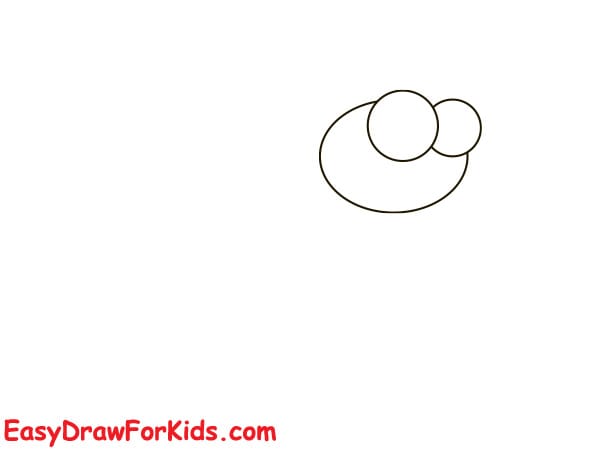
Step 1: Start by drawing two large circles next to each other for the eyes.
Then, draw a curved line around the eyes to shape the head, like a soft oval surrounding them.
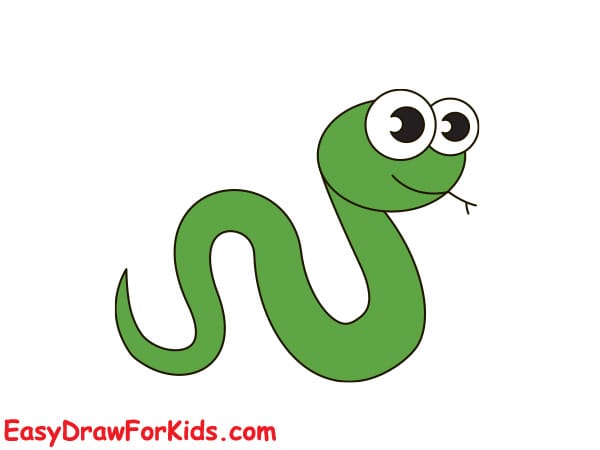
Step 2: Inside each eye, draw a small filled circle to represent the pupils.
Draw a curved smile under the head to give the snake a friendly expression.
Add a small forked tongue sticking out from the mouth.

Step 3: Draw a long, curved line starting from below the head and flowing downward and up again in a wave motion. This forms the front side of the snake’s body.

Step 4: Mirror this with another line to form the back of the body, keeping the shape smooth and continuous.
Close the snake’s body by connecting the curves at the tail.
Make sure the tail narrows to a pointy tip.

Step 5: Coloring
>>>Read more: How To Draw A Zebra – 2 Ways (With Pictures)
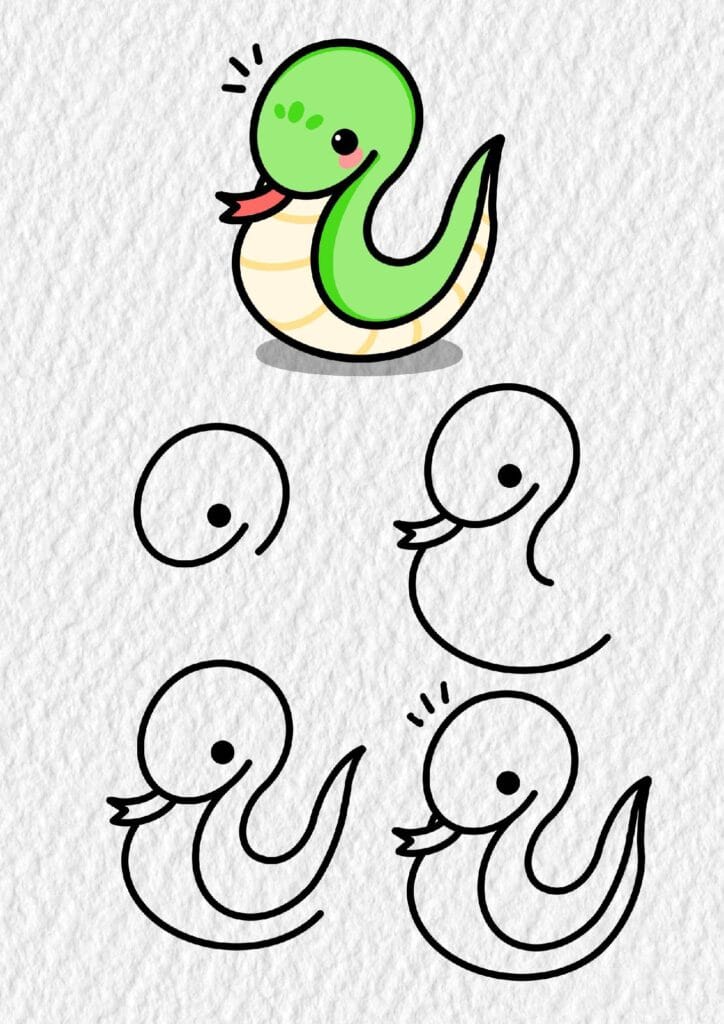
2. Cute Snake Drawing
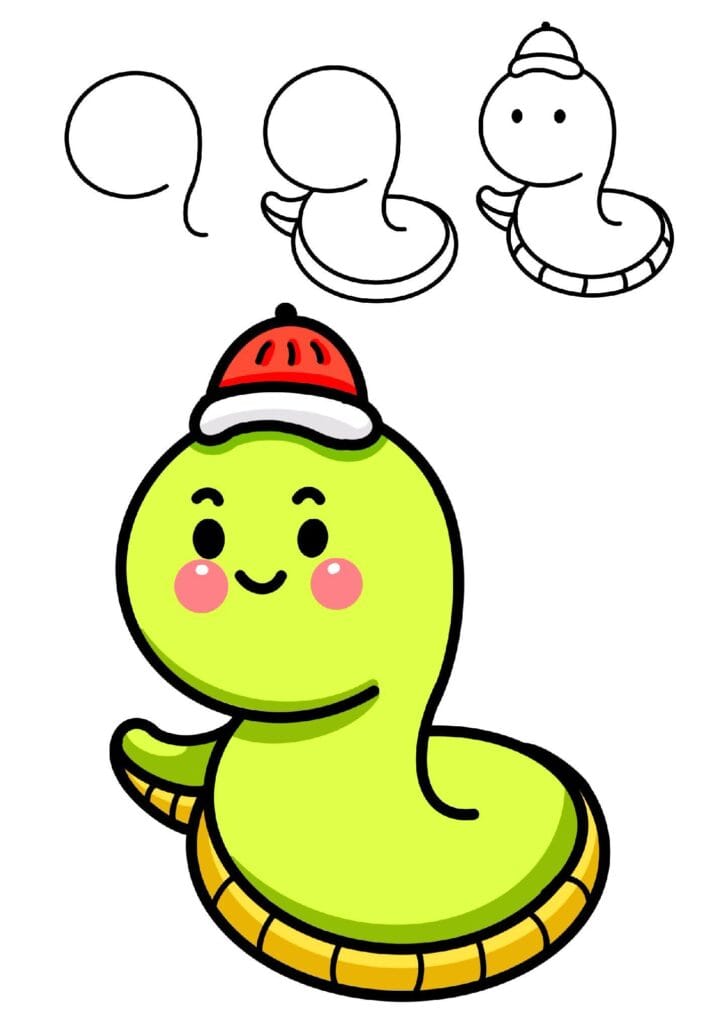
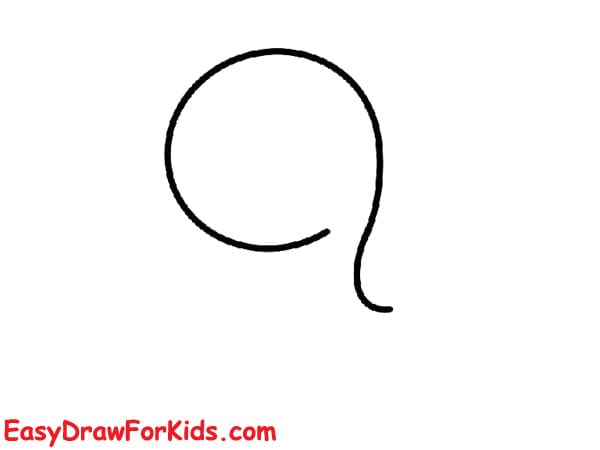
Step 1: Begin by drawing a large circle for the snake’s head.
From the lower right side of the circle, draw a curved line that swoops down and loops around, forming the snake’s coiled body and tail.
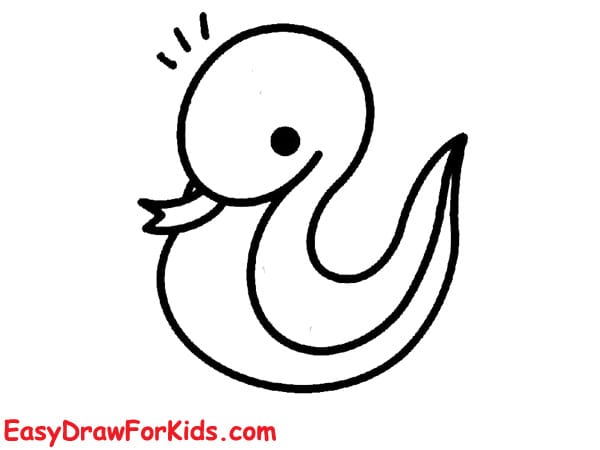
Step 2: Close the curve by drawing the underside of the tail, wrapping it smoothly under the body.
Draw a horizontal curved line inside the lower body area to create the belly segment.

Step 3: Draw two small dots for the eyes on the head.
Add a knit winter hat on top of the head with a wavy bottom line and a bobble on top.
Add stripes or patterns on the body (near the tail or belly) to give texture and realism.

Step 4: Color the snake’s body green.
Use pink or red for the cheeks to make it look cute.
Color the hat red and white or any cozy winter colors.
The tongue can be red or pink.

>>>Read more: How To Draw A Dragon – 3 Ways (With Pictures)
3. Simple Snake Drawing
Step 1: Start by drawing a large round circle for the head.
Inside the circle, add a small solid circle toward the center to form the eye.
Draw a curved line sweeping down and around from the side of the head – this will be the beginning of the snake’s coiled body.

Step 2: Continue extending the curved line downward and around to create a looped tail, forming the full coil of the snake.
Add a tiny open mouth near the base of the head.
Draw a small forked tongue poking out.

Step 3: Add small lines above the head to indicate excitement or cuteness.
Refine the tail’s pointed end and thicken the body line if needed. Ensure all curves are smooth and connected.
Step 4: Color the head and back green.
Use a light beige or yellow for the belly area. The tongue should be red or pink.
Add blush circles on the cheeks for cuteness.
Consider adding a shadow underneath for a grounded look.

>>>Read more: How To Draw A Lion – 4 Ways (With Pictures)
4. Sleeping Snake Drawing
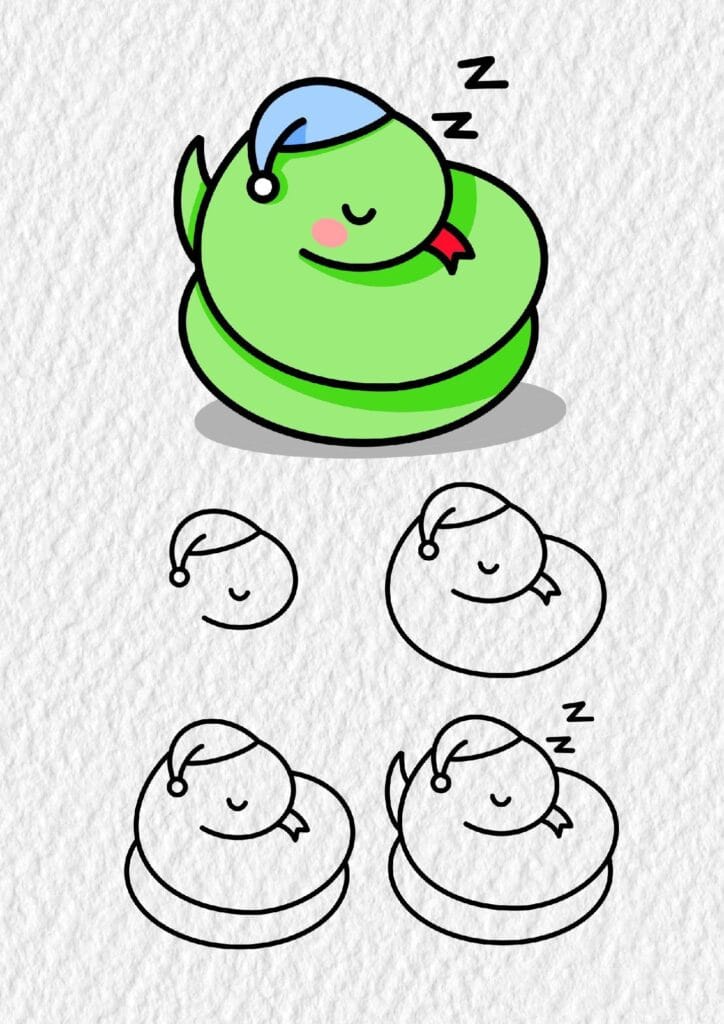
Step 1: Start with the Head and Sleeping Cap
Draw a small rounded circle for the head tilted slightly downward.
Add a a closed arc to show the snake is sleeping.
Draw a floppy sleeping cap on top of the head – use a curved line for the hat’s base and another curved triangle for the top part, ending with a small ball at the tip.

Step 2: Draw the Body in a Coiled Position
Extend a thick curved line down and around from the head to create a coiled body – like a rounded spiral.
Add an inner curved line to represent the second layer of the coil.
Complete the bottom part of the coil with a horizontal oval for the base.

Step 3: Add Details
Add a small pointed tail sticking out from the top or side of the coil.
Draw a tiny forked tongue gently sticking out to show it’s asleep peacefully.
Add “Z” marks above the snake’s head to symbolize it’s sleeping.

Step 4: Add Color
Color the body green or any soft tone you prefer.
Use blue (or red) for the sleeping cap. Add a light blush or red tongue.

>>>Read more: How To Draw A Butterfly – 5 Ways (With Pictures)
5. Snake And Apple Drawing
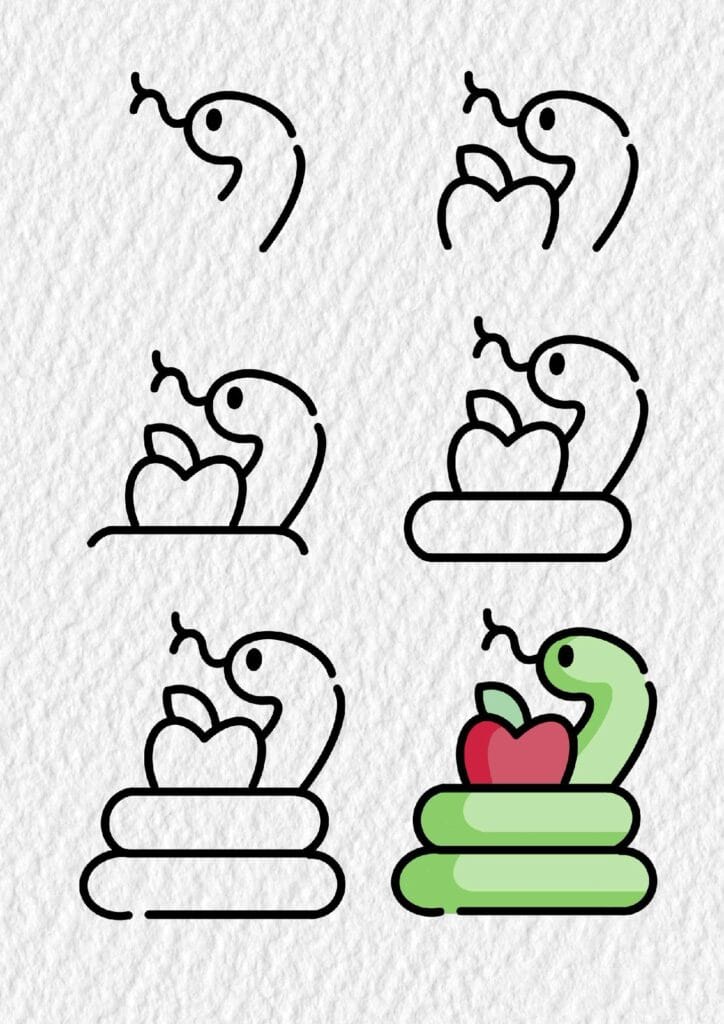
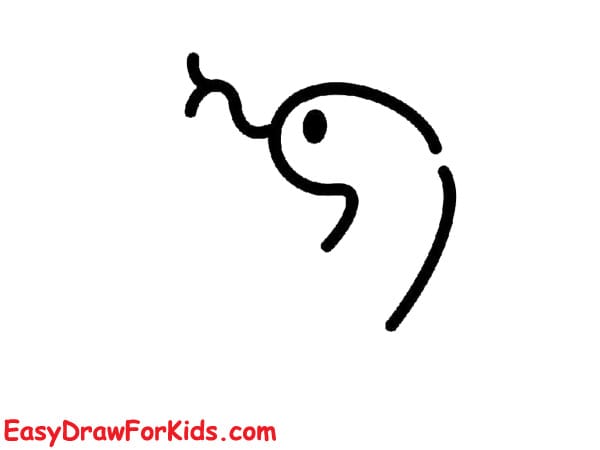
Step 1: Start by drawing a curved line to form the top of the snake’s head and its slightly raised neck.
Add a small circle for the eye and a short forked tongue sticking out.
The mouth should curve downward slightly to give the snake a curious expression.
Step 2: Draw a wavy heart-like shape in front of the snake to represent the top of an apple.
Add a small leaf and stem on top of the apple.
Position the apple so it looks like the snake is wrapped behind or around it.

Step 3: Draw a rounded rectangle or oval shape under the apple to represent the first coil of the snake’s body.
This coil should slightly peek out on the sides of the apple.

Step 4: Draw a second and third coil below the first one using similar rounded rectangle shapes, stacked neatly.
The body should look like it’s coiling or curling while sitting.

Step 5: Color your snake drawing

>>>Read more: How To Draw A Bee – 7 Ways (With Pictures)
And that’s how you draw a snake, step by step.
Thanks for following along!
Keep practicing to develop your style — and who knows?
Maybe you’ll draw an entire jungle next!