Have you ever wanted to learn how to draw a monkey?
In this tutorial, we will guide you learn how to draw your cute monkey.
So let’s get started!
How to draw a Monkey – A Step by Step Guide

1. How to draw a monkey swinging on a rope while holding a banana
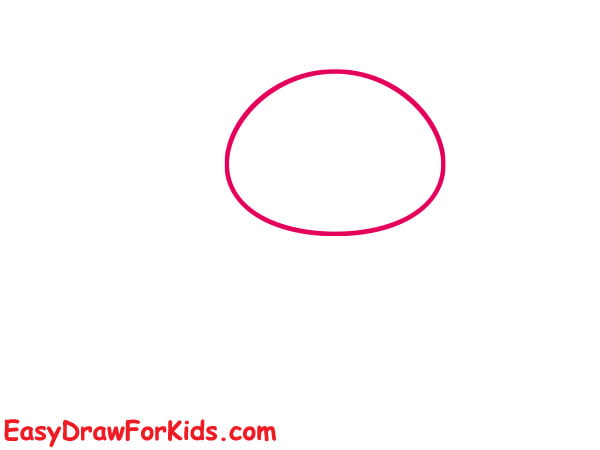
Step 1: Draw an oval shape tilted sideways for the head
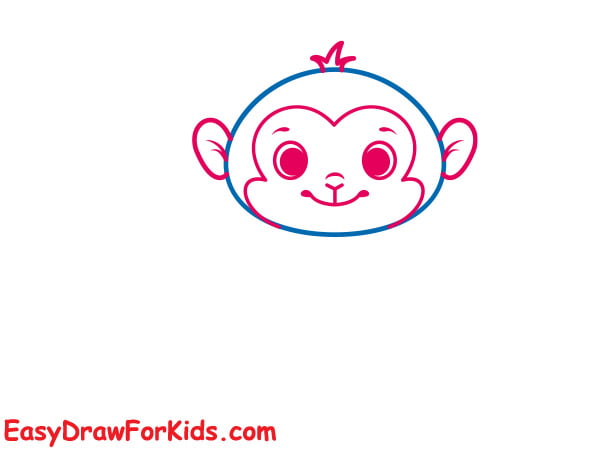
Step 2: Adding the Facial Features
Draw oval shape shapes for the eyes, add circles inside for the pupils.
Sketch a wide triangle for the nose; add expressive curved lines below the nose for the mouth.
Draw oval shapes tilted backward for the ears, add curved lines inside for ear details.
Step 3: Draw an oval below the head for the torso

Step 4: Drawing the Arms and Legs
Extend straight lines from shoulders for the upper arm.
Bend lines sharply for lower arm in swinging pose.
Sketch each leg connected at the hips.

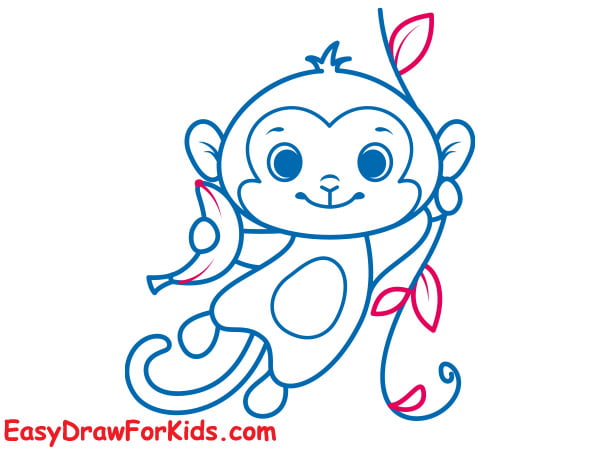
Step 5: Drawing the Banana and Rope
Now for the best part of the guide on how to draw a monkey – adding the banana and rope.
Draw a simple curved for the banana shape and place it on the hand of the monkey.
Draw a curved line that angles up on the hand of the monkey as shown the picture.

Step 6: Draw the tail by extending a curved line from the back of the body. Add small circles at the end of the arm for the hands.

Step 7: Using a curve line for drawing some leaves on the rope, as shown in the picture
Step 8: Color your drawing
Monkeys are usually brown, so you can color the body and face in shades of brown.
Color the banana yellow, and you can add some green for the stem.
You can also color the rope brown or gray.

>>Read more: How To Draw A Spider – Easy Step By Step Guide
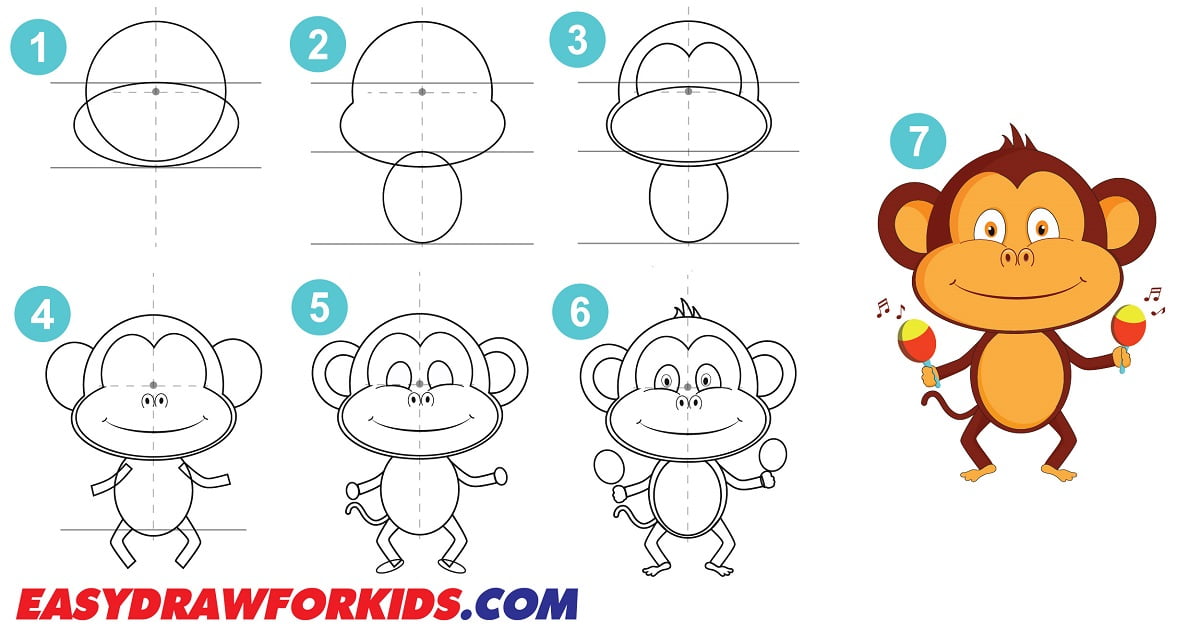
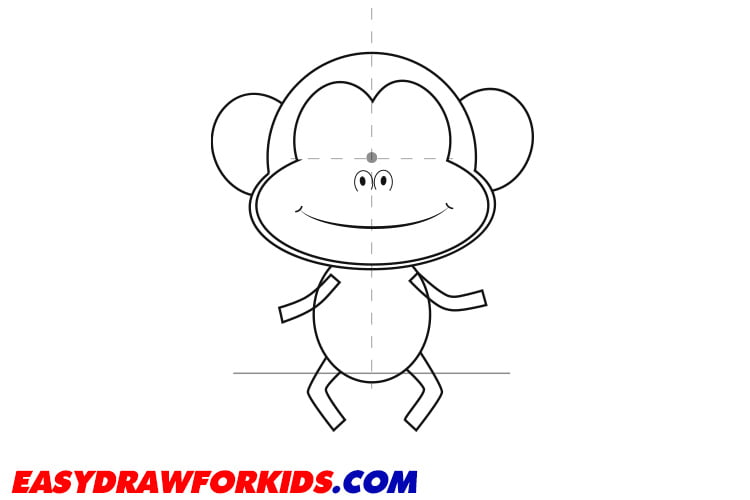
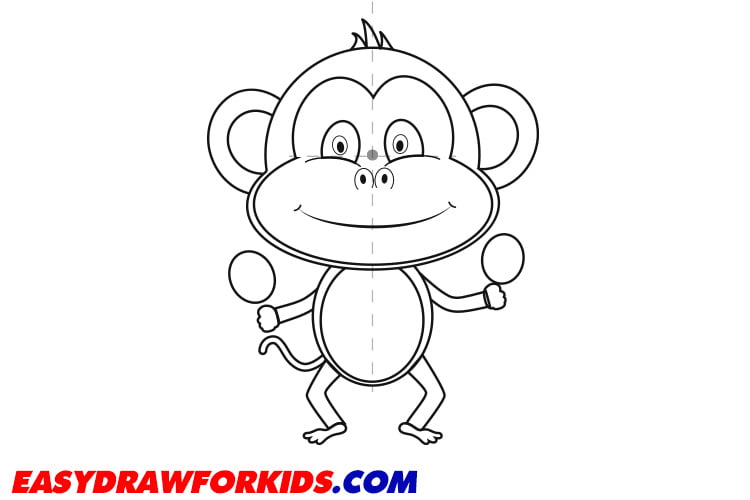
2. How to draw a cartoon monkey step by step
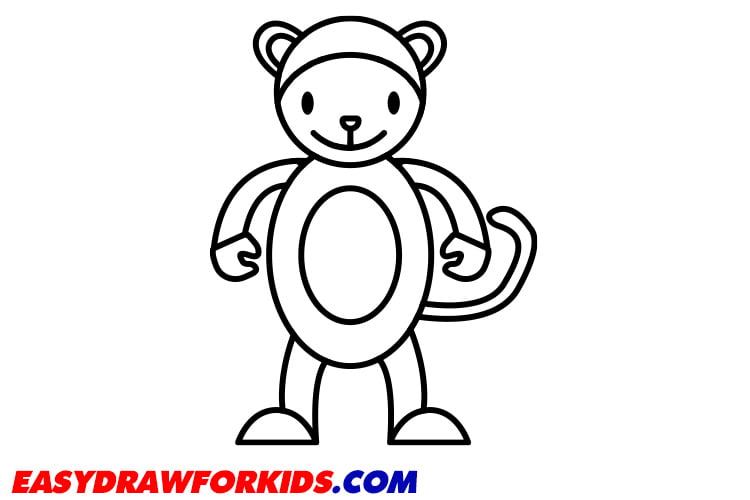
Step 1: Draw a circle for the head, at the top of the head, depict a dividing line where the color of the fur will differ.

Step 2: Depict the eyes, nose, and mouth inside the outline of the head using ovals, dots, and an arc.

Step 3: On the sides of the head, depict two identical circles and outline the inside of the ear.

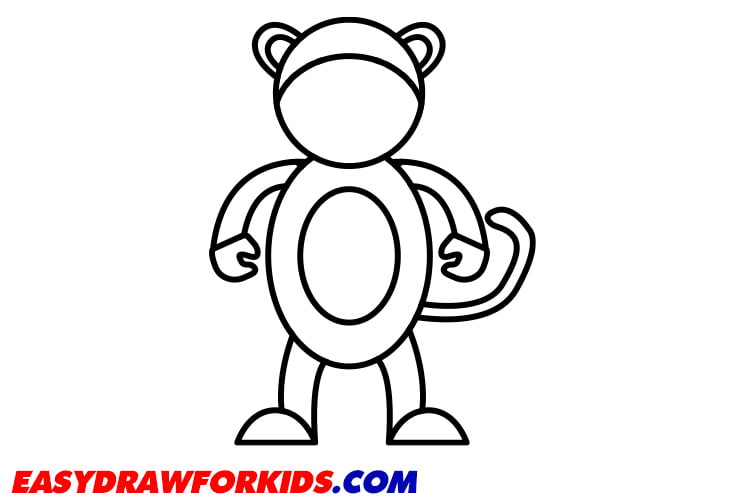
Step 4: Depict the body of cartoon monkey
Draw it below the previously drawn head with curved lines.

Step 5: Sketch the upper paws of the body as shown in the picture

Step 6: Add the lower paws and tail
At the bottom of the monkey’s body, add the paws by using curved lines.
Using smooth lines, add the thin, curved tail.
Step 7: And there you have it! Your very own cartoon monkey. Just add some color and detail, and you’re all set.

>>Read more: How To Draw A Pug
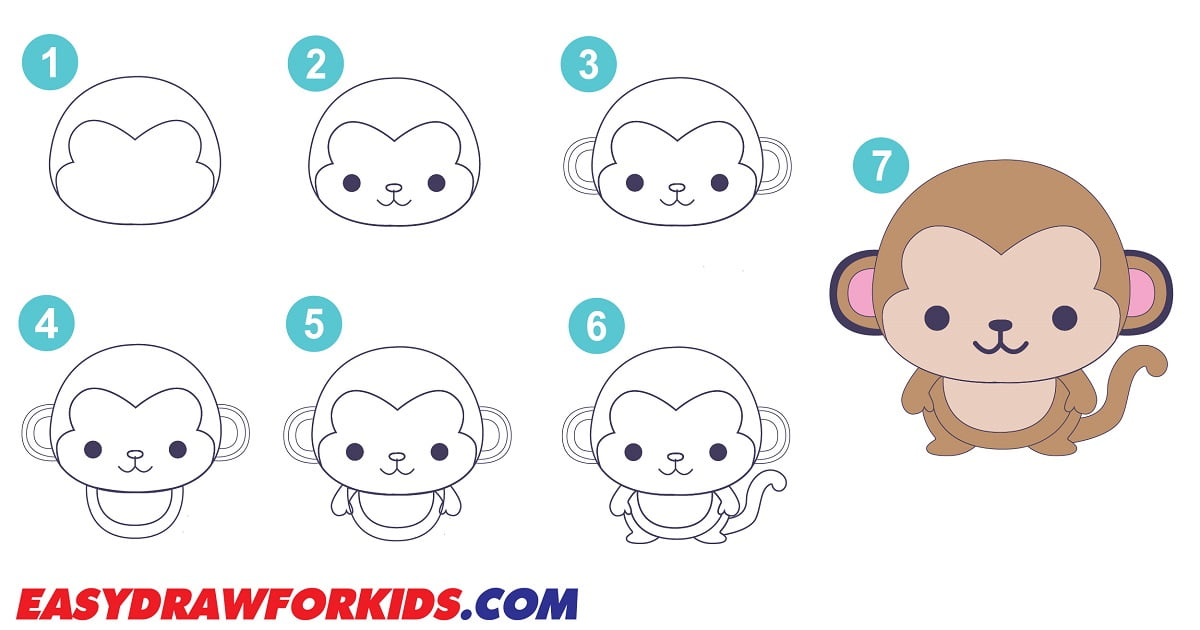
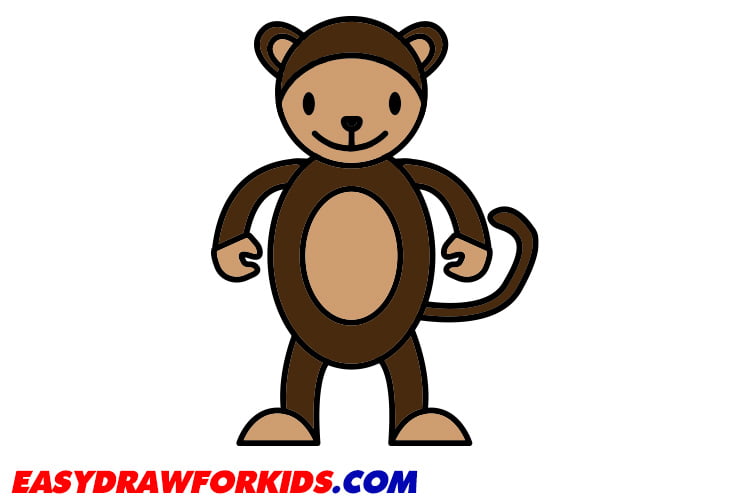
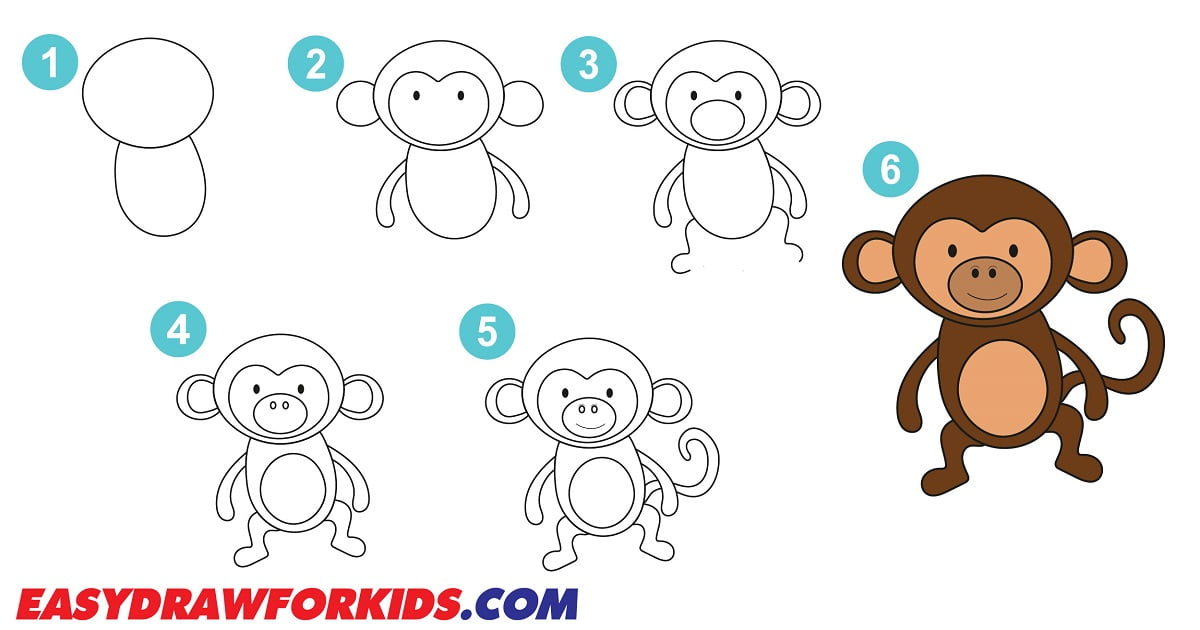
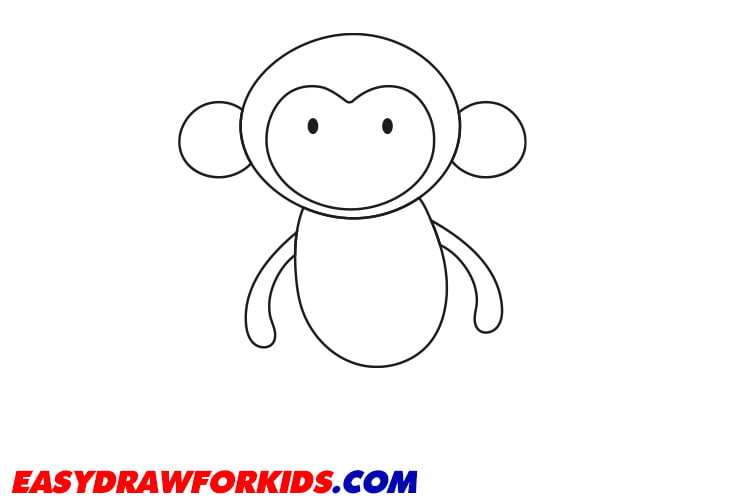
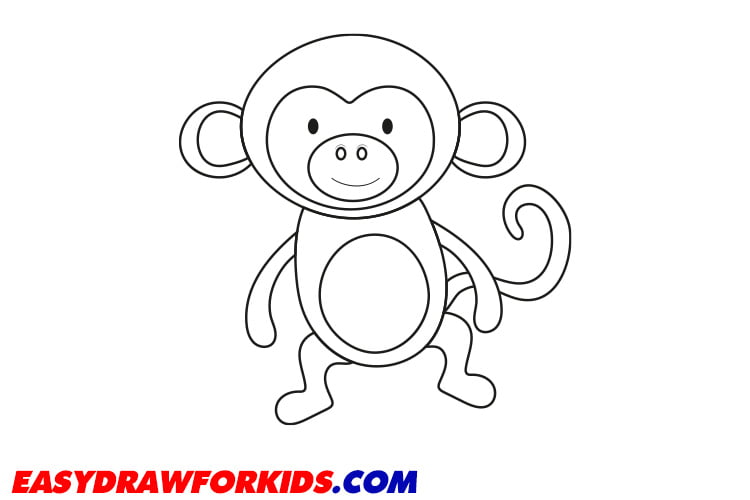
3. How to draw a simple monkey
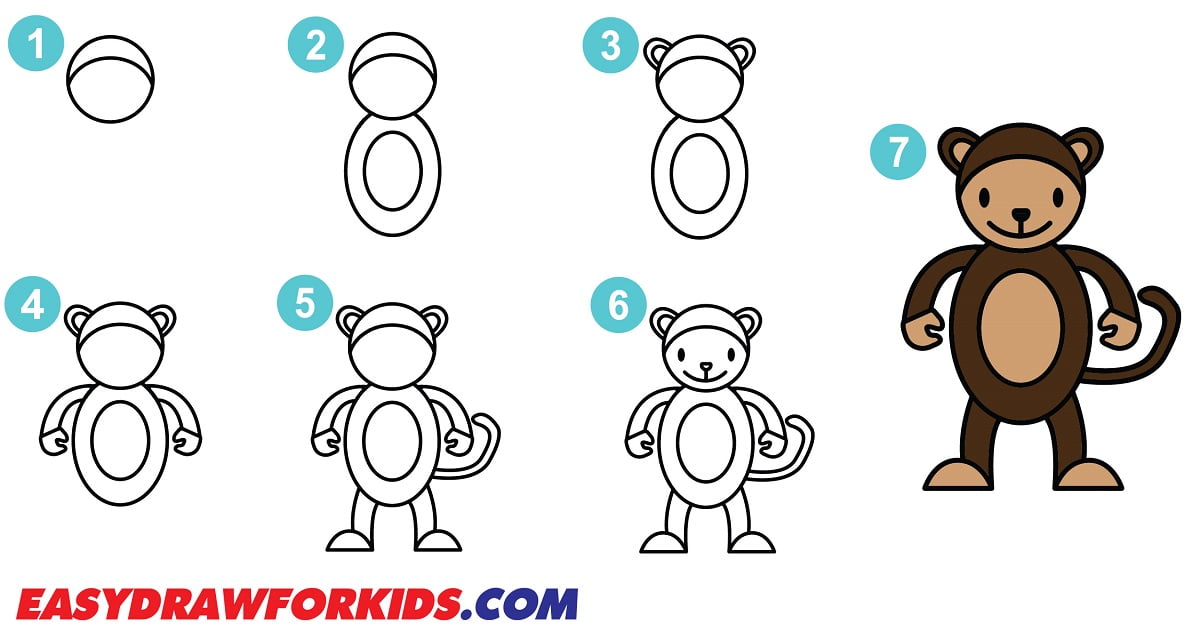
Step 1: Begin by drawing a small circle for the monkey’s head and dividing line at the top of the head

Step 2: Draw the torso below the head with a curved line and a circle on the belly

Step 3: Sketch out two ears. Draw the inside of the ear using small curved lines.

Step 4: Draw hands and arms
Extend two lines from the sides of the monkey’s body for the arms.
At the end of each arm, draw a small circle for the hands.

Step 5: Draw legs and tail
In the fifth step on how to draw a monkey, extend two lines from the bottom of the body for the legs.
At the end of each leg, draw a small half-circle for the feet.
Using smooth lines, add the thin, curved tail.
Step 6: Depict the eyes, nose, and mouth inside the outline of the head using ovals, dots, and an arc.
Step 7: Add some color for the cartoon monkey
>>Read more: How To Draw A Teddy Bear
4. How to Draw an Easy Monkey step by step
Step 1: Draw the head and torso
Sketch an oval shape for the head.
Next, with a curved line, draw the small torso below the first one for the body.

Step 2: Depict elements of the face, ears, and hands
Add two dots for the eye and curved lines for the ears
Then, extend two lines from the sides of the monkey’s body for the hand.
Step 3: Add the details
Sketch out the nose in the form of a large oval
Next, using smooth rounded lines depicts the inner of each ear.
Then, draw smooth lines for a part of the legs.

Step 4: Outline the monkey’s belly, legs, and nose
Draw an oval shape inside the outline of the torso.
Add two circles on either side to create the nostrils.
Draw smooth connecting lines between the legs and torso.

Step 5: Draw a short curved line for the mouth, using smooth lines, add the thin, curved tail.
Step 6: Color the picture
Now that we’ve completed this guide on how to draw a monkey, it’s time to bring your monkey art to life with color!
To color the cute monkey, you can use shades of brown or any color that suits your style.
>>Read more: How To Draw Godzilla – Easy Step By Step Guide
5. Easy monkey drawing
Step 1: Draw an oval and circle lightly, this will be the monkey’s skull and face.

Step 2: Draw a small oval shape below the head for the monkey’s body.

Step 3: Draw a slight oval shape to show the picture of a monkey’s face.

Step 4: Depict the hands, legs, nose and mouth
Sketch out curved lines from the sides of the body for the hand and legs, as shown in the picture.
Draw curved lines from the center of the face for the nose and add two dots to create the nostrils.
Step 5: Depict the eyes, tail and paws
Add a small oval shape for hands and paws
Next, draw the eyes just above the halfway point of the oval.
Then, draw a smooth line from the bottom of the torso to the tail.

Step 6: Add the details
Draw two small circles inside each eye for the pupils.
Draw a curved line inside the torso for the belly.
Finally, draw a pinch on the head to add some cuteness.
Step 7: Now it’s time to color the picture according to your style

>>Read more: How To Draw A Fox – Easy Step by Step Guide
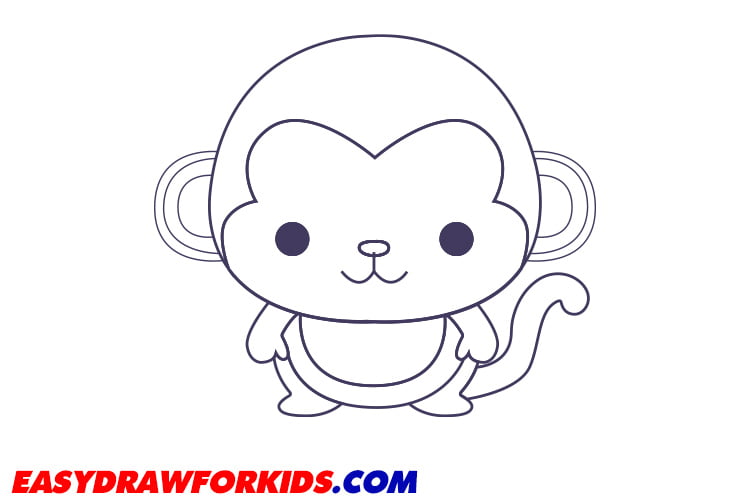
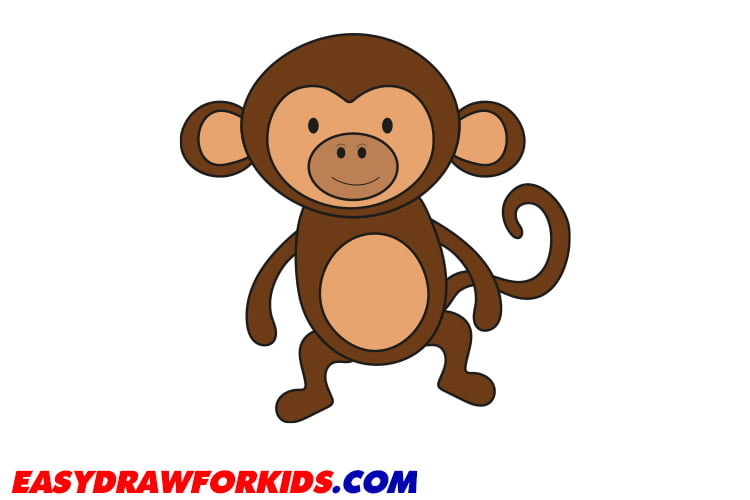
Your Monkey Drawing is complete!
So this tutorial came to end: you learned how to draw a monkey.
If you have any questions, you can write about it in the comments.


Leave a Reply