
Learning how to draw lips is an important skill for artists who want to improve their portrait illustrations. Lips have unique shapes, natural curves, and subtle color variations that can make a character’s face look more expressive and lifelike.
In this step-by-step digital art tutorial, you will learn how to draw beautiful lips
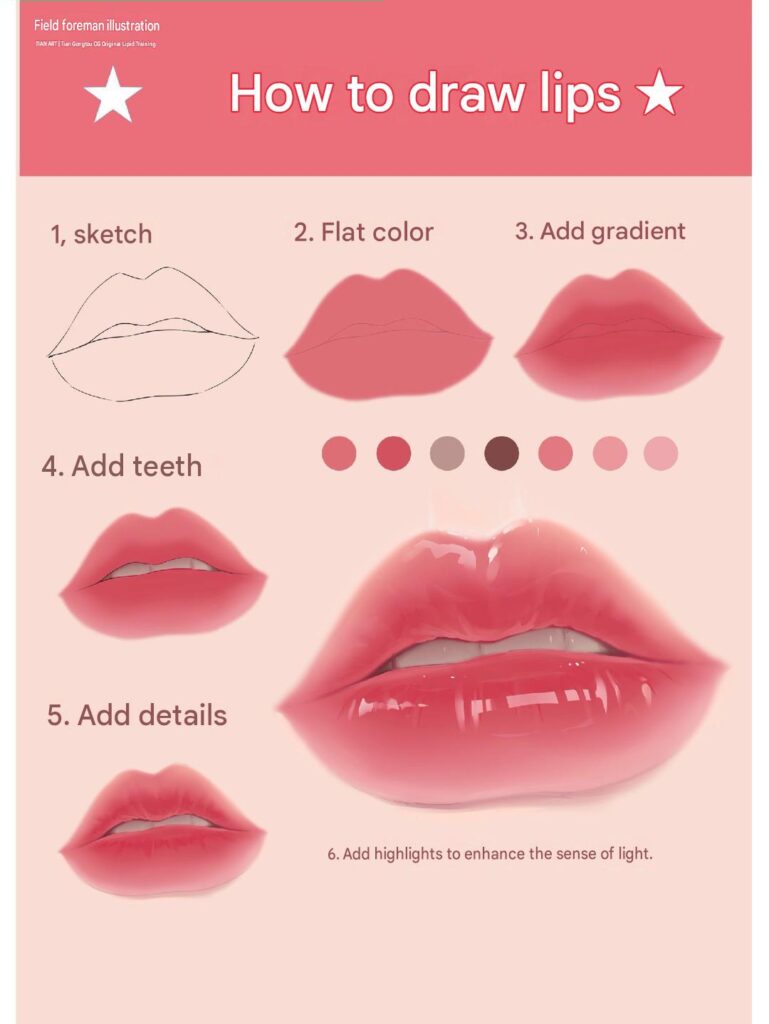
How to Draw Lips Step by Step
1. How to Draw Lips Step by Step – Easy Digital Art Tutorial
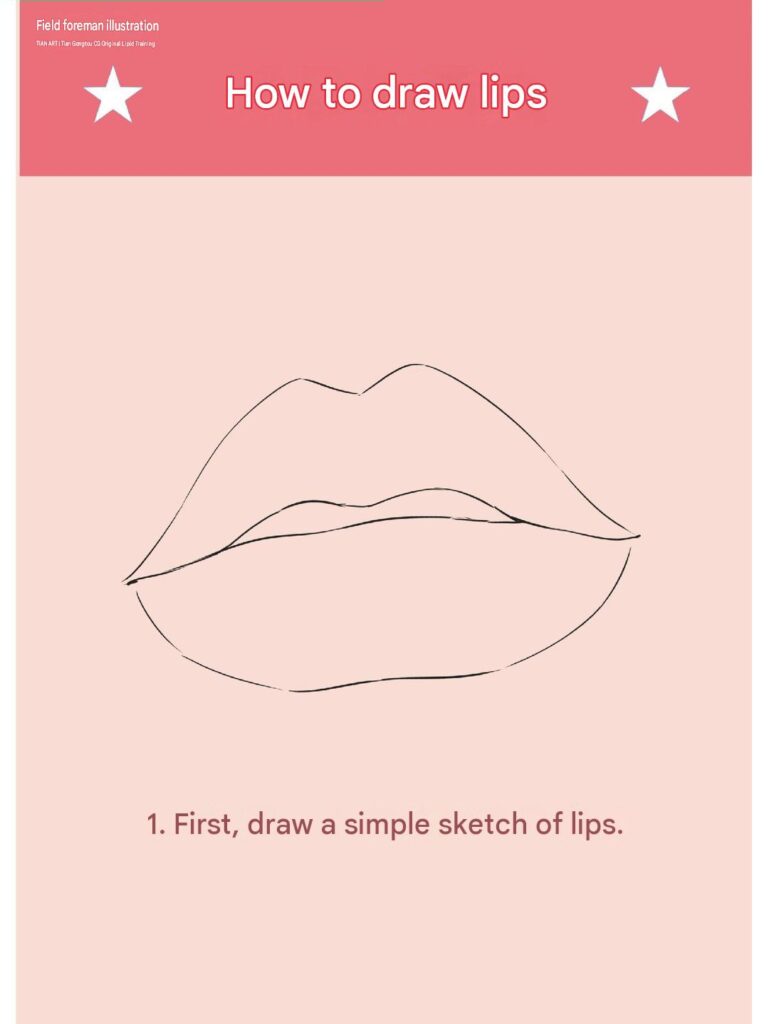
Step 1: Start by drawing the basic outline of the lips. Lightly sketch the upper and lower lips, paying attention to their natural curves and proportions.
Define the Cupid’s bow on the upper lip and create a smooth curve for the lower lip. Keep your sketch simple and symmetrical before moving on to coloring.
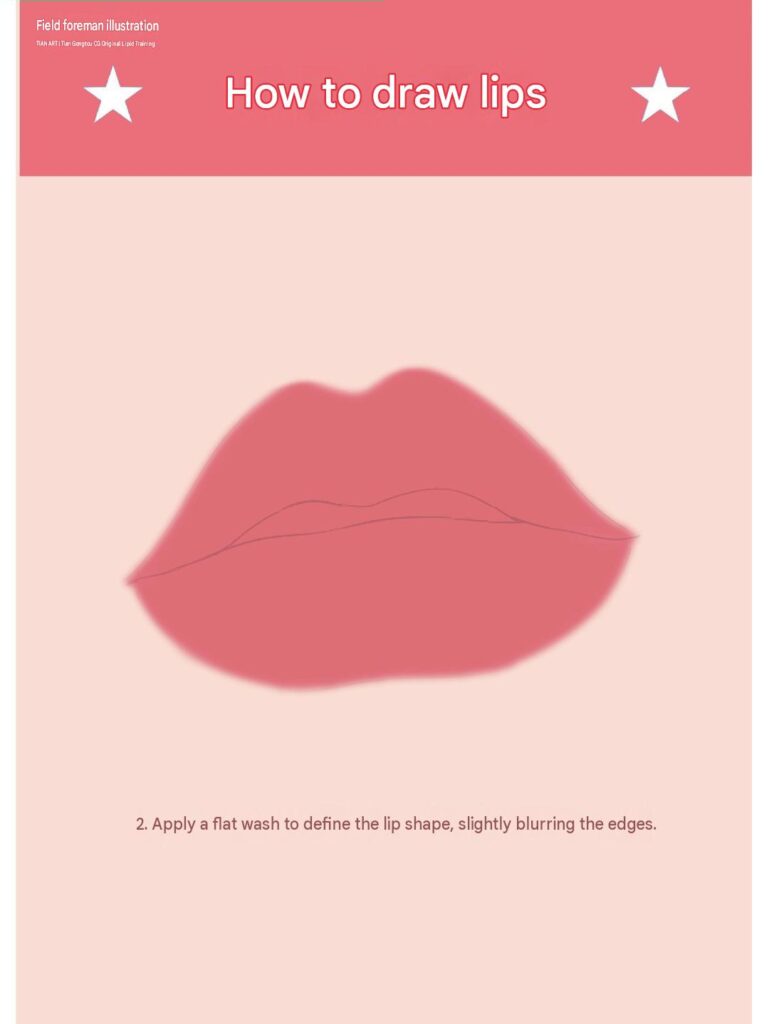
Step 2: Once the sketch is complete, fill the lips with a flat base color. Choose a soft pink or rosy red tone to establish the main appearance.
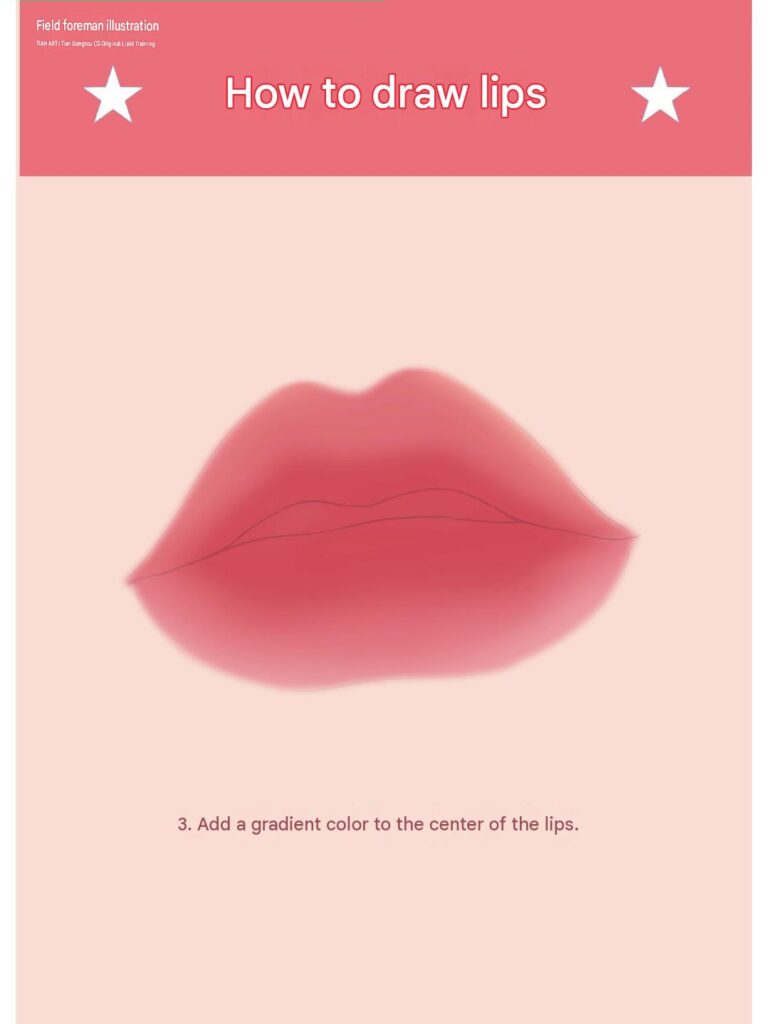
Step 3: Introduce darker shades of red and pink to create depth and volume. Focus on the center of the upper lip, the outer edges, and the areas around the natural lip line.
Use a soft airbrush to blend the different colors smoothly. Gradually build up the shadows to create a natural gradient without harsh transitions.
Step 4: If you want to create a slightly open-mouth expression, carefully draw the visible teeth between the upper and lower lips.
Use a soft ivory or light cream color instead of pure white. Add subtle grayish shadows around the edges to give the teeth a natural appearance and help them blend into the mouth.
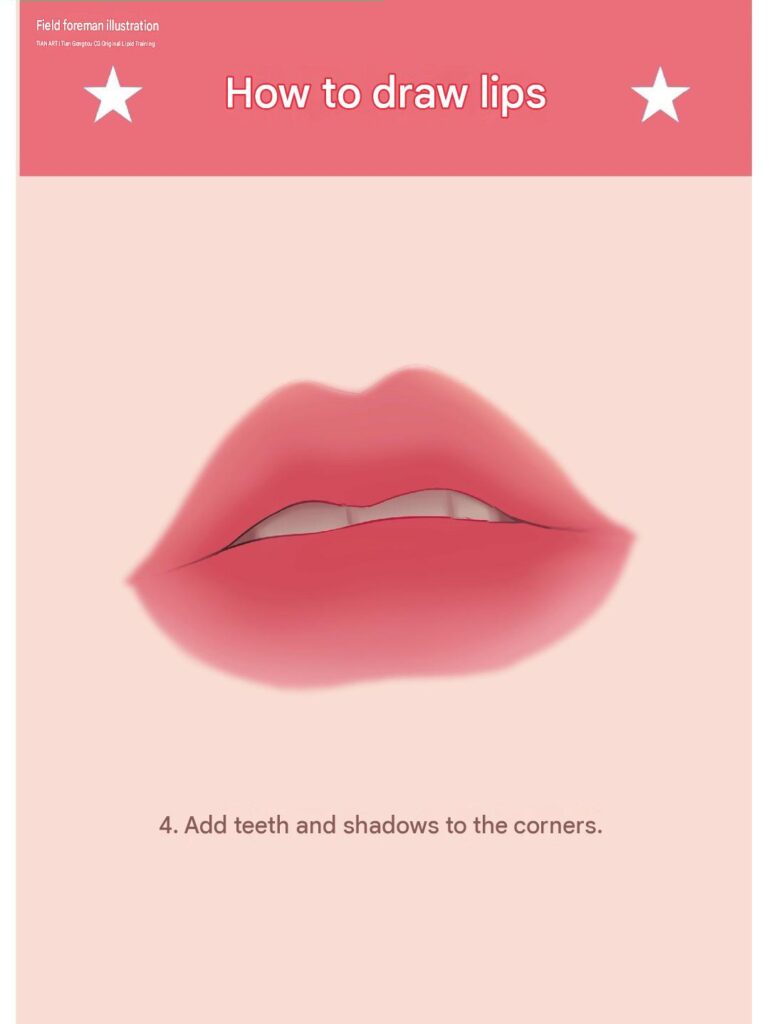
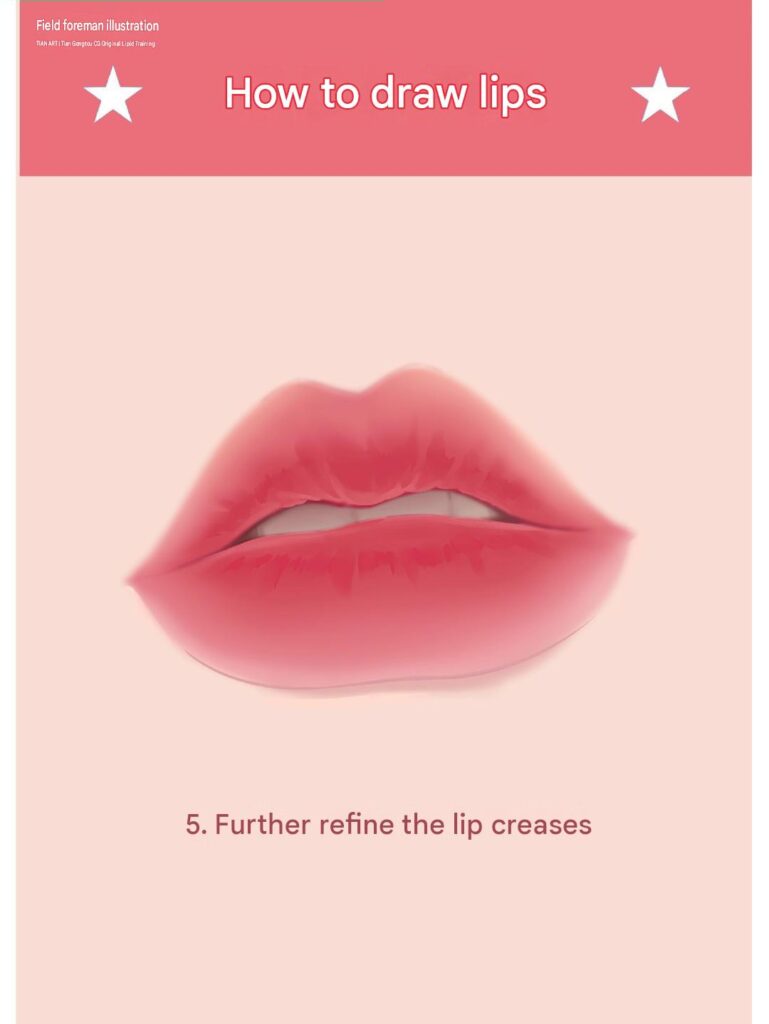
Step 5: Draw subtle vertical lines and small natural creases across the lips. Strengthen the darker areas near the mouth opening and refine the edges to make the lips look more detailed and dimensional.
Step 6: In the final step, use a light pink or pale white color to add highlights to the lips.
Place small reflective strokes along the upper and lower lips, especially around the areas facing the light source. Use a soft brush to blend some highlights while keeping a few sharp reflections for a glossy effect.
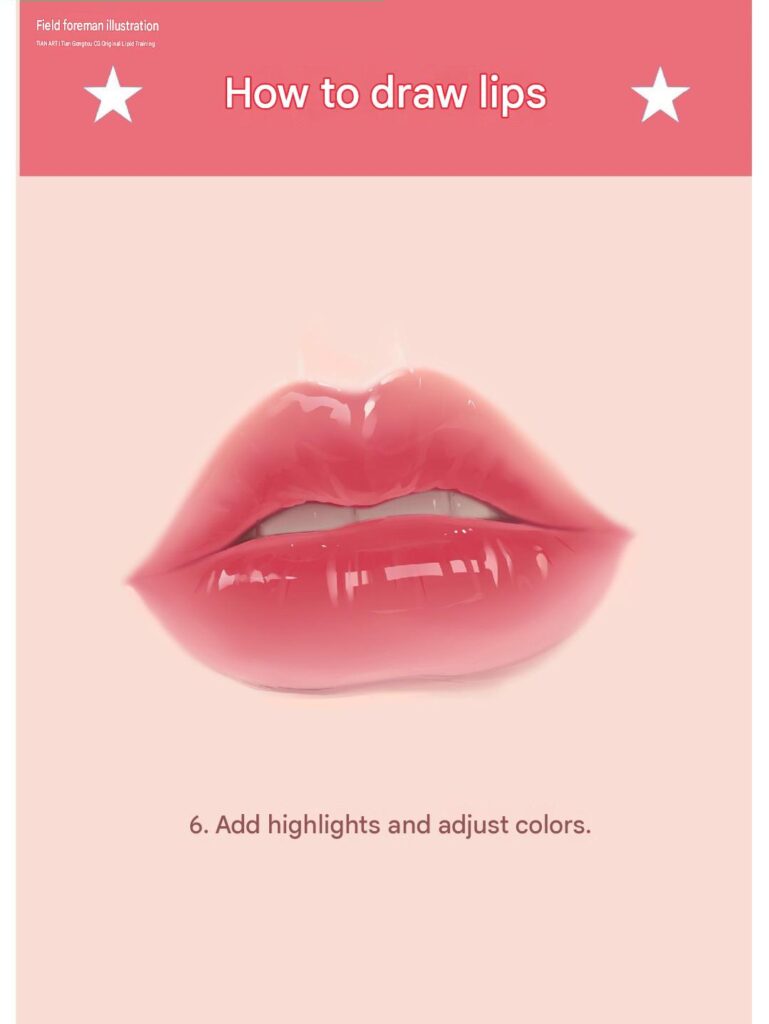
Review the overall shading, color balance, and lip contours to complete your illustration.
2. How to Draw Realistic Lips Step by Step – 12-Step Digital Painting Tutorial
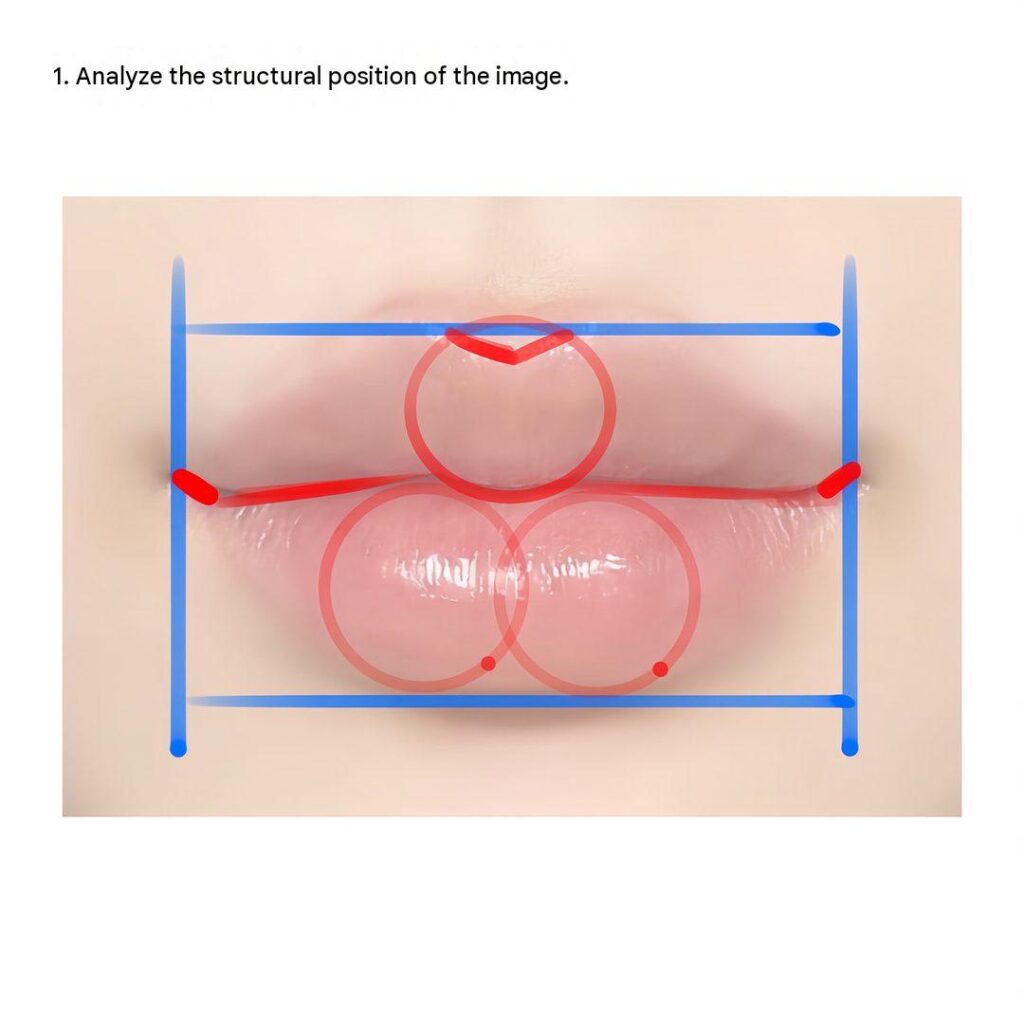
Step 1: Analyze the Structure and Proportions of the Lips
Use simple geometric shapes to understand the positioning and balance of each section. Pay attention to the width, height, and natural curves to create a well-proportioned foundation.
Step 2: Start drawing the initial outline of the mouth using light strokes. Define the upper lip, lower lip, and the central line that separates them.
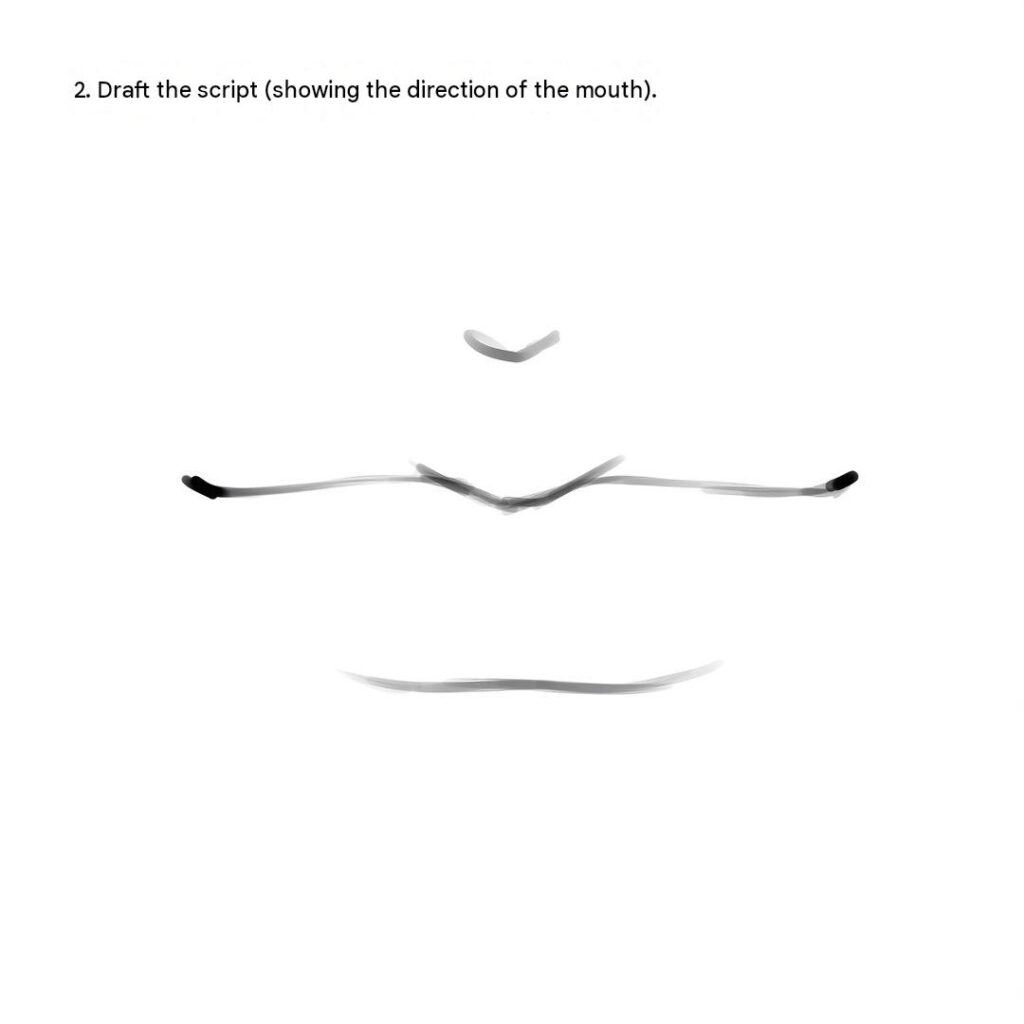
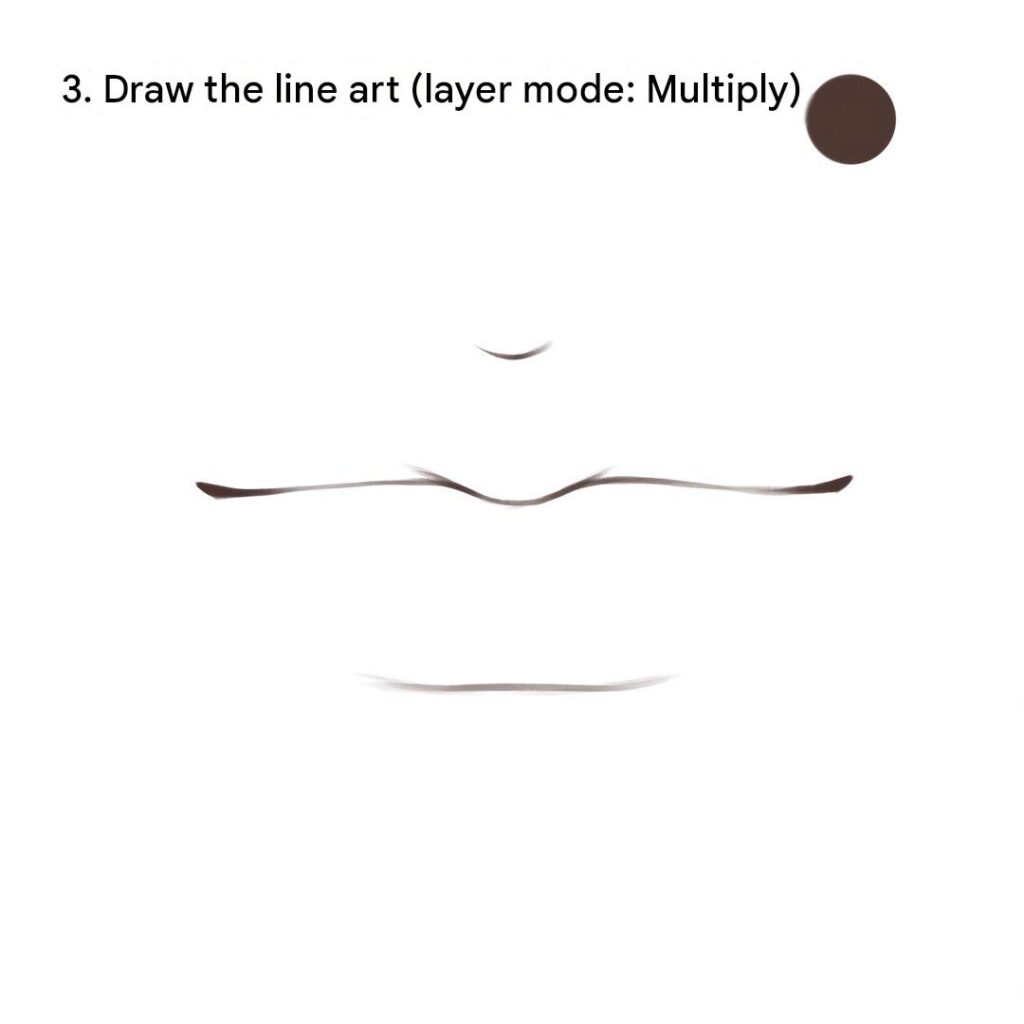
Step 3: Refine your sketch by creating clean and smooth line art. Use a dark brown or soft black color to define the lip contours.
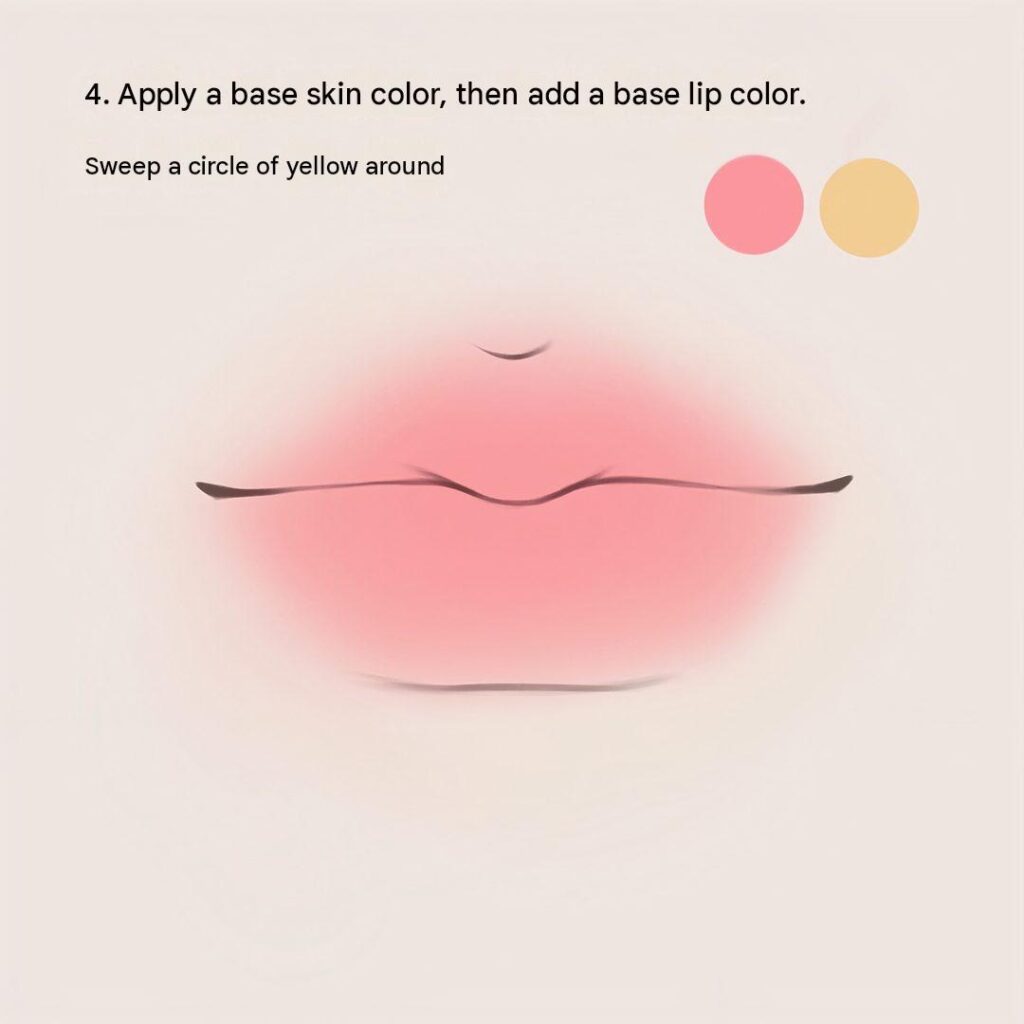
Step 4: Choose a soft skin tone for the surrounding area and a natural pink color for the lips.
Step 5: Use a darker pink or reddish tone to add shadows around the upper and lower lips.
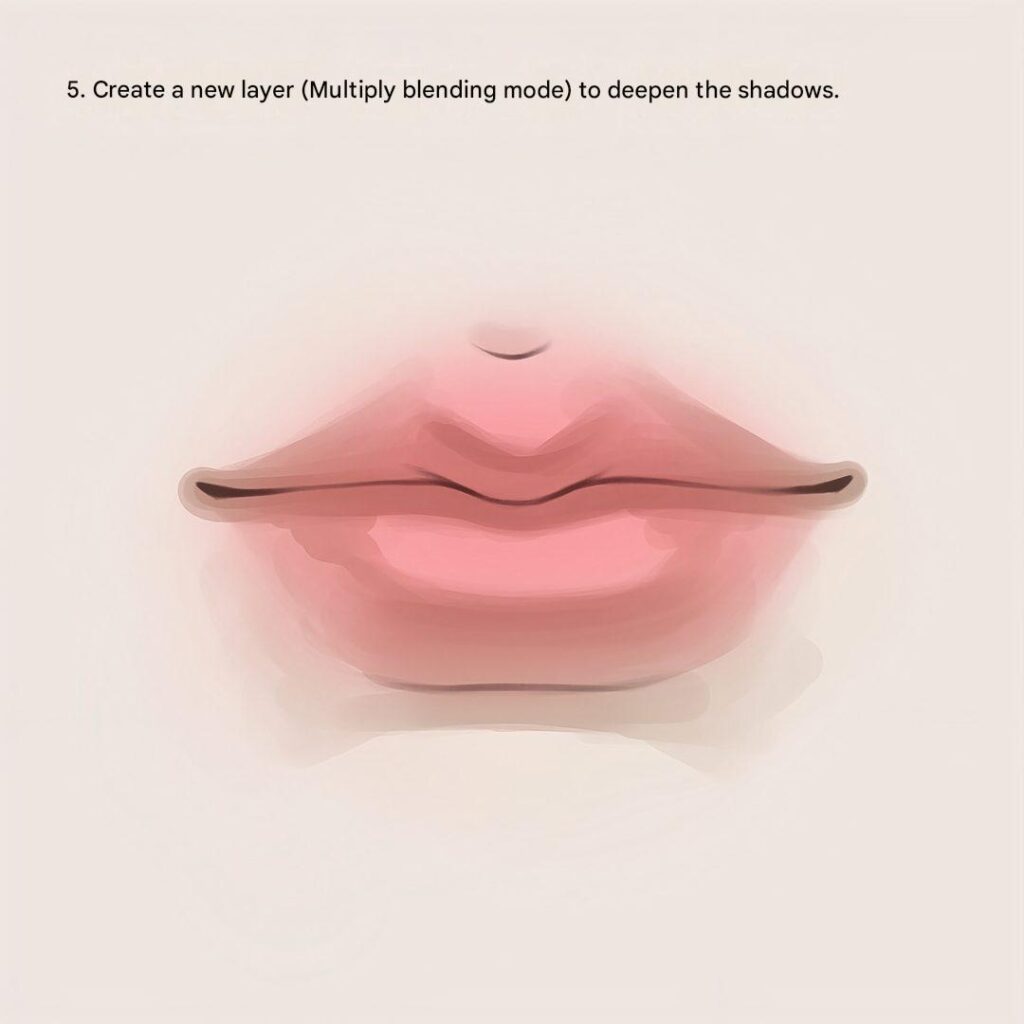
Step 6: Carefully blend the darker areas into the lighter sections without losing the original lip shape. Smooth color transitions will help create a soft and natural appearance.
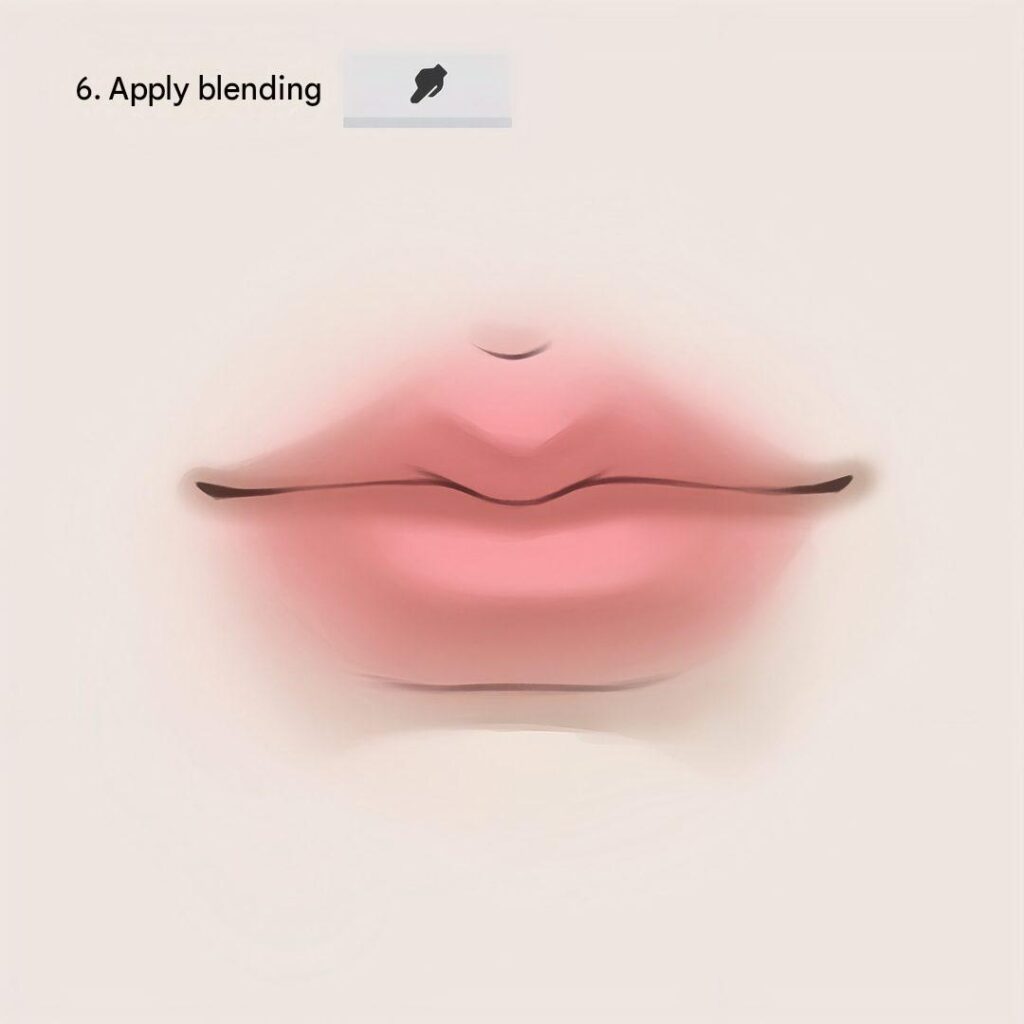
Step 7: Apply the color mainly to the upper and lower lips, concentrating on areas that need more saturation. Blend the edges gently to maintain a consistent and natural color gradient.
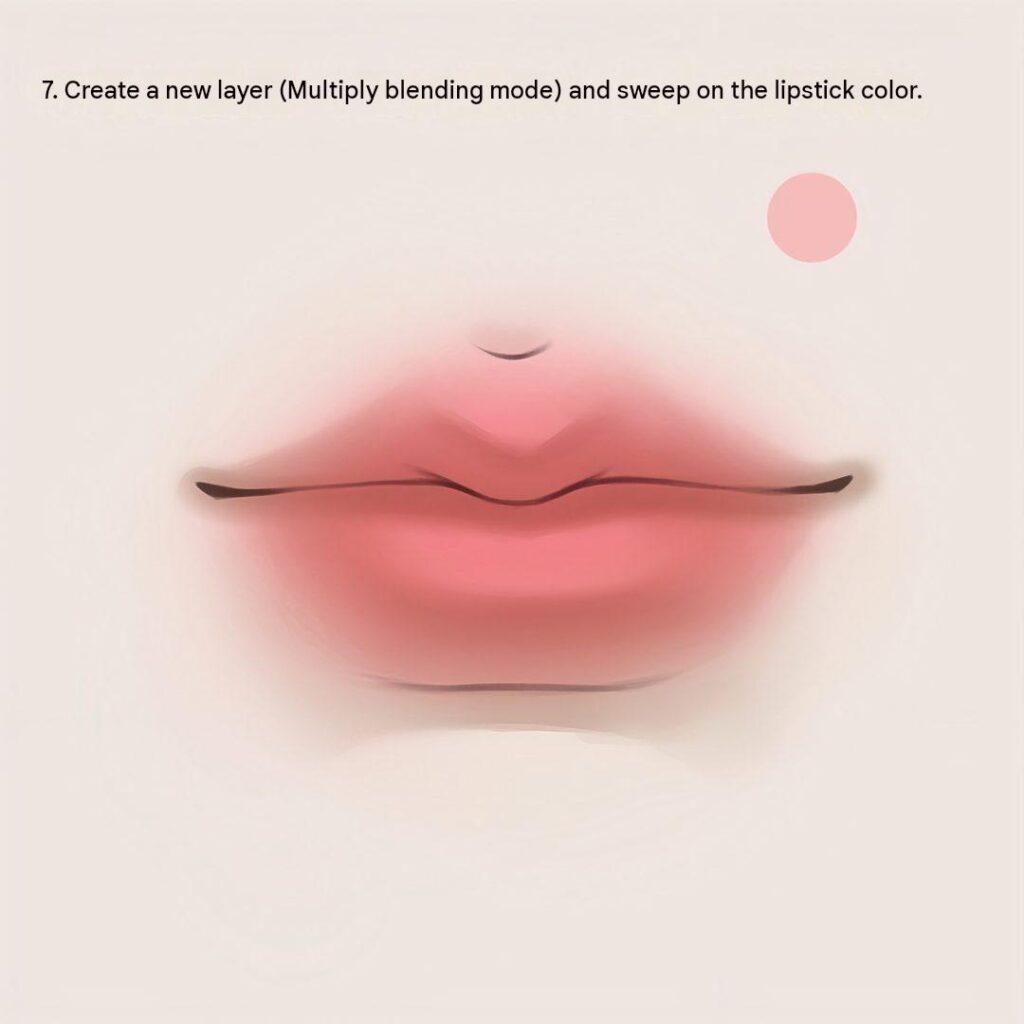
Step 8: Use a soft pink or warm highlight color to brighten selected areas of the lips. This technique helps enhance the lighting and makes the overall illustration appear more vibrant.
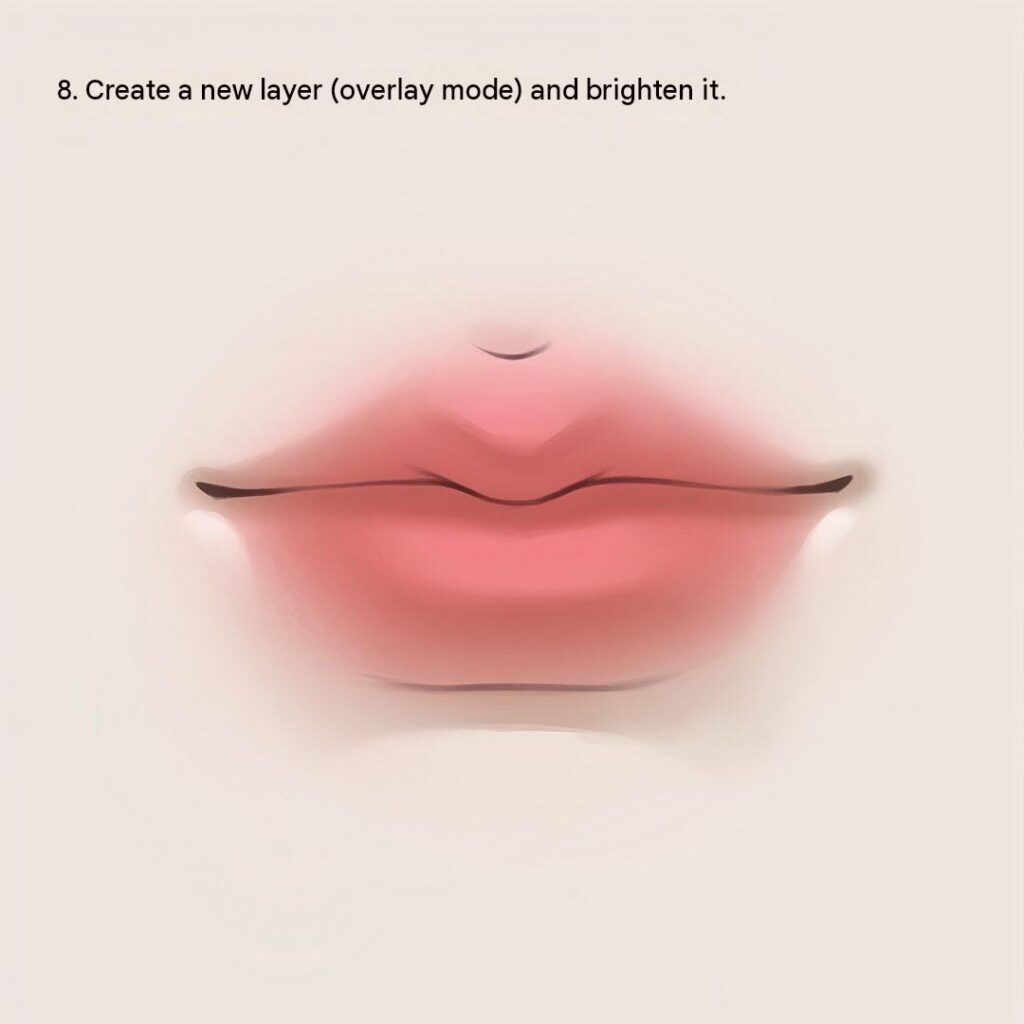
Step 9: Deepen the Shadows Around the Lip Corners
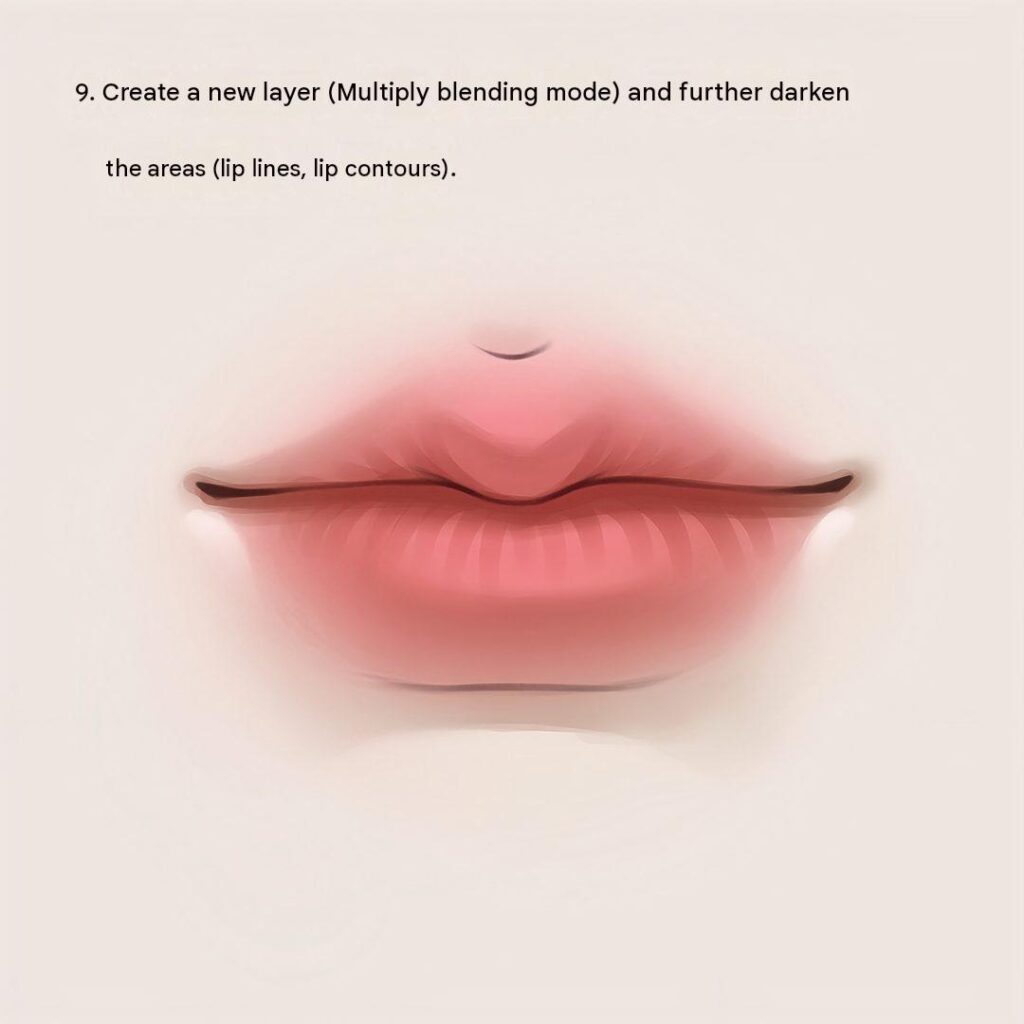
Step 10: Adjust the intensity of the darker tones and soften any harsh transitions. Make sure the upper and lower lips have enough contrast to create a realistic three-dimensional effect.
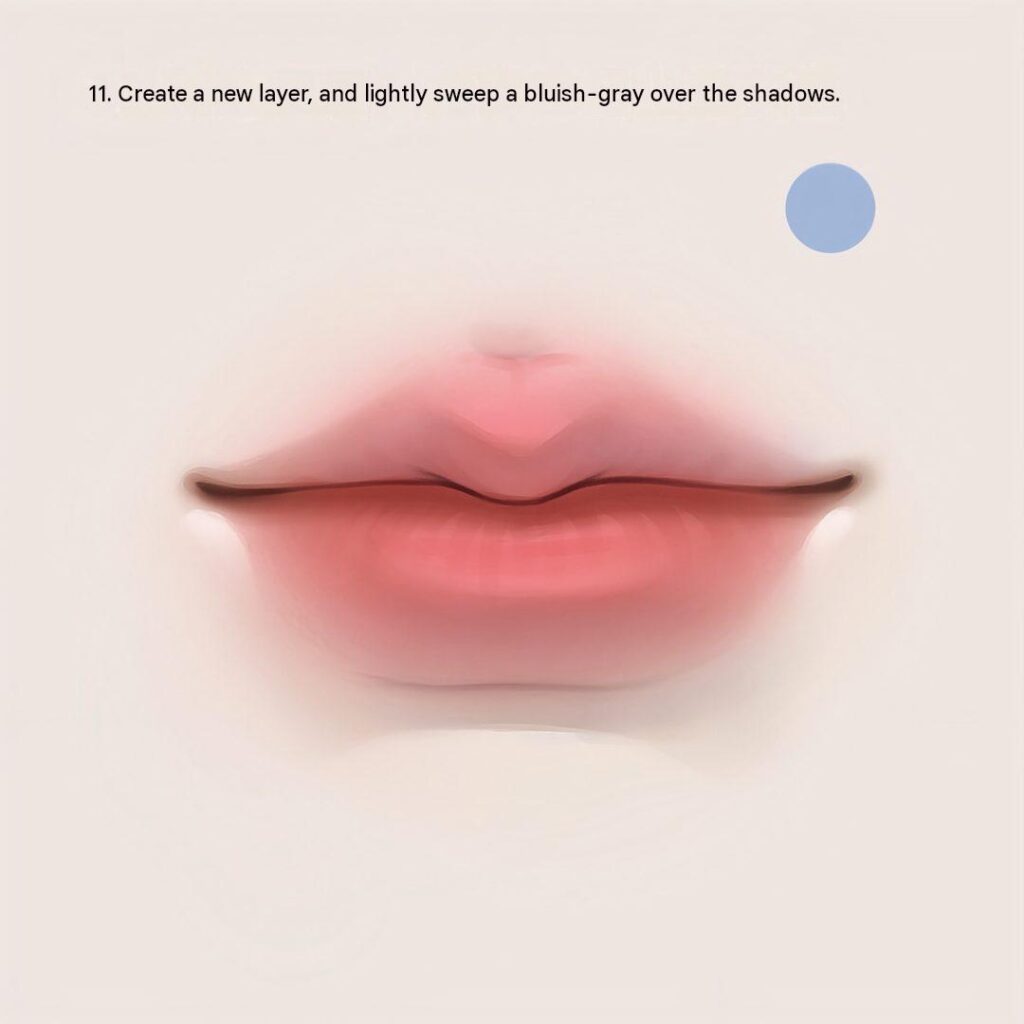
Step 11: Introduce delicate vertical lines and gentle variations in color to represent natural lip texture. Avoid making the details too strong, as subtle textures create a more realistic finish.
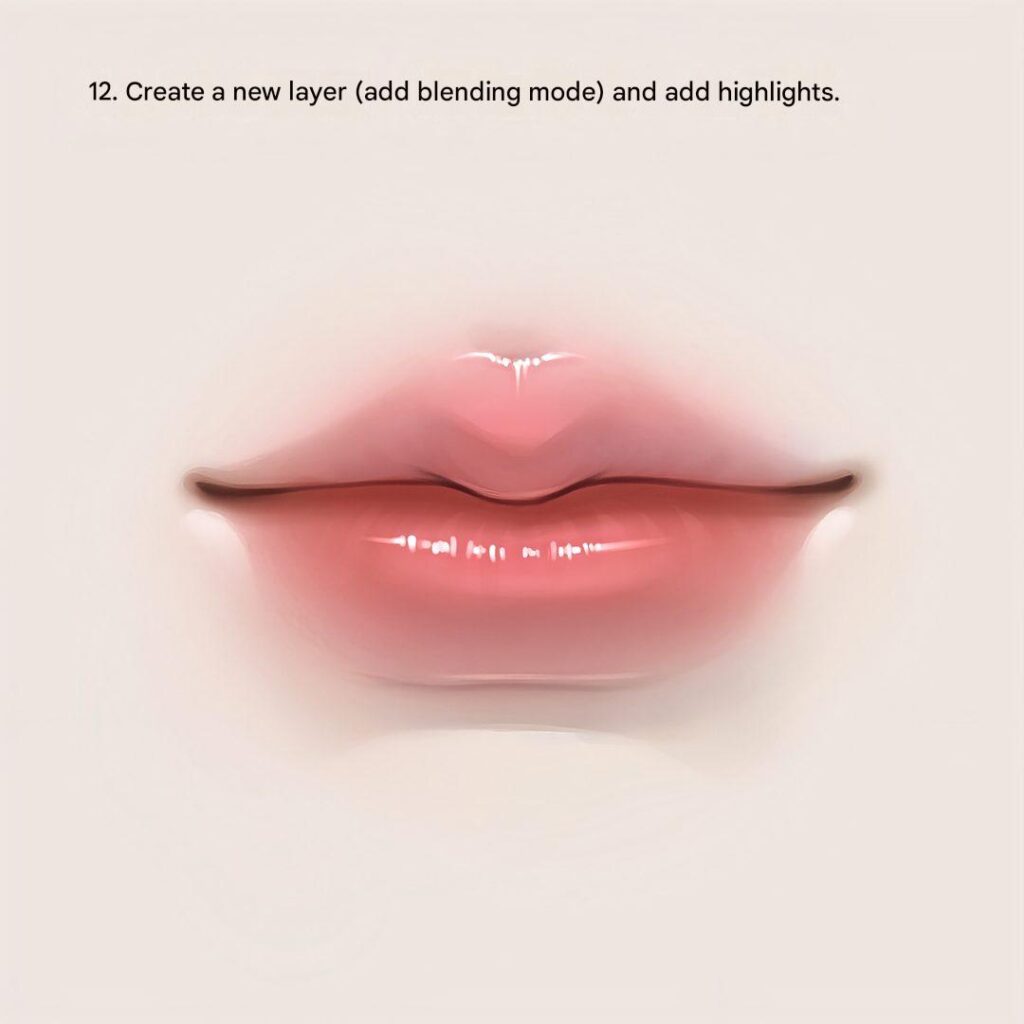
Step 12: Focus on the areas that receive the most light, especially the center of the lower lip and selected sections of the upper lip. Use a combination of soft and sharp brush strokes to create natural light reflections.

Leave a Reply