
In this tutorial, you will learn how to draw a girl legs with two ways, from creating the initial line art to adding realistic shadows, highlights, and final details.
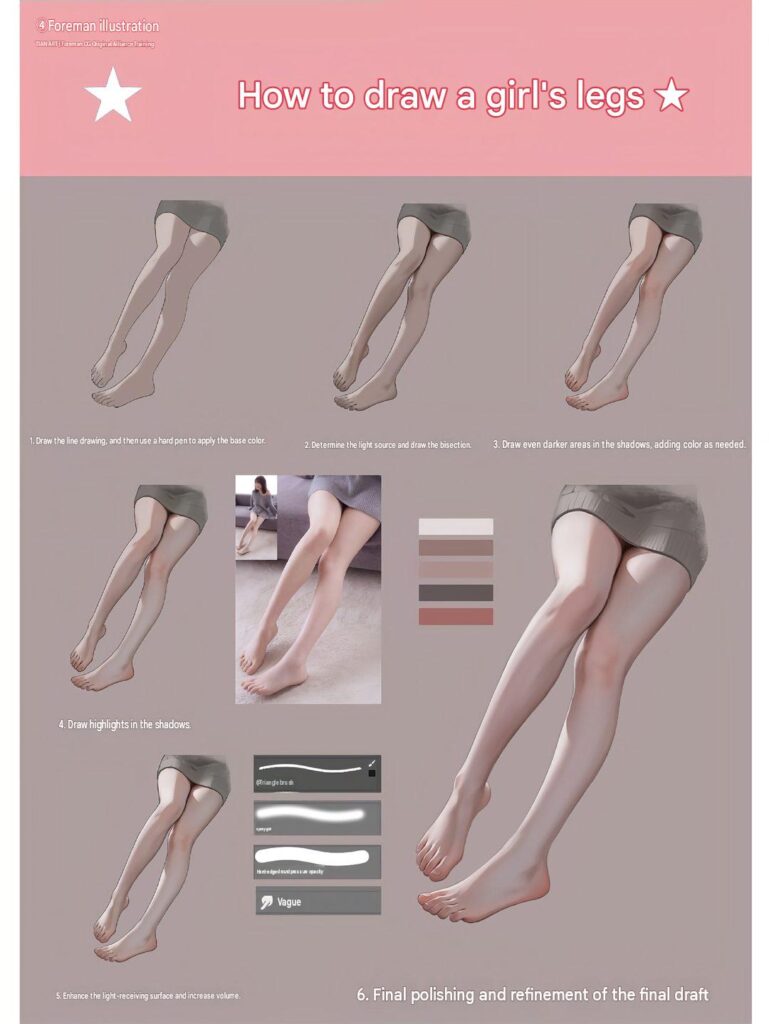
How to Draw a Girl Leg – Easy Digital Art Tutorial
1. How to Draw a Girl’s Legs Step by Step – Easy Digital Art Tutorial
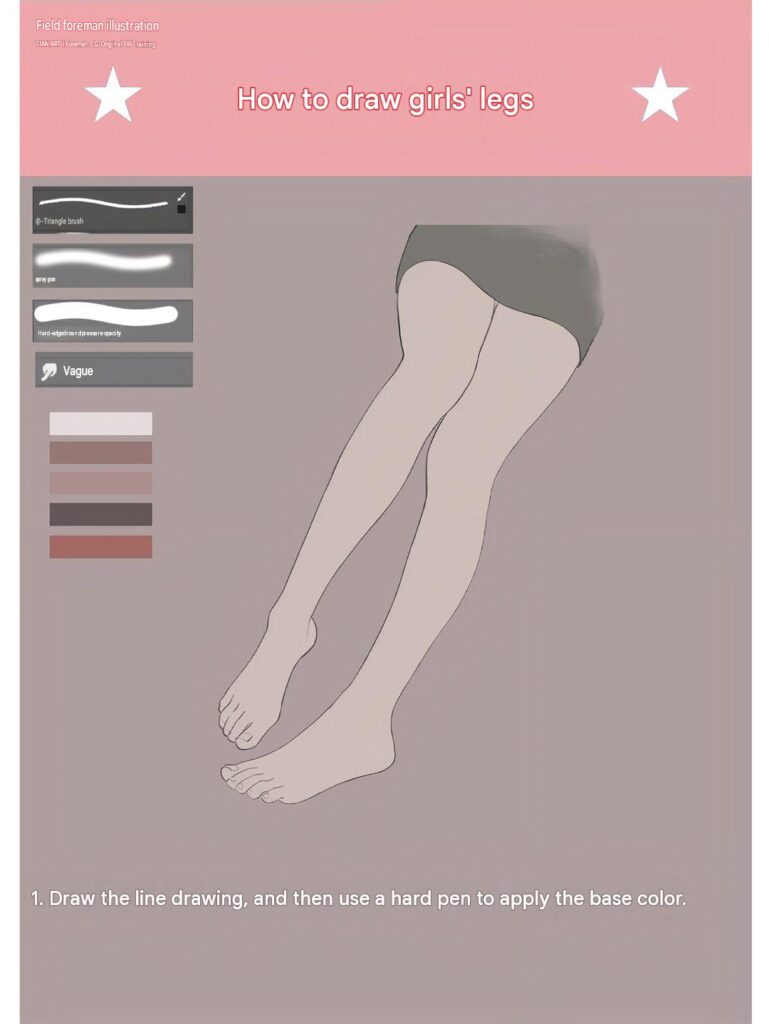
Step 1: Begin by sketching the basic structure of the legs. Focus on the overall proportions, natural curves, knees, calves, ankles, and feet.
Once the outline is complete, use a hard-edged brush to apply the base skin color. Choose a soft, natural skin tone to establish the foundation for your digital painting.
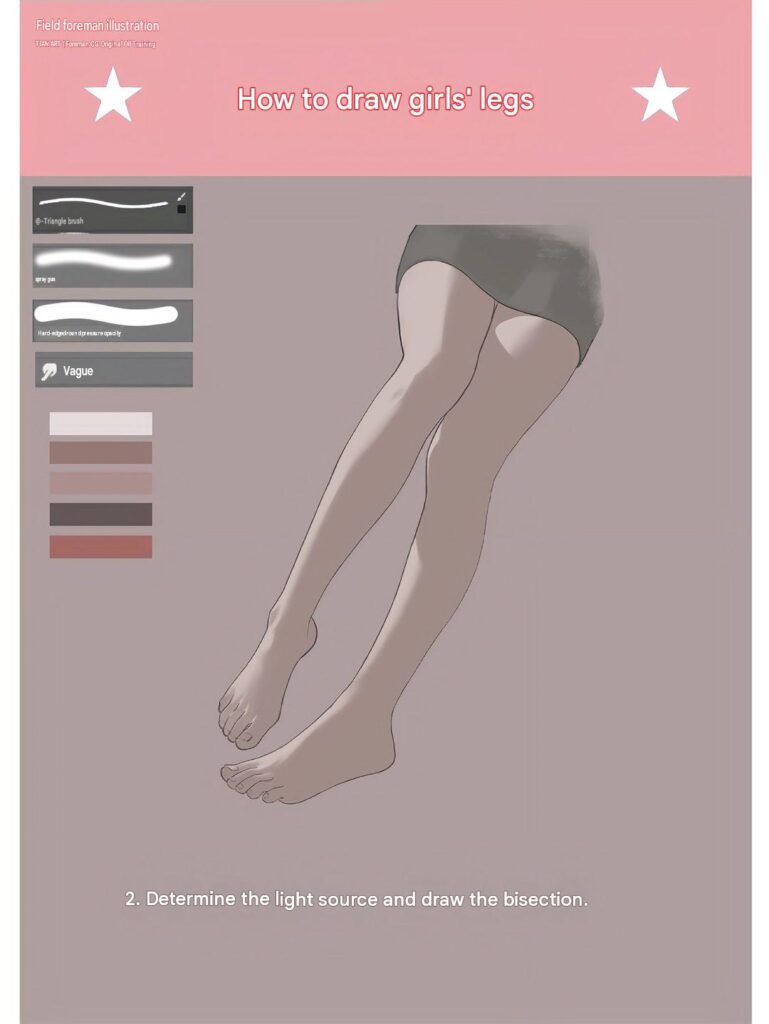
Step 2: Before adding shadows, decide where the main light source is coming from. This will help you understand which areas should appear brighter and which parts should remain darker.
Use subtle guide lines to divide the light and shadow areas. Pay attention to the thighs, knees, calves, and ankles to maintain consistent lighting throughout the illustration.
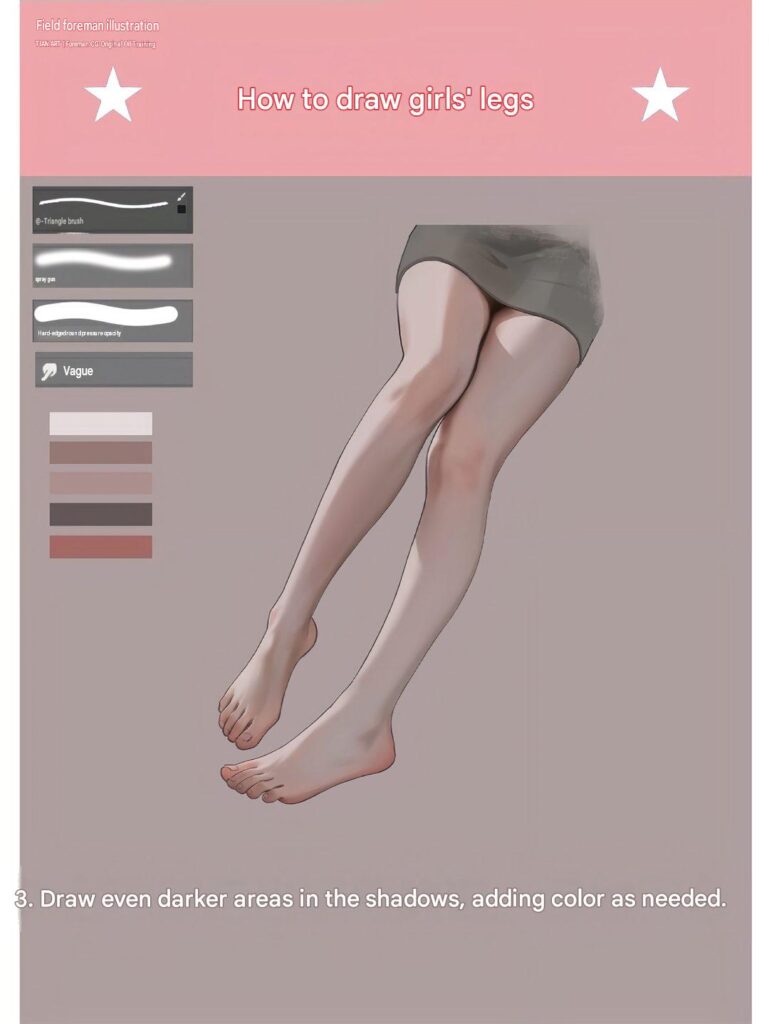
Step 3: Start adding darker skin tones to the areas that receive less light. Focus on the inner thighs, the spaces between the legs, the knees, and the sides of the calves.
Gradually build up the shadows using different shades. Avoid making the transitions too harsh, as smooth blending helps create a more realistic appearance.
Step 4: Introduce lighter colors to enhance the illuminated surfaces of the legs. Apply highlights along the thighs, knees, shins, and calves.
Use a soft brush to blend the highlights into the surrounding shadows. This creates smoother transitions and gives the legs a more natural three-dimensional appearance.
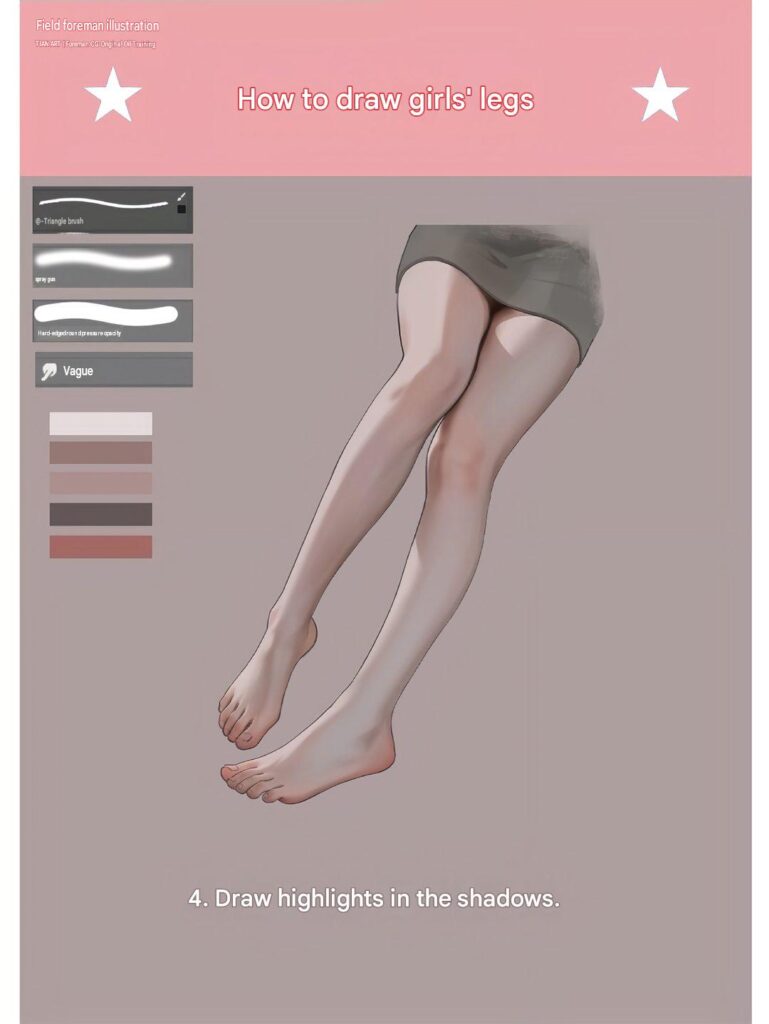
Step 5: Refine the areas that receive the most light to increase the overall volume of the legs.
Strengthen the highlights on the thighs and lower legs while adjusting the surrounding shadows. Pay attention to the natural curves and anatomical structure to make the illustration look more dimensional.
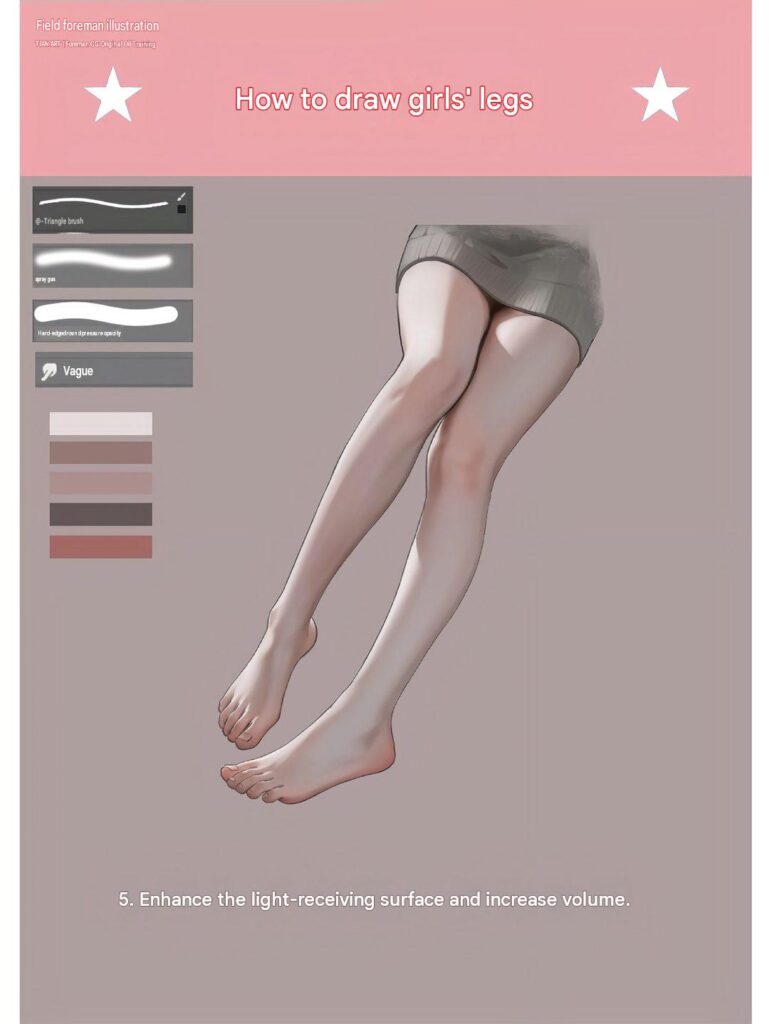
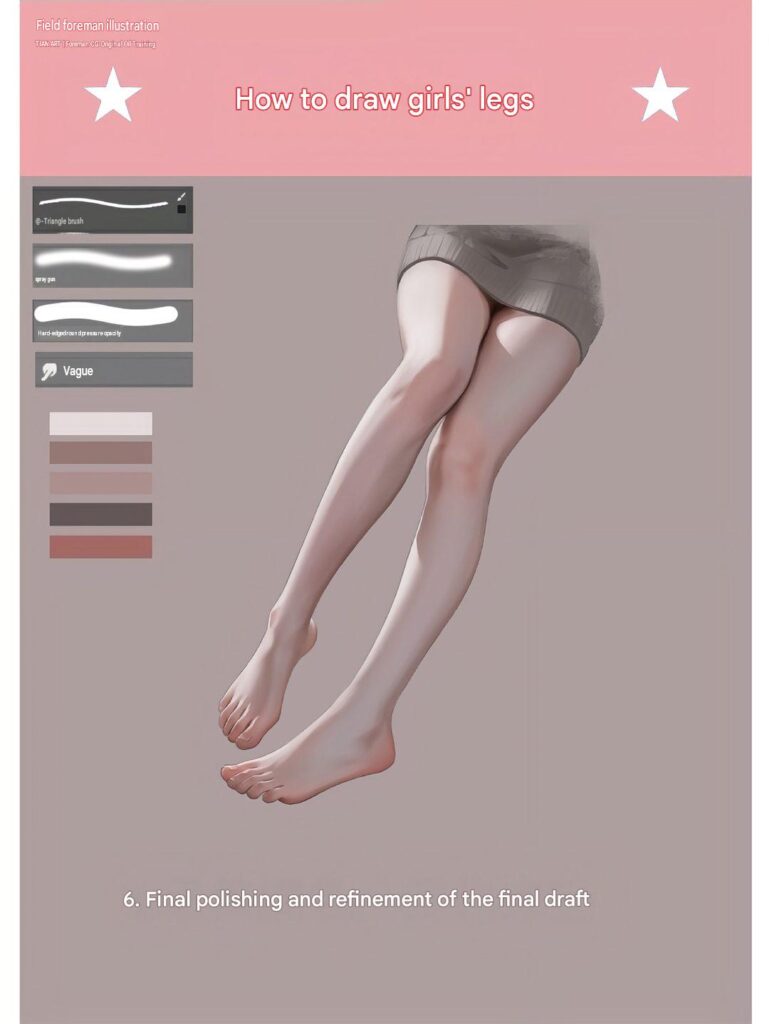
Step 6: In the final stage, carefully review the entire illustration. Refine the outlines, smooth out color transitions, and adjust the highlights and shadows where necessary.
Use different brush techniques, such as soft airbrush strokes and controlled hard-edged details, to achieve a clean and polished finish.
Make any final adjustments to the skin tones and lighting until the artwork looks balanced and complete.
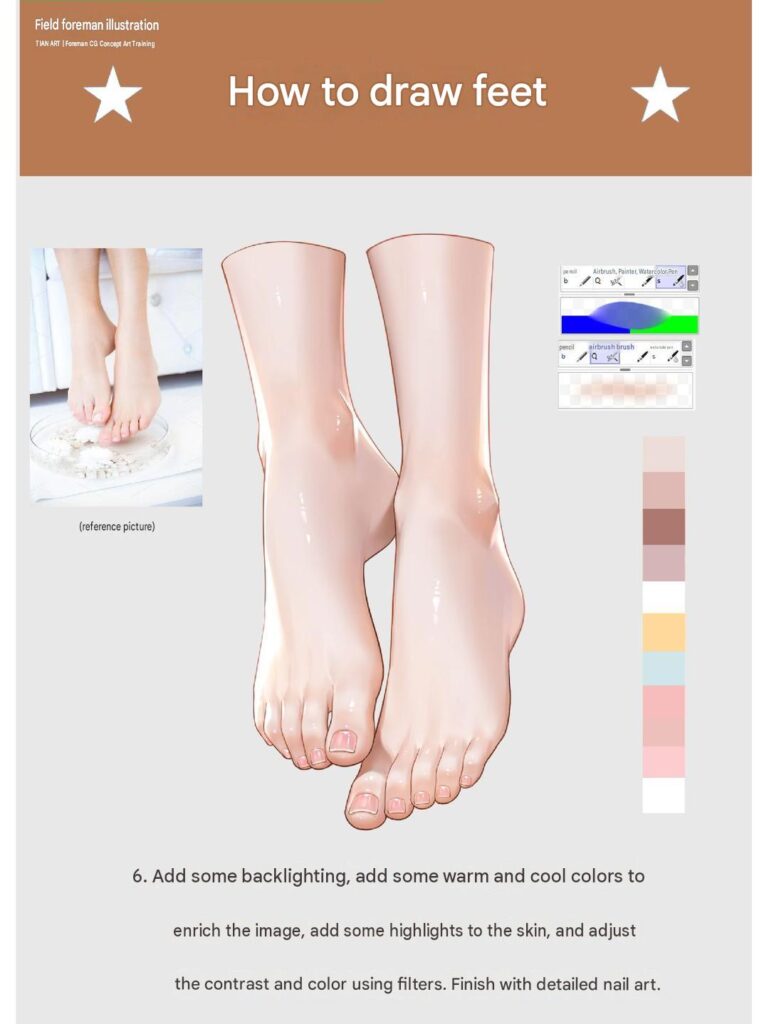
2. How to Draw Feet Step by Step
Step 1: Start by sketching the basic shapes of both feet and ankles. Use light pencil strokes to establish the overall proportions, direction, and positioning of each foot.
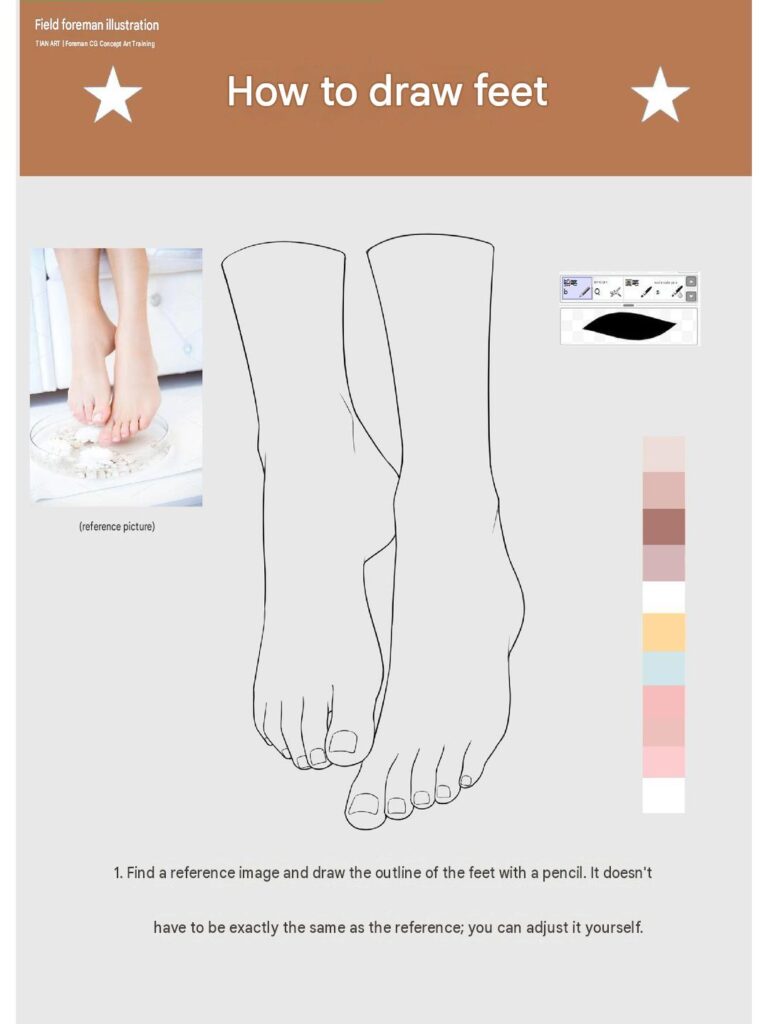
Step 2: Once the outline is complete, fill in the feet with a light skin tone. Choose a soft peach or pale pink color as the foundation.
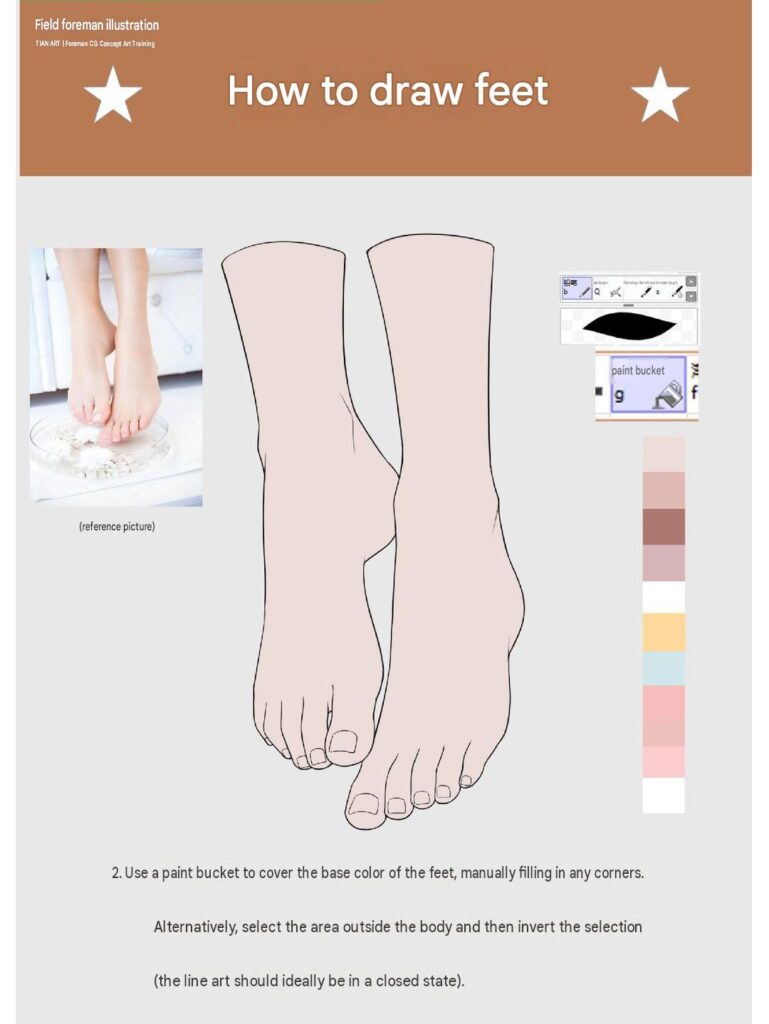
Step 3: Next, introduce a slightly darker skin tone to create depth and dimension. Focus on areas where natural shadows appear, such as between the toes, around the ankles, beneath the feet, and along the sides of the heels.
Use a soft brush to blend the darker colors smoothly into the base layer.
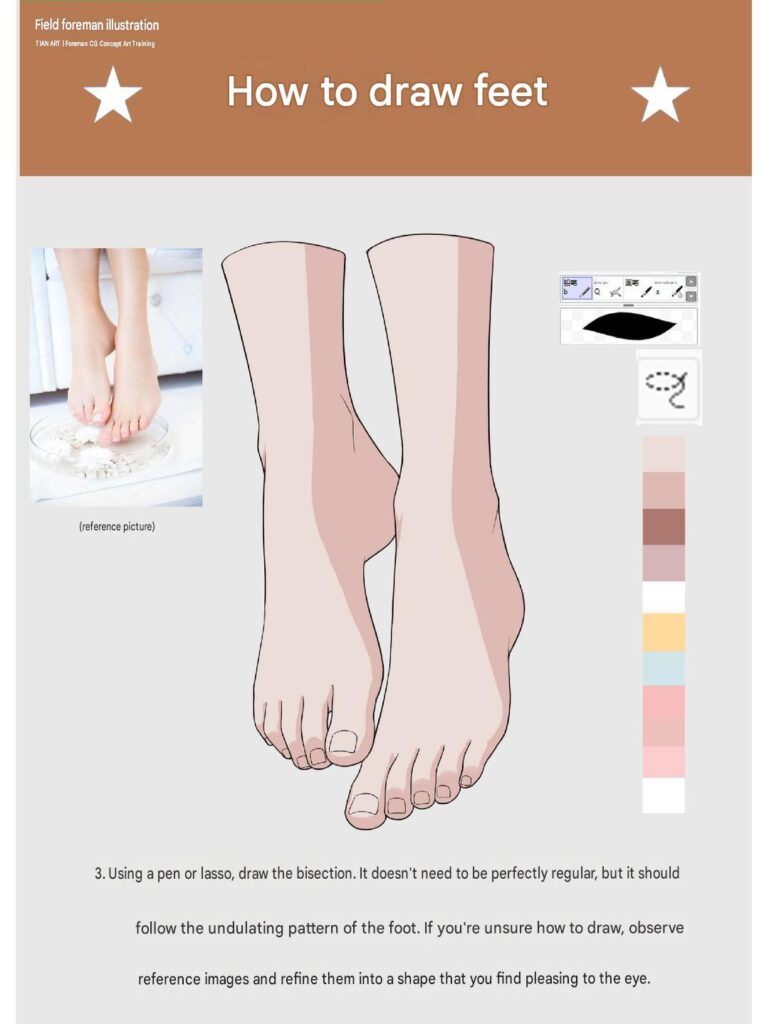
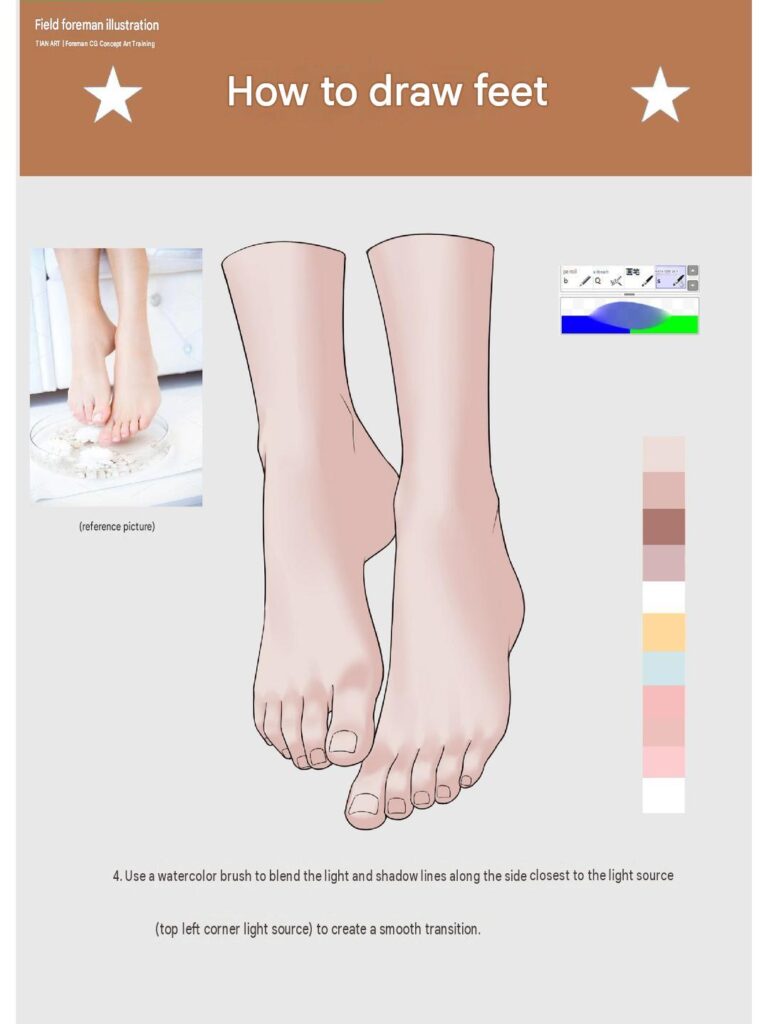
Step 4: Gradually blend the shadows and base colors to make the feet look more three-dimensional.
Use gentle brush strokes to create natural transitions between light and dark areas. Pay special attention to the curves of the toes, ankles, and upper surfaces of the feet.
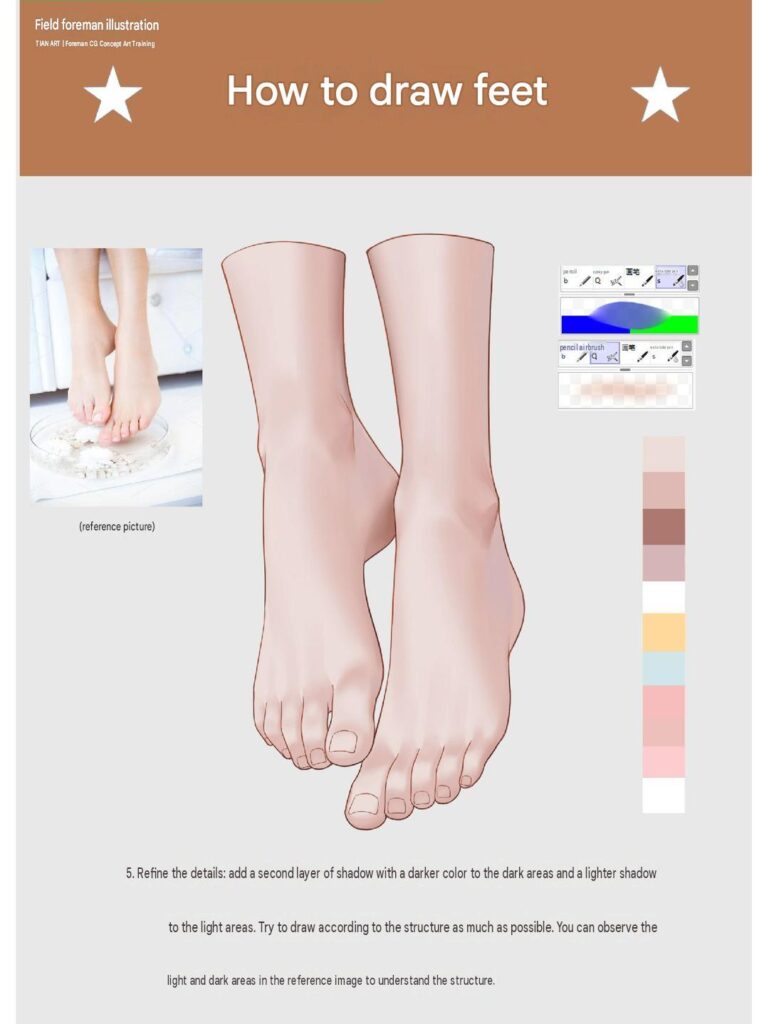
Step 5: Now, refine the outlines and improve the overall appearance of the feet. Add details to the individual toes, toenails, joints, and subtle skin folds.
Step 6: In the final step, use a light pink or pale cream color to add highlights to the upper surfaces of the feet, toes, and toenails.





Leave a Reply