
Learning how to draw abdominal muscles is an essential skill for artists who want to improve their understanding of human anatomy and muscular body proportions. The abdominal area can be challenging to illustrate because it contains several muscle groups, subtle curves, and complex lighting effects.
In this step-by-step tutorial, you will learn how to draw realistic male abdominal muscles, starting with a basic anatomical sketch and gradually building volume through colors, shadows, highlights, and texture.
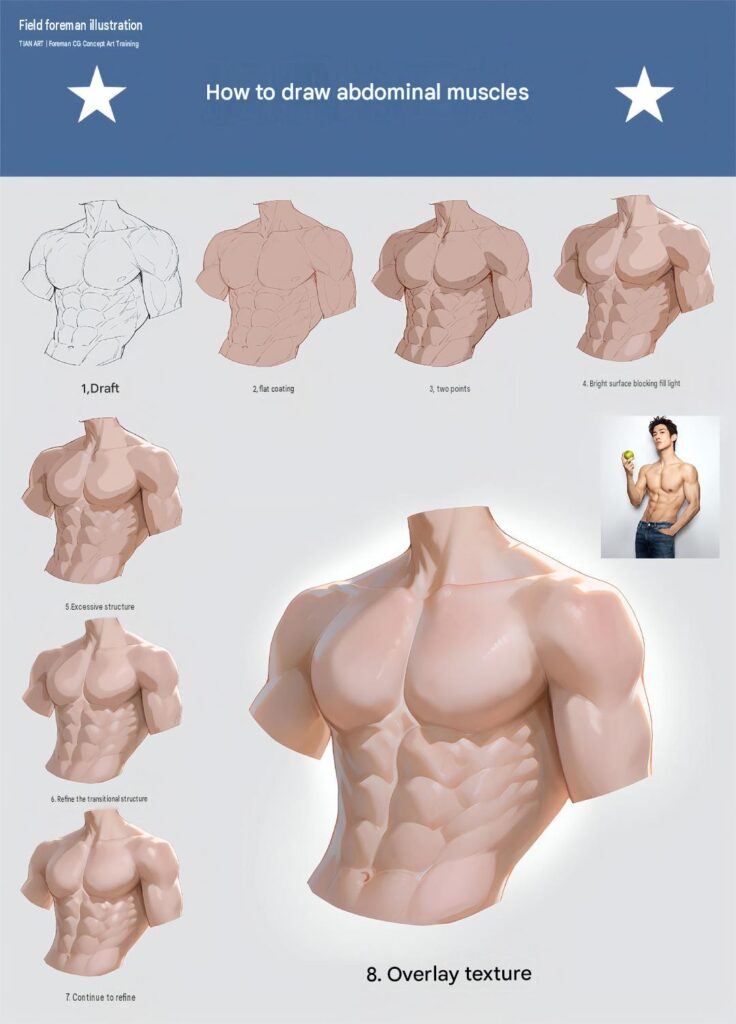
How to Draw Abdominal Muscles – 8 Easy Steps for Beginners
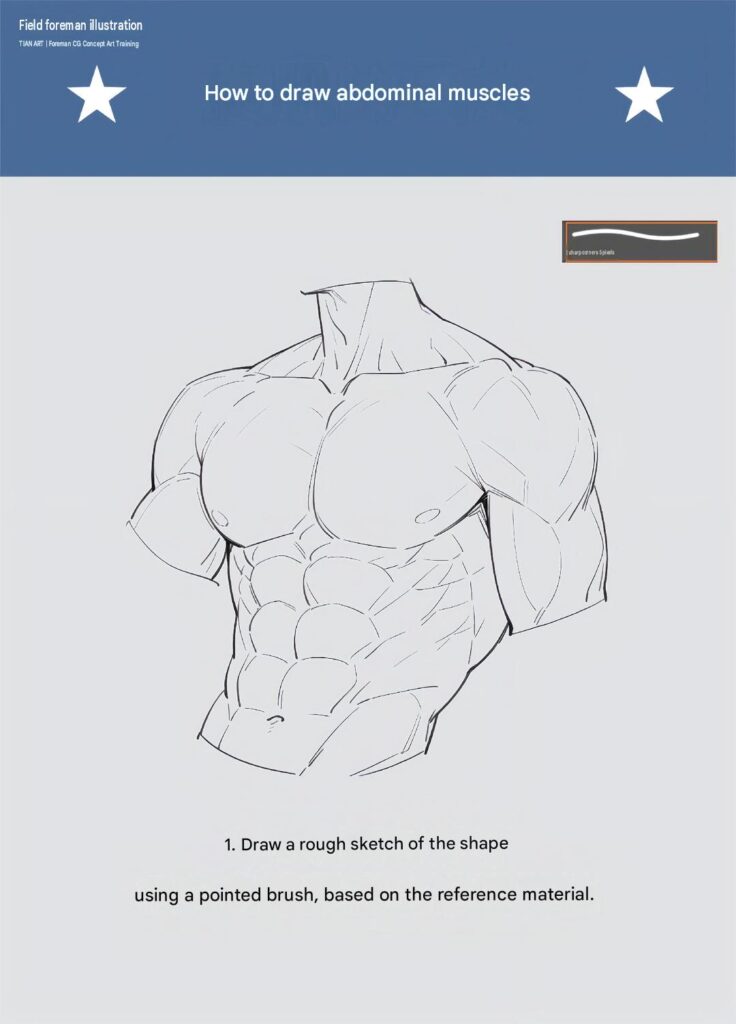
Step 1: Create the Basic Anatomy Sketch
Begin by sketching the upper body structure from the front.
Draw the neck, shoulders, chest, upper arms, rib cage, waist, and abdominal area. Use simple shapes and guidelines to establish the overall proportions.
Next, outline the major muscle groups, including the pectorals, rectus abdominis, obliques, and serratus anterior.
Pay attention to the natural curves of the torso. Keep your initial lines light so you can easily adjust the anatomy later.
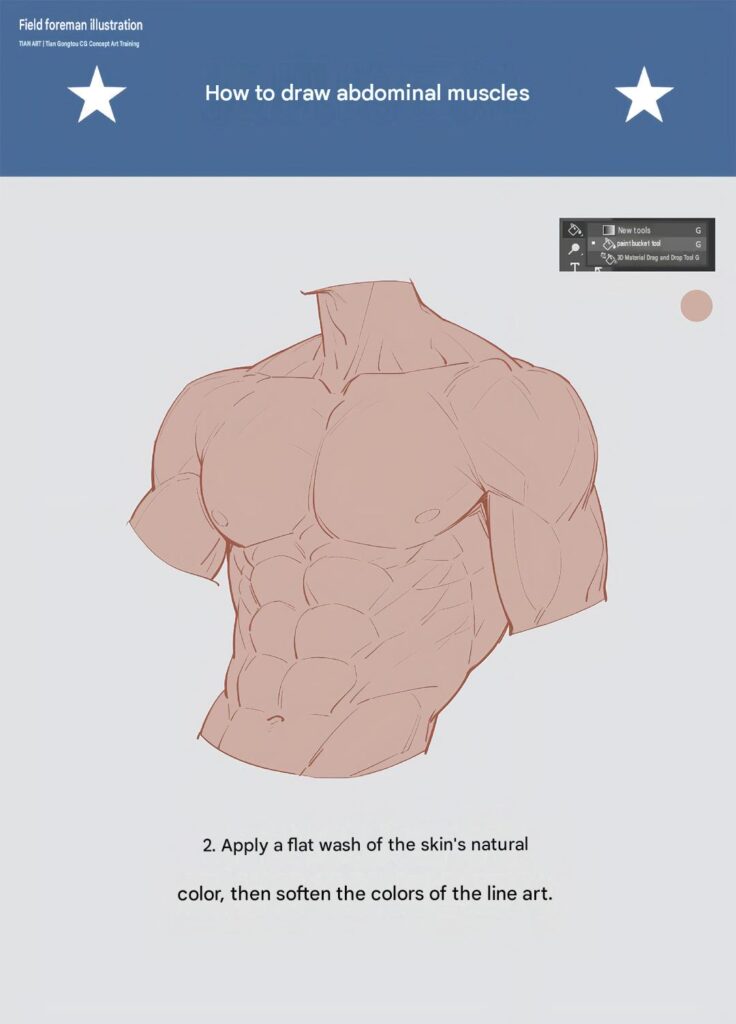
Step 2: Apply the Base Skin Colors
Once the sketch is complete, begin applying the flat base colors.
Choose a warm peach or light tan tone for the entire torso. Apply the same base color consistently across the chest, shoulders, arms, and abdomen.
At this stage, focus on covering the main areas without adding complicated shadows or highlights.
Keep the color application smooth and even to create a solid foundation for the next steps.
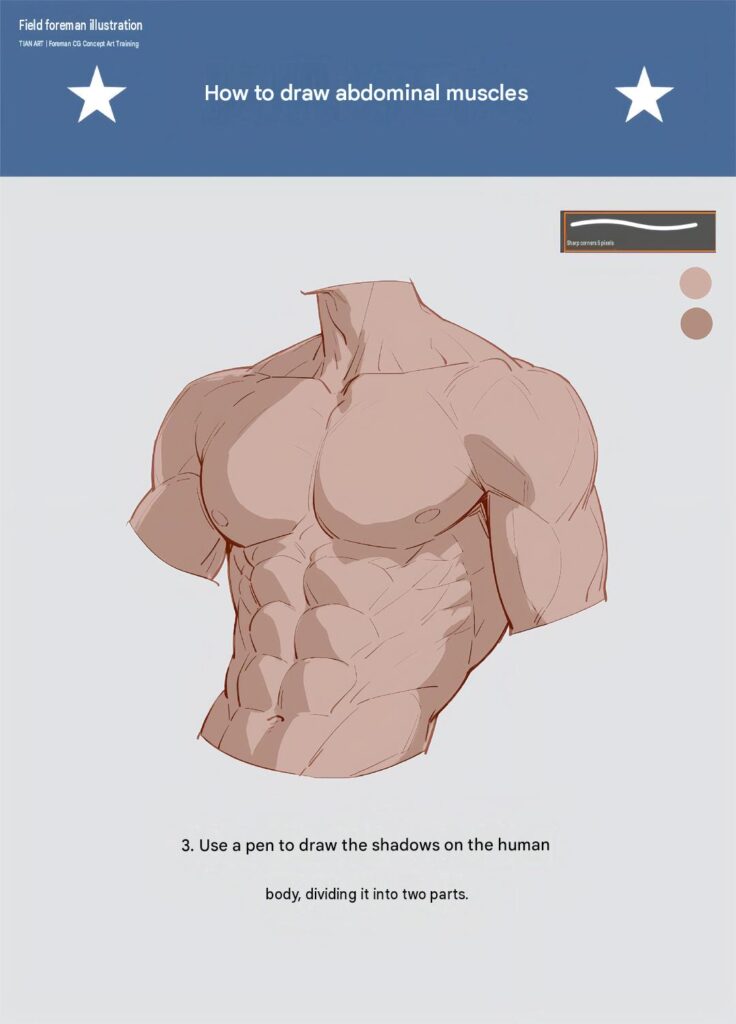
Step 3: Establish the Main Shadow Areas
Start adding shadows to define the muscular structure.
Use a slightly darker skin tone around the sides of the torso, underneath the pectoral muscles, and between the abdominal sections.
Add shadows along the obliques and beneath the rib cage to emphasize the natural separation between muscle groups.
Remember that muscles should connect smoothly rather than appearing as completely separate blocks.
Step 4: Add Light and Bright Surface Areas
Introduce lighter tones to create volume and make the muscles appear more three-dimensional.
Apply brighter skin tones to the raised surfaces of the chest, shoulders, and abdominal muscles.
Focus on the areas that face the main light source. Keep the highlights soft and avoid making every muscle equally bright.
This contrast between light and shadow helps establish the overall form of the body.
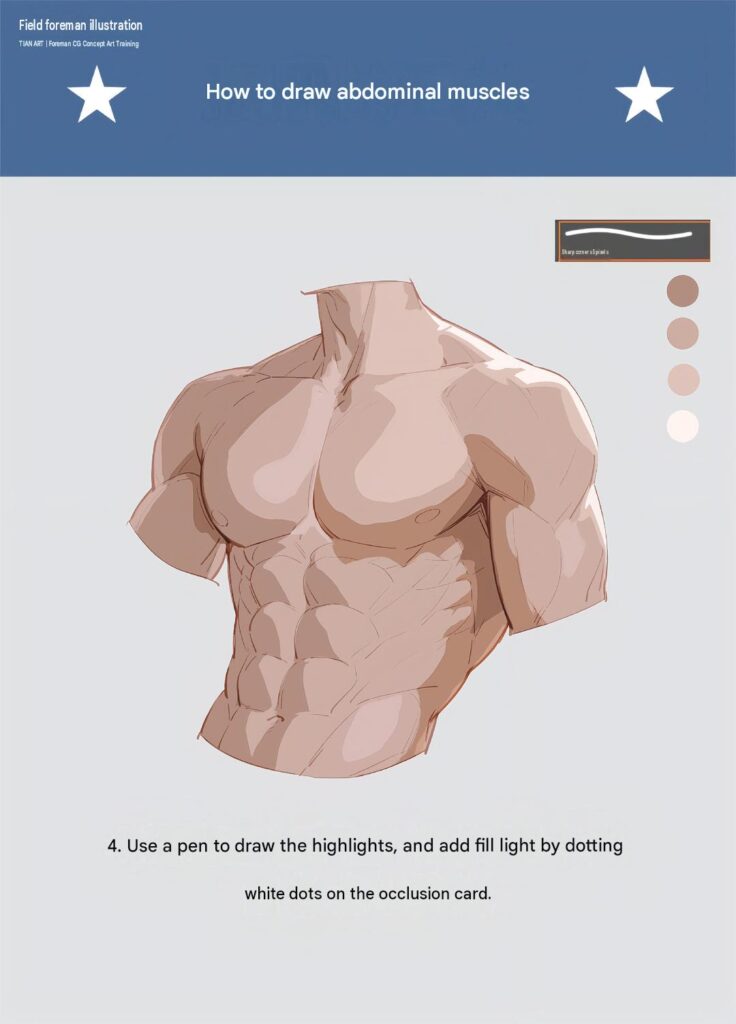
Step 5: Strengthen the Muscle Definition
Now refine the individual muscle shapes.
Improve the separation between the pectoral muscles, abdominal sections, and obliques. Add darker tones around the muscle boundaries to emphasize their structure.
Pay special attention to the six-pack arrangement and the natural connection between the chest and abdomen.
Avoid making the muscle divisions too sharp or symmetrical. Natural anatomical variation makes the drawing more convincing.
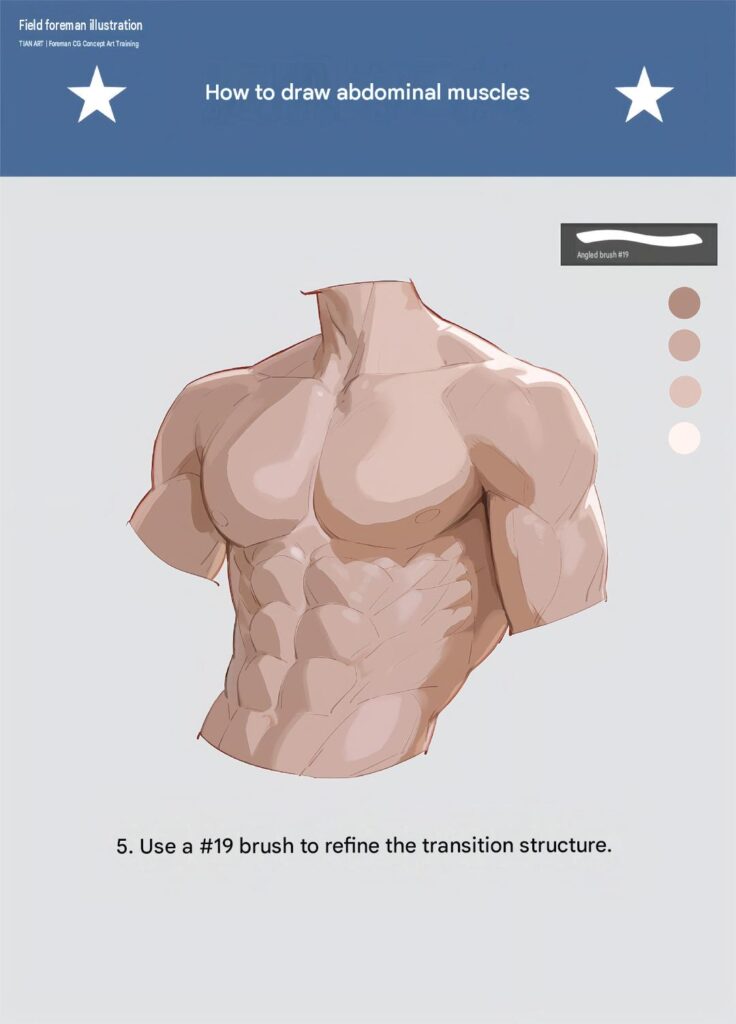
Step 6: Refine the Muscle Transitions
Smooth the transitions between the different muscle groups.
Blend the shadows into the base skin colors and soften harsh edges where the muscles connect.
Refine the shape of the rib cage, waist, and lower abdominal area. Add subtle shading to create a natural flow between the upper and lower torso.
The goal is to make the muscles look connected and rounded rather than flat or overly outlined.
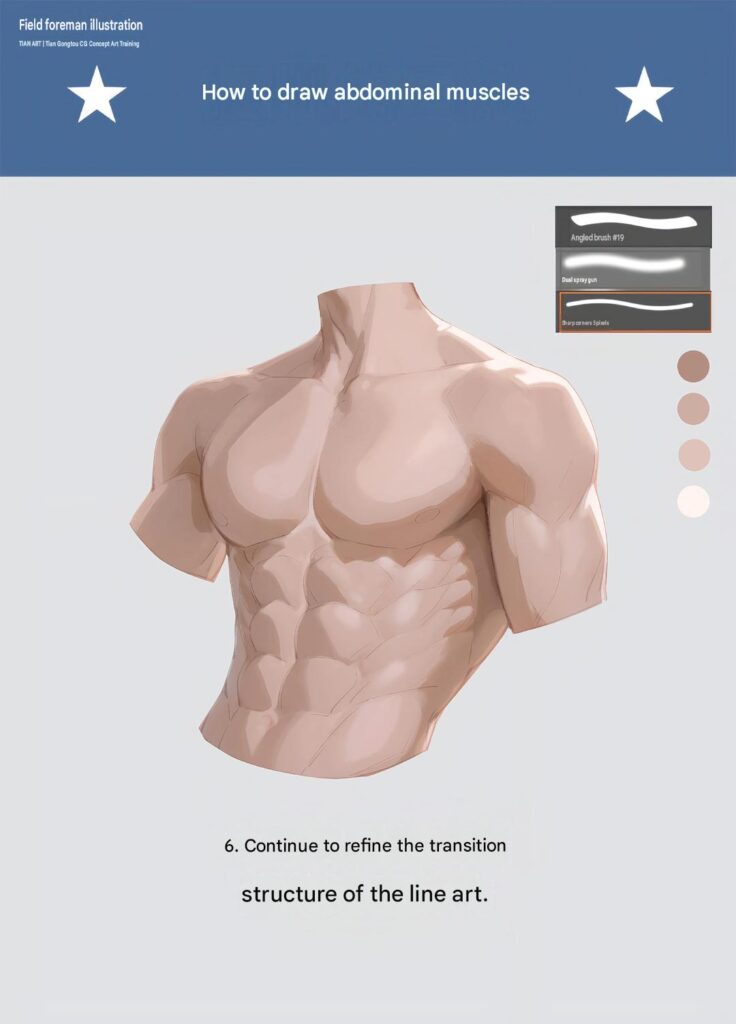
Step 7: Continue Refining the Anatomy and Lighting
Continue improving the overall appearance of the muscular torso.
Adjust the proportions, strengthen important shadows, and add subtle highlights to the raised muscle surfaces.
Refine the shoulders, chest, abdominal muscles, and side contours to create a balanced composition.
Use a combination of warm shadows and soft highlights to give the skin a natural appearance.
Take time to review the entire drawing and correct any areas that look too exaggerated or uneven.
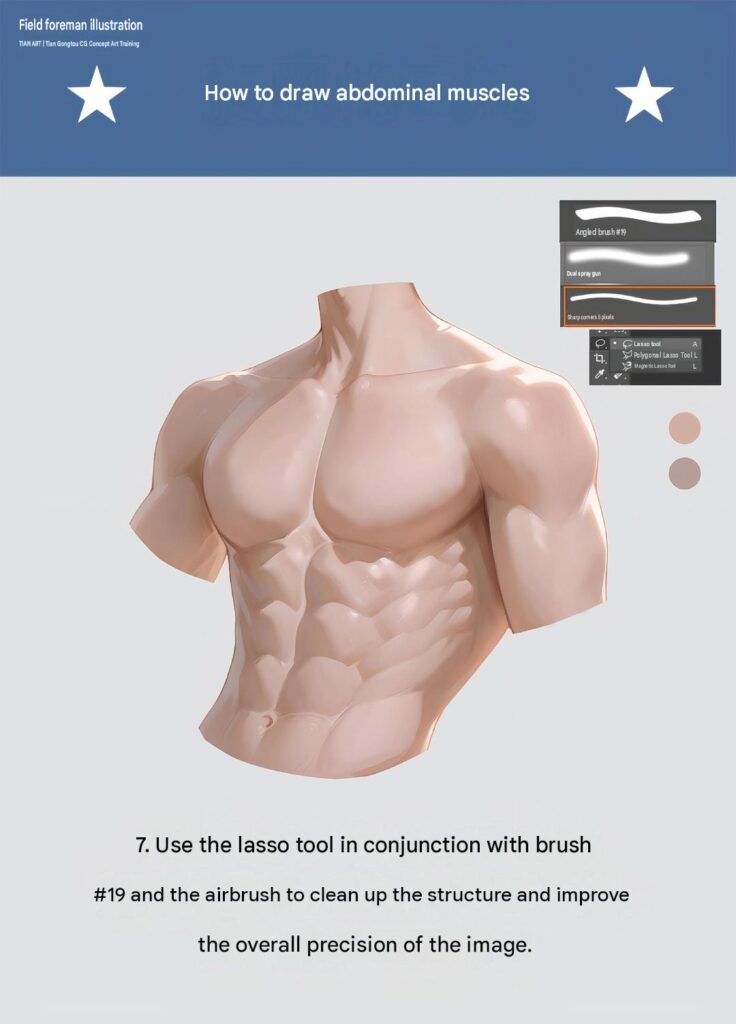
Step 8: Add Texture and Final Details
The final step is to add subtle surface texture and polish the illustration.
Use soft brushes to introduce delicate skin variations and small tonal changes. Add gentle highlights to the chest and abdominal muscles to create a smooth, realistic finish.
Refine the edges, clean up unnecessary sketch lines, and adjust the overall contrast.
Make sure the lighting remains consistent across the entire torso.
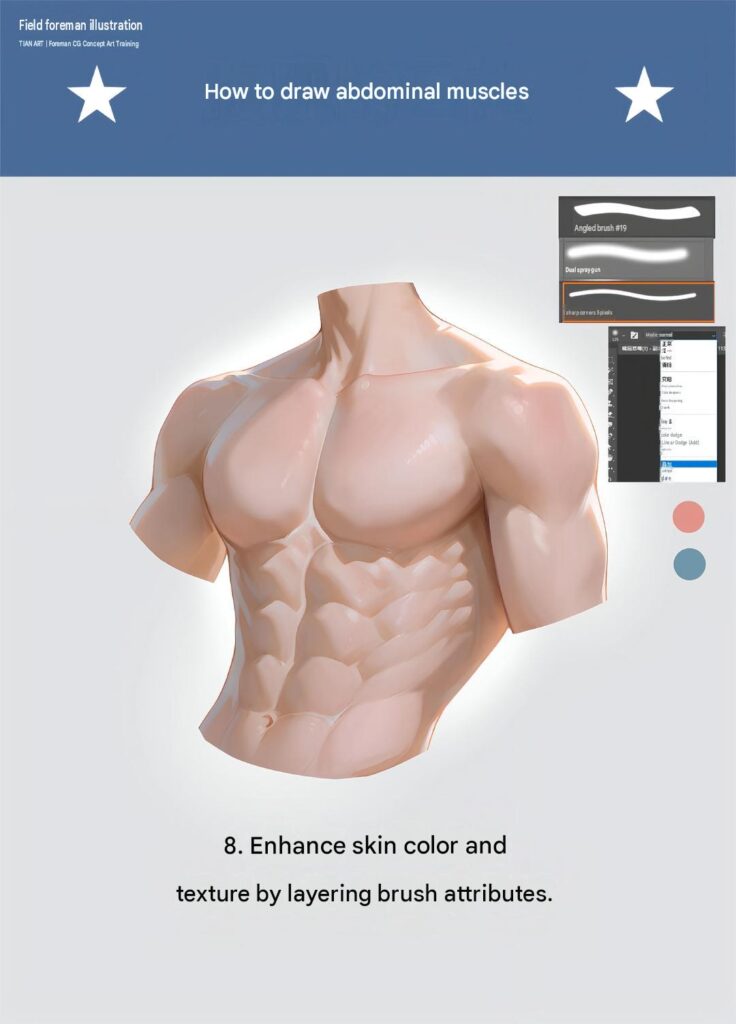
Your realistic abdominal muscle drawing is now complete!


Leave a Reply