
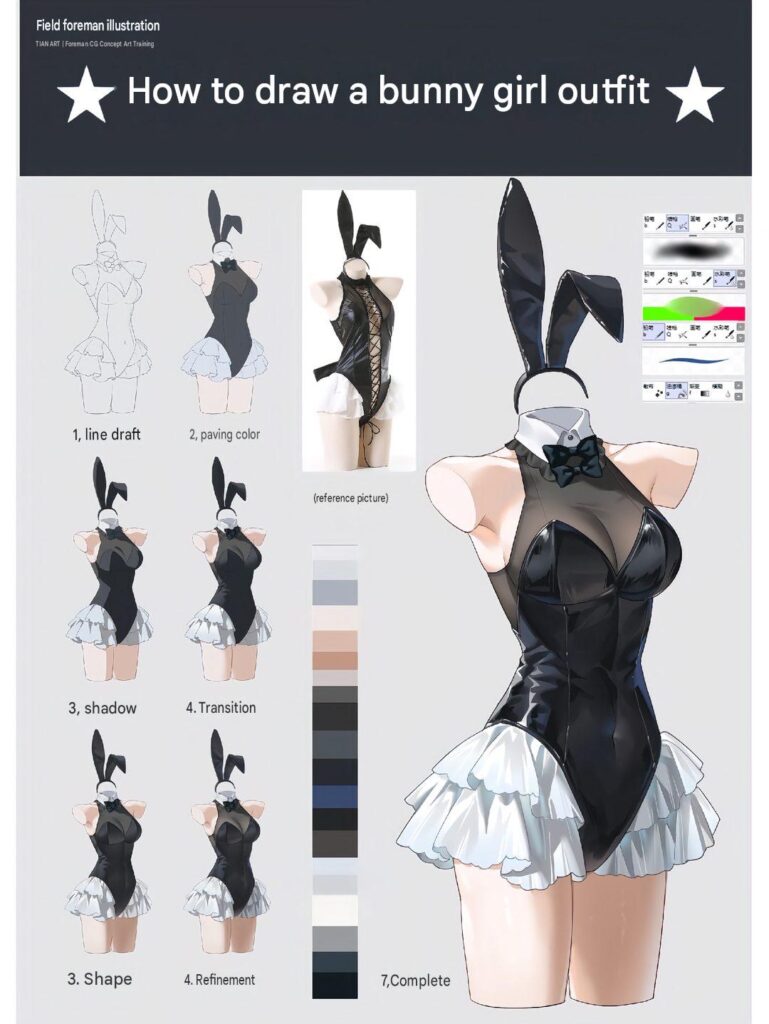
Learning how to draw a bunny girl outfit is a great way to practice fashion illustration, costume design, and digital painting techniques. This stylish outfit combines a fitted black bodysuit, elegant bunny ears, a decorative bow tie, and a layered white skirt.
In this step-by-step tutorial, you will learn how to create a beautiful bunny girl costume illustration, starting with a basic line sketch and gradually adding colors, shadows, highlights, and realistic fabric details.
How to Draw a Bunny Girl Outfit – Step-by-Step Digital Art Tutorial
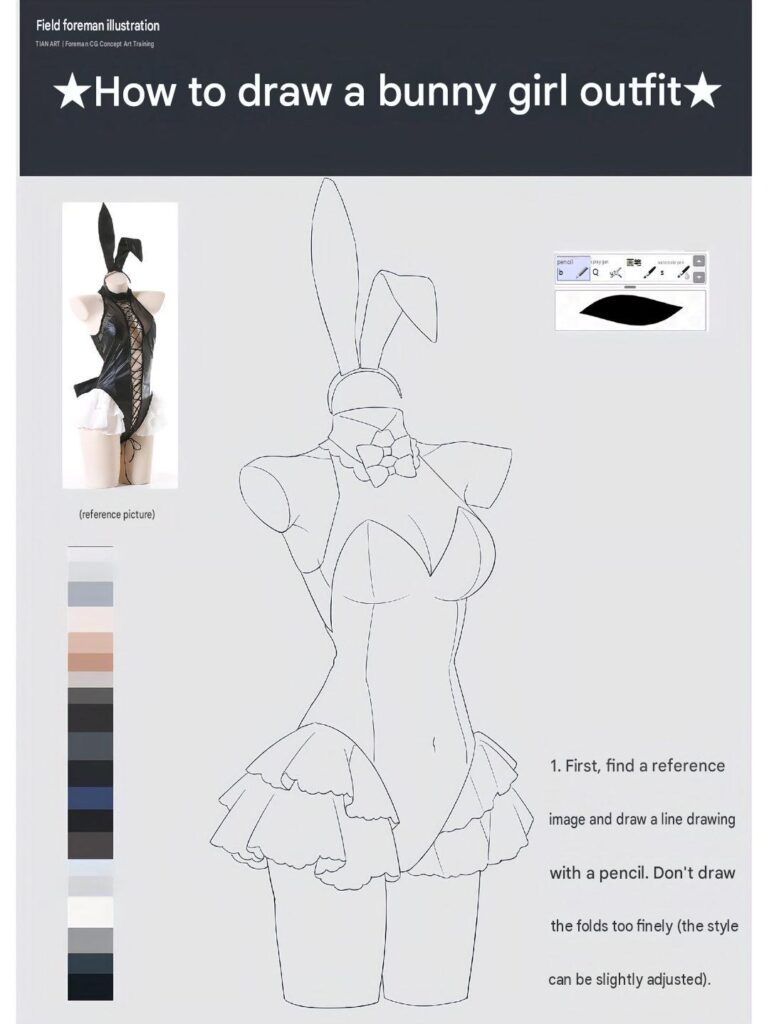
Step 1: Create the Initial Line Draft
Start by sketching the basic character pose and outfit structure.
Draw the upper body, waist, hips, and legs using simple guidelines. Next, outline the main costume elements, including the fitted bodysuit, bunny ears, collar, bow tie, and layered skirt.
At this stage, avoid adding complicated details. A clean foundation will make the following steps much easier.
Step 2: Apply the Base Colors
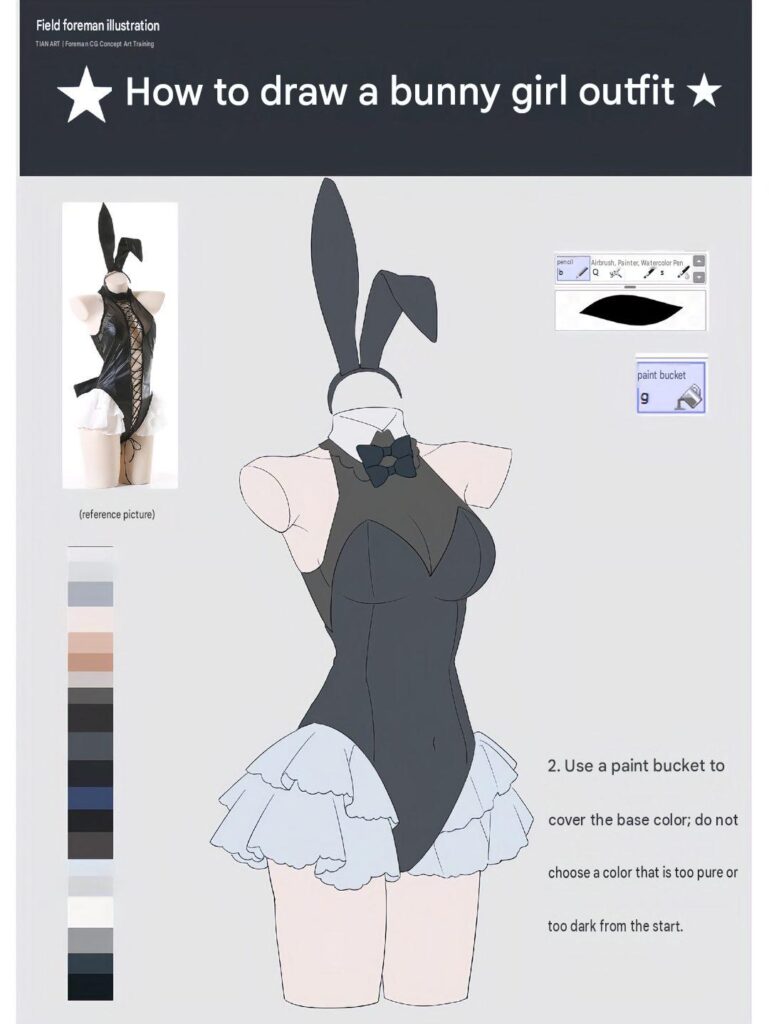
Once the line sketch is ready, begin applying the main colors.
Use black or dark charcoal for the fitted bodysuit. Add white and light gray to the layered skirt, collar, and decorative accessories.
For the exposed skin areas, choose soft peach and warm beige tones.
Color the bunny ears in dark gray or black, and make the bow tie match the main costume.
Step 3: Add the Basic Shadows
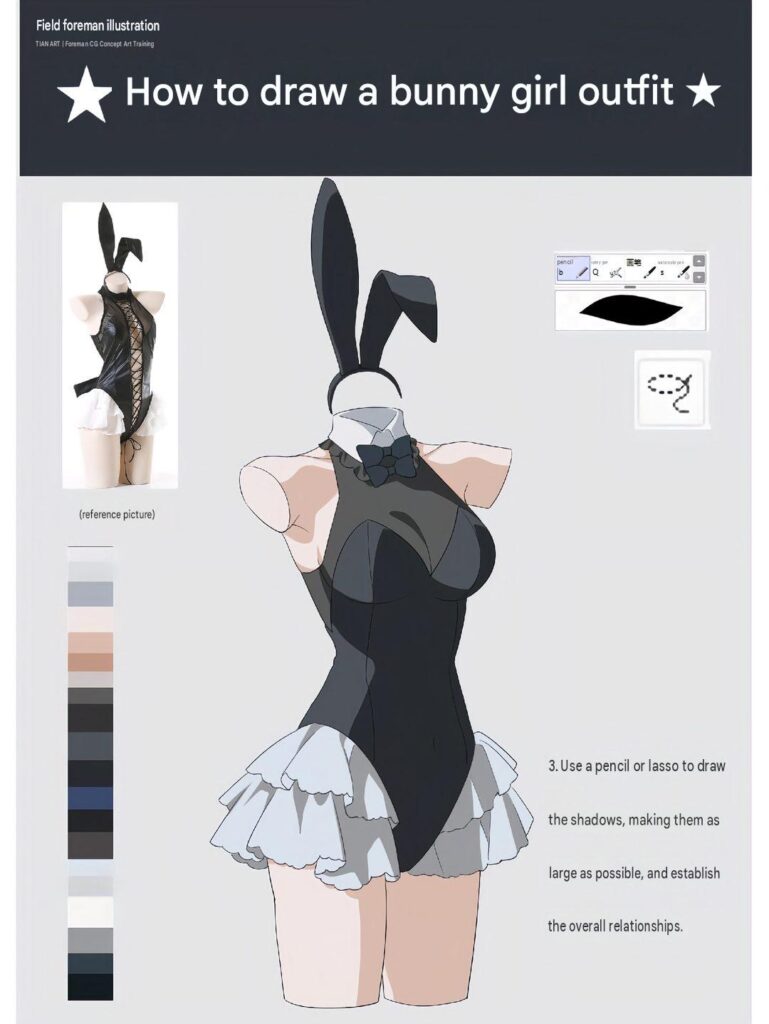
Use darker shades of black and charcoal around the sides of the bodysuit, underneath the collar, and along the waist.
Add soft gray shadows beneath the skirt layers to separate the fabric sections.
For the skin, use warm peach and slightly darker beige tones to create natural shading around the shoulders, arms, and legs.
Pay attention to the direction of the light source to keep the shadows consistent.
Step 4: Create Smooth Color Transitions
Blend the shadows and base colors together to achieve a smoother appearance.
Use different shades of gray and black to create gradual transitions across the bodysuit. This helps the clothing look more dimensional instead of appearing completely flat.
For the white skirt, combine light gray shadows with bright white highlights to emphasize the folds and overlapping fabric.
Smooth transitions are especially important when illustrating shiny materials.
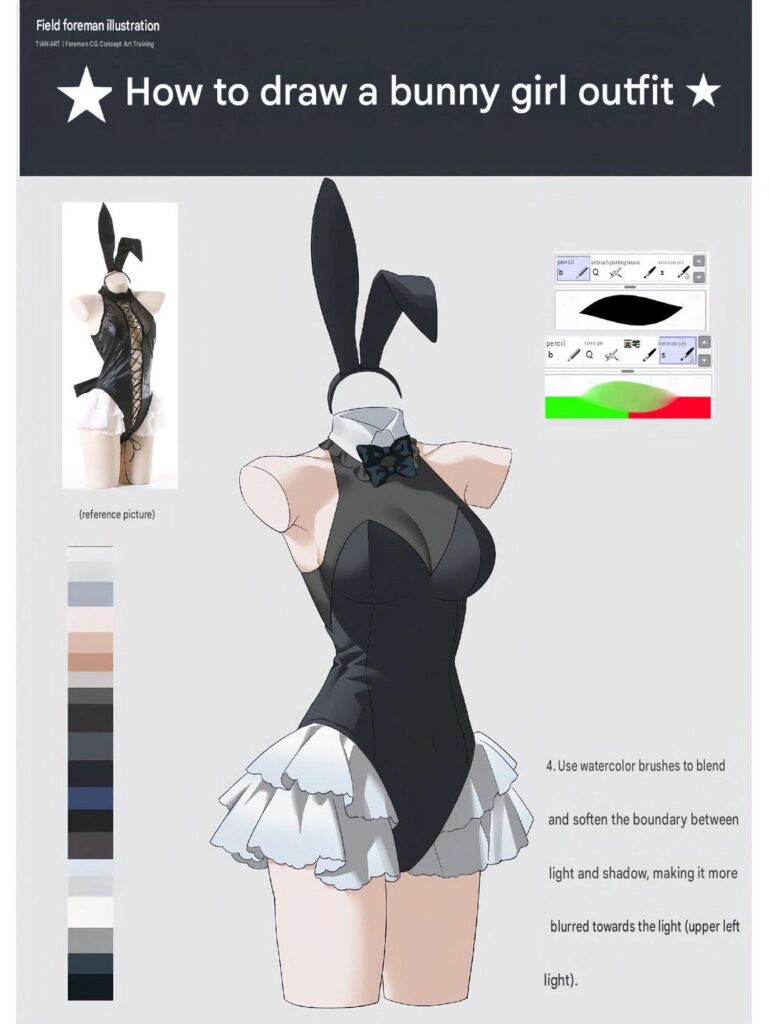
Step 5: Refine the Outfit Shape
Start refining the overall costume design.
Improve the silhouette of the bodysuit and carefully define the waist, neckline, and decorative sections.
Add more structure to the layered skirt by adjusting the curves and edges of each fabric section.
Refine the bunny ears, collar, and bow tie to make the accessories look more polished.
Clean up unnecessary sketch lines and ensure that all clothing elements fit together naturally.
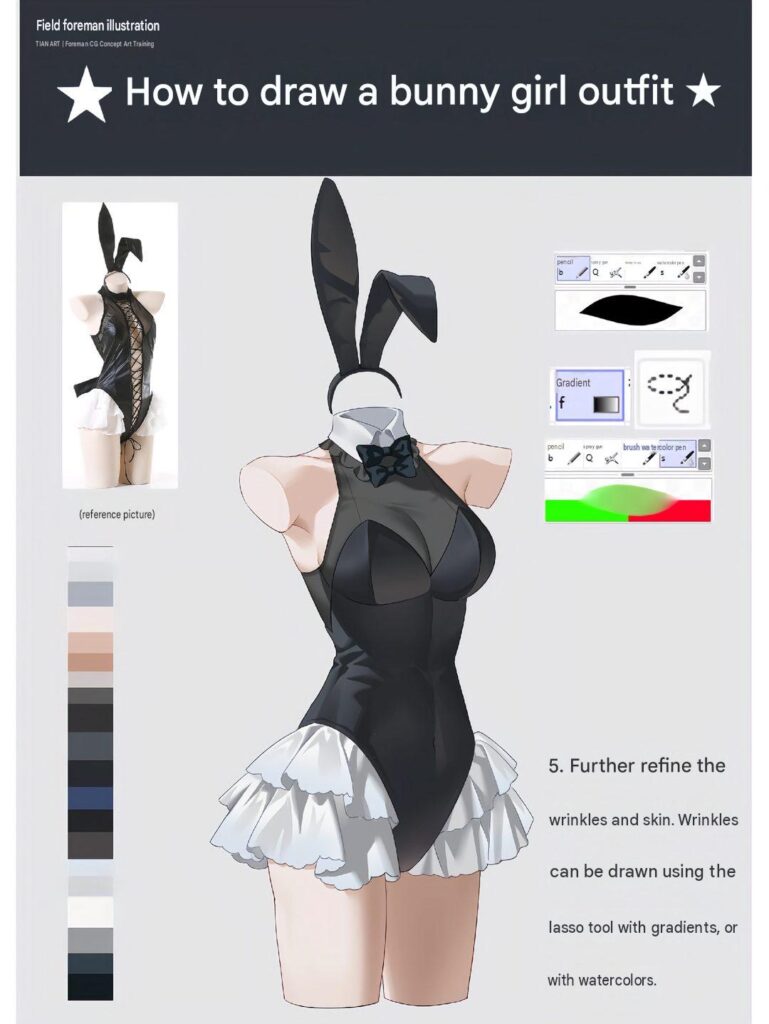
Step 6: Add Highlights and Fabric Details
This is where the illustration starts to look more realistic.
Use bright white and light gray highlights on the black bodysuit to create a glossy material effect.
Add small reflective streaks along curved surfaces and darker shadows around the edges to emphasize the fabric’s shape.
For the white skirt, use subtle gray shadows and soft highlights to create a delicate layered appearance.
You can also add small details to the bow tie, collar, and bunny ears to improve the overall design.
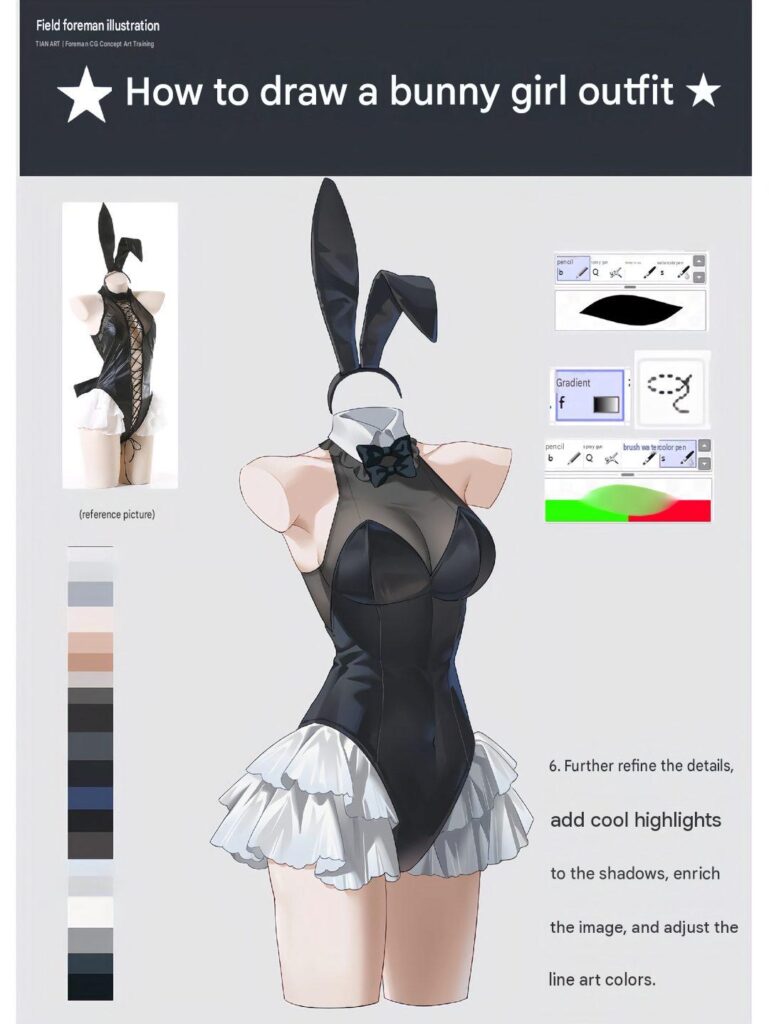
Step 7: Final Refinement and Completion
In the final stage, review the entire illustration and make the necessary adjustments.
Refine the lighting, color balance, shadows, and highlights. Make sure the black costume has enough contrast and the white skirt maintains its layered appearance.
Polish the edges of the outfit and add the final details to the accessories.
Remove any remaining construction lines and adjust the colors until the illustration looks balanced and complete.
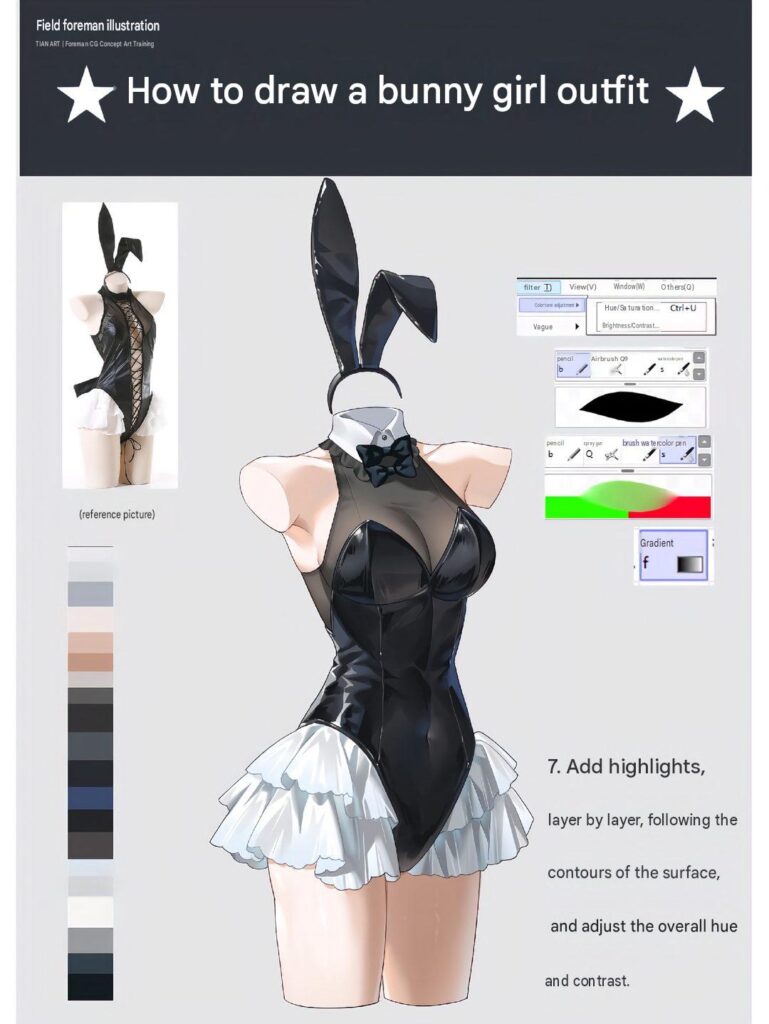
Your bunny girl outfit illustration is now finished!

Leave a Reply