
Learning how to draw ears is an important skill for artists who want to create more realistic anime characters and detailed digital illustrations.
In this tutorial, you will learn how to draw and paint a beautiful ear using six simple steps.
From creating the initial line art to adding realistic shadows and glossy highlights, each stage will help you develop a more polished and professional-looking illustration.
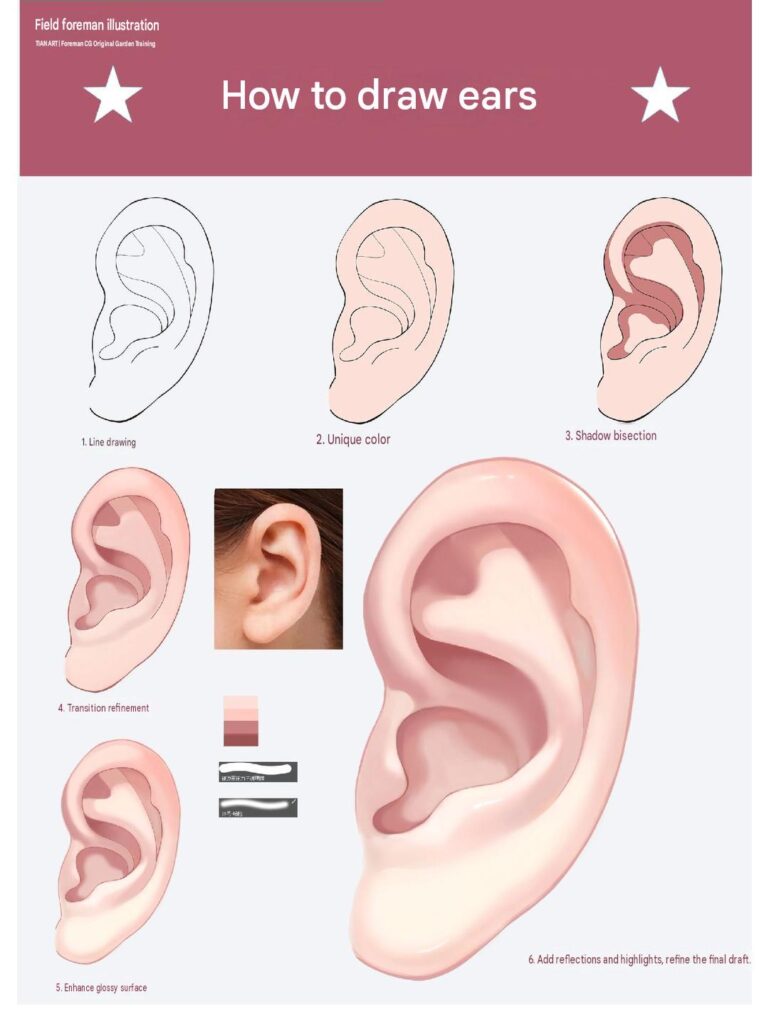
How to Draw Ears: A Step-by-Step Digital Painting Tutorial
1. How to Draw Realistic Anime Ears
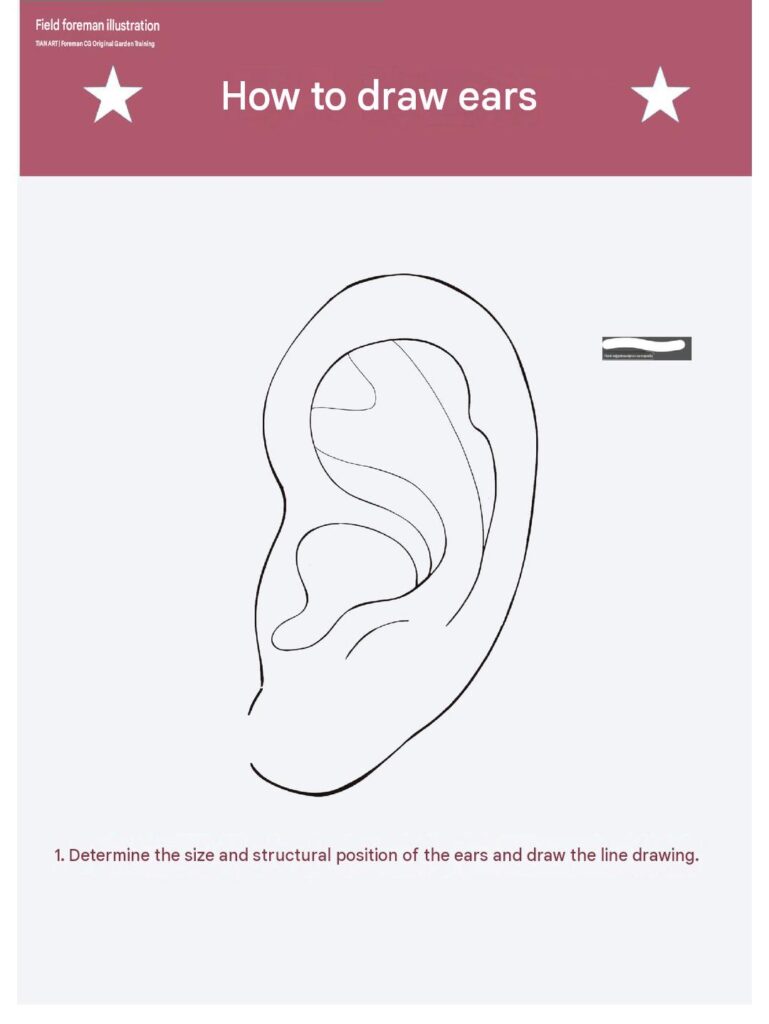
Step 1: Start by drawing the overall shape of the ear. Pay attention to its natural proportions, including the outer rim, inner curves, earlobe, and ear canal.
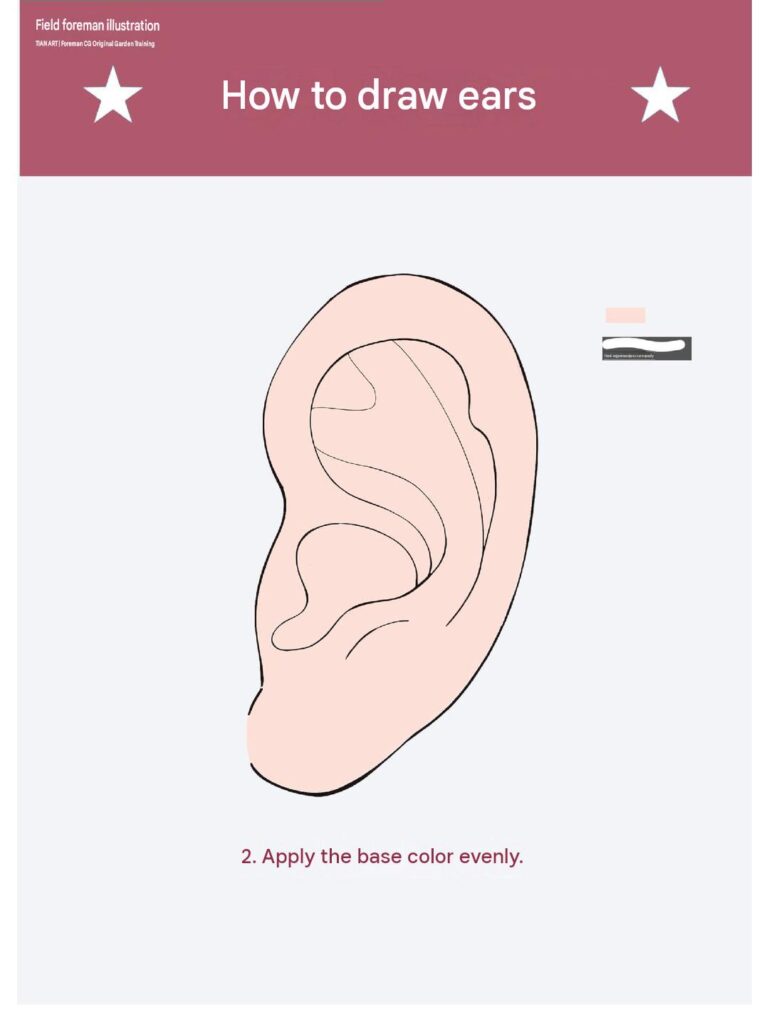
Step 2: Once the line art is complete, choose a soft, natural skin tone and fill the entire ear.
A light peach or warm pink color works well for anime-style illustrations. Make sure the base color is applied evenly without leaving unwanted gaps.
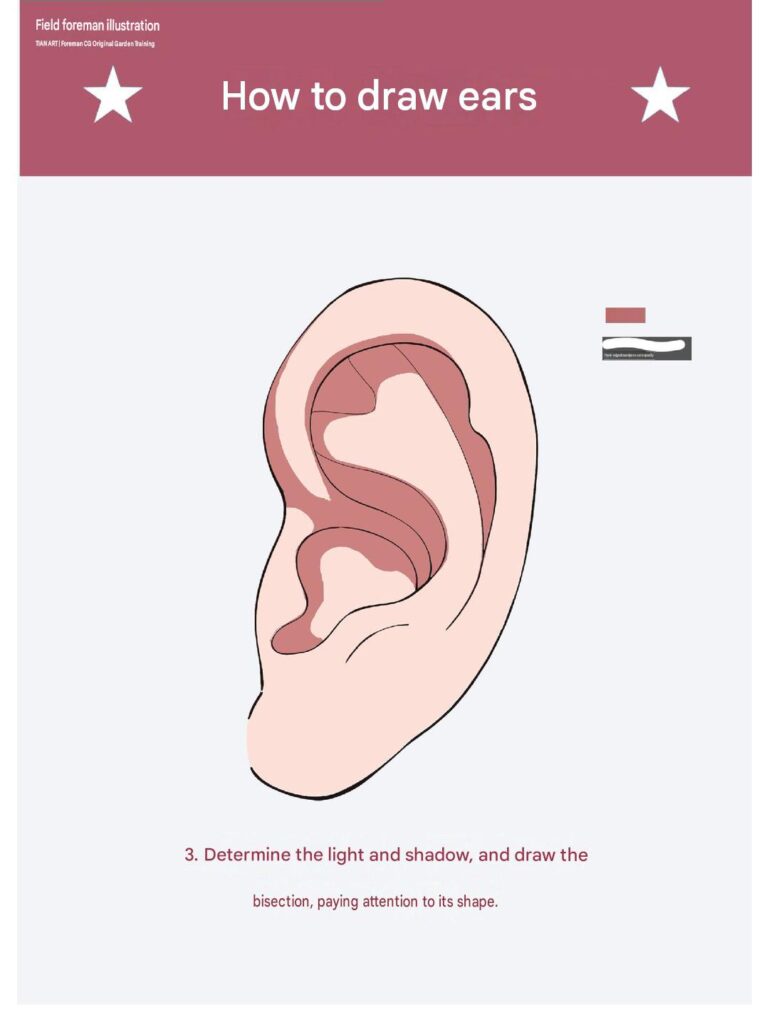
Step 3: The next step is to introduce shadows to create depth and dimension.
Use a darker pink or reddish-brown color to shade the inner folds of the ear, especially around the ear canal, antihelix, and lower inner curves.
Step 4: After establishing the shadows, gradually blend the different skin tones together.
Use a soft airbrush or blending brush to create smooth transitions between light and dark areas. Avoid making the shadows too harsh, as natural skin usually has subtle color variations.
Refine the inner folds and outer edges to make the ear look softer and more realistic.
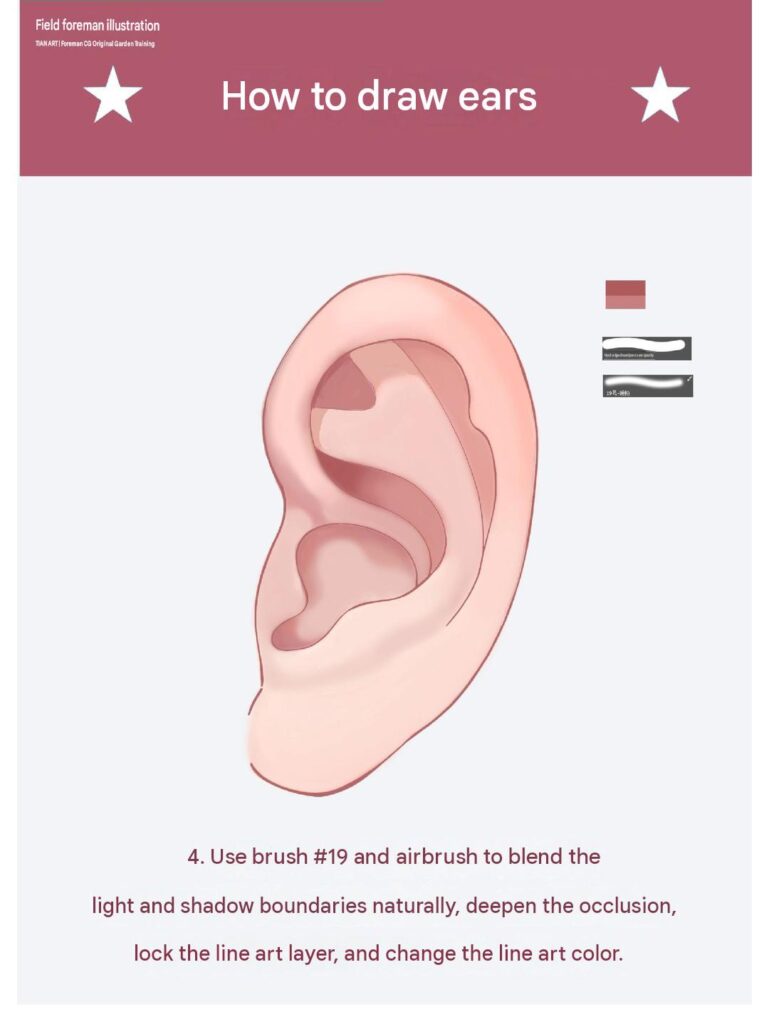
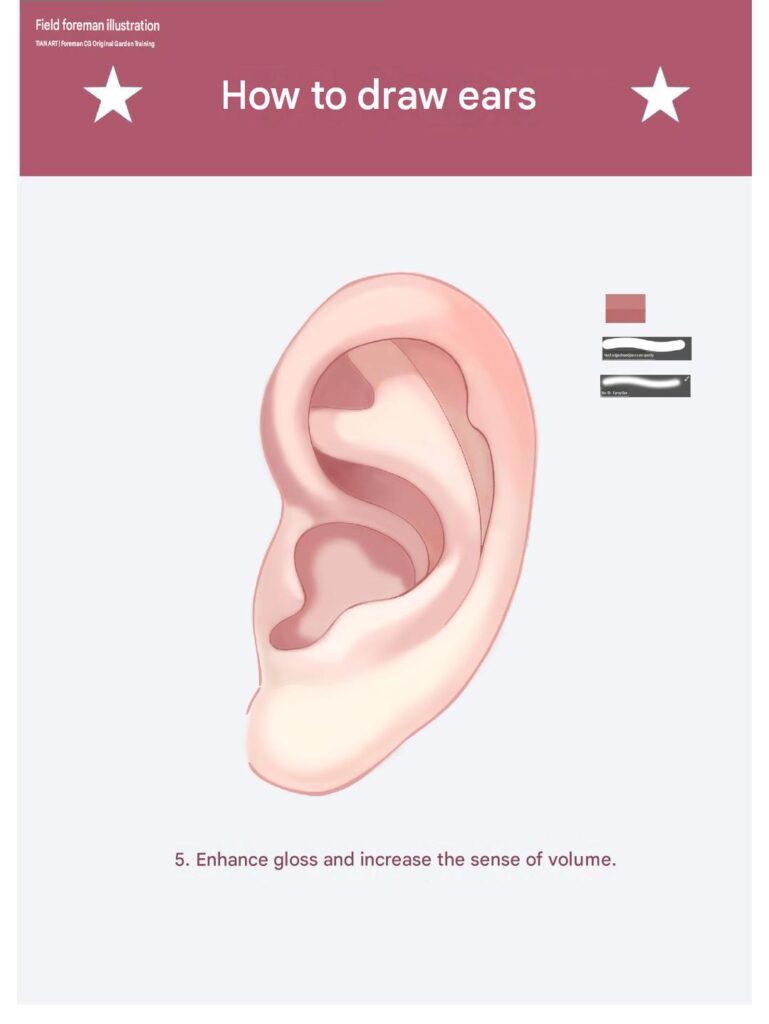
Step 5: Now focus on improving the surface quality of the illustration.
Use a soft brush to brighten the areas that receive the most light. Add subtle reflections along the upper outer rim, inner curves, and raised parts of the ear.
Keep the highlights smooth and controlled. Avoid adding too many bright spots, as this may make the skin appear unnatural.
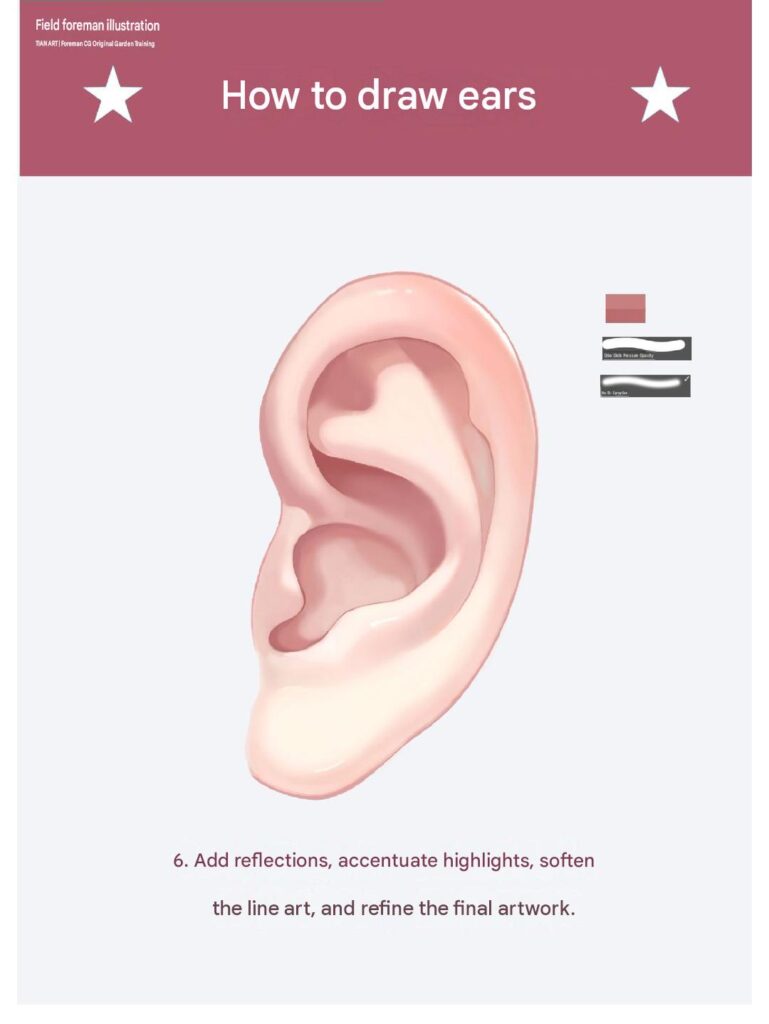
Step 6: Use a small, bright brush to add delicate highlights to the most prominent areas of the ear. Refine the shadows, clean up the edges, and adjust the contrast where necessary.
Check that the light and shadow distribution remains consistent throughout the drawing.
Finally, review the overall color balance and make any necessary adjustments.
2. How to Draw Anime Ears Step by Step: A Complete Digital Painting Tutorial
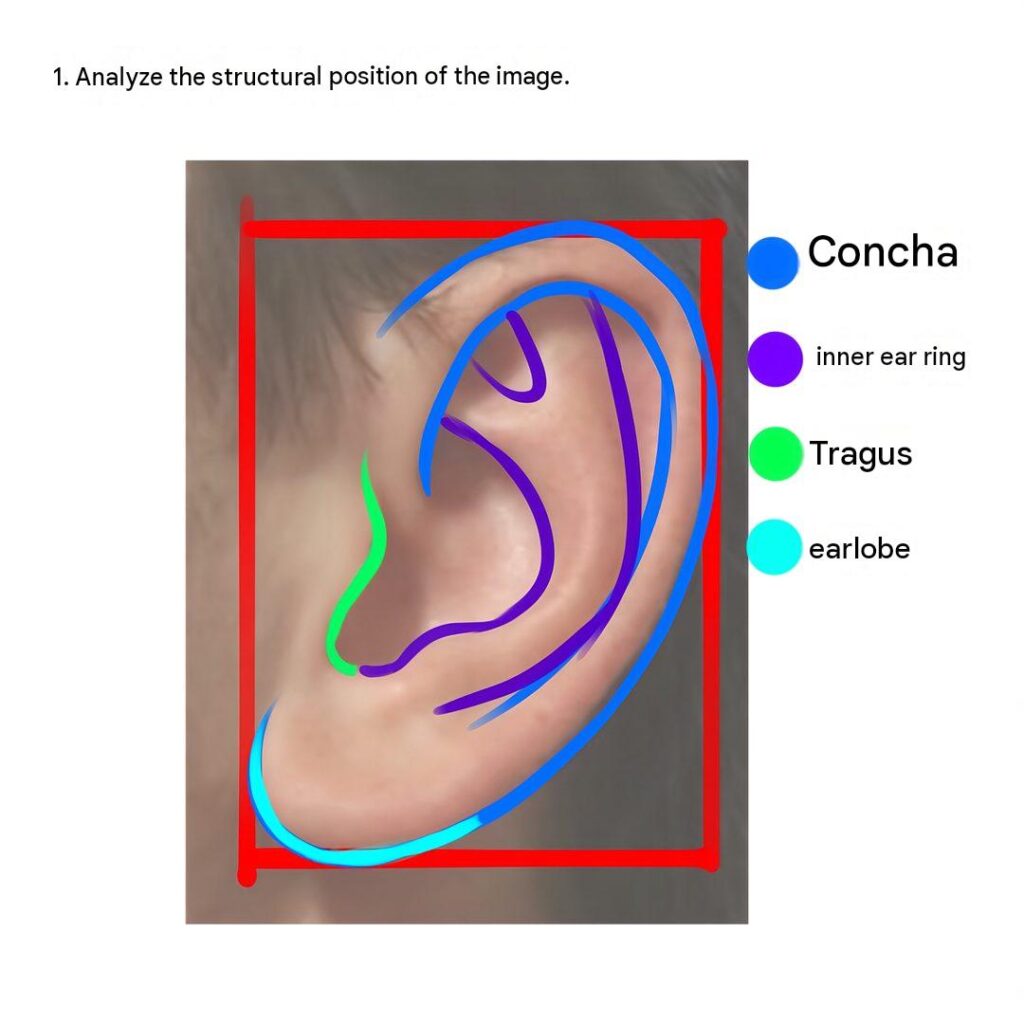
Step 1: Start by studying the overall shape and proportions of the ear. Identify the main anatomical parts, including the helix, antihelix, concha, tragus, and earlobe.
Use a reference image to understand the proportions and establish a simple boundary around the ear. This will help you maintain accurate positioning throughout the drawing process.
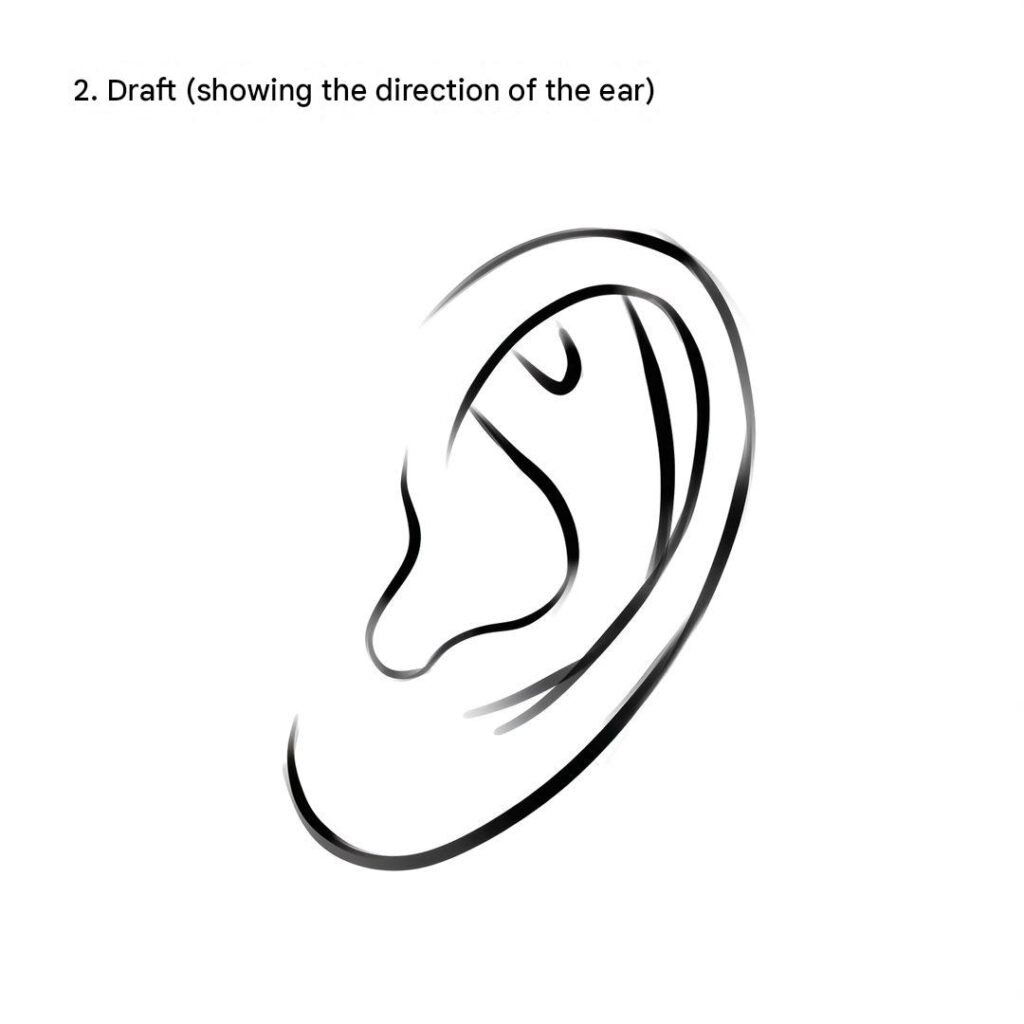
Step 2: Begin sketching the ear using light, smooth lines. Focus on the outer contour and the direction of the inner curves.
Draw the upper rim first, then gradually add the inner folds and lower earlobe. Keep the lines simple and avoid adding unnecessary details at this stage.
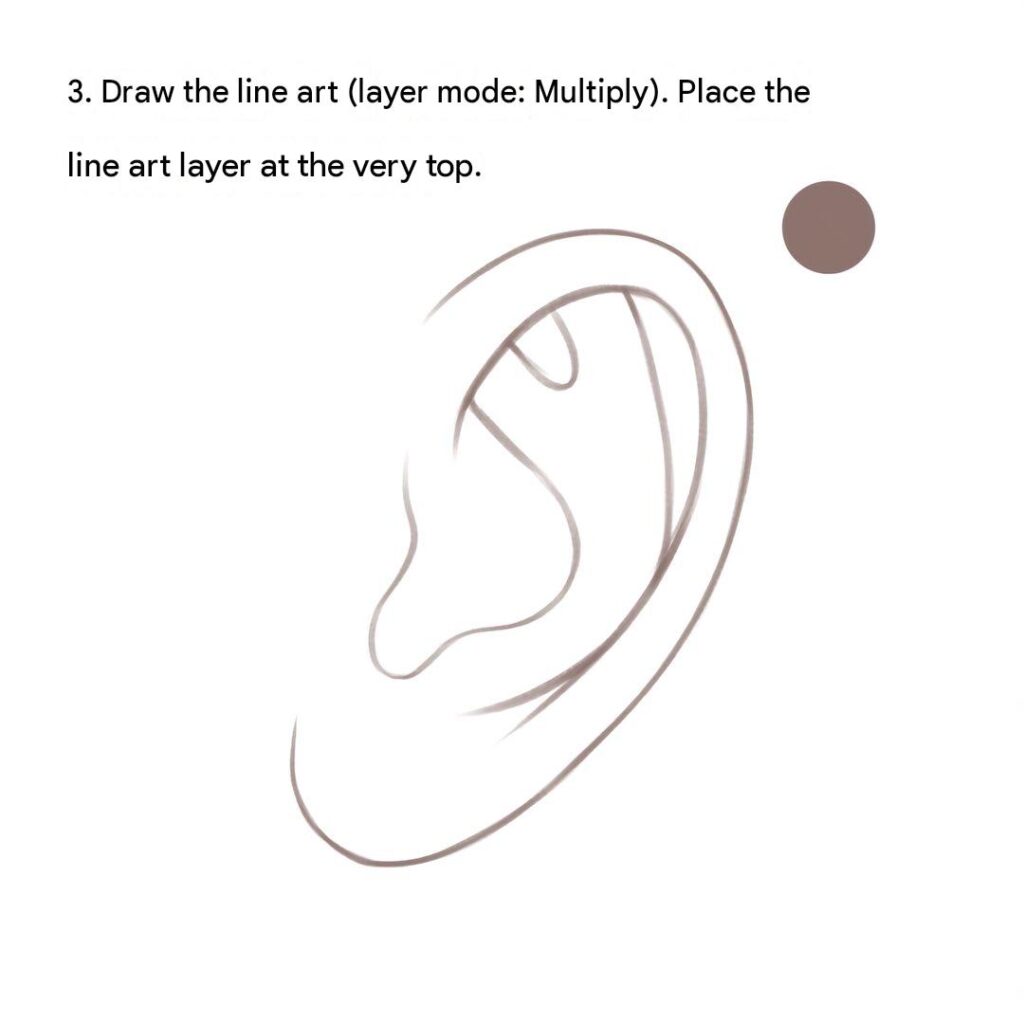
Step 3: Create a new layer for the line art and set the appropriate blending mode, such as Multiply.
Carefully trace the sketch using a clean, controlled brush. Refine the outer edges and emphasize the important inner structures of the ear.
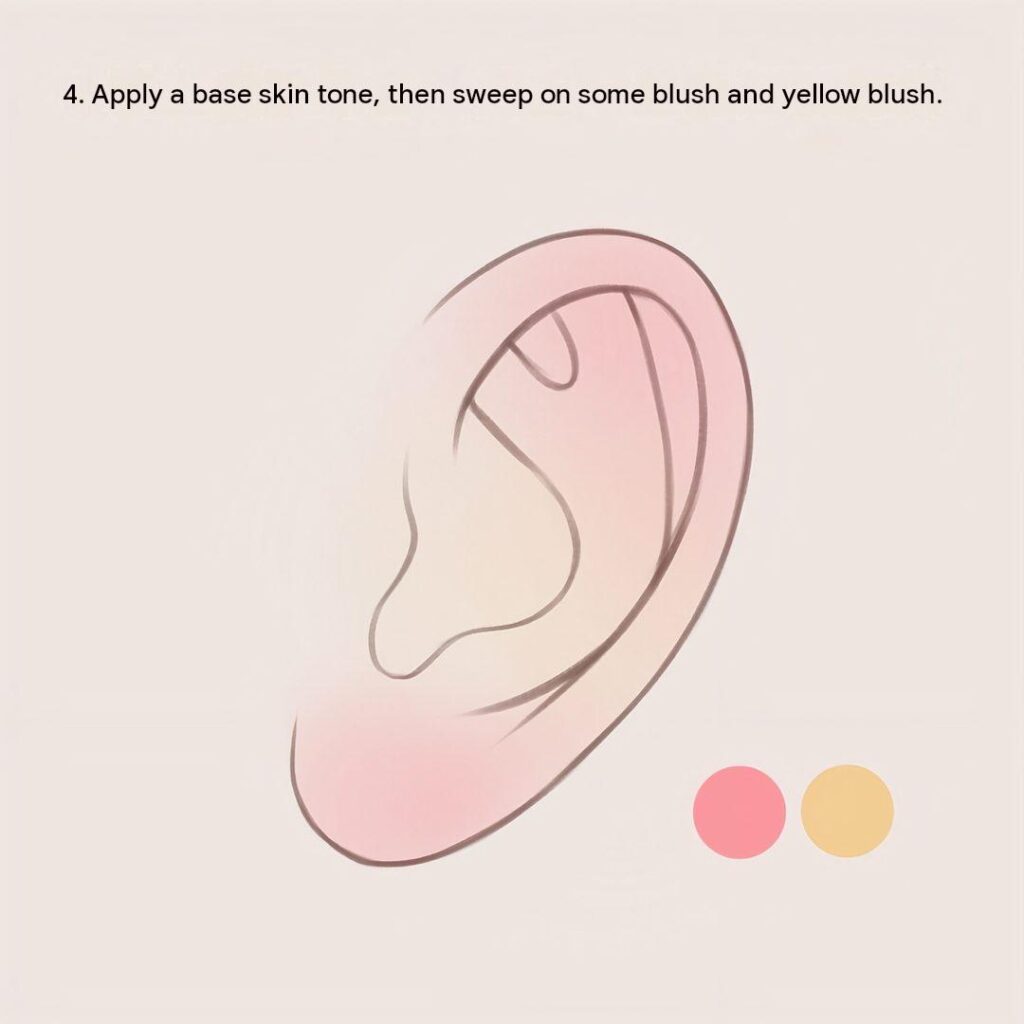
Step 4: Once the line art is finished, apply a natural skin-tone base color to the entire ear.
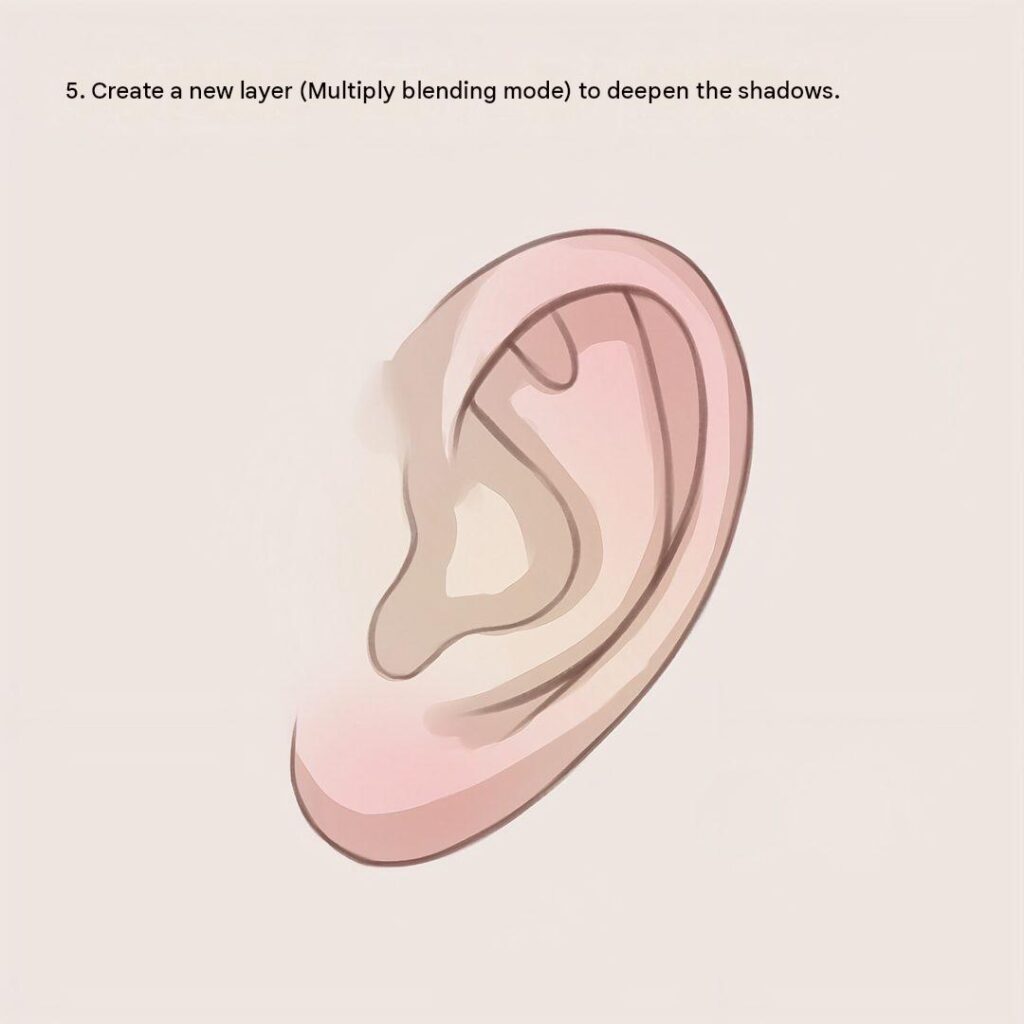
Step 5: Create a new layer and use the Multiply blending mode to begin adding shadows.
Select a slightly darker skin tone and carefully shade the inner folds, especially around the concha, antihelix, and deeper recessed areas.
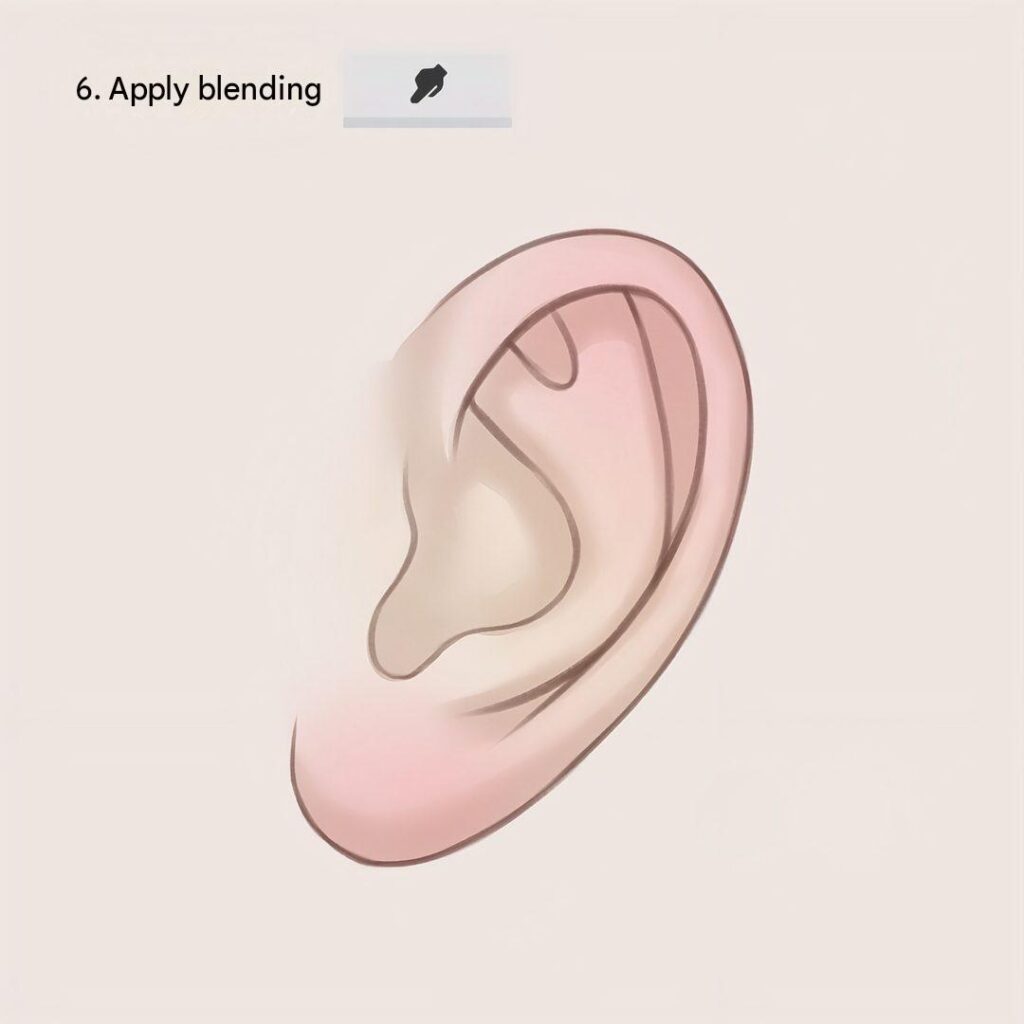
Step 6: After applying the main shadows, use a blending brush to soften the transitions between light and dark areas.
Gently blend the edges without removing the important anatomical details.
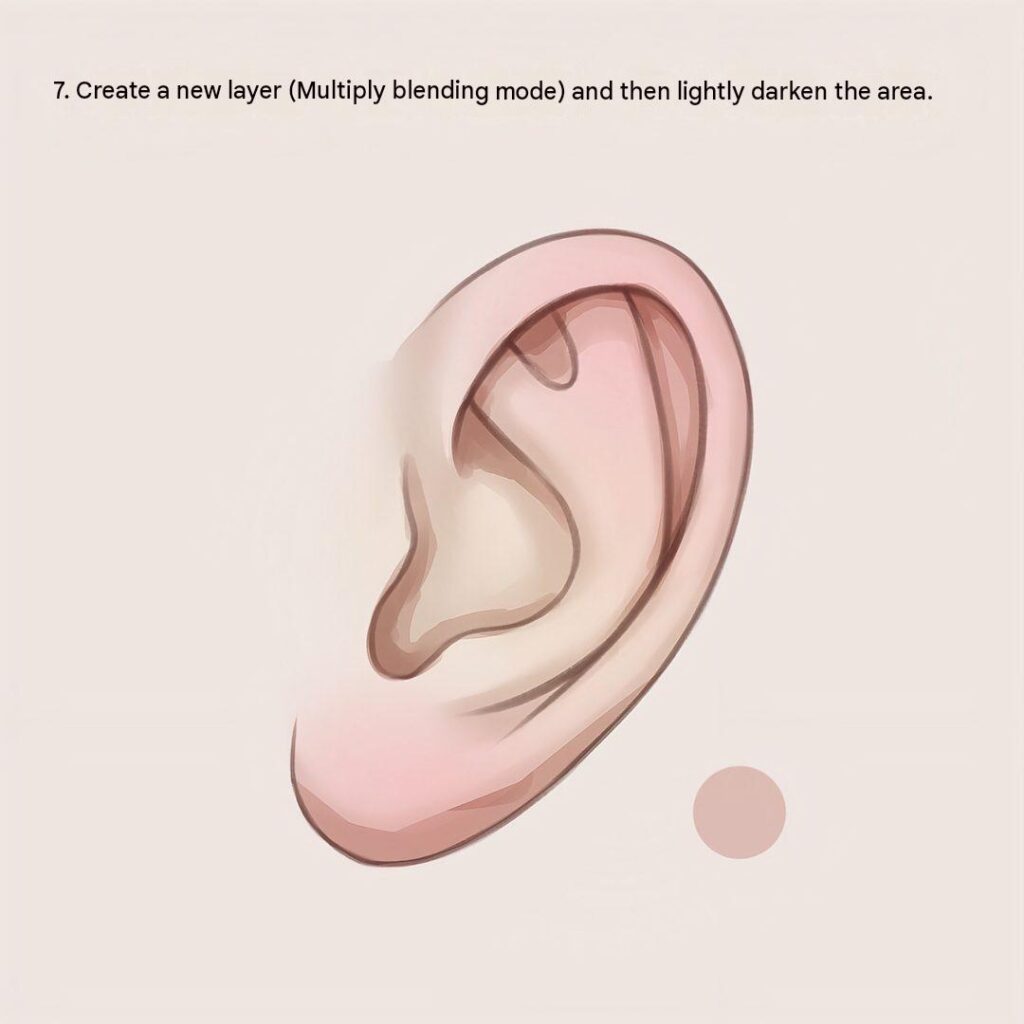
Step 7: Create another Multiply layer to strengthen the darker areas.
Add deeper reddish-brown tones to the ear canal and the most recessed folds. Gradually increase the contrast to make these areas appear deeper.
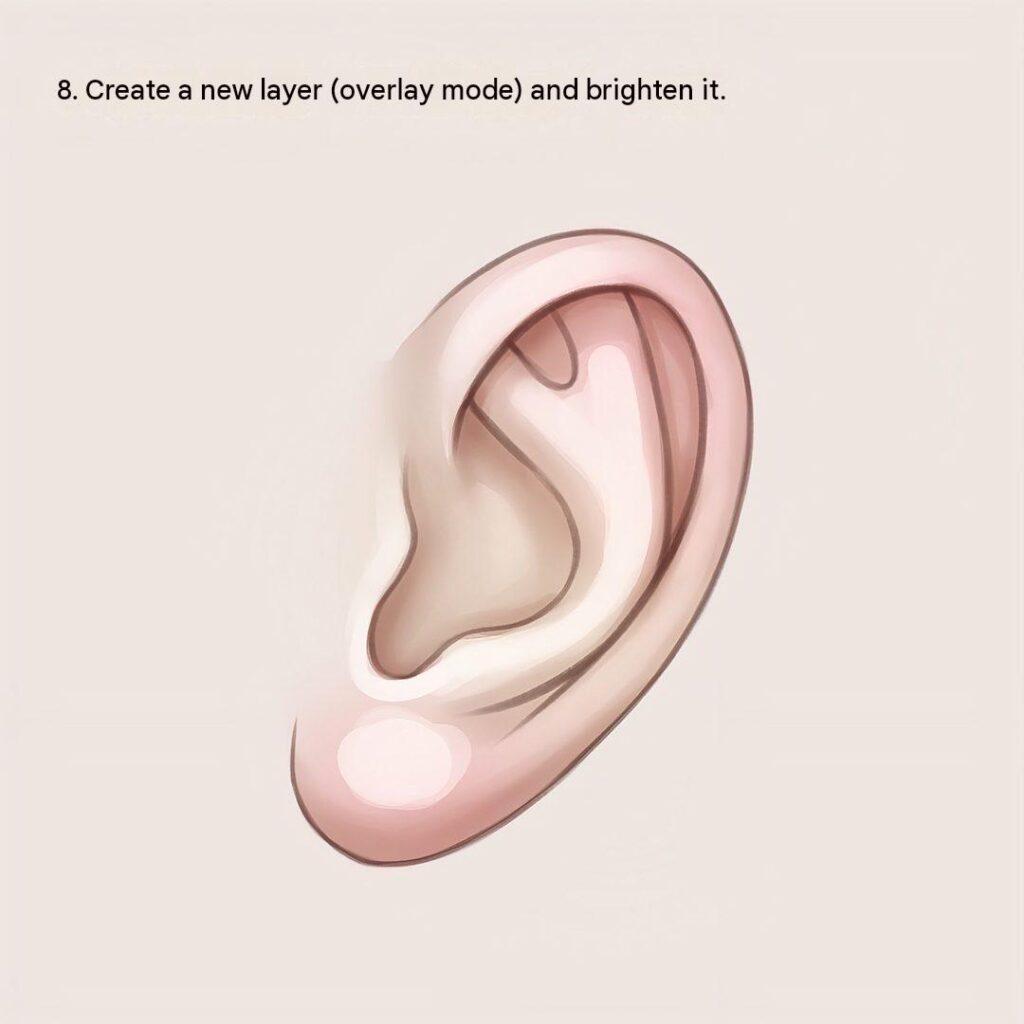
Step 8: Use a soft brush with a warm, light skin tone to brighten the areas that receive more light.
Focus on the upper outer rim, raised inner curves, and lower surfaces that face the light source.
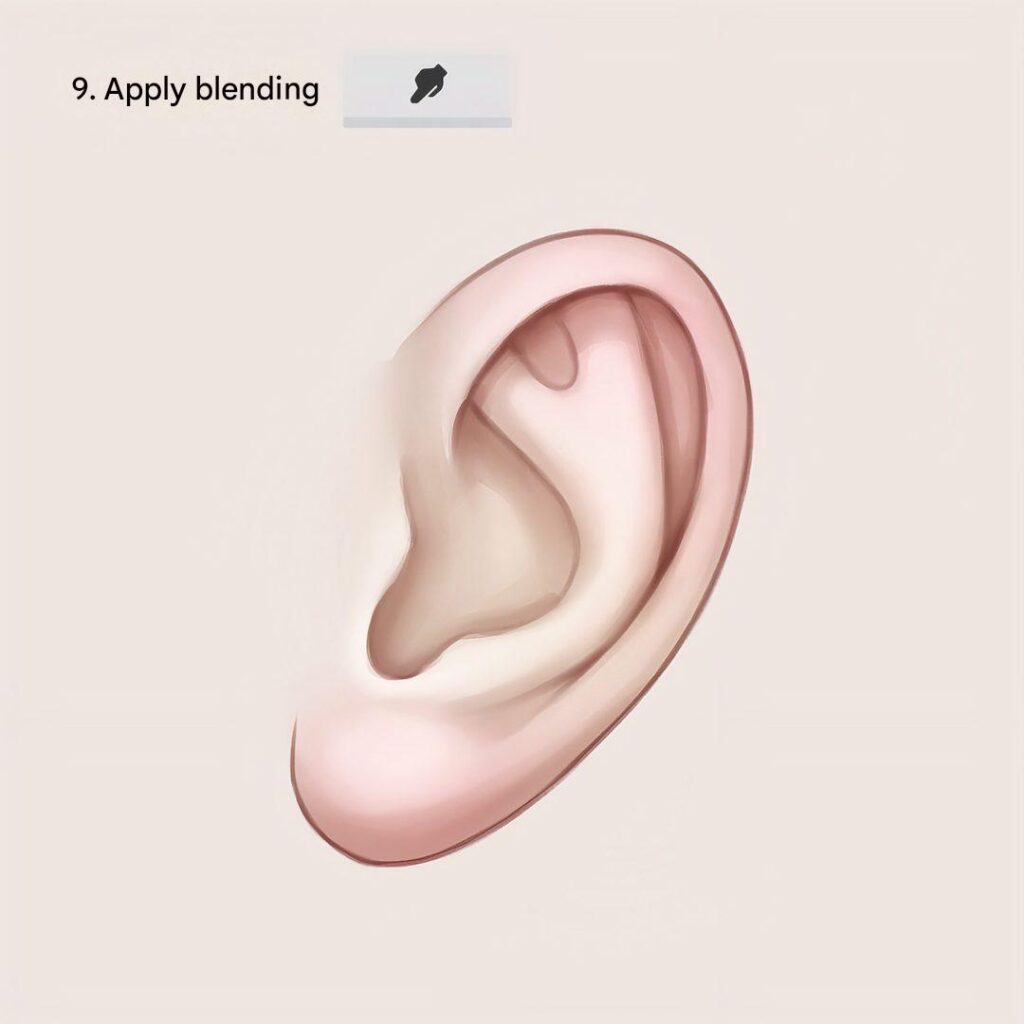
Step 9: Smooth out any harsh transitions and adjust the contrast between the highlighted and shadowed areas.
Step 10: Refine the outlines, remove unnecessary sketch marks, and make any final color adjustments.
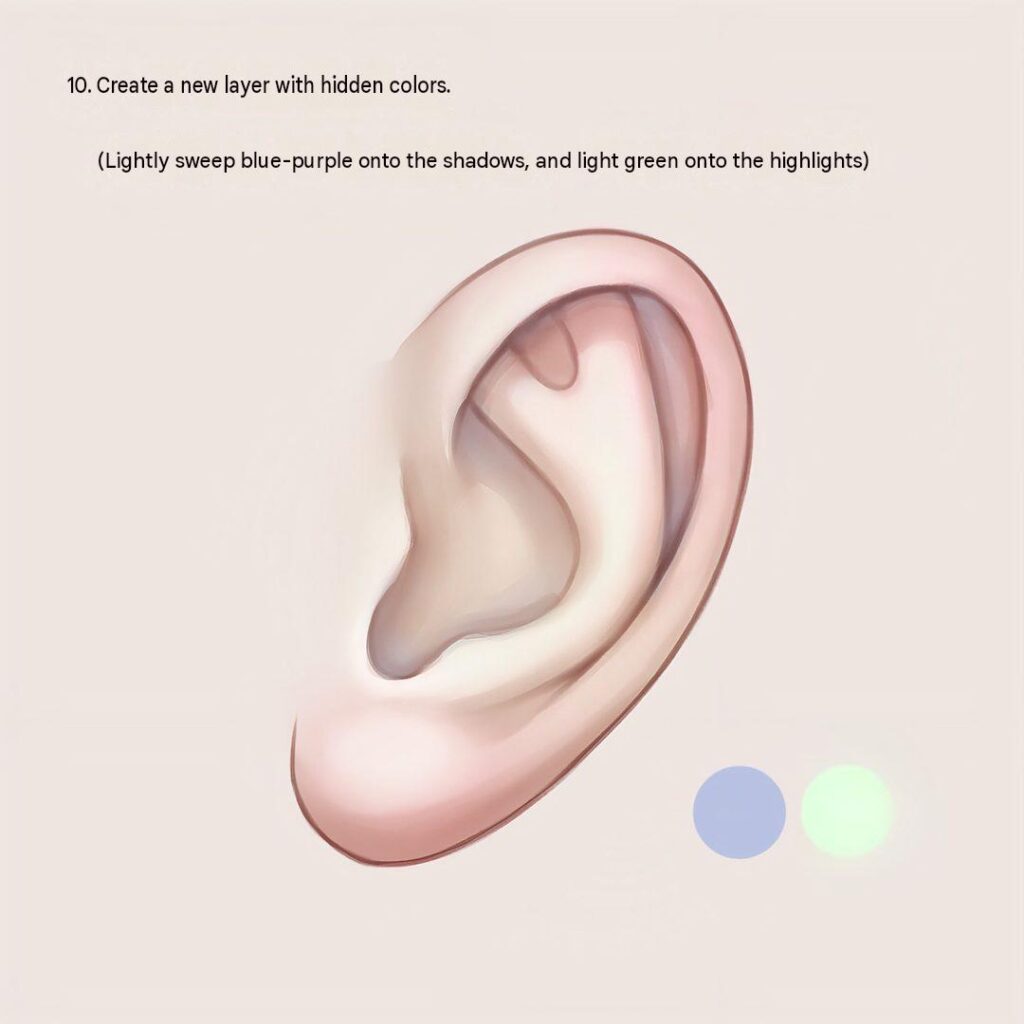
Once everything looks balanced, your anime-style ear illustration is complete!

Leave a Reply