
Learning how to draw eyes is an essential skill. In this step-by-step tutorial, you will learn how to draw beautiful eyes with vibrant pink irises and realistic lighting effects.
Starting with a simple line sketch, you will gradually add base colors, shadows, gradients, eyelashes, and reflective highlights to create a stunning digital illustration.
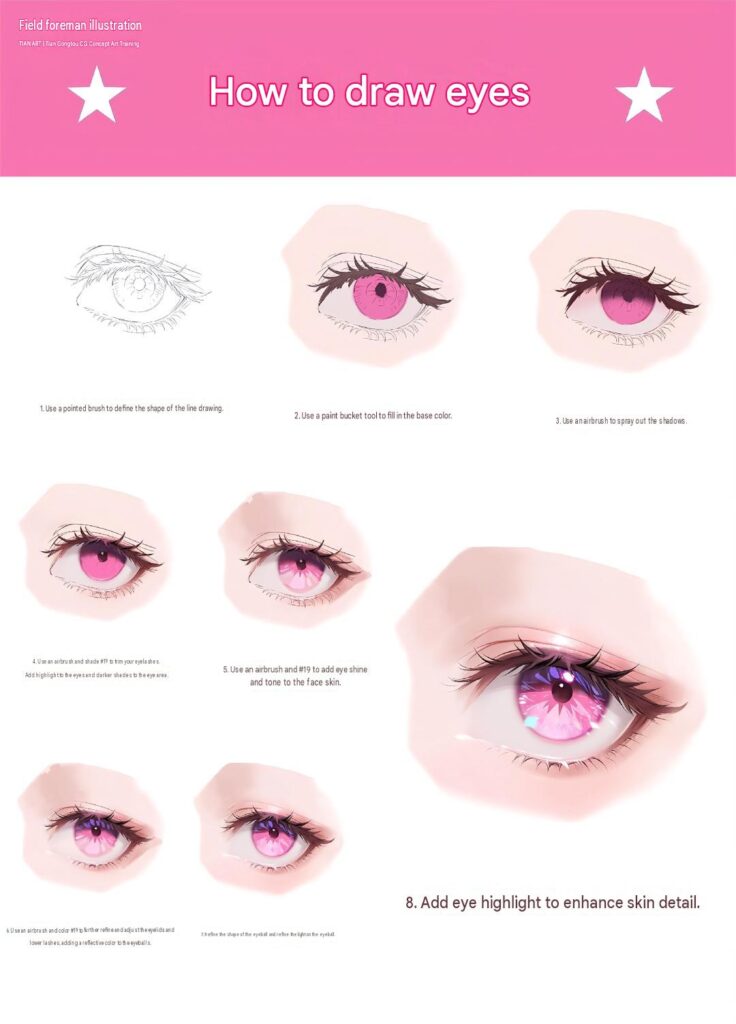
How to Draw Eyes – 4 Easy Ways for Beginners
1. How to Draw Anime Eyes
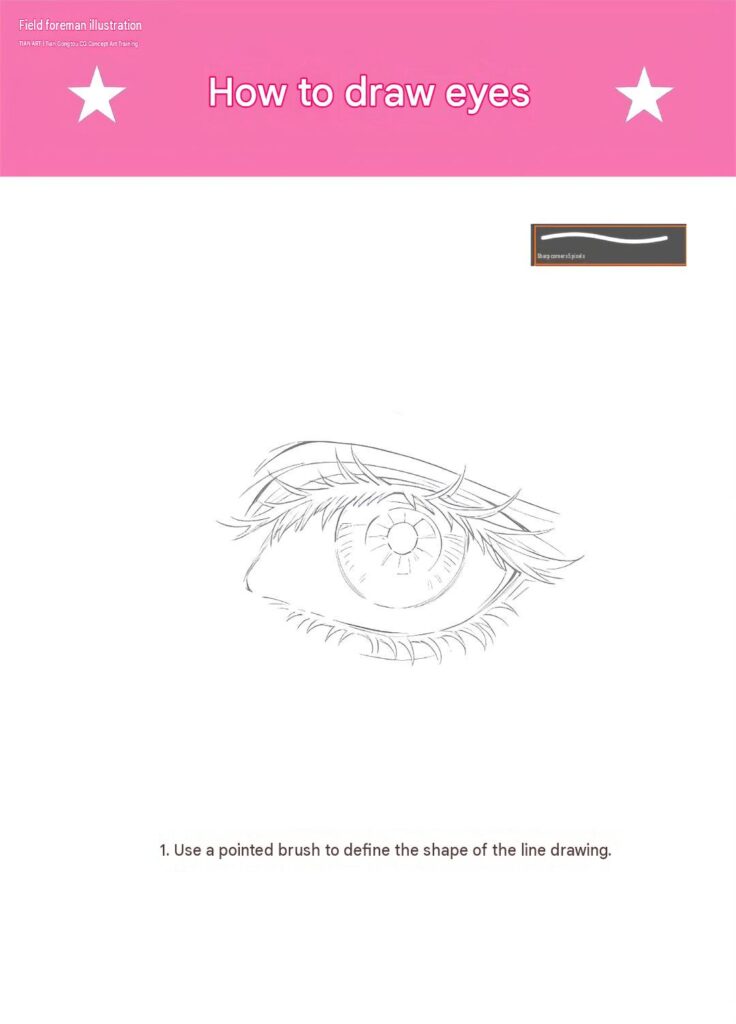
Step 1: Create the Basic Eye Sketch
Use a pointed brush to outline the upper and lower eyelids. Create a slightly curved upper eyelid with a more delicate lower lash line.
Next, sketch the iris, pupil, and basic eyelash positions.
Pay attention to the overall proportions and make sure the eye has a balanced shape. Add a few curved lines to indicate the direction of the eyelashes.
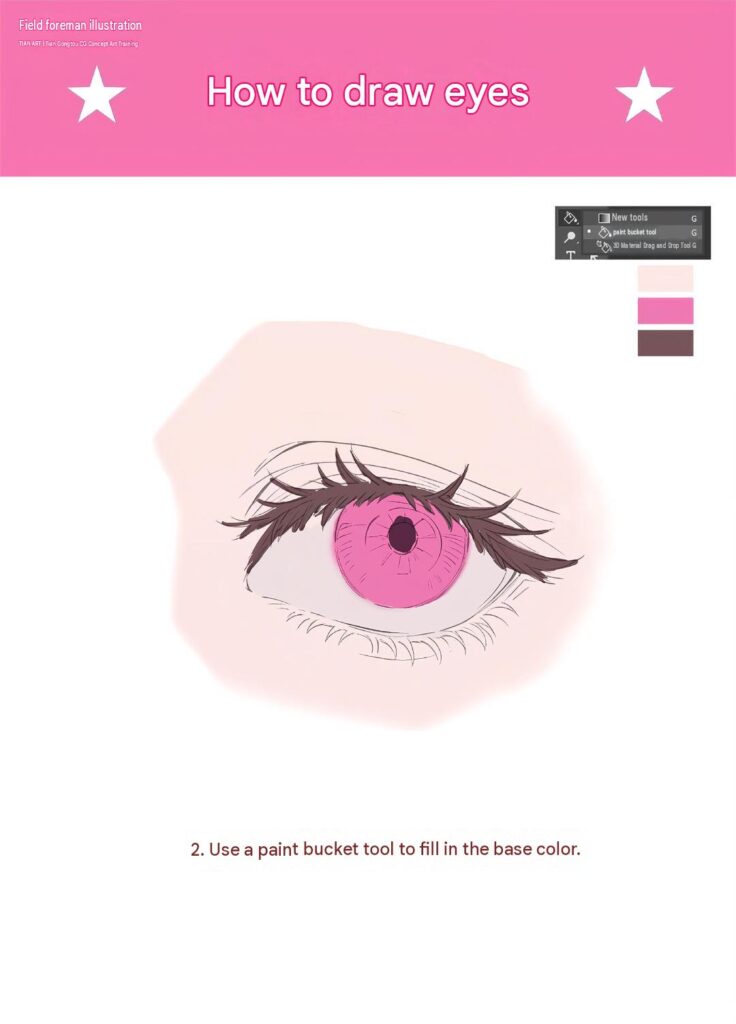
Step 2: Once the line drawing is complete, begin applying the main colors.
Use a bright pink or rose color for the iris. Add a darker shade for the pupil and use black or deep brown for the upper eyelashes.
For the surrounding skin, choose a soft peach or light pink tone.
Keep the base colors clean and smooth. Avoid adding too many shadows or highlights at this stage.
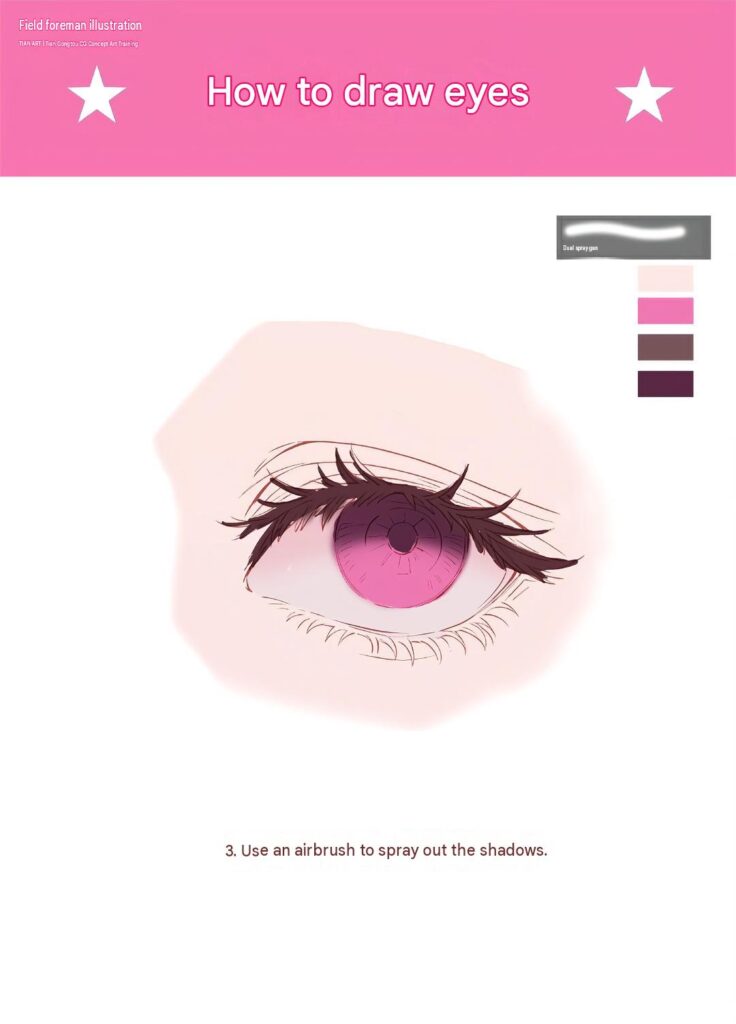
Step 3: Now introduce darker tones to create depth and dimension.
Use a soft airbrush to add purple and dark pink shadows around the upper part of the iris.
Darken the area underneath the upper eyelid to create a natural shadow effect. You can also add subtle shading around the eye socket to make the eye appear more three-dimensional.
Blend the colors smoothly to avoid harsh transitions.
Step 4: Refine the Eye Shadows and Add Highlights
Continue building the depth of the eye using additional shading.
Use a darker pink or purple tone to strengthen the shadows around the iris and pupil.
Add small highlights to the surface of the iris and refine the surrounding eyelid area.
You can also deepen the shadows around the upper lashes to create stronger contrast and make the eye look more expressive.
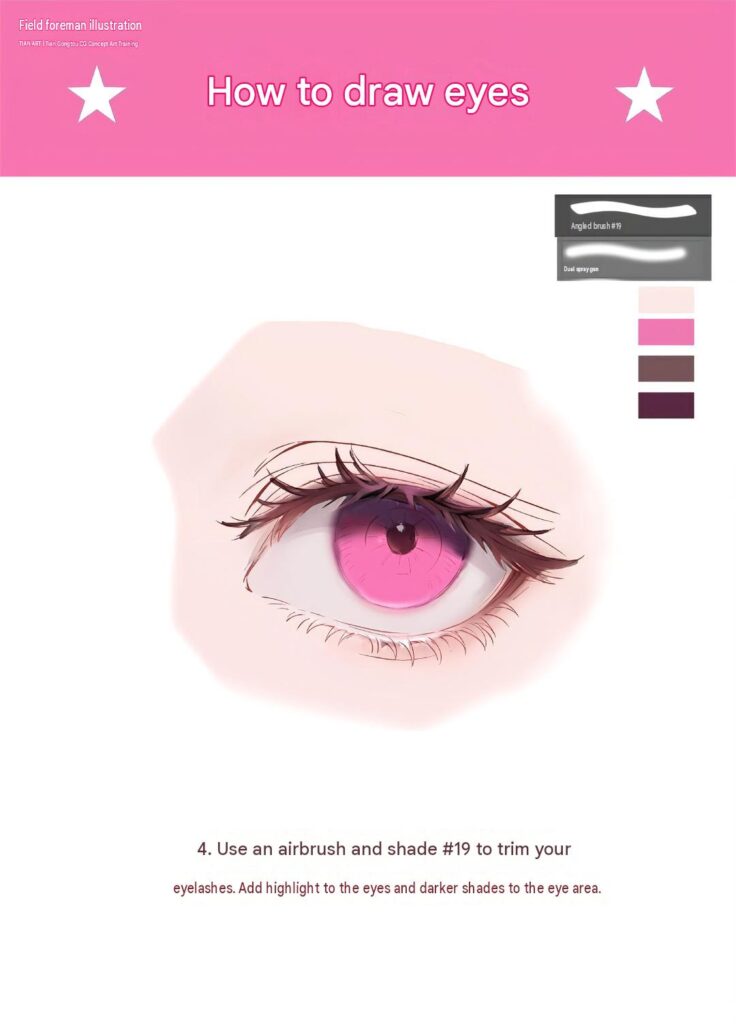
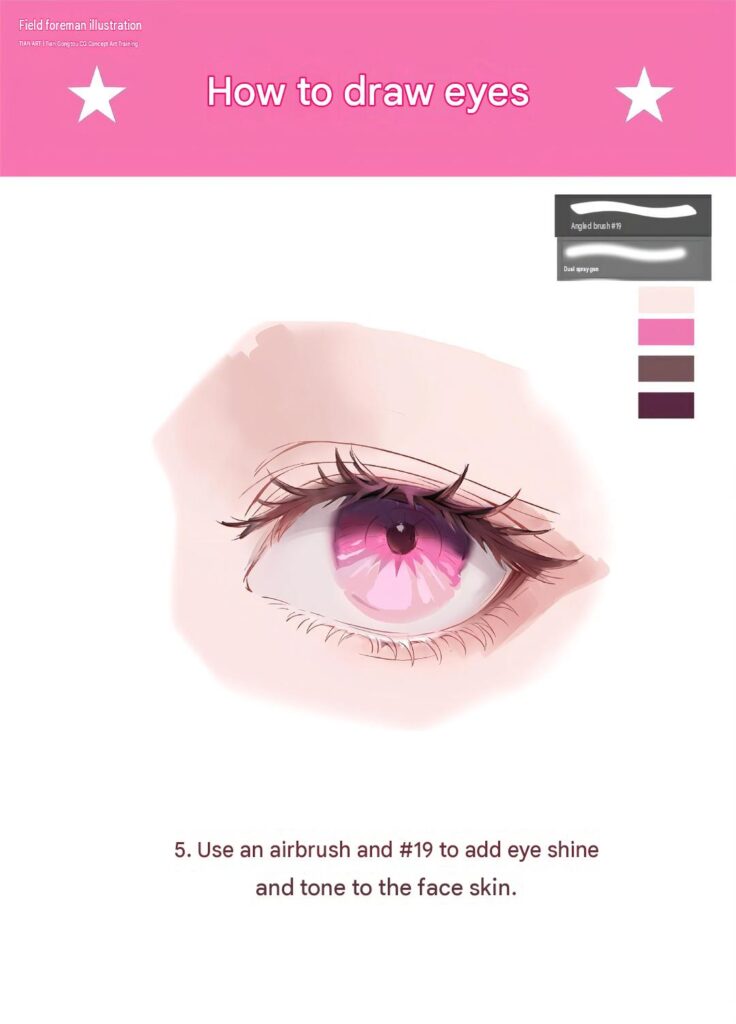
Step 5: Add Eye Shine and Skin Tones
This step helps make the anime eye look brighter and more attractive.
Use a soft airbrush to introduce lighter pink and white tones inside the iris.
Add subtle highlights around the pupil to create a sparkling effect. Refine the surrounding skin using warm peach and soft pink shades.
Blend the colors carefully to achieve a smooth transition between the eye and the surrounding skin.
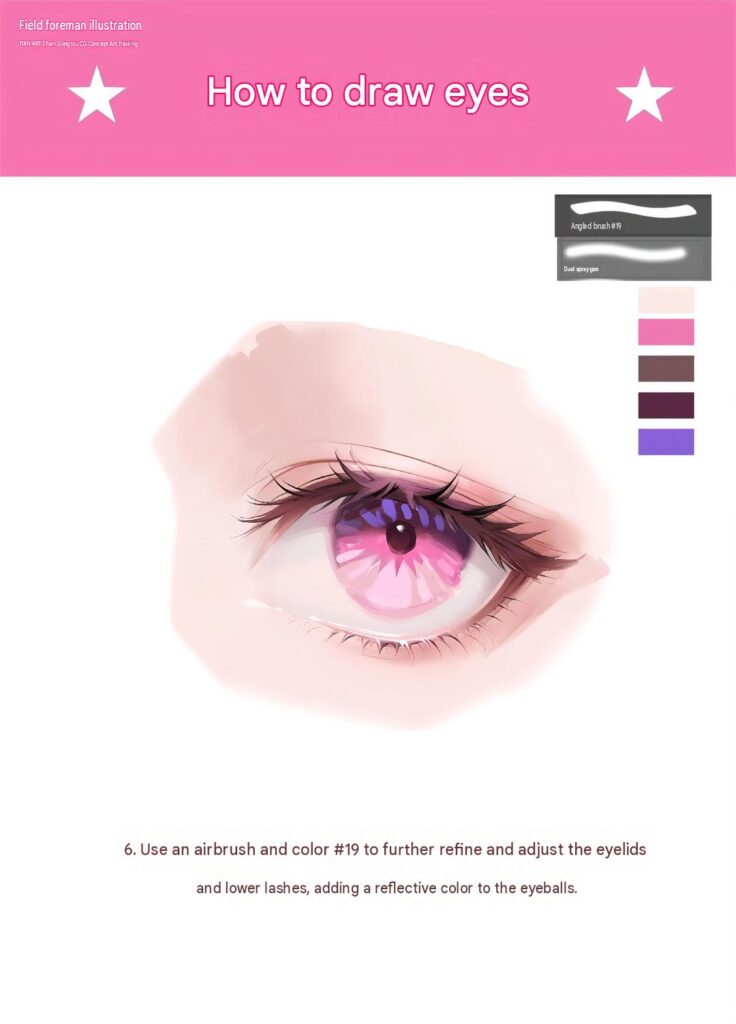
Step 6: Refine the Eyelids and Lower Eyelashes
Now focus on improving the smaller details.
Use a fine brush to refine the upper eyelashes, lower lashes, and eyelid outlines.
Add individual eyelashes with curved strokes, making sure they follow the natural direction of the eye.
Use a darker color to strengthen selected lash areas while keeping the lower eyelashes lighter and more delicate.
You can also add small reflective details inside the eyeball to increase its brightness.
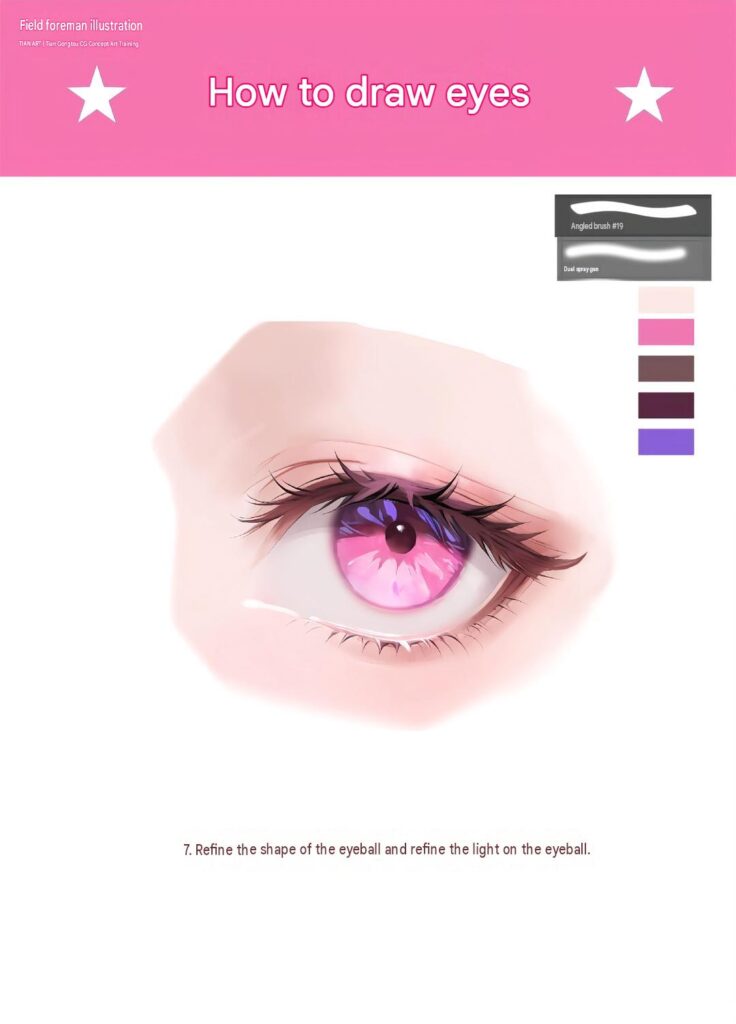
Step 7: Refine the Iris and Eye Lighting
Continue improving the iris by adding more color variations and lighting details.
Use different shades of pink, magenta, and purple to create a rich and vibrant appearance.
Add subtle gradients around the pupil and refine the edges of the iris.
Introduce small reflective shapes and adjust the brightness of the eye to create a beautiful glass-like effect.
Make sure the pupil remains clearly visible and the overall eye structure stays balanced.
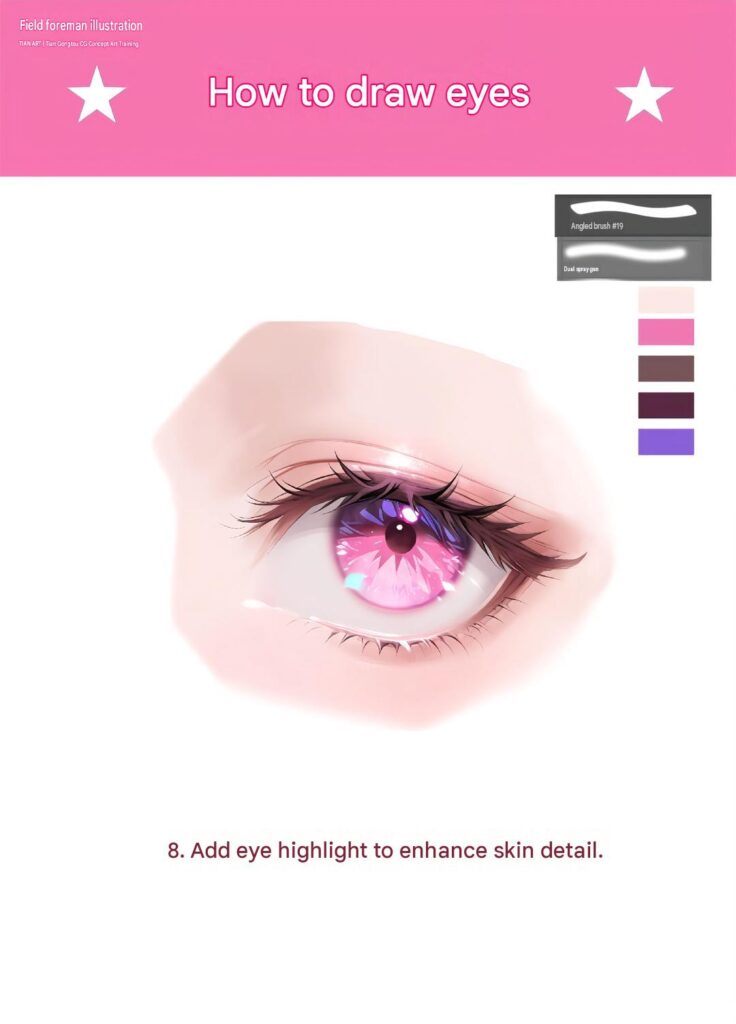
Step 8: Add Final Highlights and Skin Details
Use bright white and light blue highlights inside the iris to create a sparkling appearance.
Add soft highlights along the upper eyelid and surrounding skin. Refine the eyelashes and strengthen selected shadows to improve contrast.
Clean up unnecessary sketch lines and add the final reflective details.
2. How to draw lively eyes
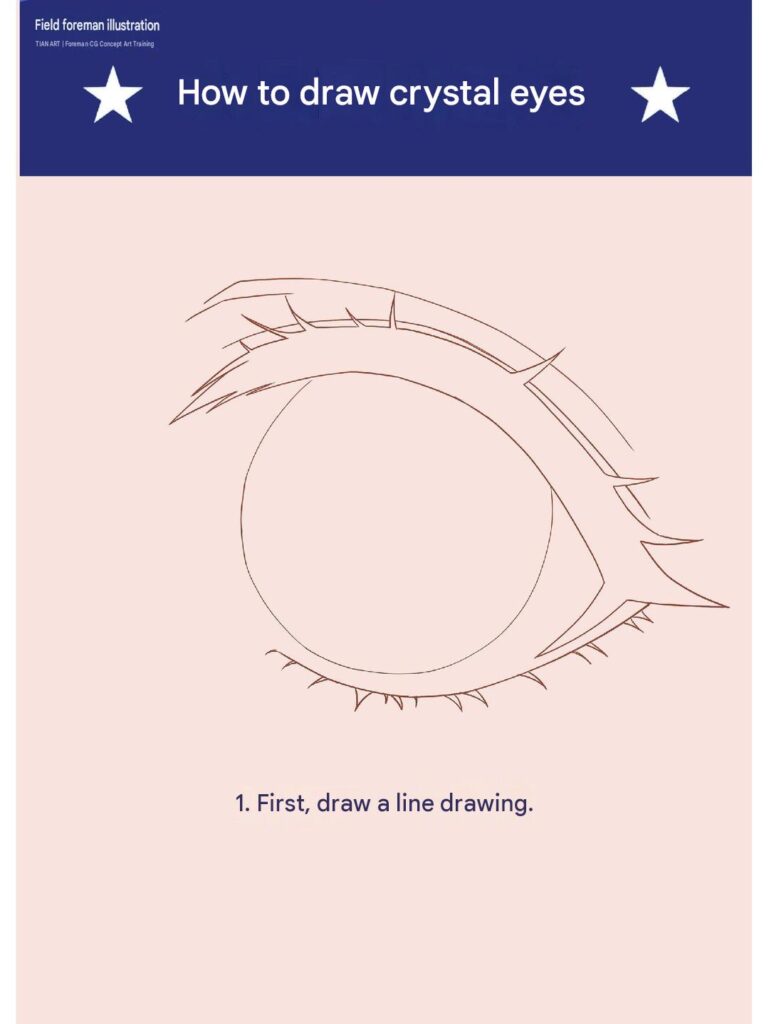
Step 1:
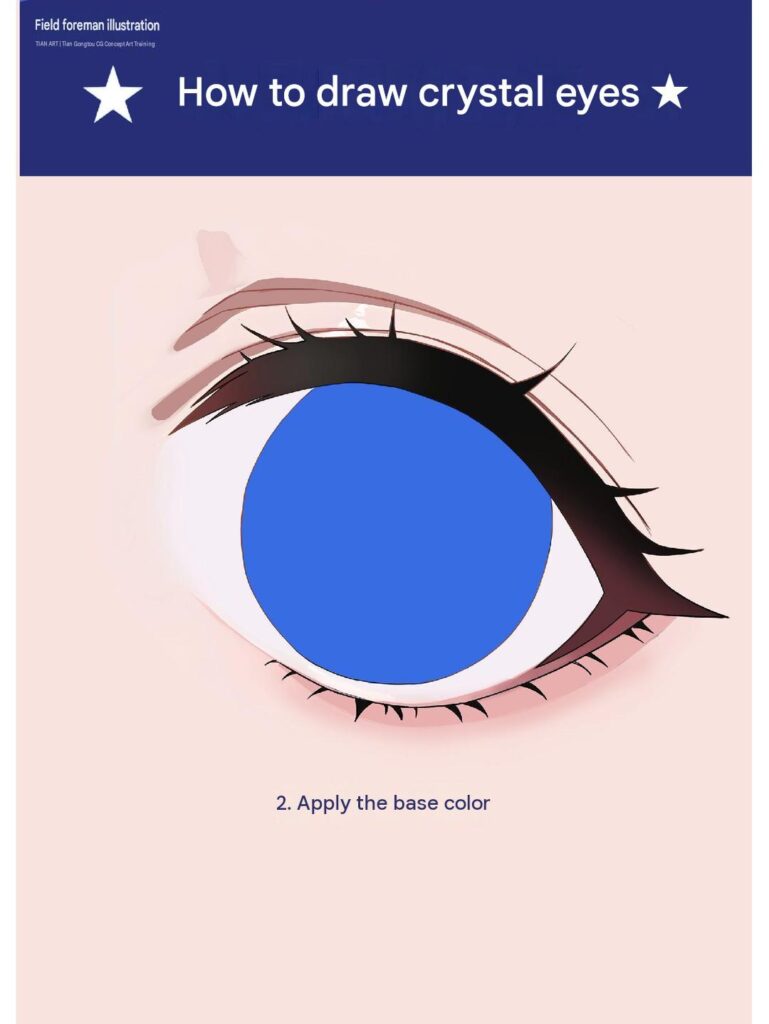
Step 2:
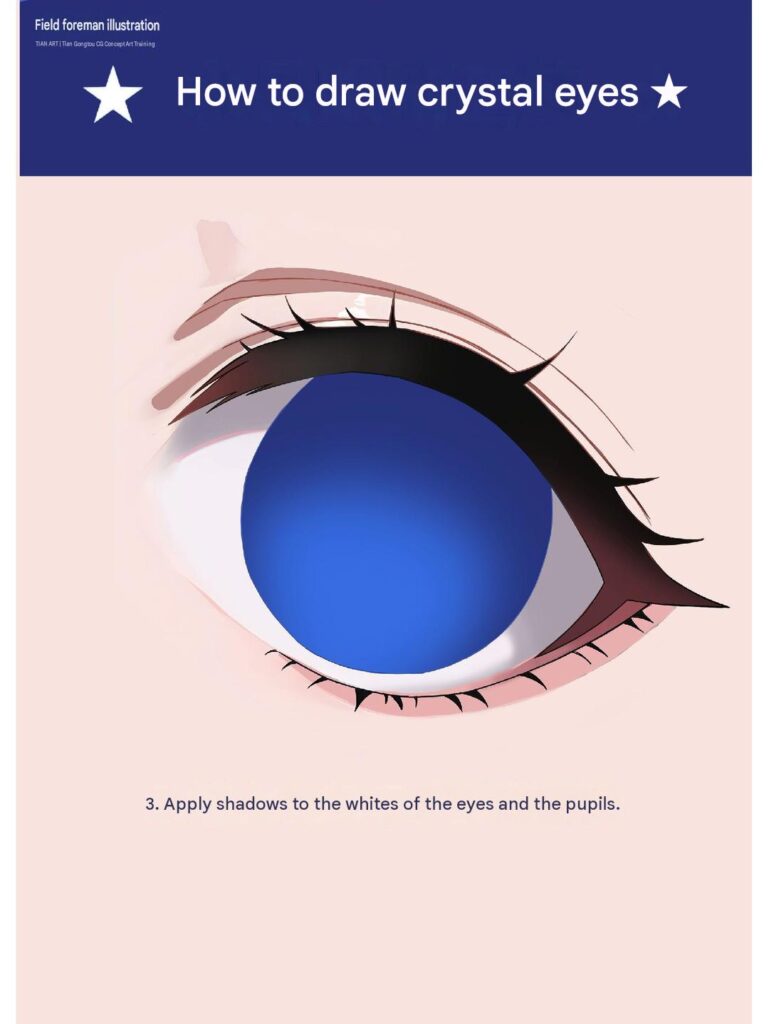
Step 3
Step 4
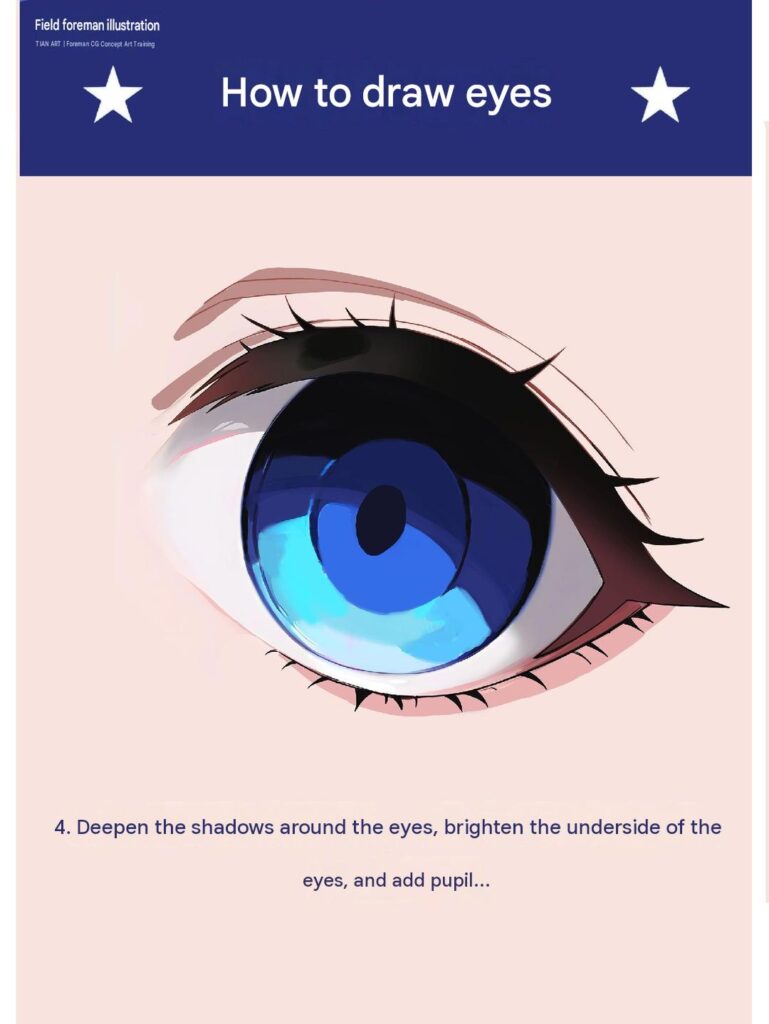
Step 5
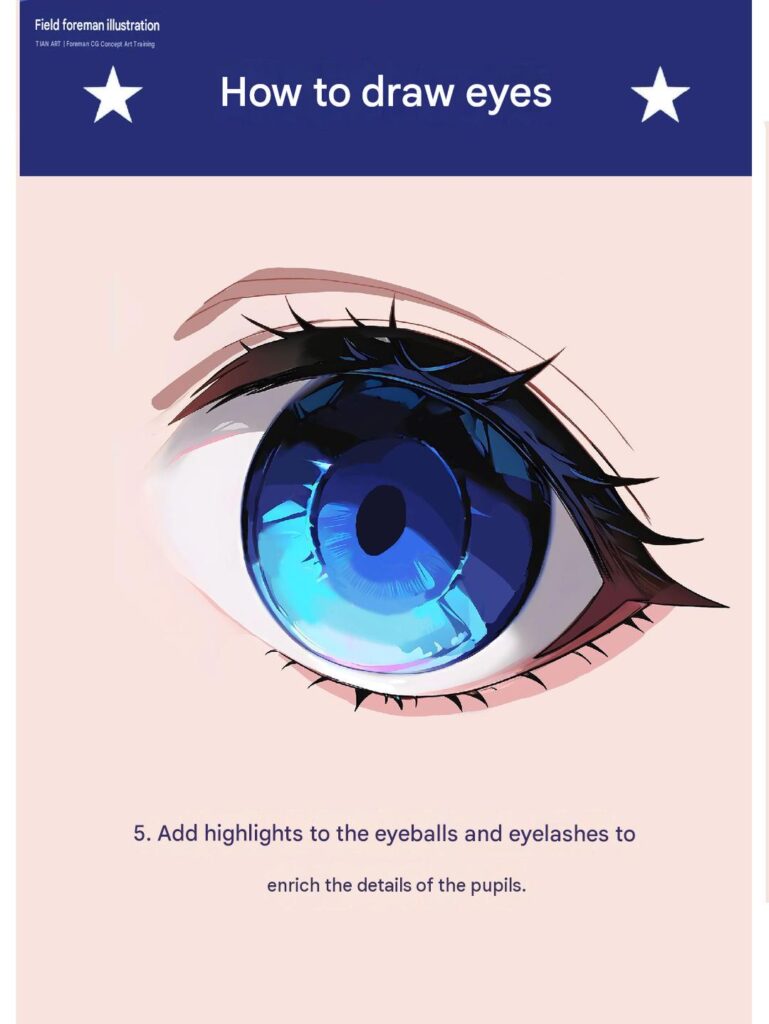
Step 6
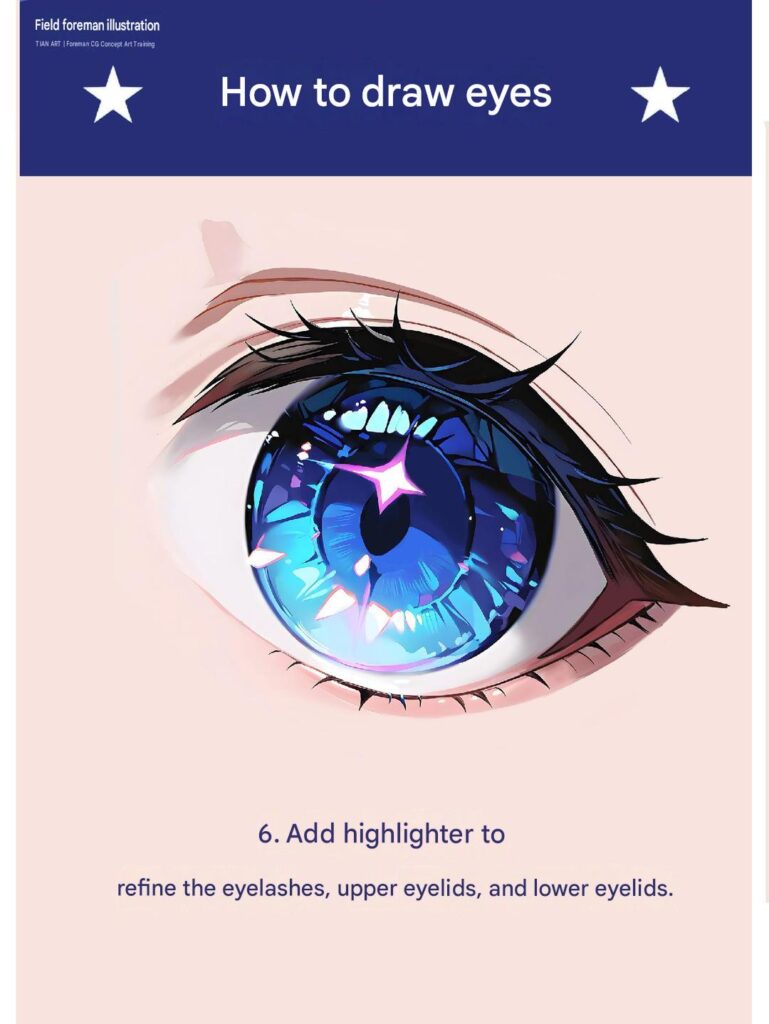
3. How to draw anime style eyes
Step 1
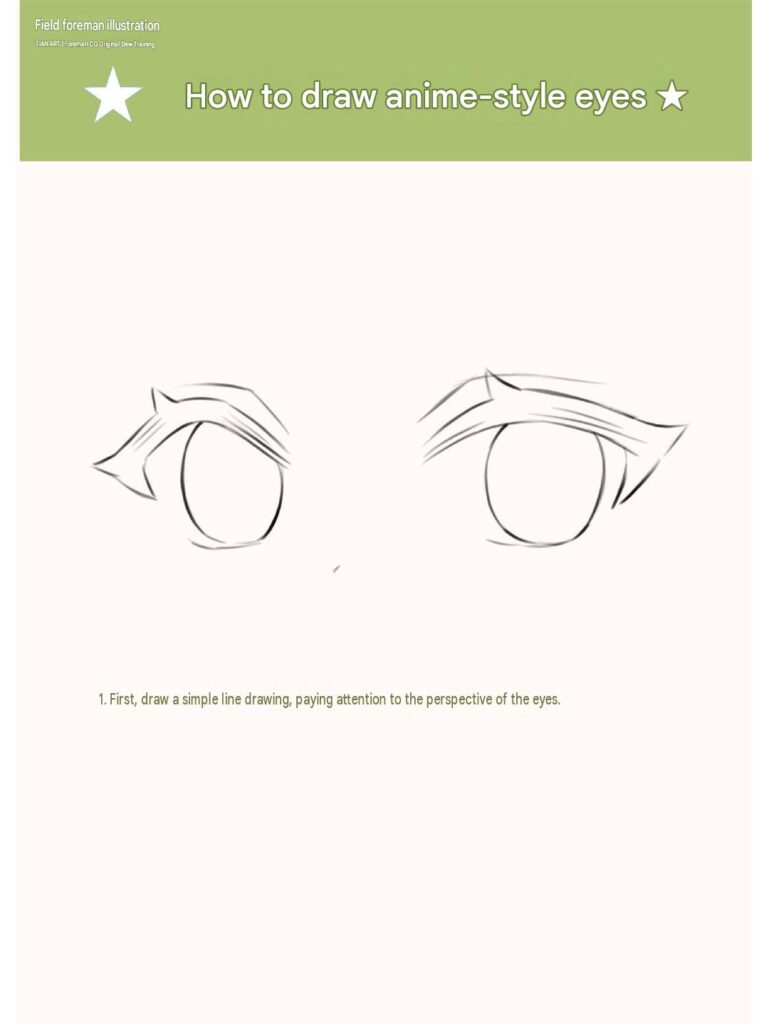
Step 2
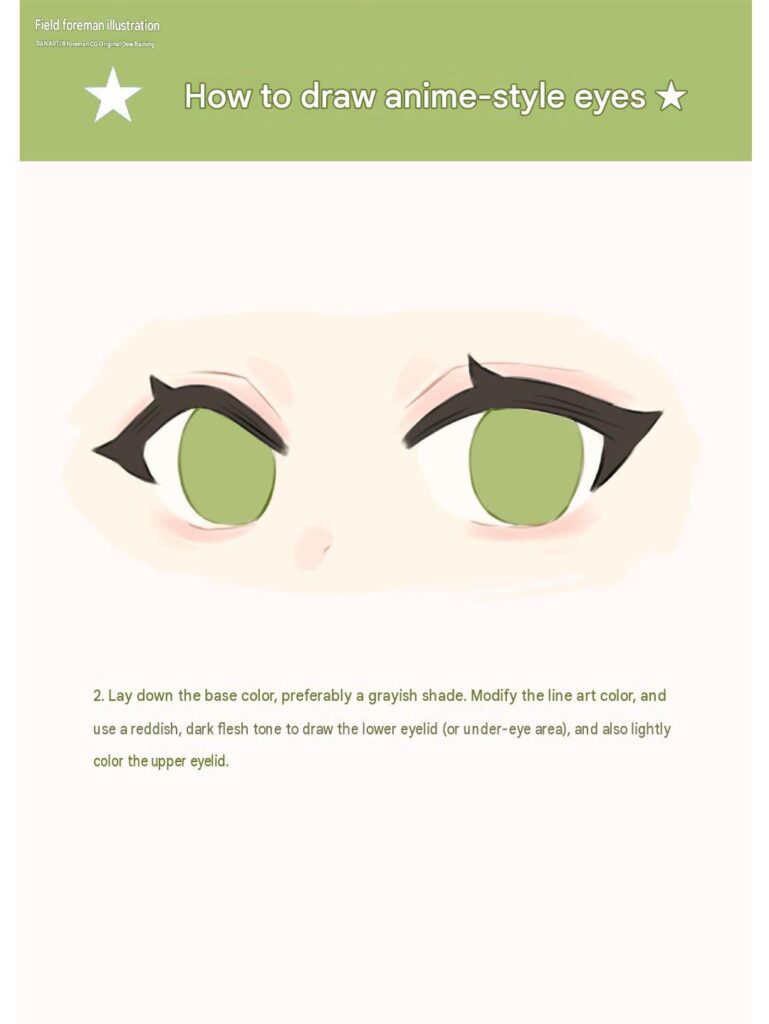
step 3
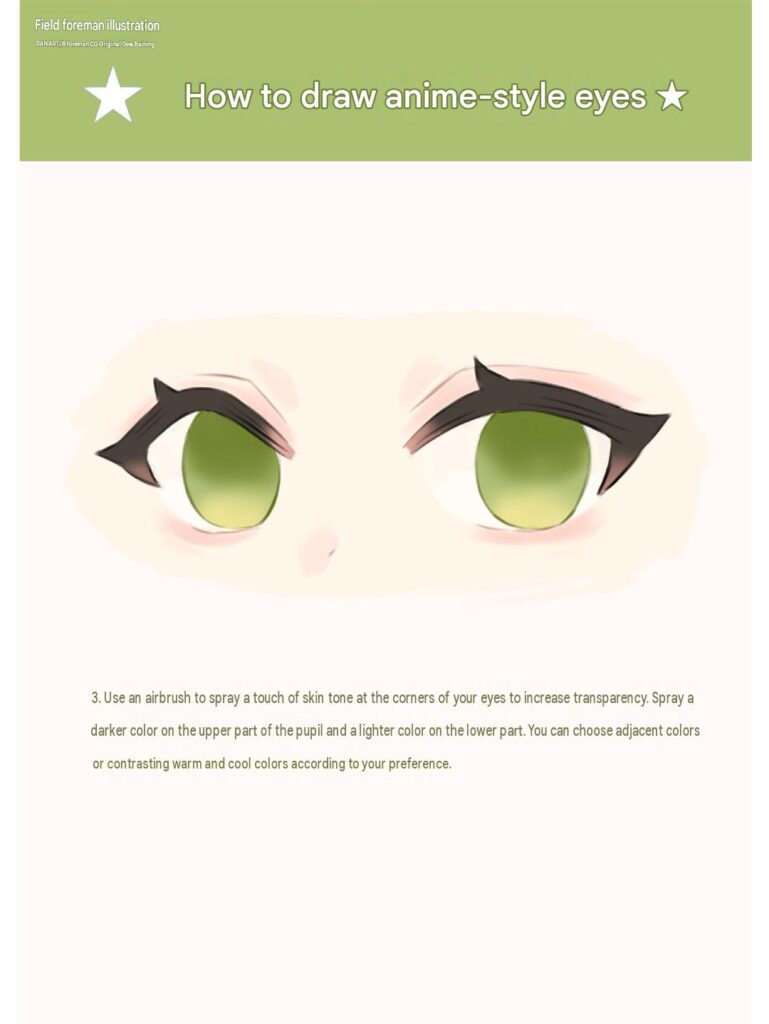
Step 4
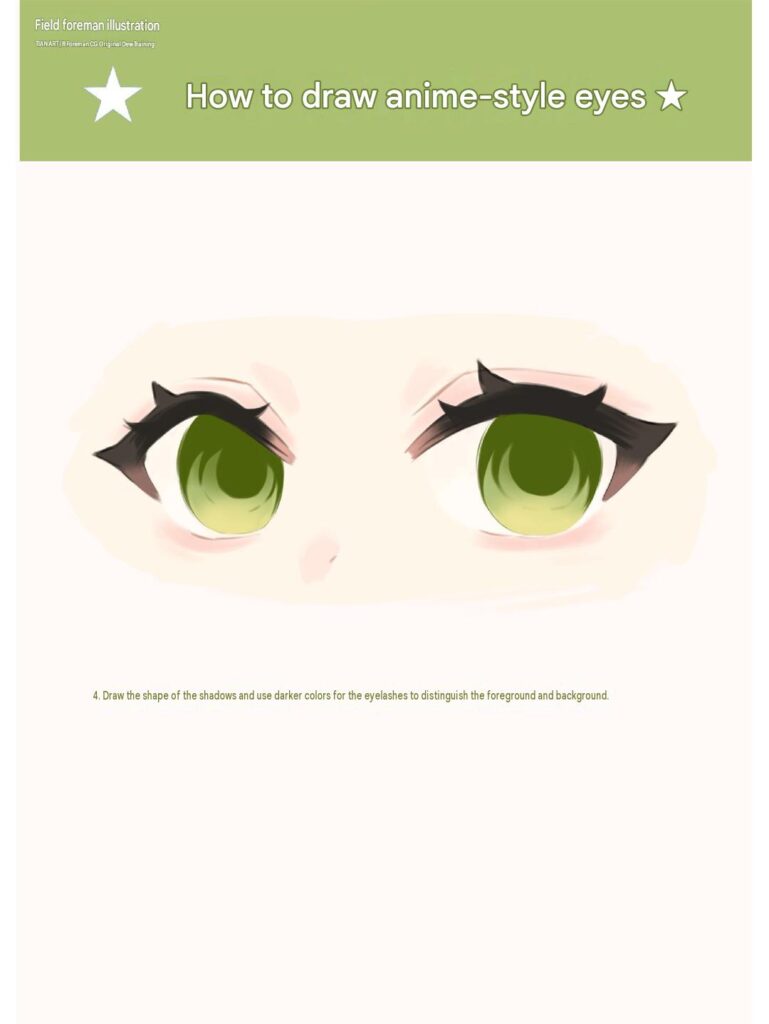
Step 5
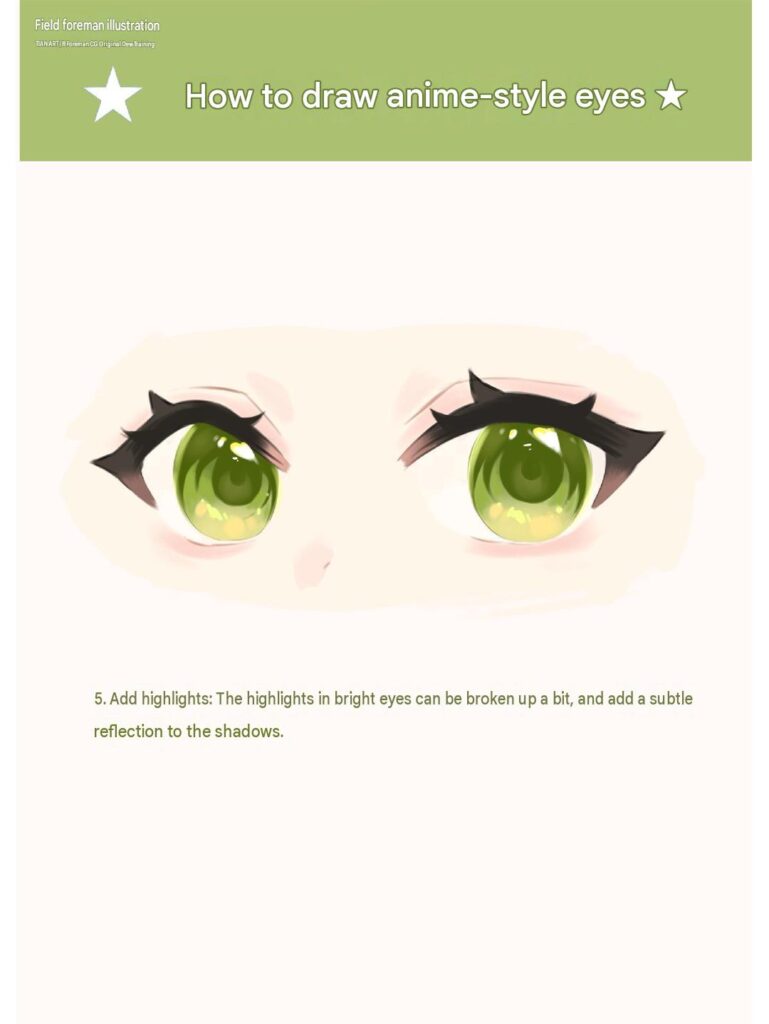
Step 6
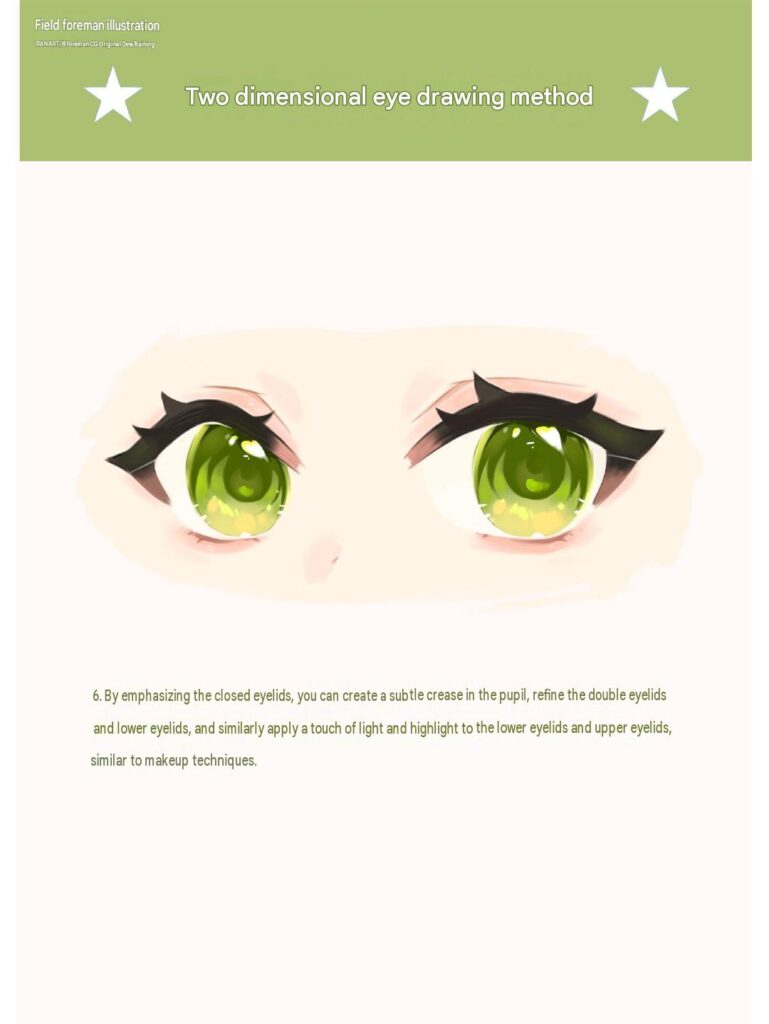
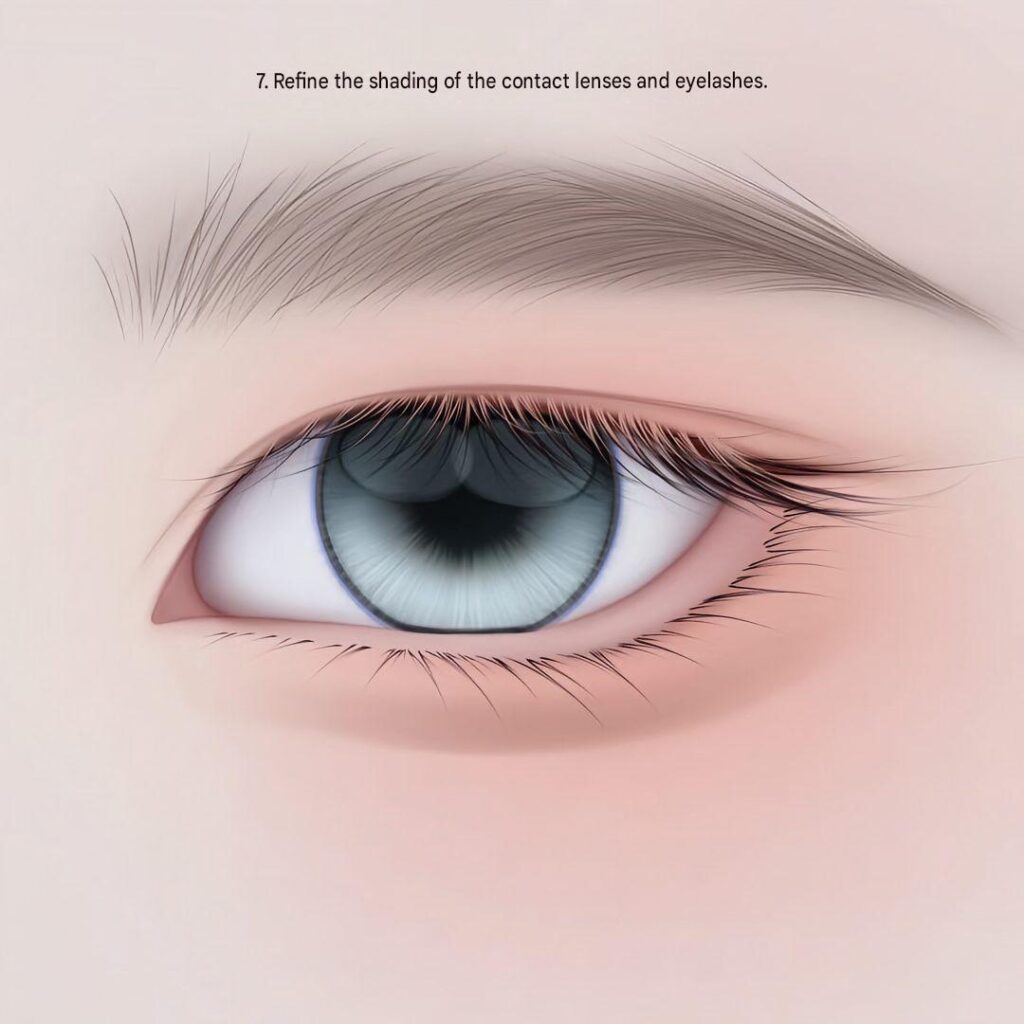
Step 7
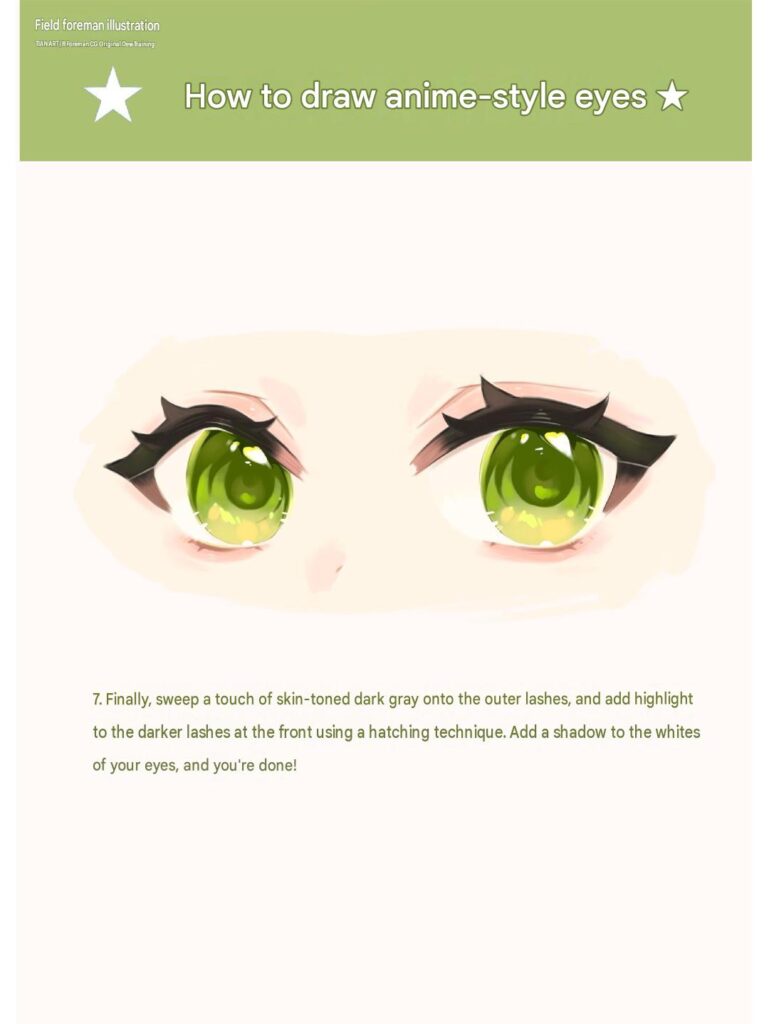
4. How to draw eye
Step 1
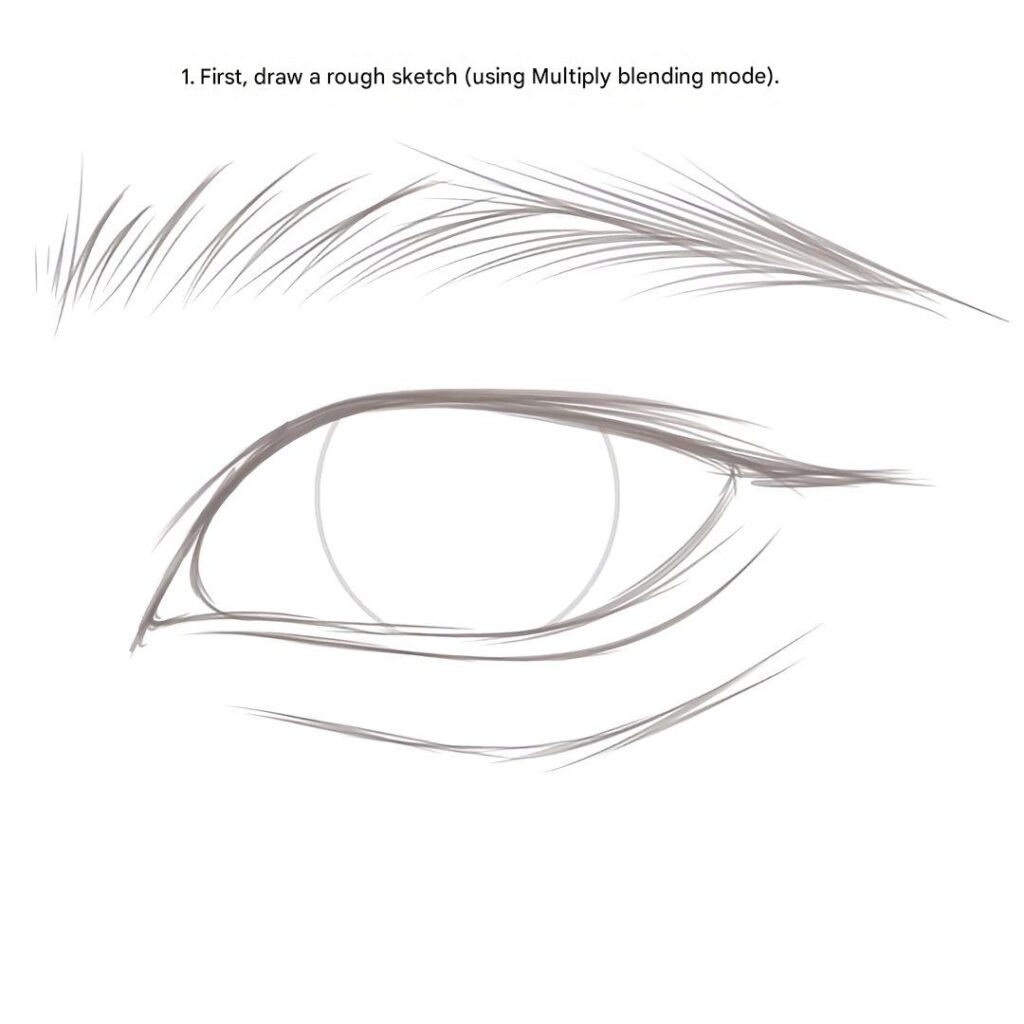
Step 2
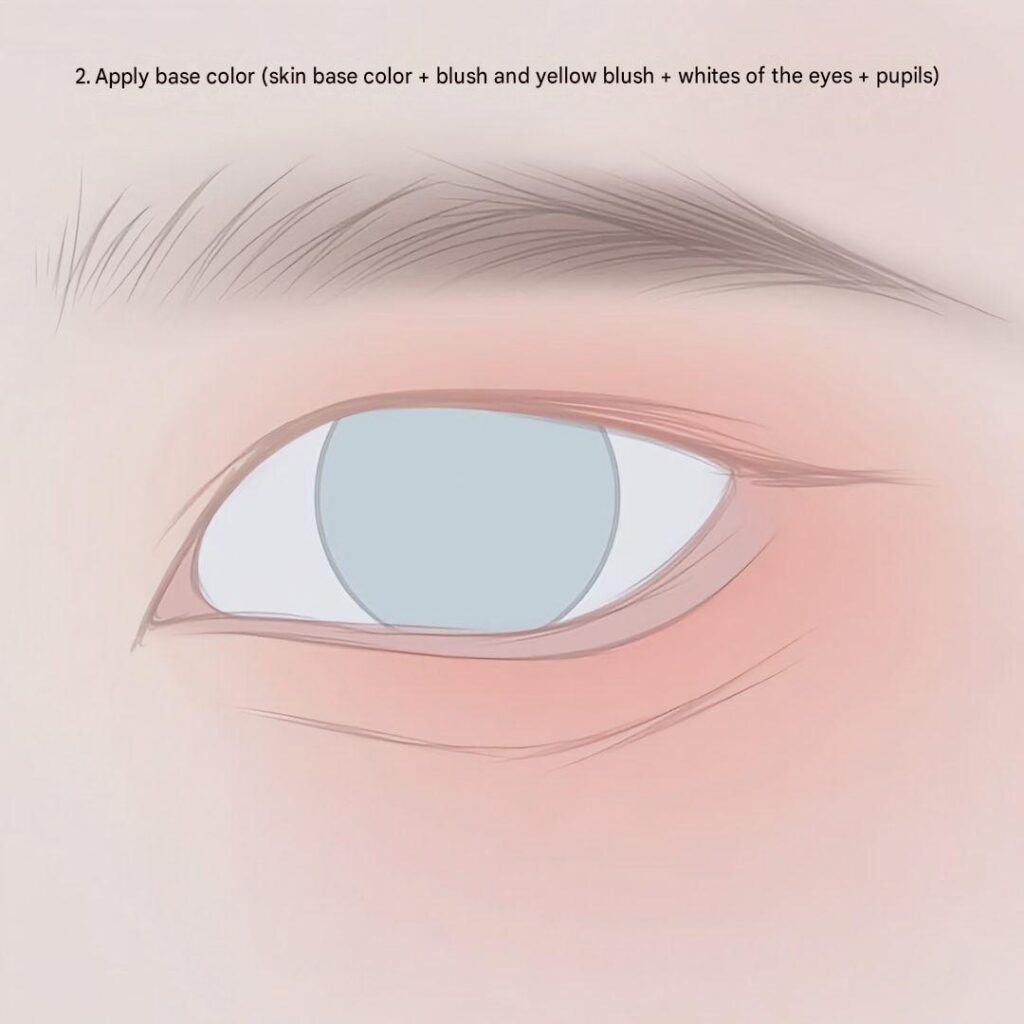
Step 3
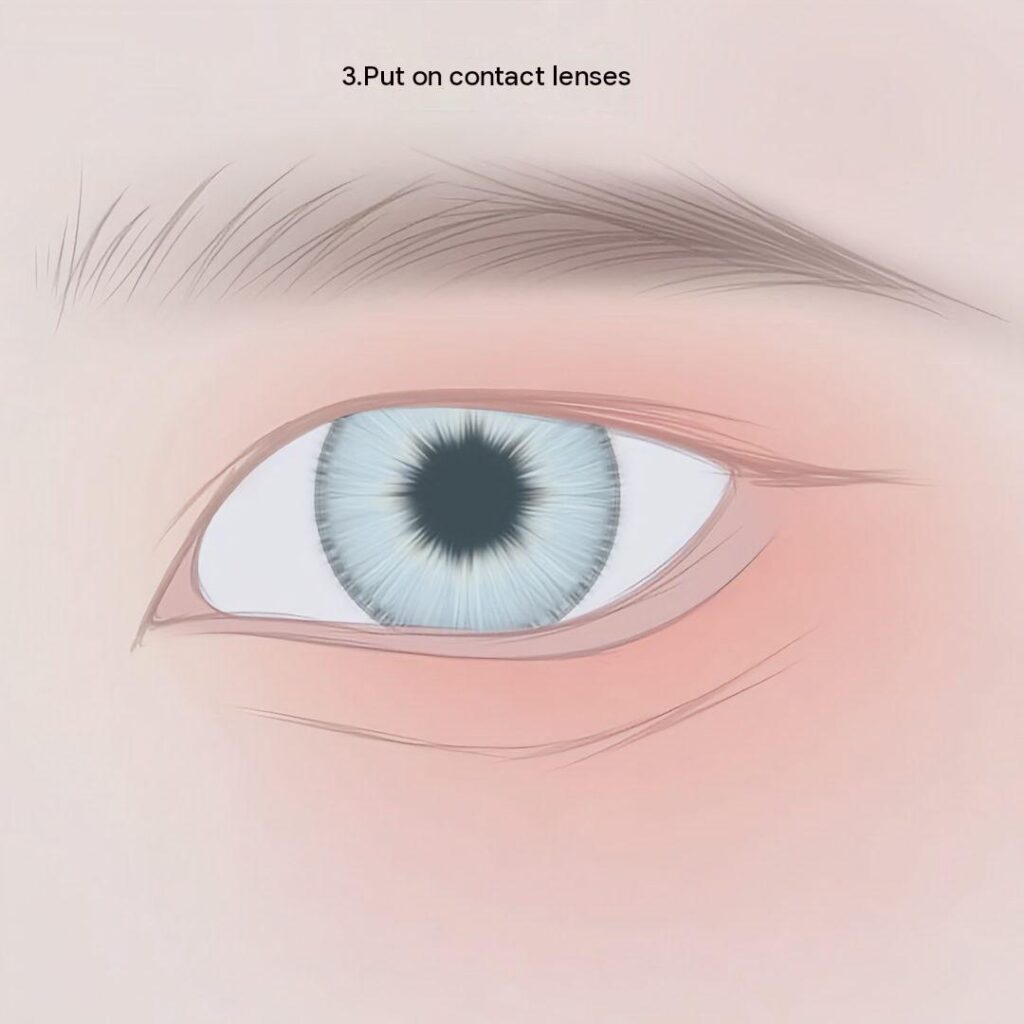
Step 4
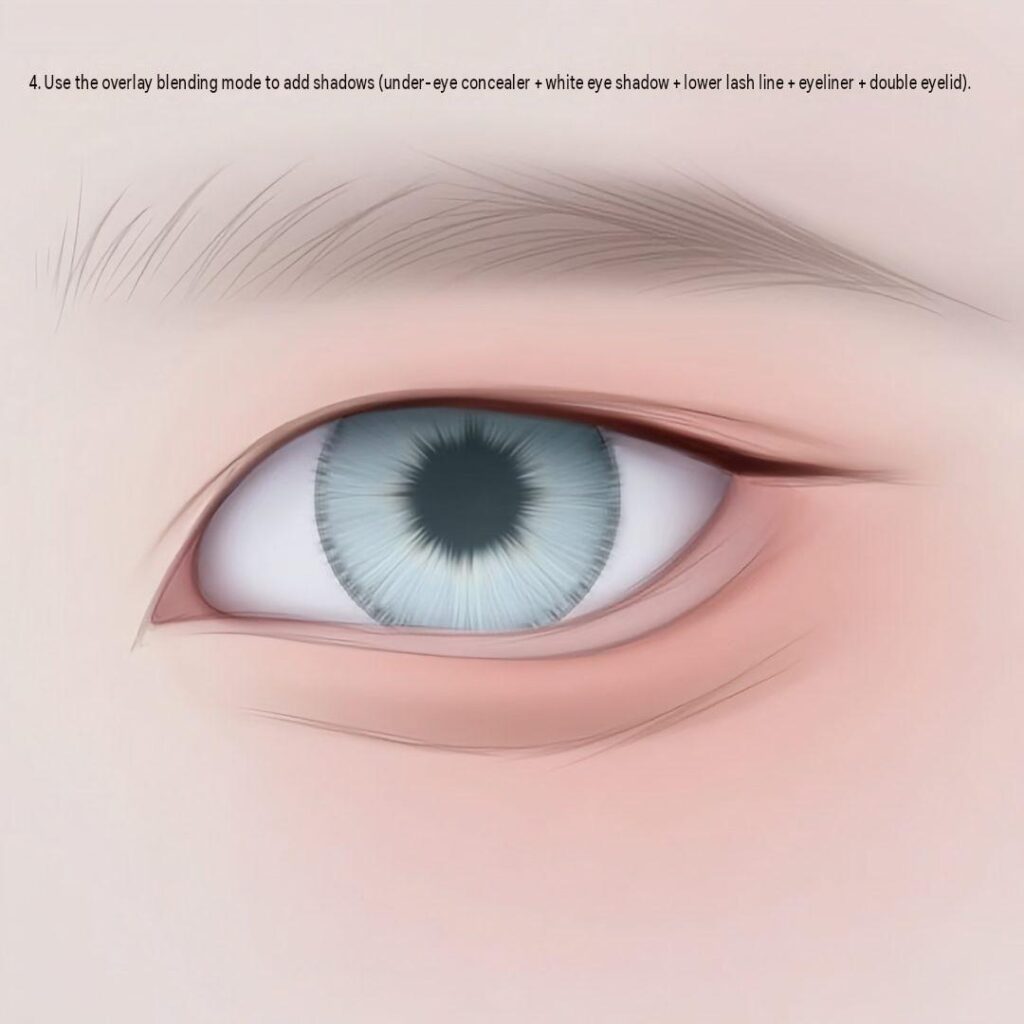
Step 5
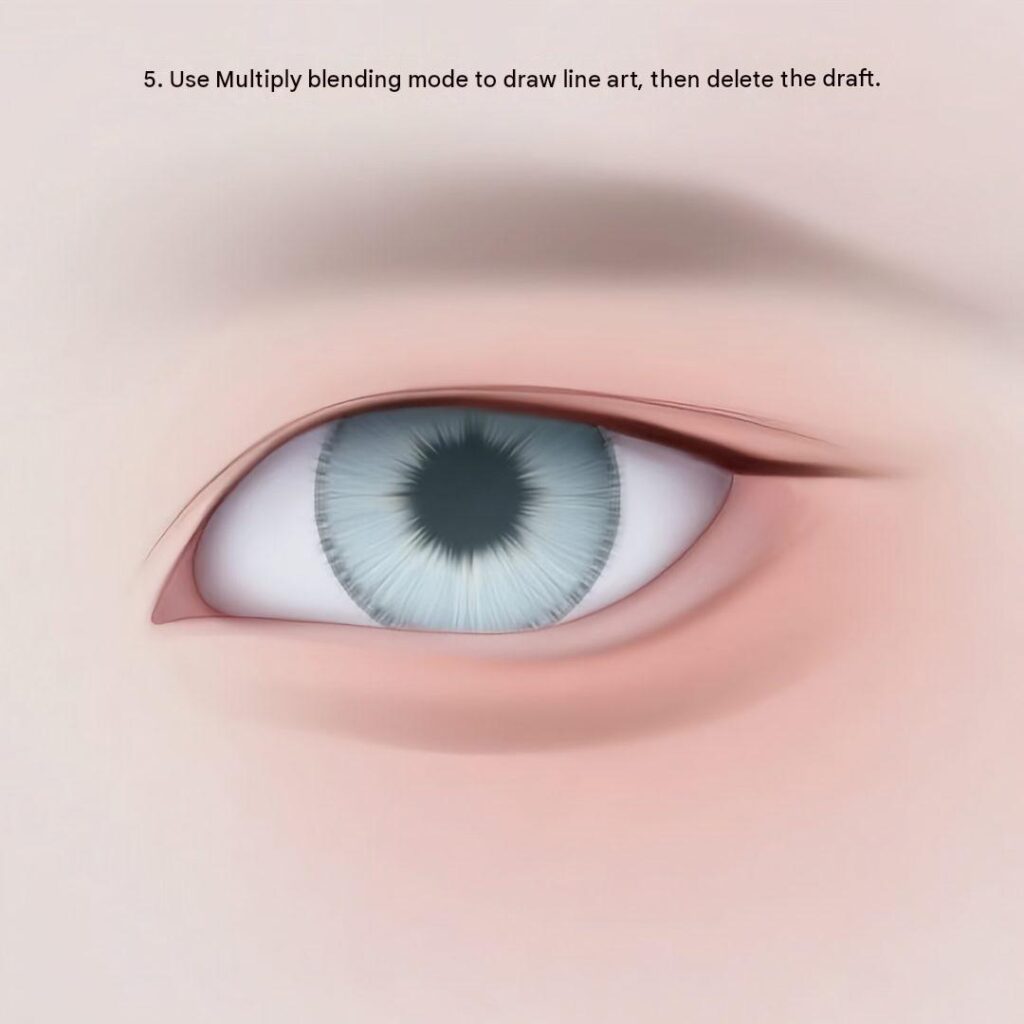
Step 6
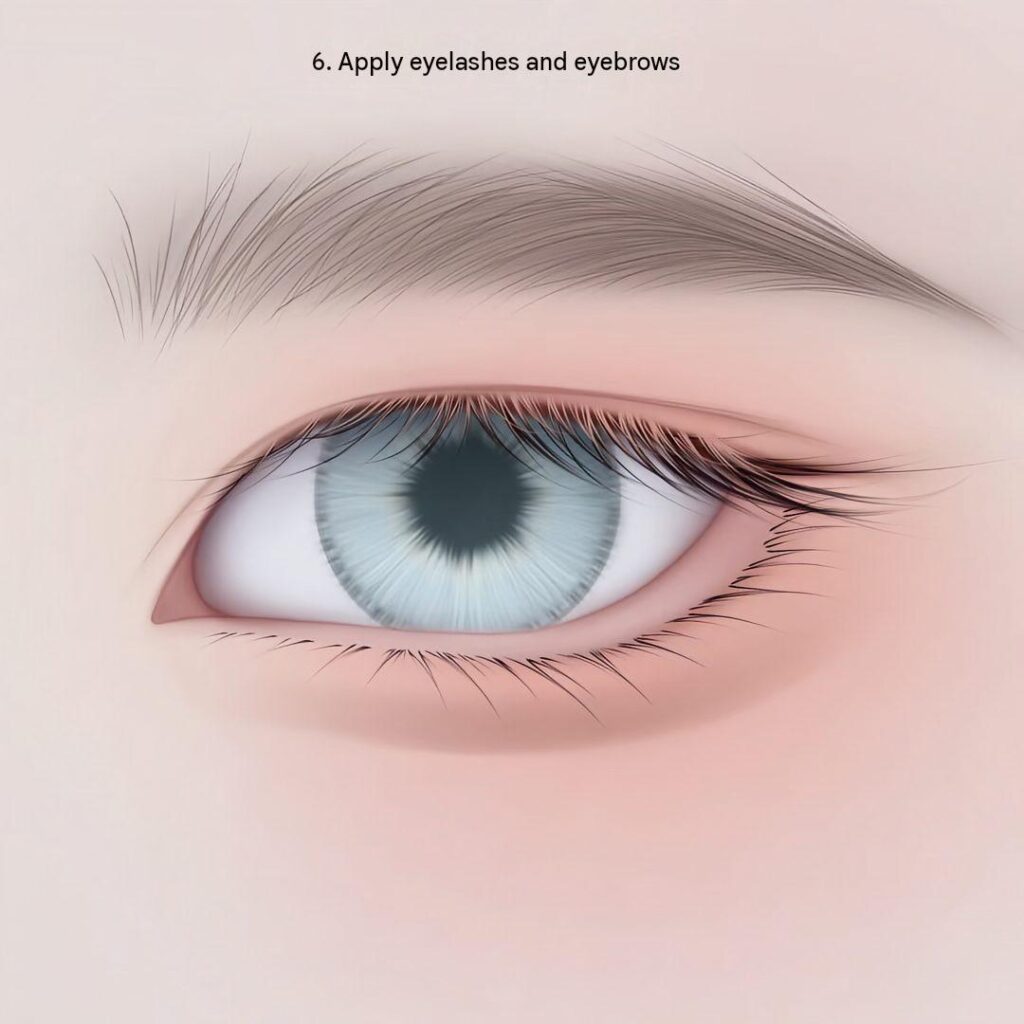
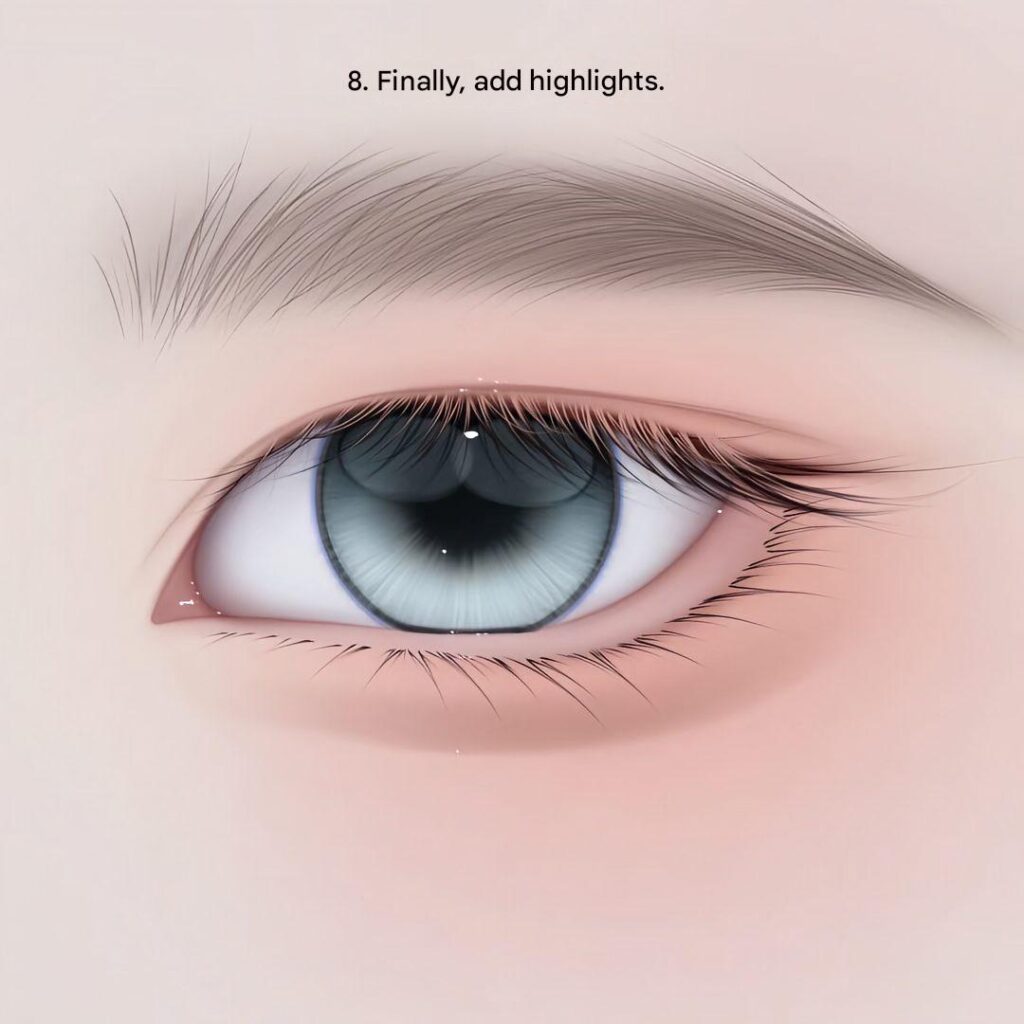
Step 7
Step 8




Leave a Reply