
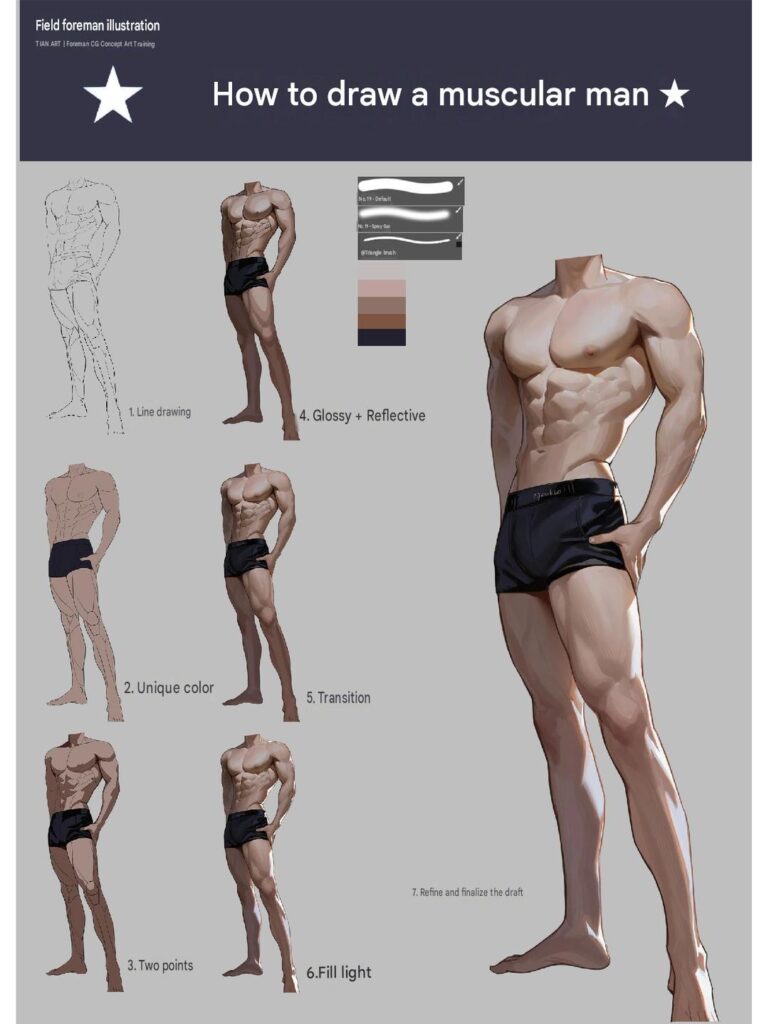
Learning how to draw a muscular man is an excellent way to improve your human anatomy, figure drawing, and digital painting skills. Creating a well-defined muscular body requires an understanding of body proportions, muscle structure, lighting, and shading techniques.
In this step-by-step tutorial, you will learn how to draw a realistic muscular male figure with a strong upper body, defined abdominal muscles, powerful legs, and natural body proportions.
How to Draw a Muscular Man – 7 Easy Steps for Beginners
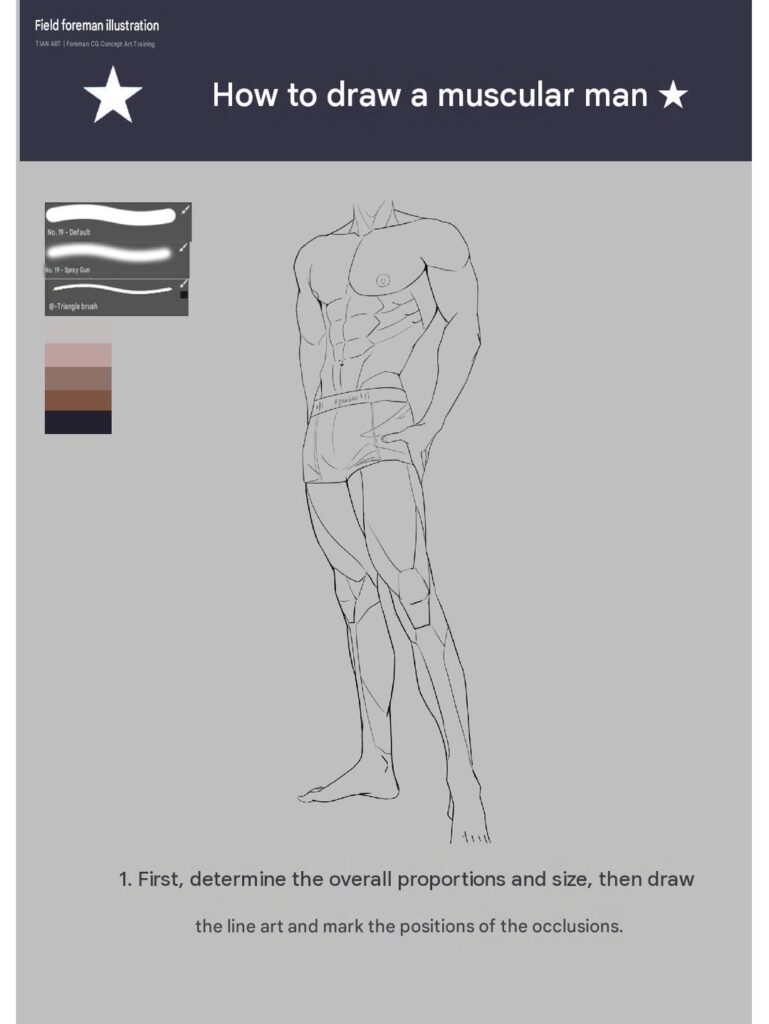
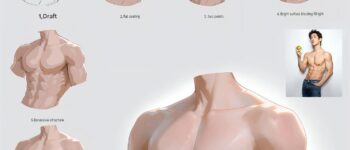
Step 1: Create the Initial Line Drawing
Begin by sketching the basic structure of the male figure.
Establish the head, neck, shoulders, chest, waist, hips, arms, and legs using simple shapes and guidelines.
Next, lightly outline the major muscle groups, including the chest, abdominal muscles, arms, thighs, and calves.
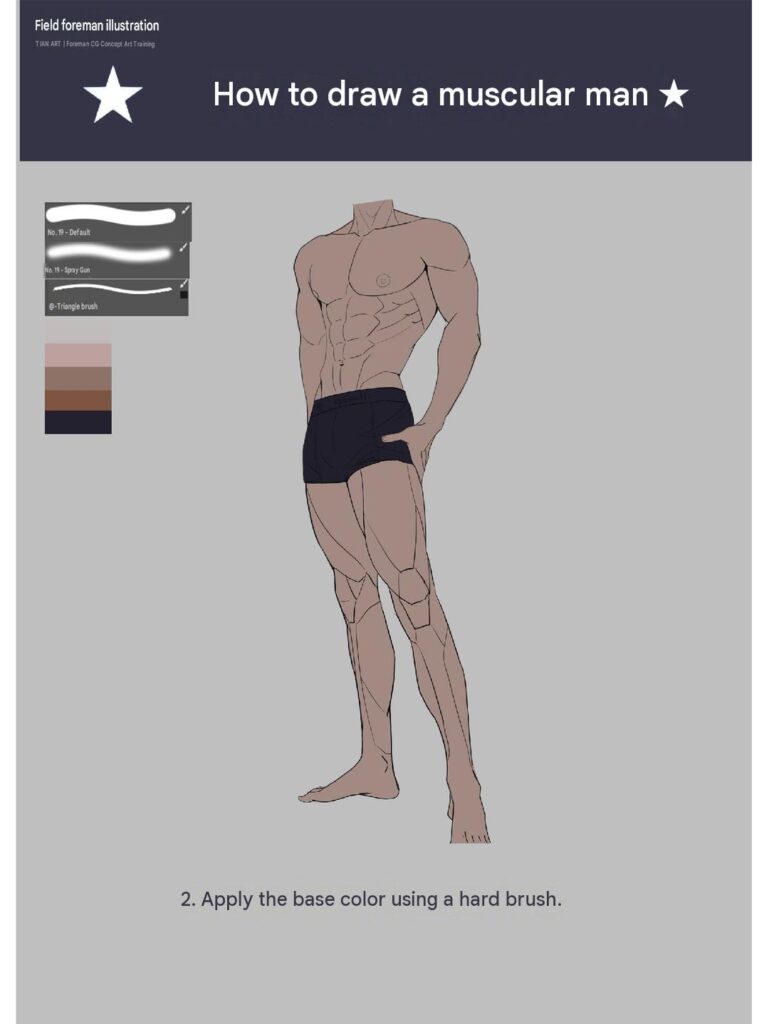
Step 2: Apply the Base Colors
Use a warm peach or light brown skin tone for the body. Apply a dark navy or black color to the shorts to create contrast with the skin.
Keep the base colors smooth and consistent across the different body areas.
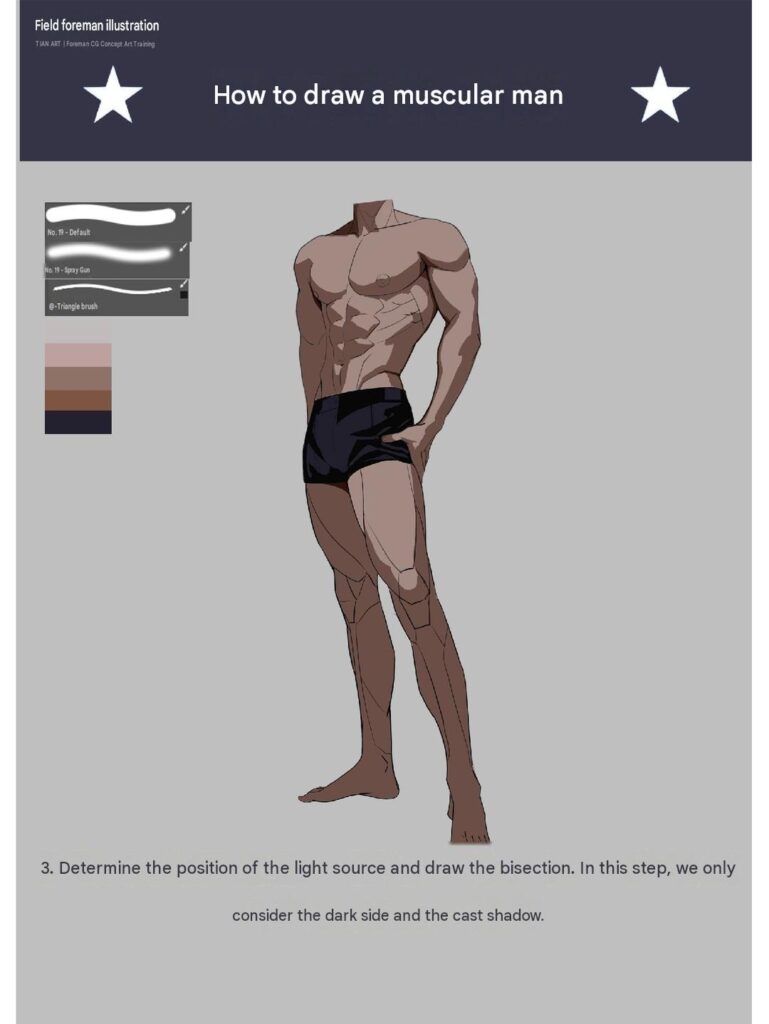
Step 3: Establish the Main Shadow Areas
Use darker brown and warm skin tones around the chest, abdomen, shoulders, arms, and legs.
Pay special attention to the areas underneath the pectoral muscles, between the abdominal sections, and around the sides of the thighs.
Add darker tones along the waist and inner legs to create a stronger sense of depth.
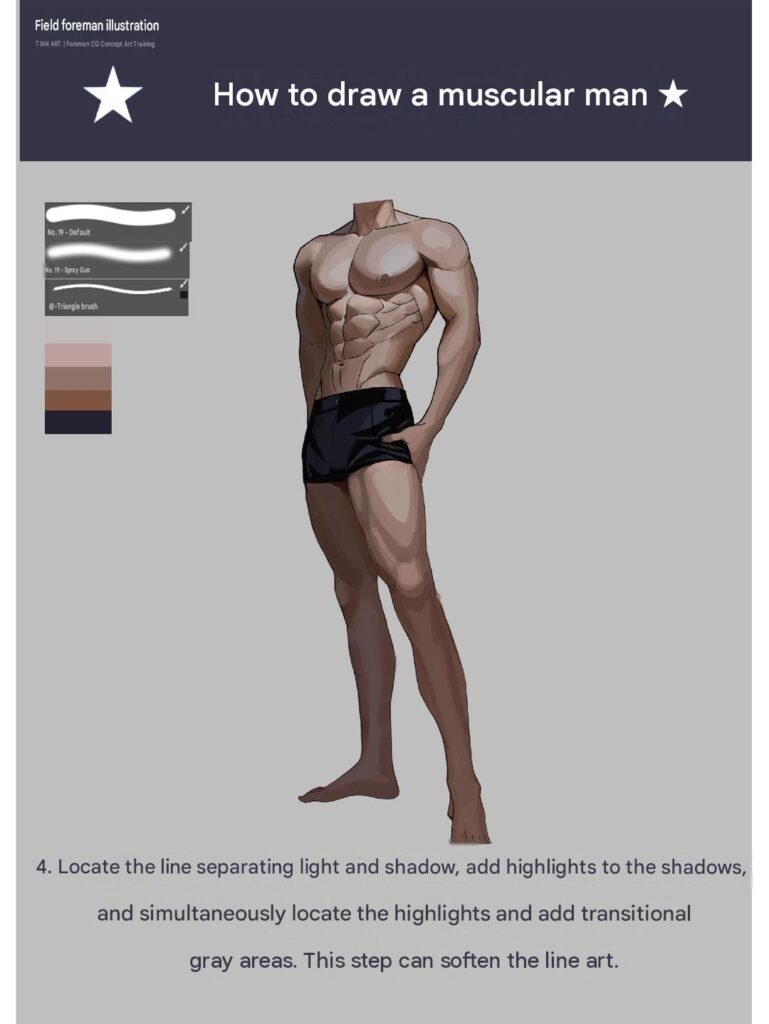
Step 4: Add Glossy and Reflective Effects
Use light peach, cream, and pale skin tones on the raised surfaces of the chest, shoulders, arms, and legs.
For the shorts, add small bright highlights along the fabric folds to create a slightly glossy material effect.
Use a soft brush for smooth highlights and a sharper brush for selected reflective details.
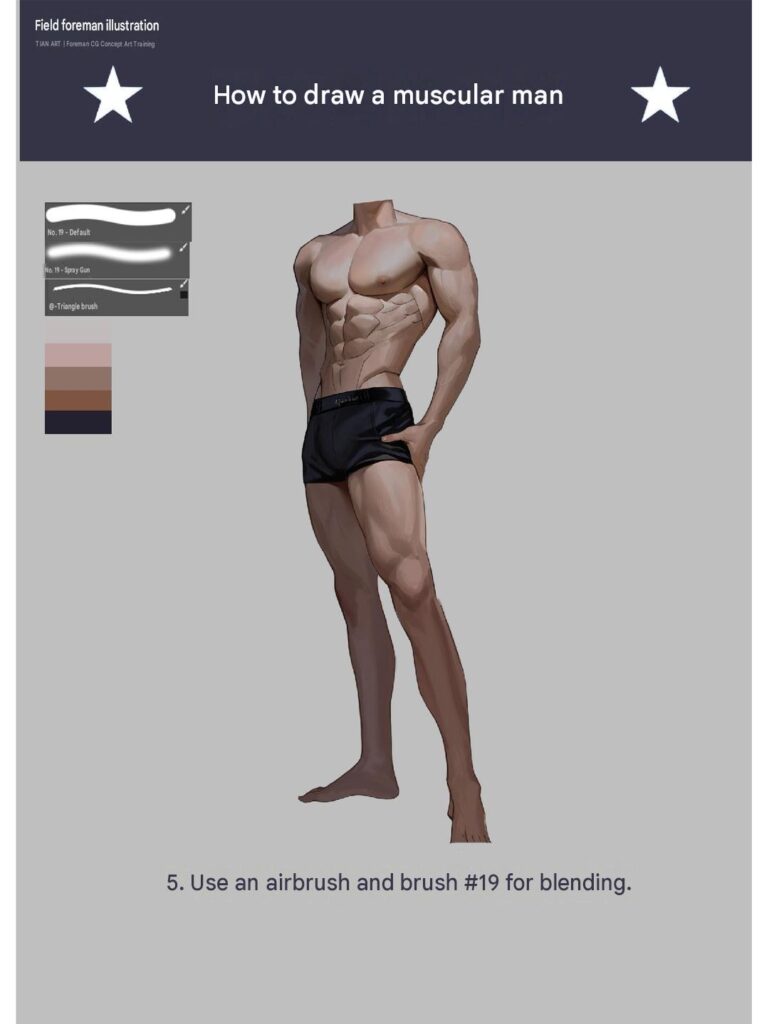
Step 5: Create Smooth Color Transitions
Blend the base colors, shadows, and highlights to achieve a natural appearance.
Use intermediate skin tones to connect the darker shadow areas with the brighter surfaces.
Refine the transitions around the abdominal muscles, chest, shoulders, and thighs.
Avoid creating harsh boundaries between muscle groups. Smooth blending helps the body look rounded and anatomically connected.
For the shorts, soften selected transitions while keeping the darkest folds visible.
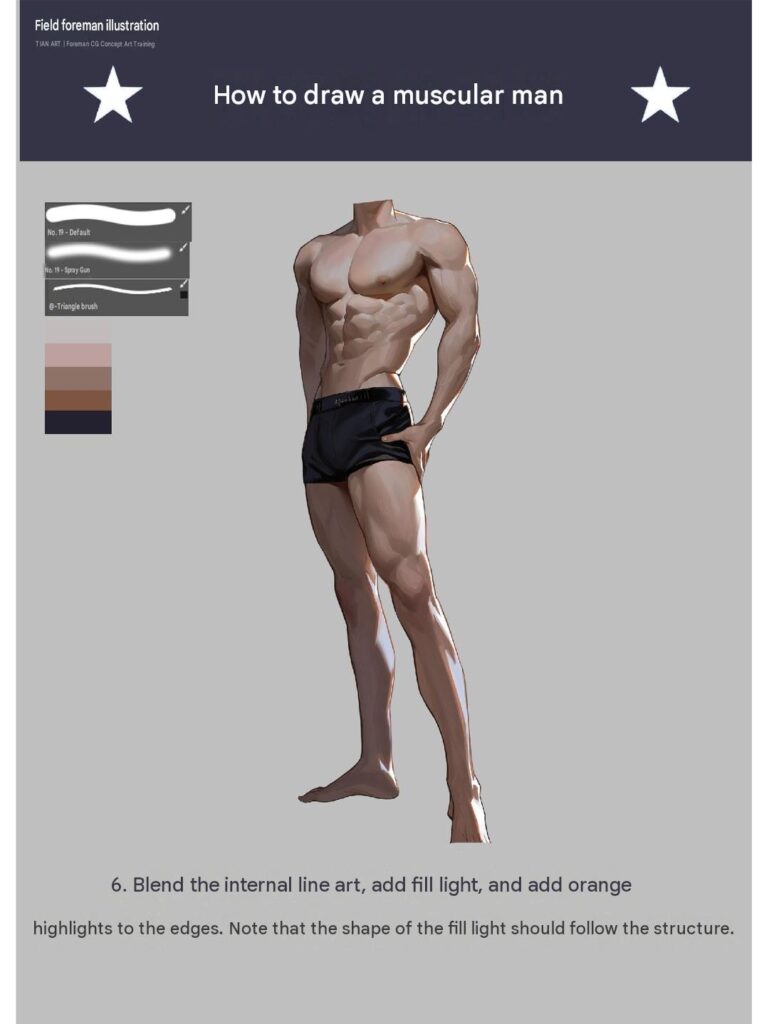
Step 6: Refine the Lighting and Fill Light
Add soft highlights to the upper chest, shoulders, abdominal muscles, thighs, and lower legs.
Introduce subtle reflected light along the darker sides of the body to prevent the shadows from looking completely flat.
Refine the muscle contours and adjust the contrast between light and dark areas.
This step is important for creating a realistic sense of volume and emphasizing the muscular physique.
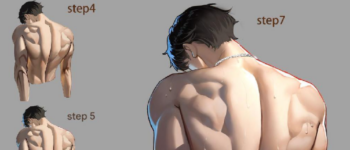
Step 7: Refine and Finalize the Drawing
Polish the muscle definition, body proportions, skin tones, and clothing details. Add small highlights to the chest, abdomen, arms, and legs.
Clean up unnecessary sketch lines and refine the edges of the figure.
Make sure the lighting and shadows are balanced across the entire body.
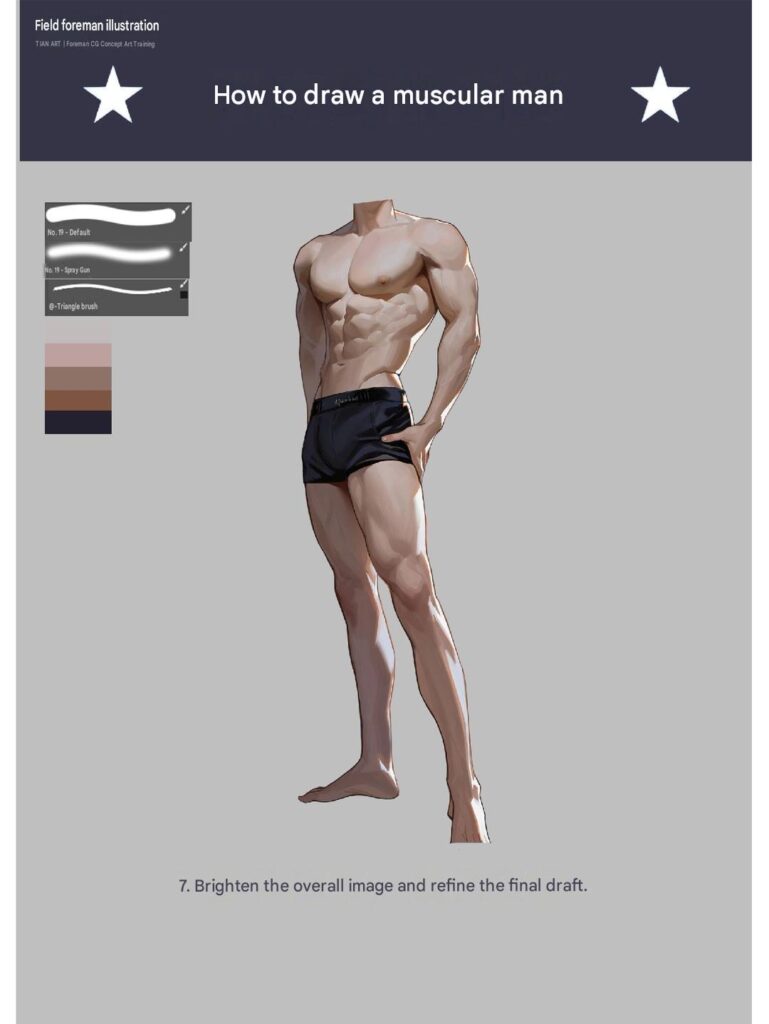
Your muscular male figure illustration is now complete!



Leave a Reply