
Learning how to draw a hand is one of the most important skills for artists who want to improve their human anatomy and character illustration abilities. Hands are challenging to draw because they contain many small joints, delicate curves, and complex proportions.
In this step-by-step tutorial, you will learn how to draw a beautiful hand in a natural, relaxed pose. Starting with a simple anatomical sketch, you will gradually build the hand’s structure, apply skin tones, add shadows, and create realistic highlights.
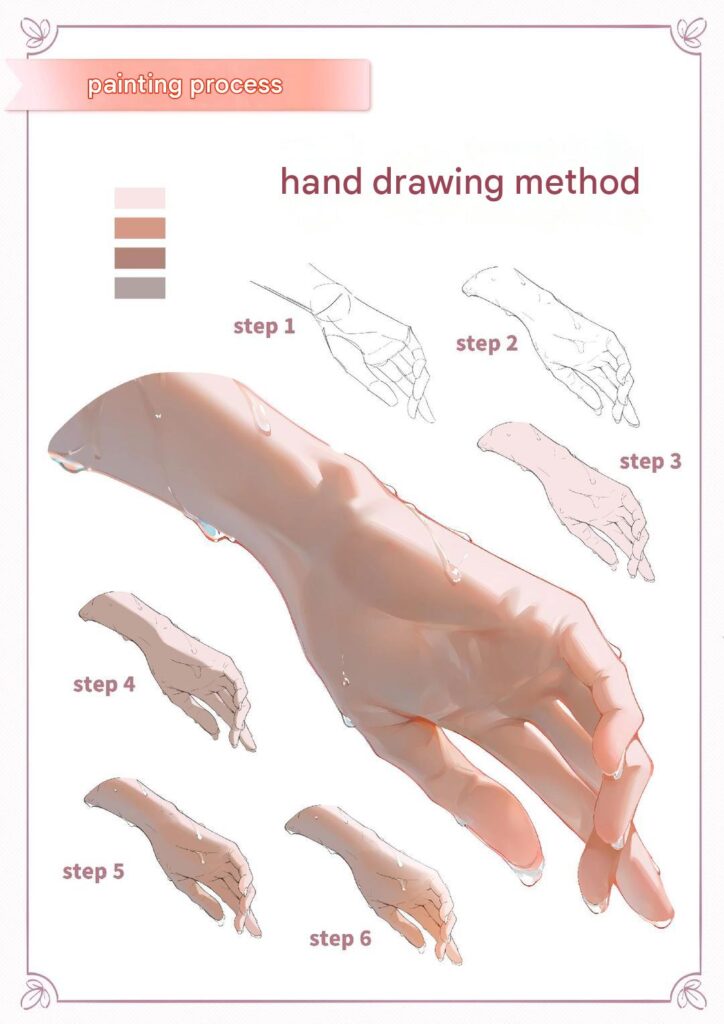
How to Draw a Realistic Hand
1. How to Draw a Realistic Hand – 6 Easy Steps for Beginners
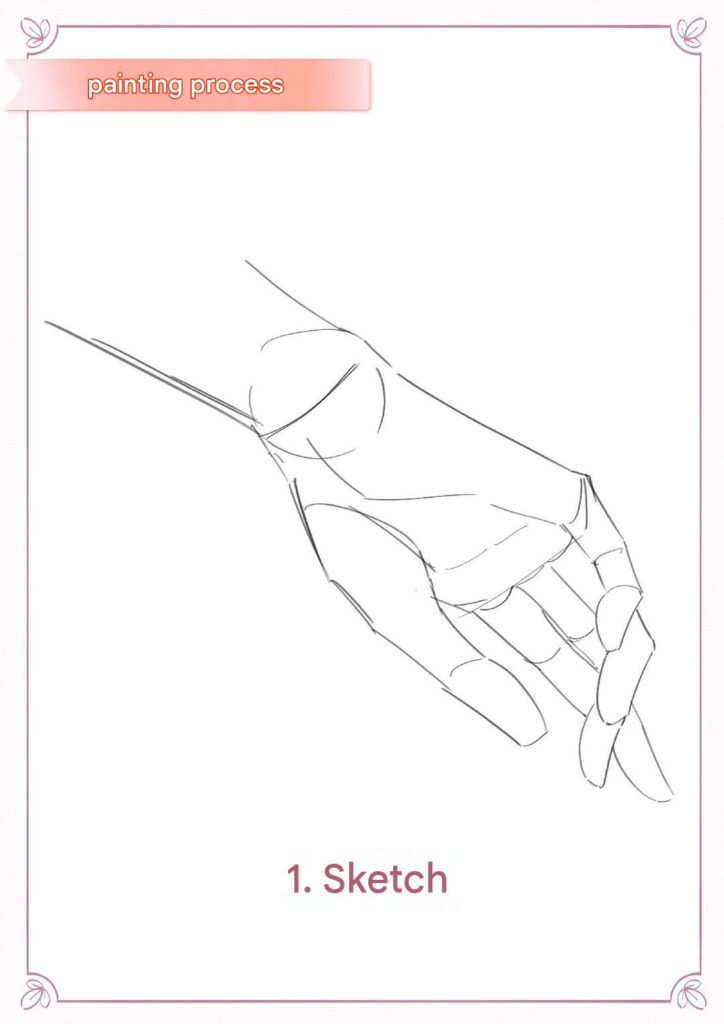
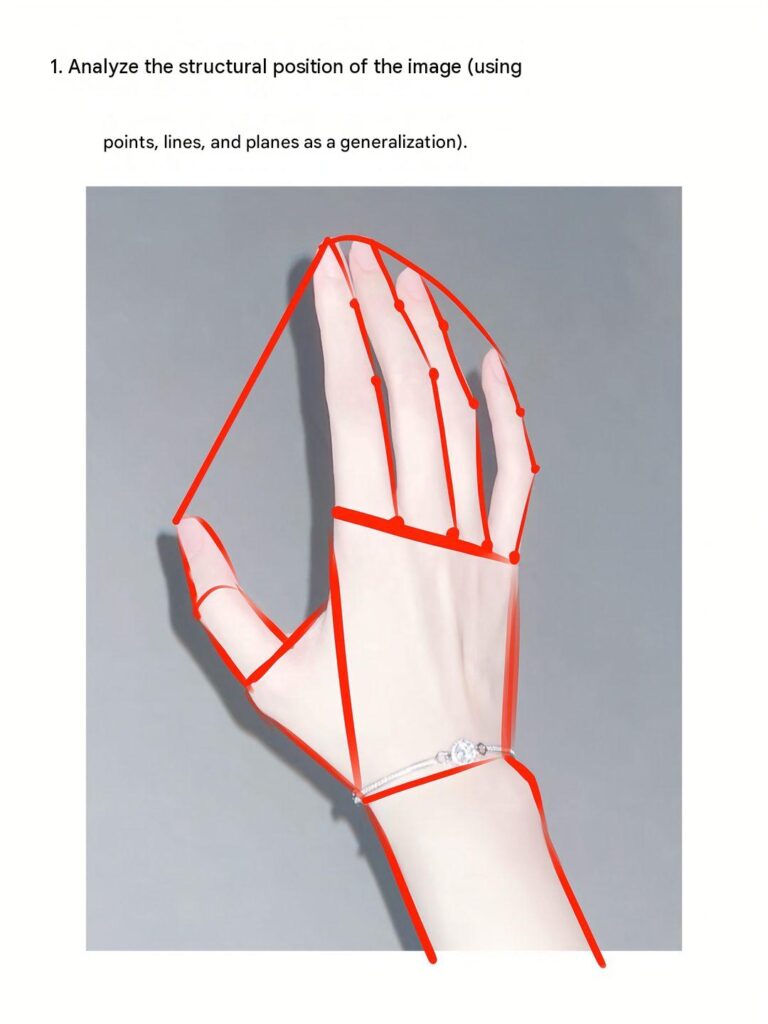
Step 1: Begin by creating a simple line drawing of the hand.
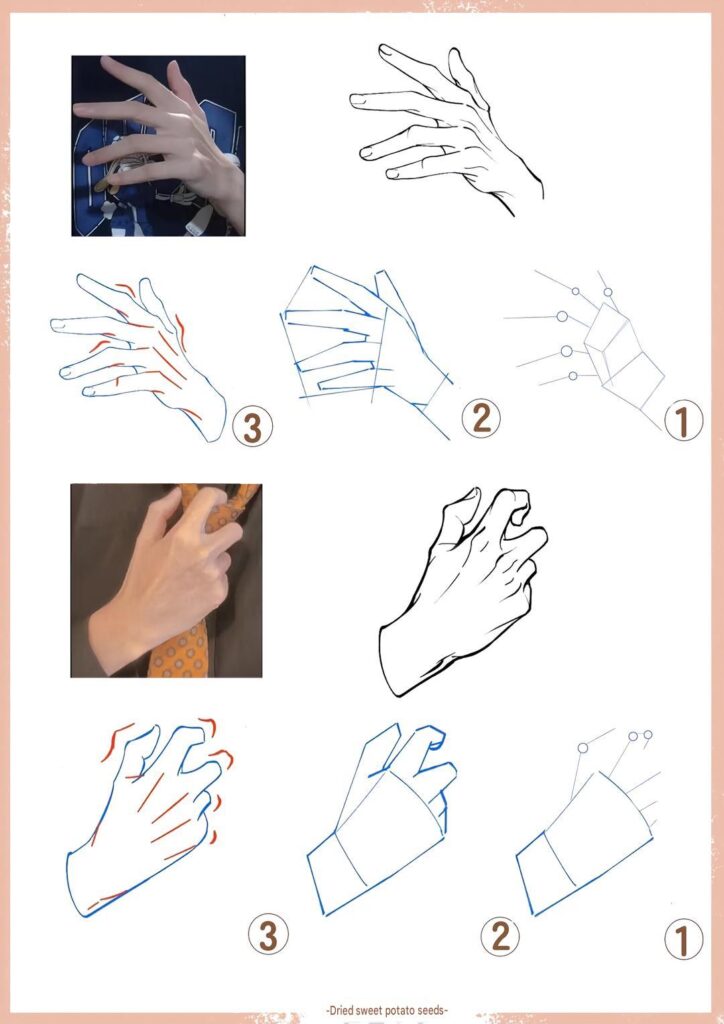
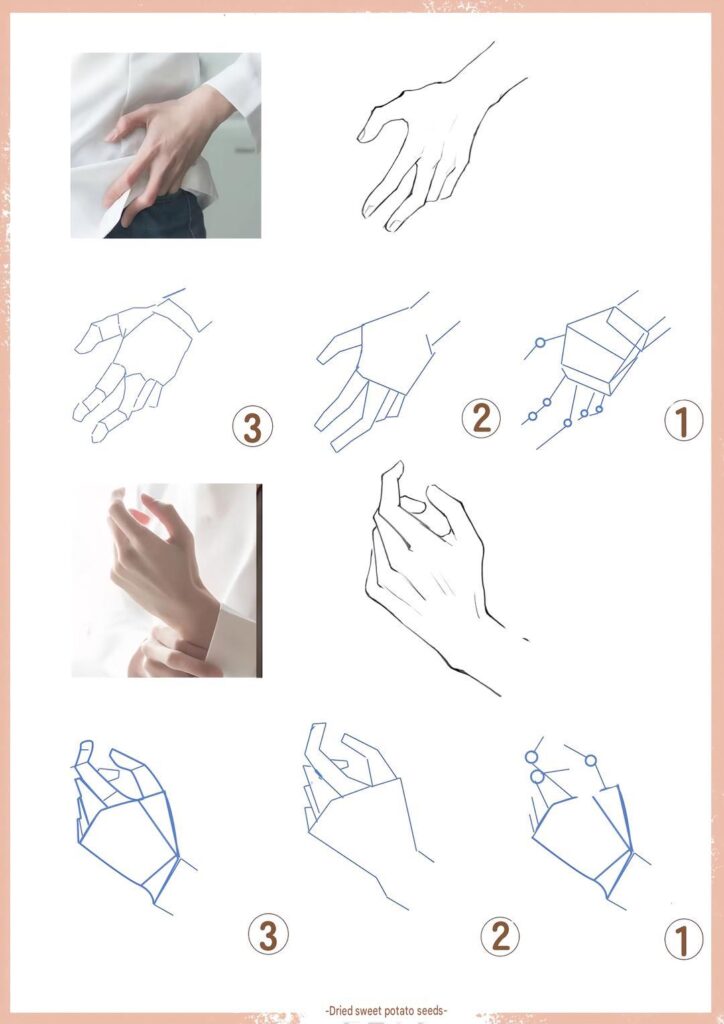
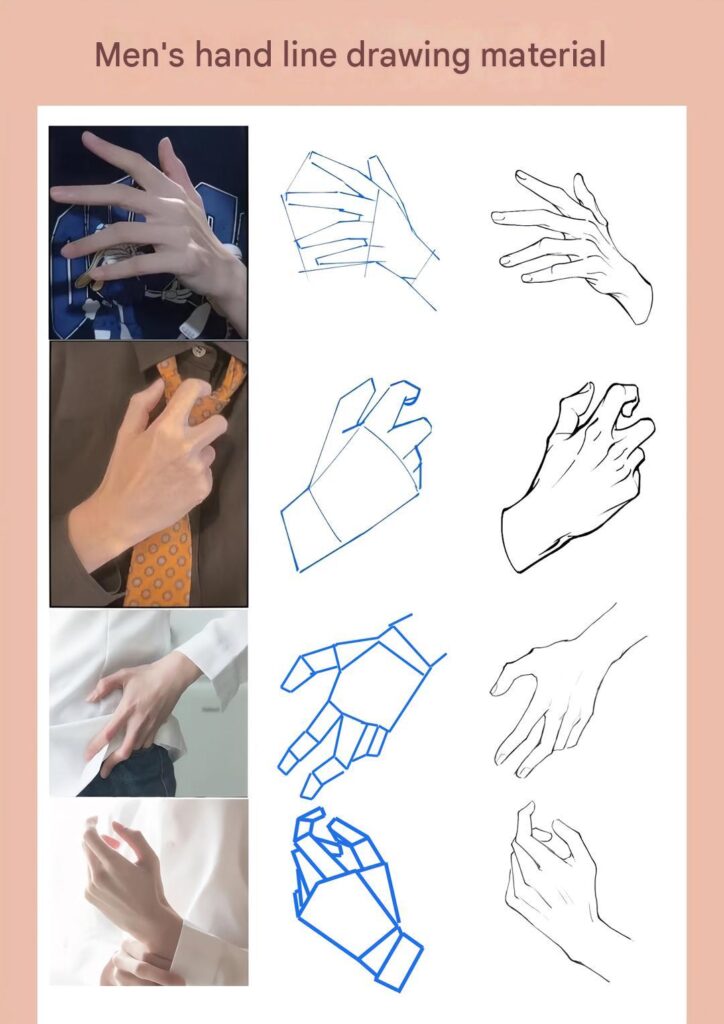
Establish the overall direction of the wrist, palm, and fingers. Use basic shapes and guidelines to determine the proportions and positioning of each finger.
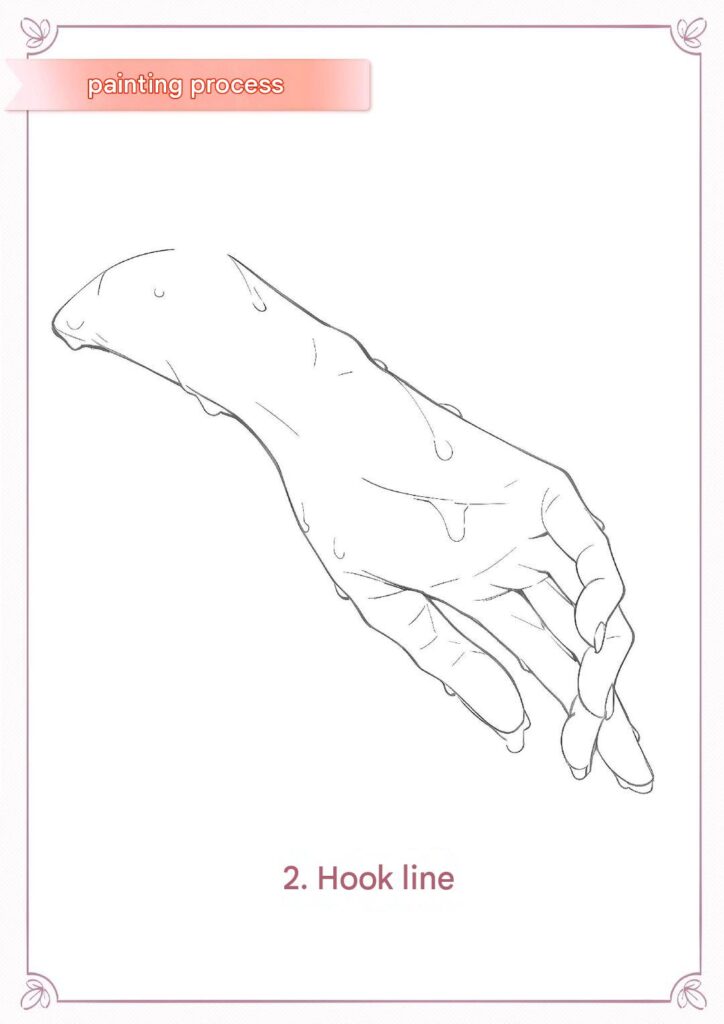
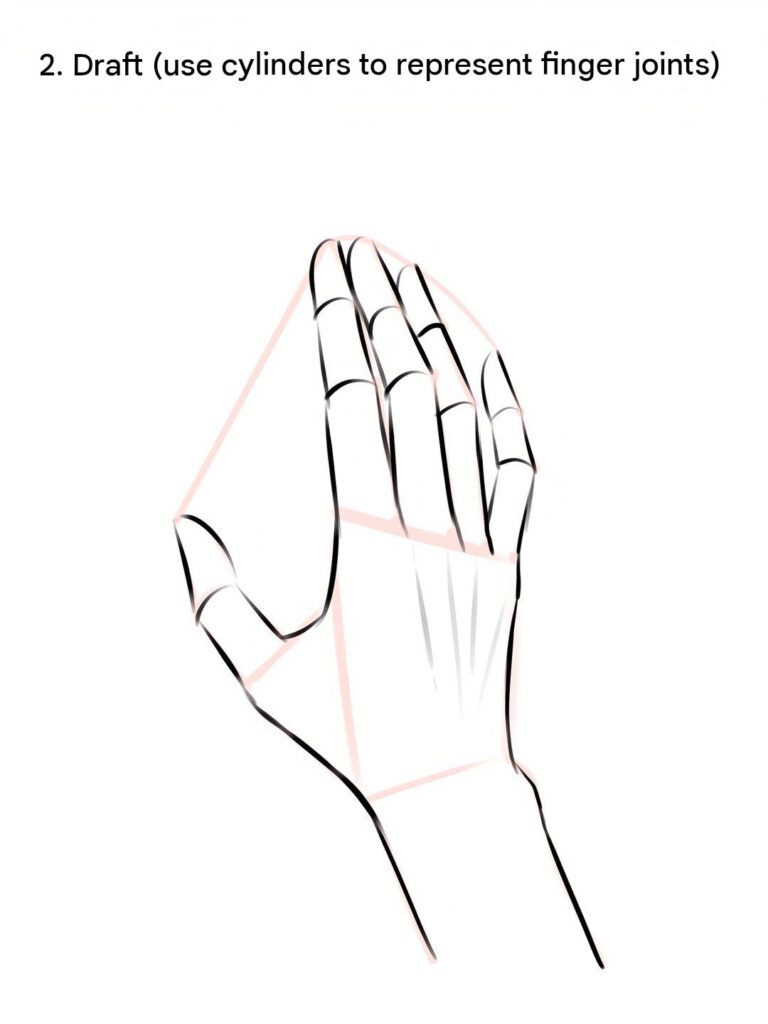
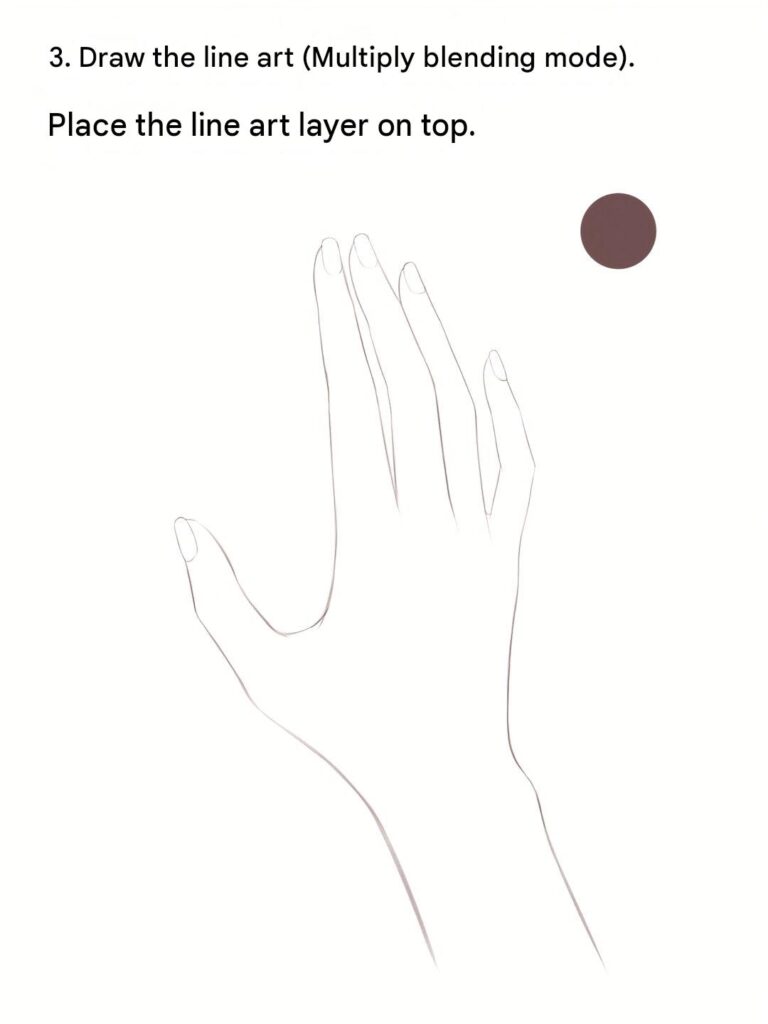
Step 2: Once the basic structure is established, begin refining the shape of the hand.
Connect the palm and fingers using smooth, natural lines. Adjust the finger lengths, knuckles, and joints to create a more realistic appearance.
Pay special attention to the overlapping areas between the fingers and the thumb.
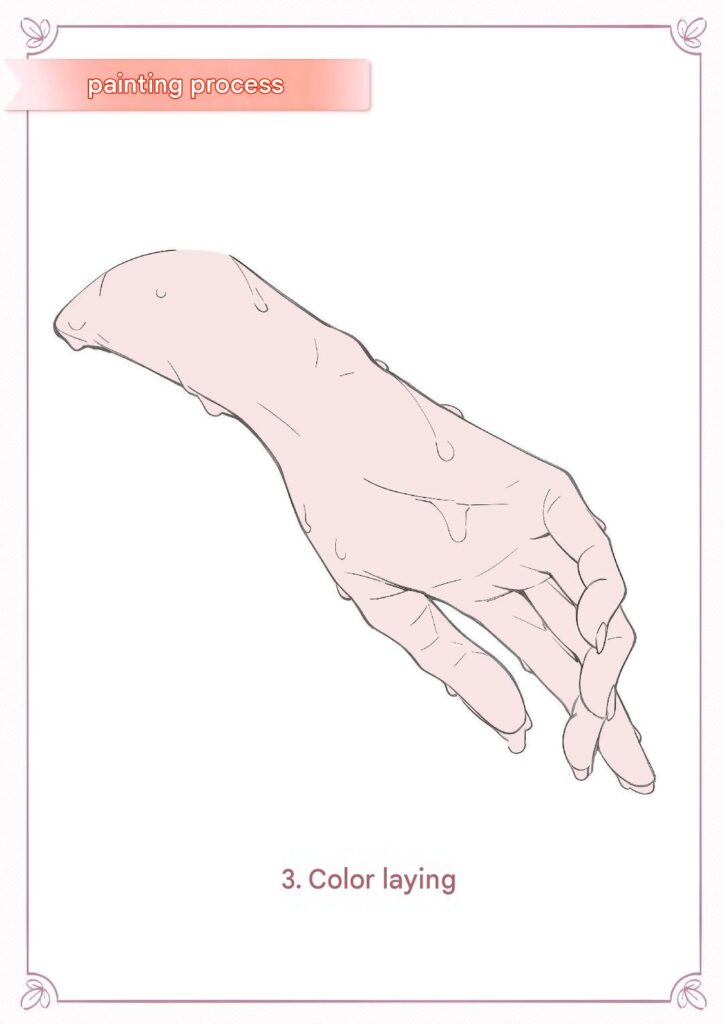
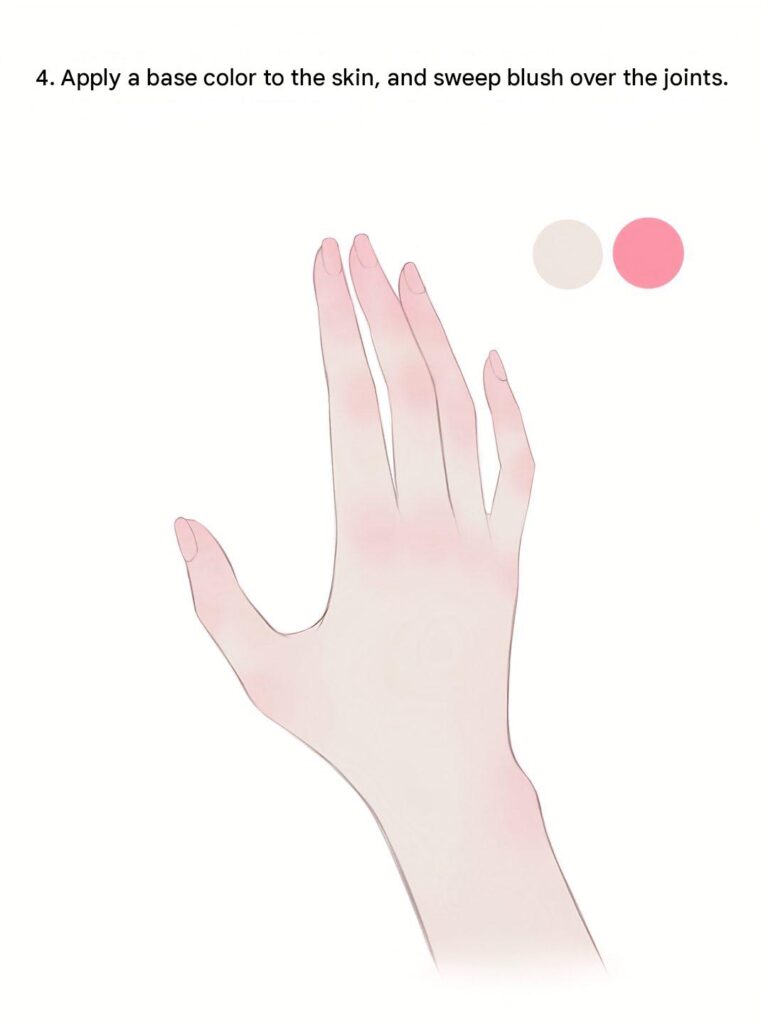
Step 3: Now begin adding the main skin tones.
Choose a soft peach or light pink color as the base tone. Apply it evenly across the palm, fingers, and wrist.
Keep the color distribution smooth and consistent.
You can introduce slightly warmer tones around the fingertips and joints to create a natural skin appearance.
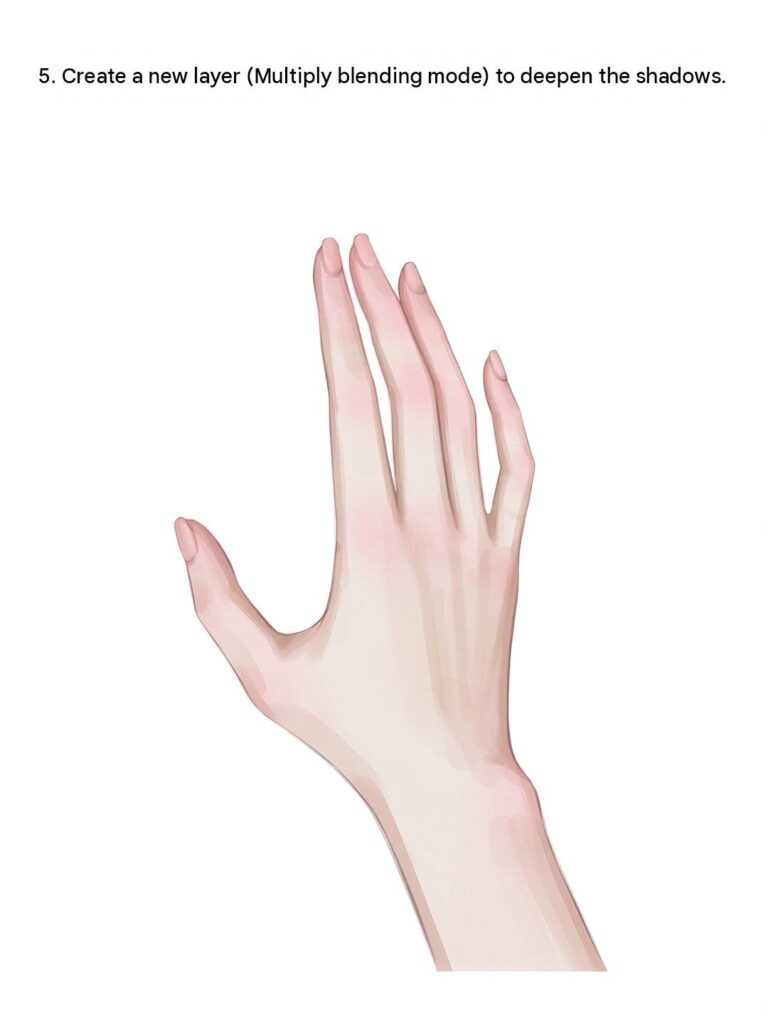
Step 4: Start introducing darker skin tones to create depth and dimension.
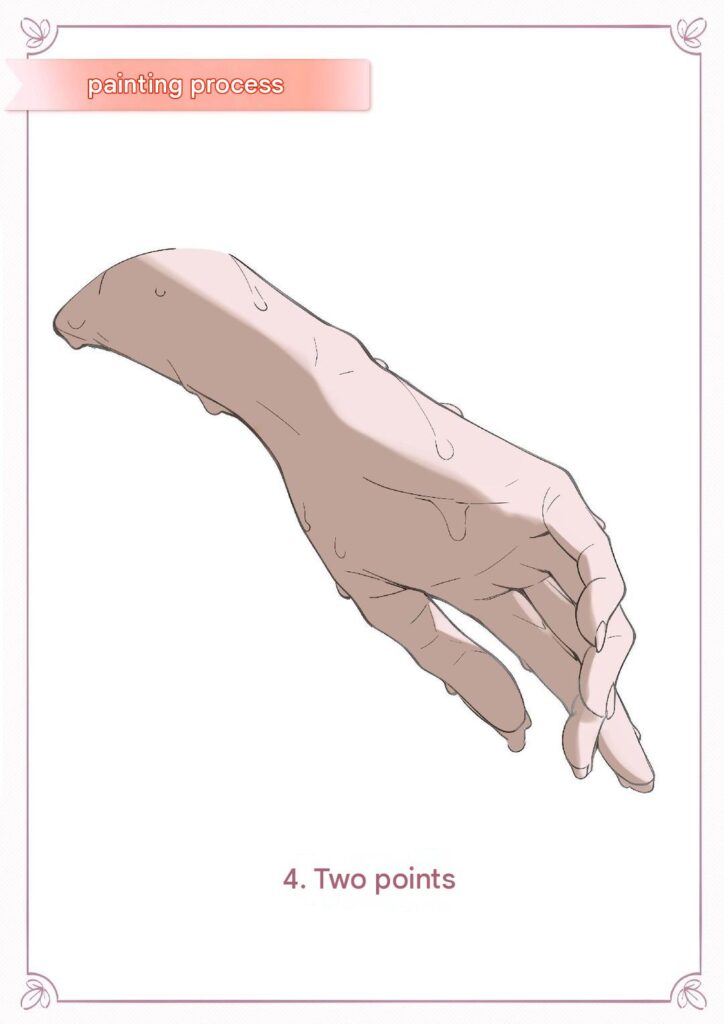
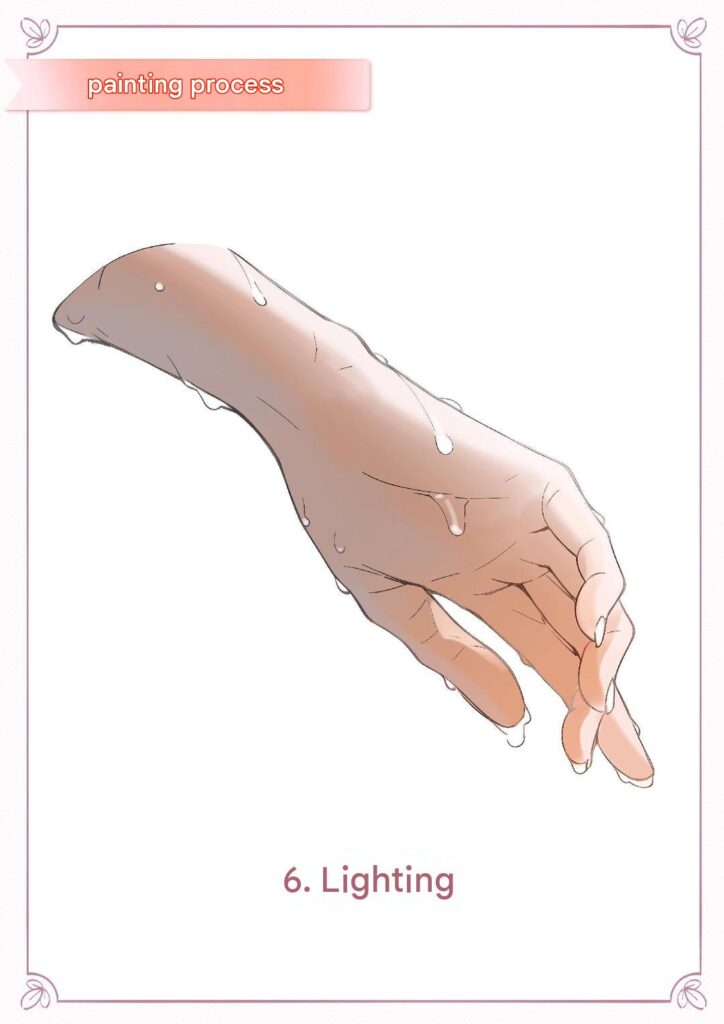
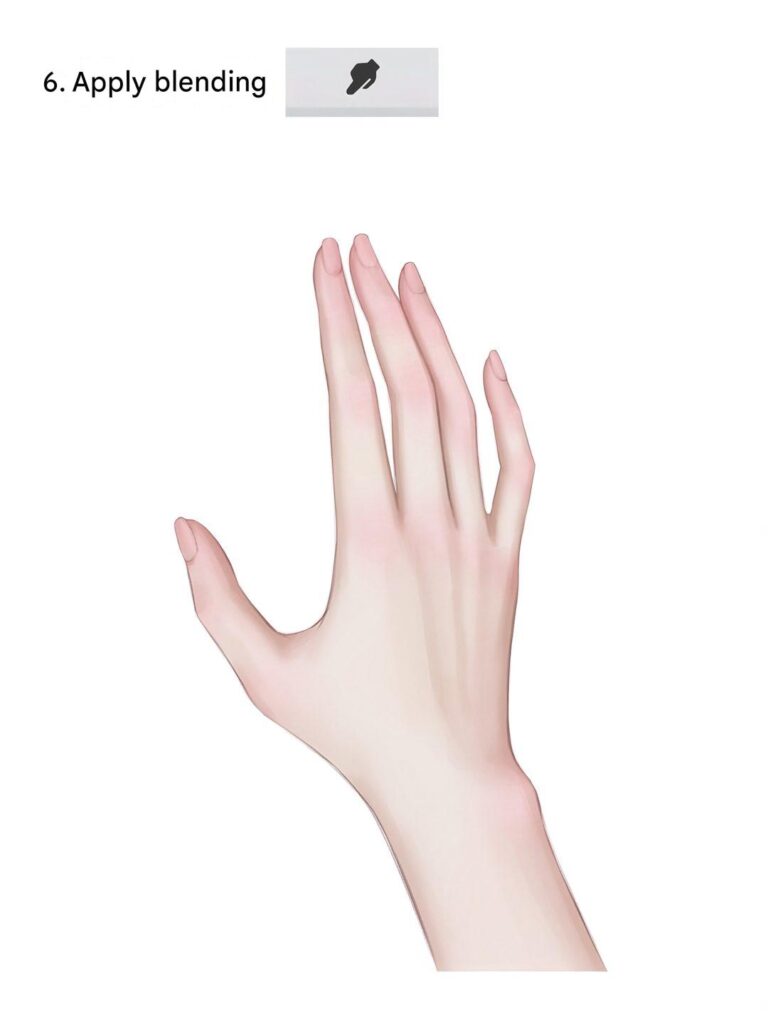
Step 5: Continue improving the hand by refining the transitions between light and shadow.
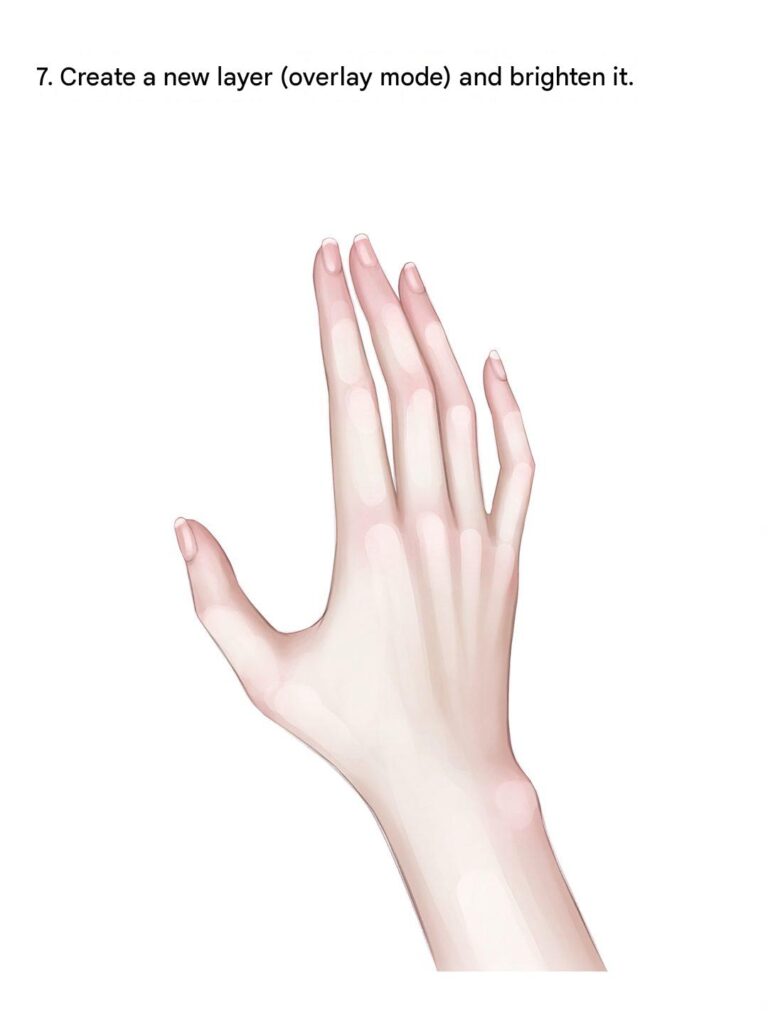
Use lighter peach tones to brighten the raised areas of the fingers, knuckles, and back of the hand.
Add subtle highlights along the fingertips and selected edges to create a soft, realistic appearance.
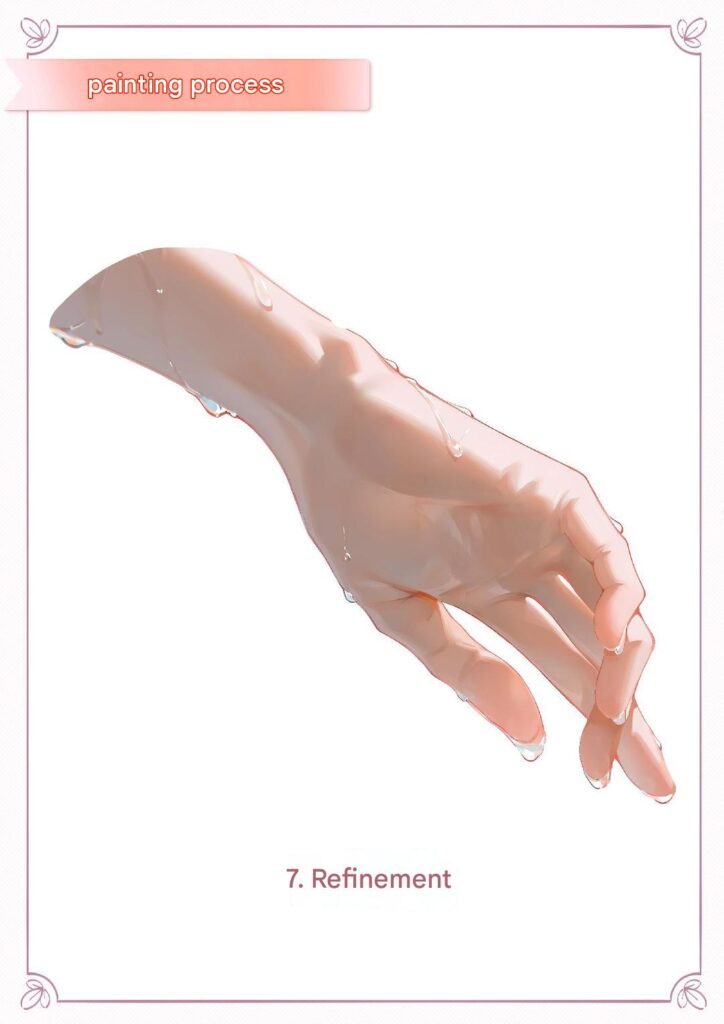
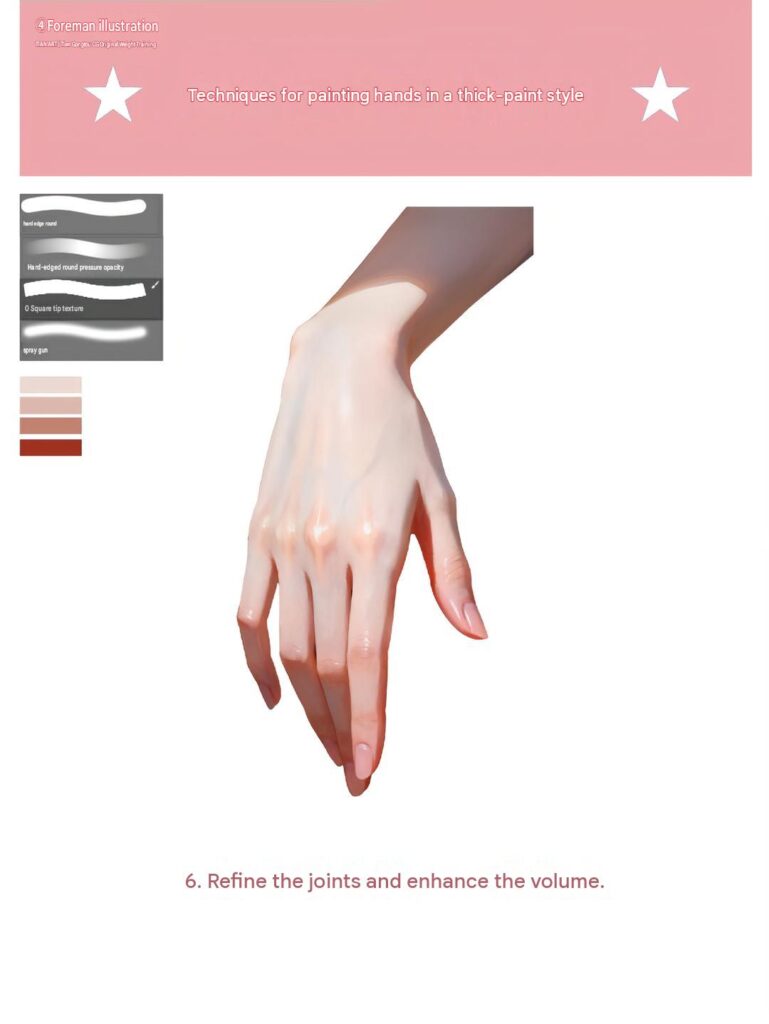
Step 6: Refine the finger contours, knuckles, fingernails, and subtle skin details.
Add small white highlights to the fingertips and areas that receive direct light. Adjust the shadows and skin tones to create a balanced and natural finish.
2. How to Draw and Paint a Realistic Hand
Step 1: Start by drawing a simple outline of the hand and wrist. Pay attention to the overall proportions, finger lengths, and natural curves.
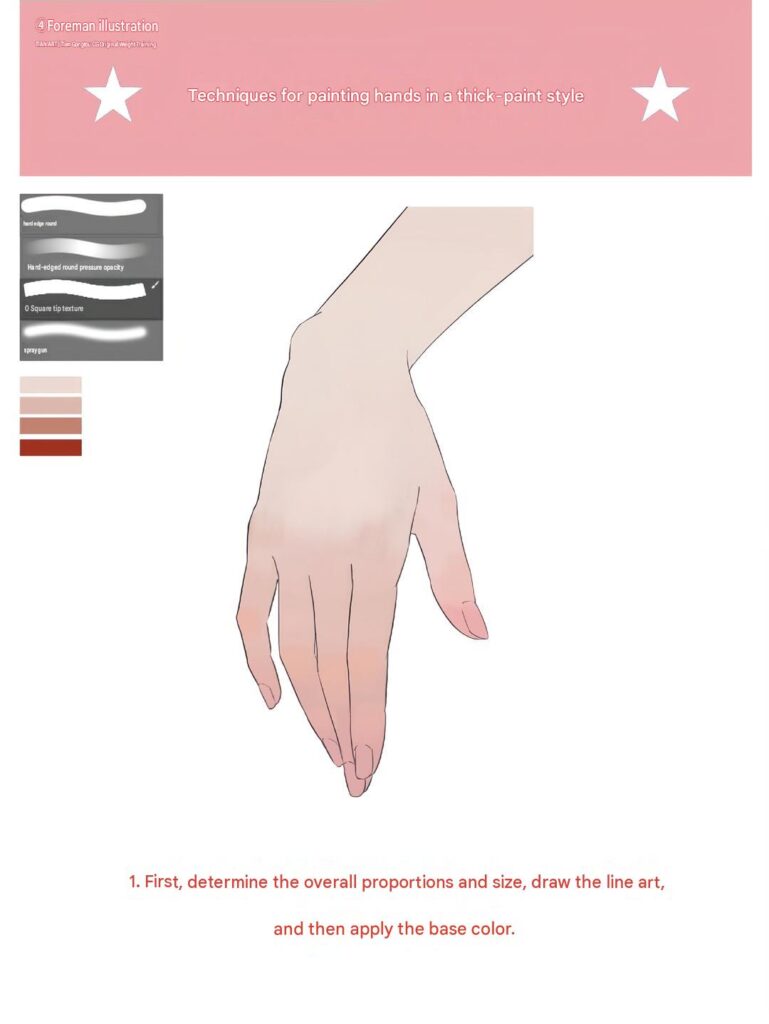
Step 2: Refine the initial sketch by shaping each finger and adjusting the position of the joints. Observe how the fingers connect to the palm and how the thumb curves naturally.
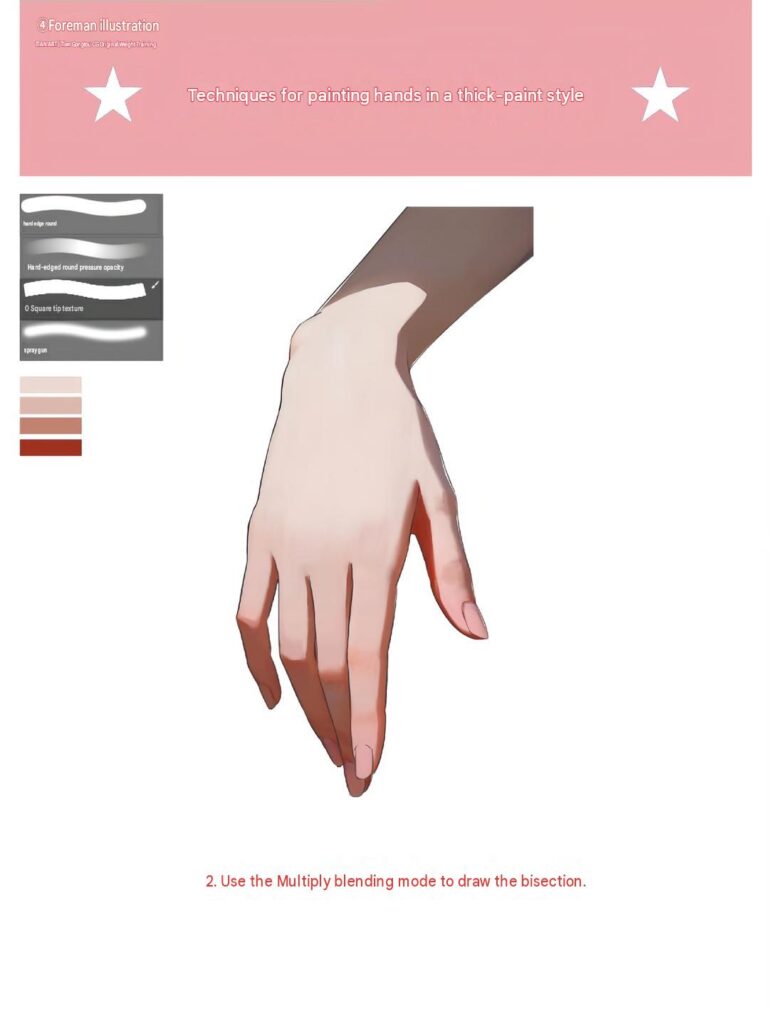
Step 3: Fill the hand with a natural skin base color, making sure the color transitions remain smooth and consistent.
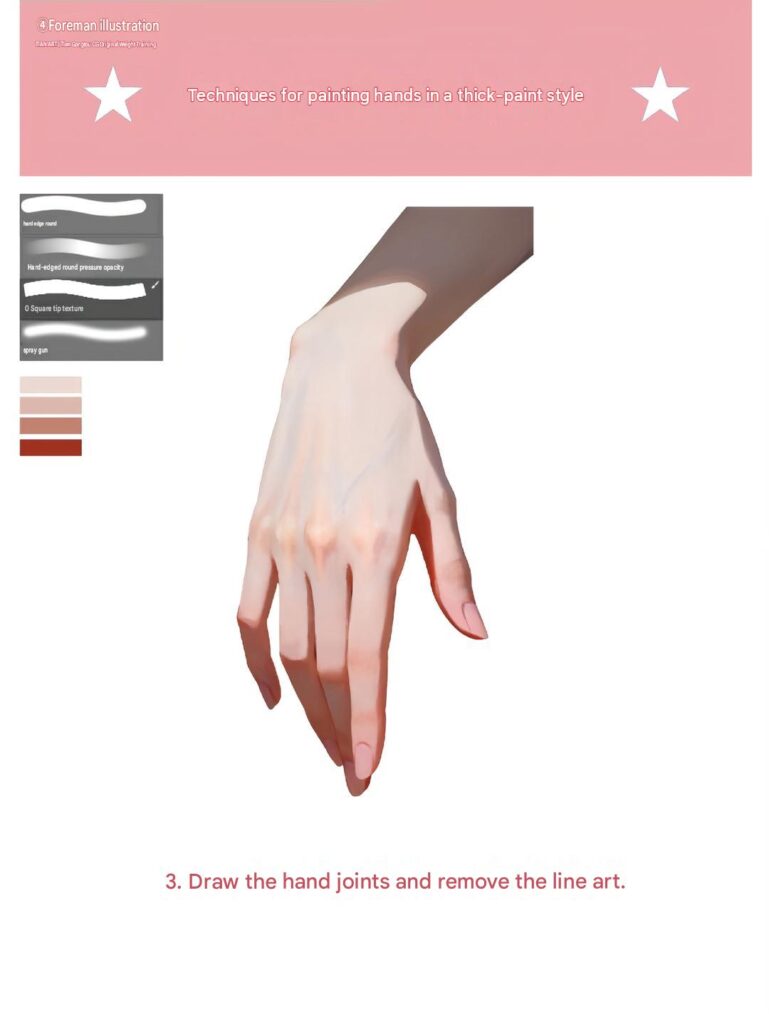
Step 4: Introduce darker shades around the finger joints, between the fingers, and along the sides of the palm. Focus on the areas where light is blocked to create depth and dimension. Use soft blending techniques to make the shadows look natural.
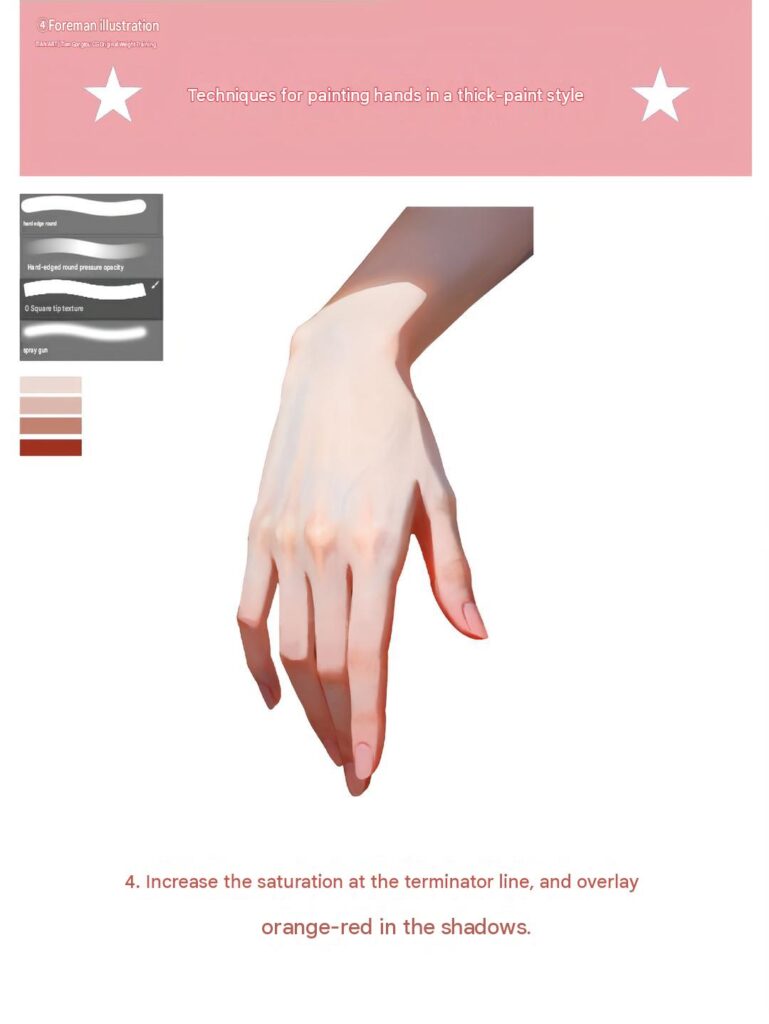
Step 5: Apply lighter tones to the raised areas of the fingers, knuckles, and back of the hand. Use a soft brush to create subtle highlights and enhance the smooth, glossy appearance of the skin. Small reflective details can make the illustration look more realistic.
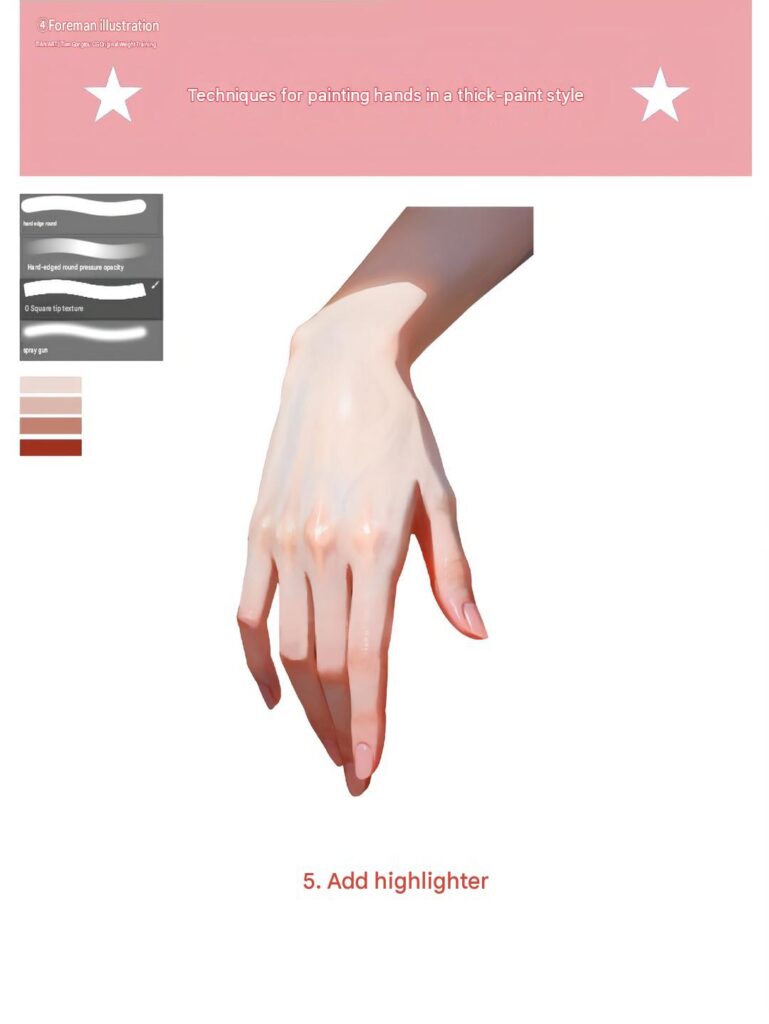
Step 6: Finally, refine the finger joints, edges, and overall shading. Adjust the contrast between light and dark areas to improve the hand’s volume.
3. Hand Drawing Tutorial
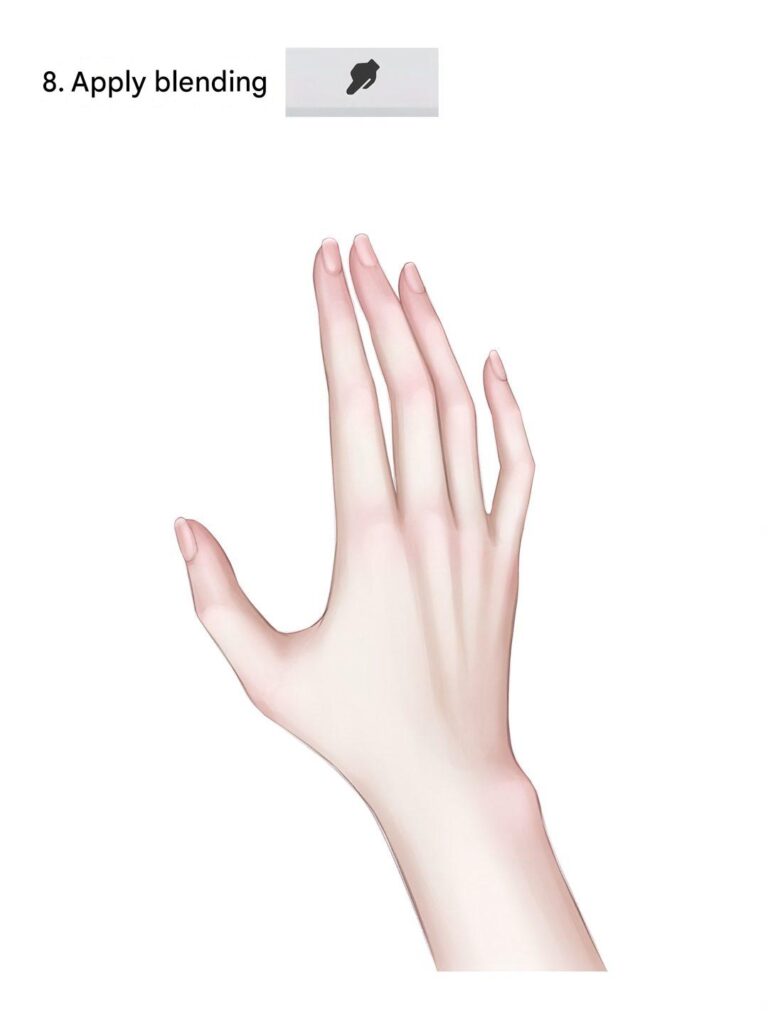
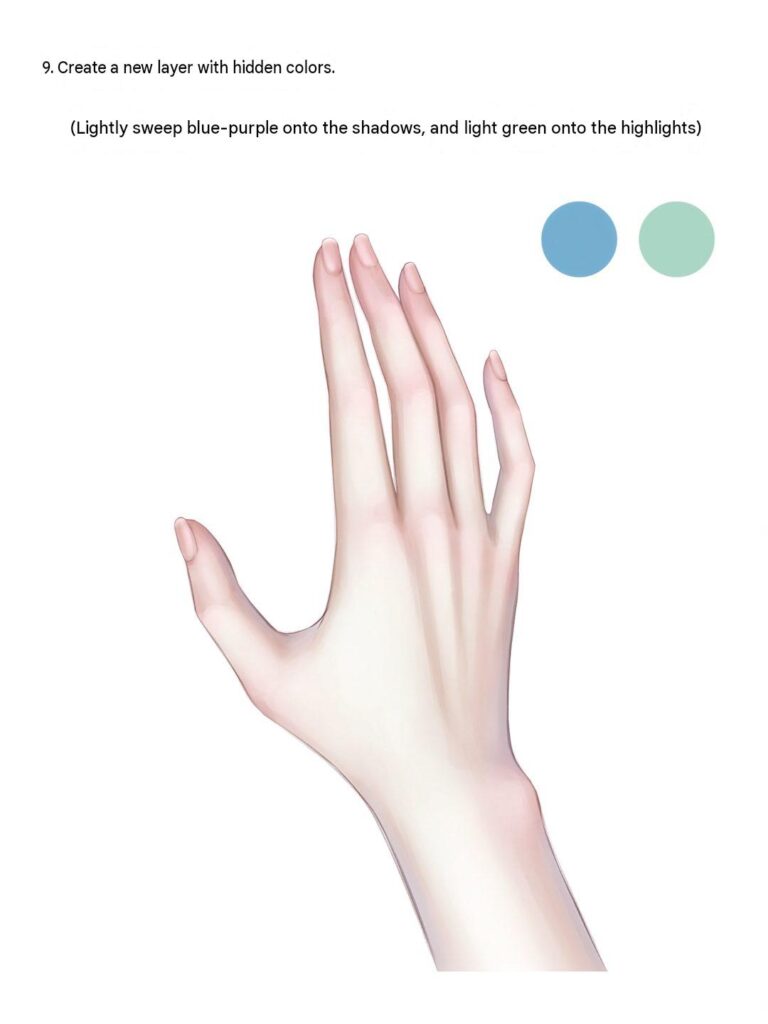
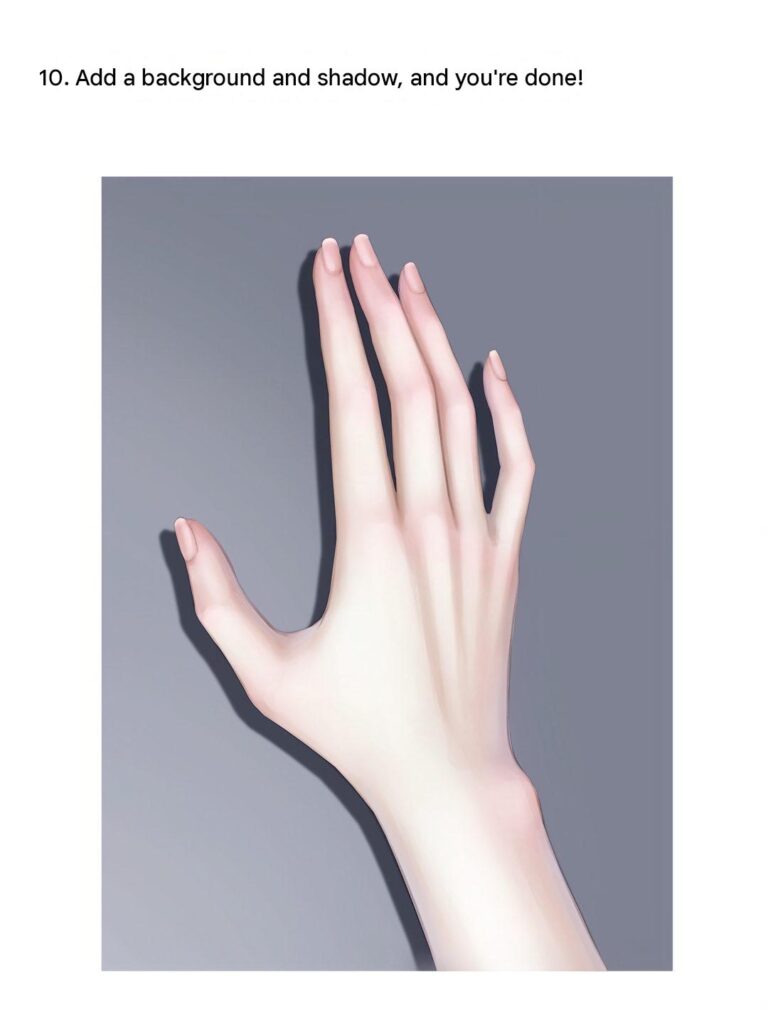
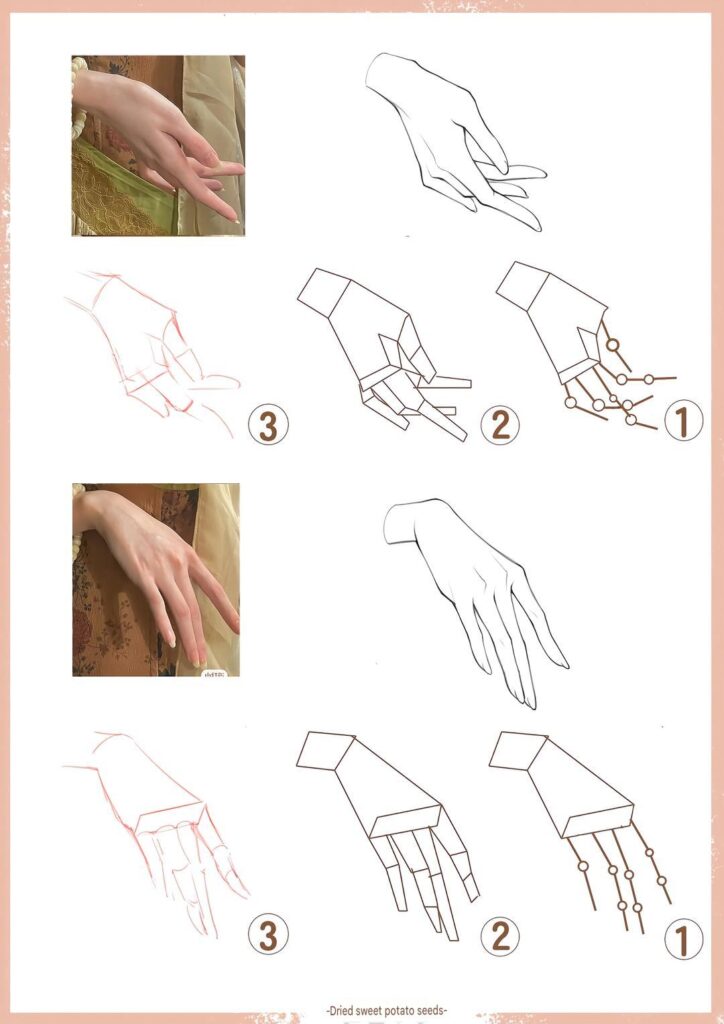
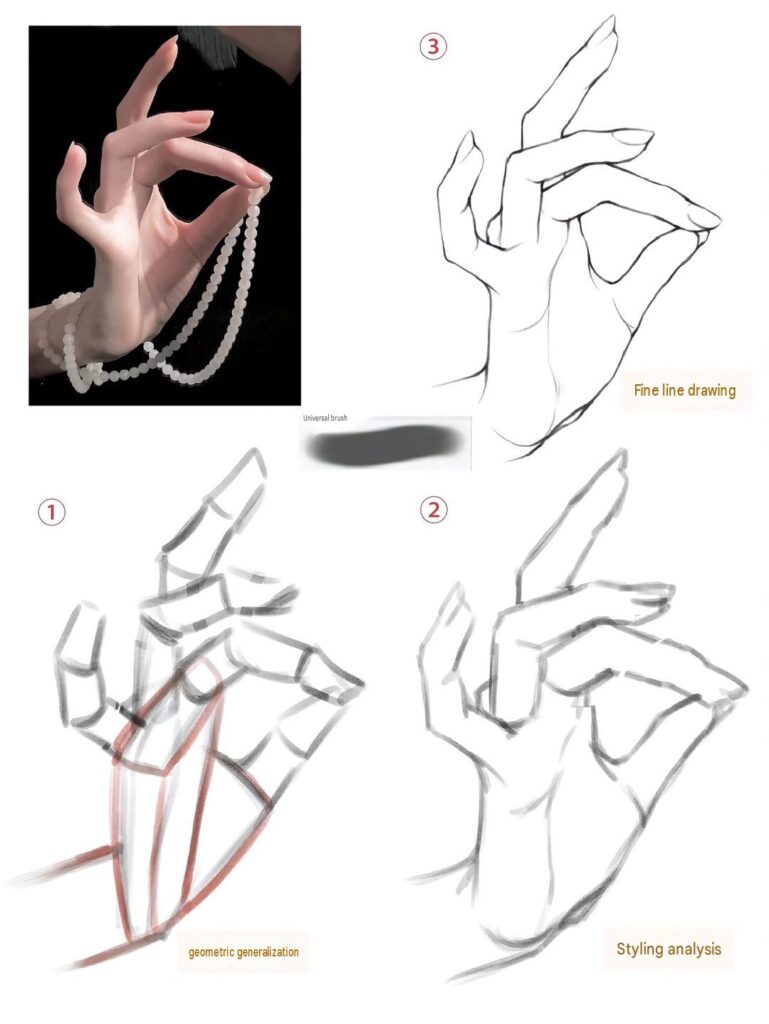
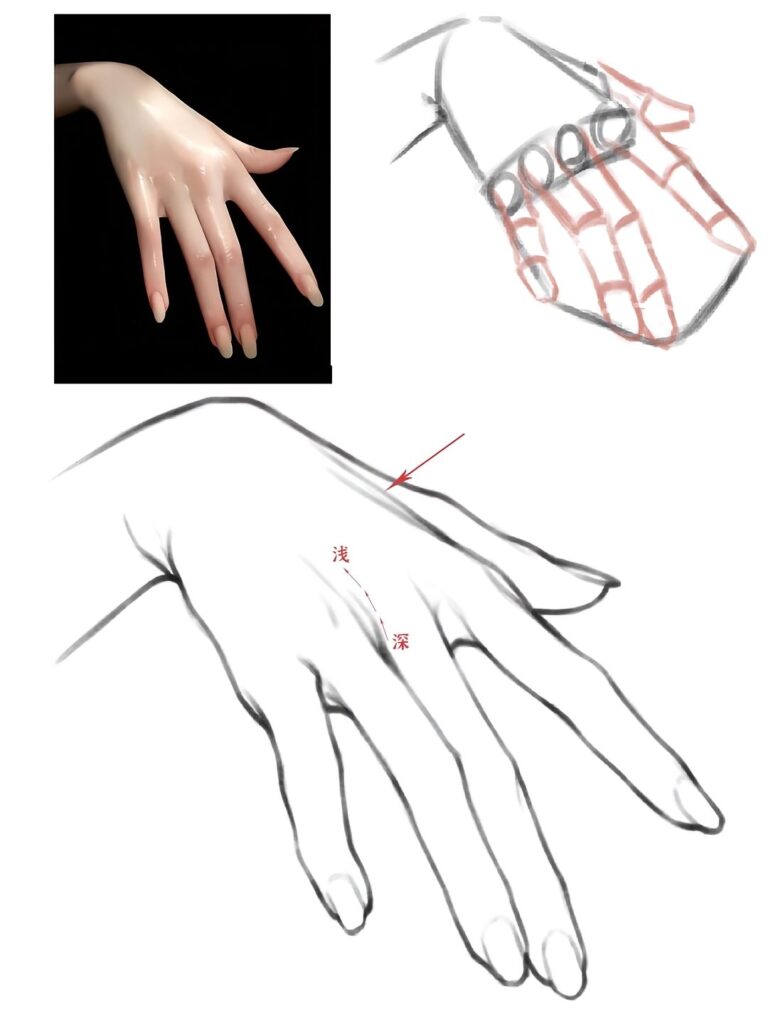
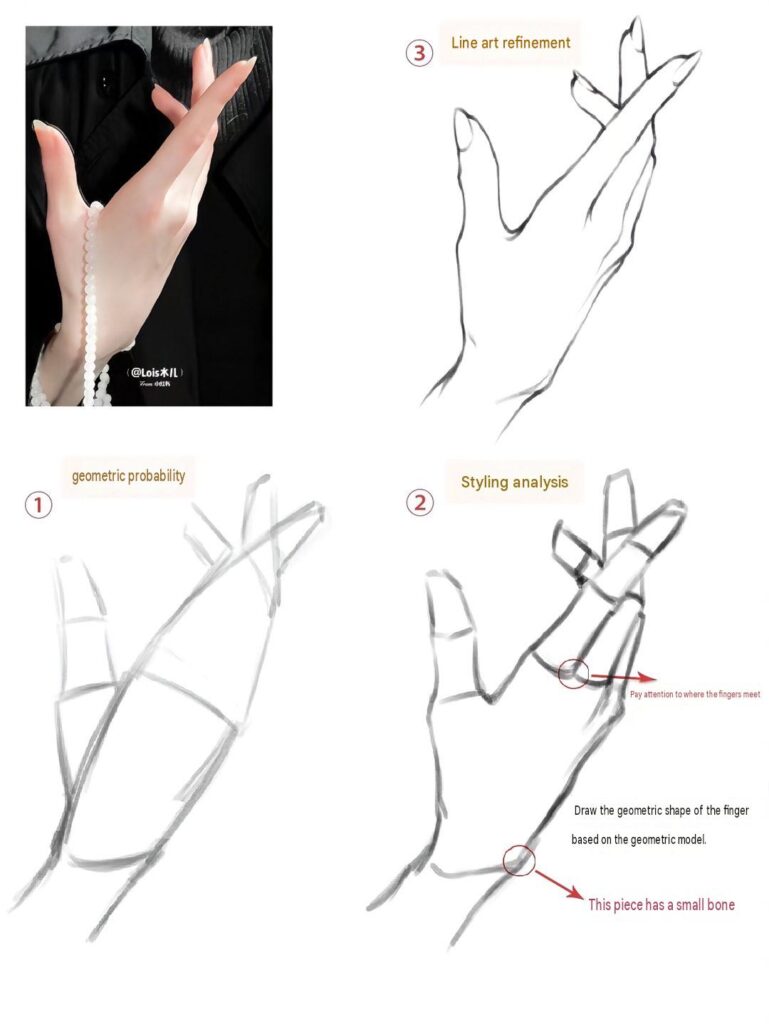
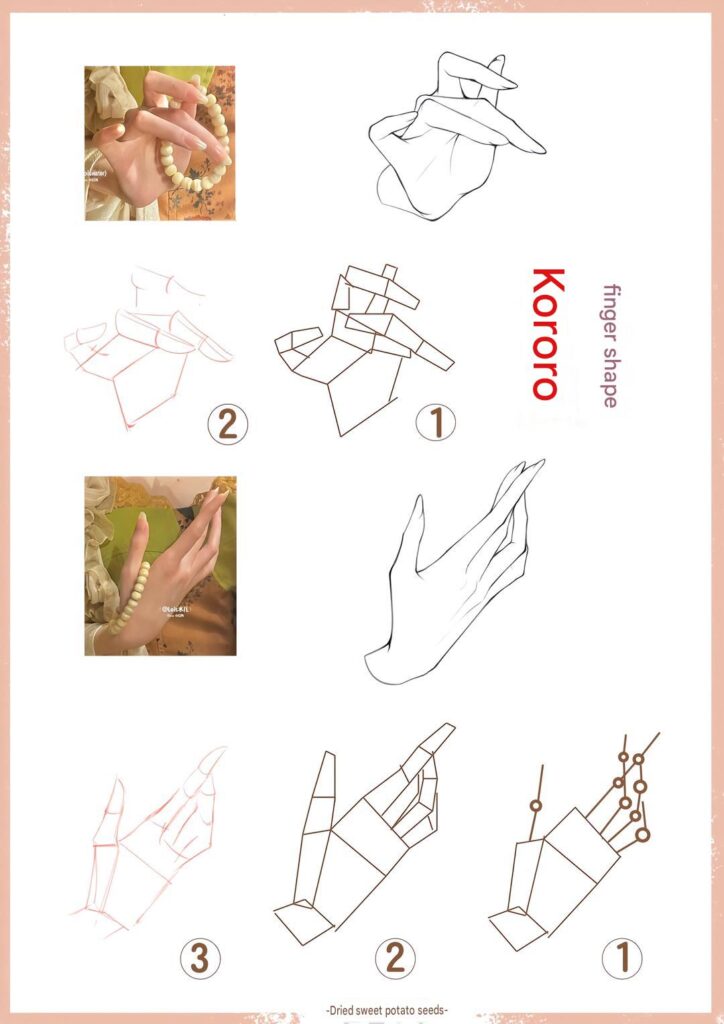






Leave a Reply