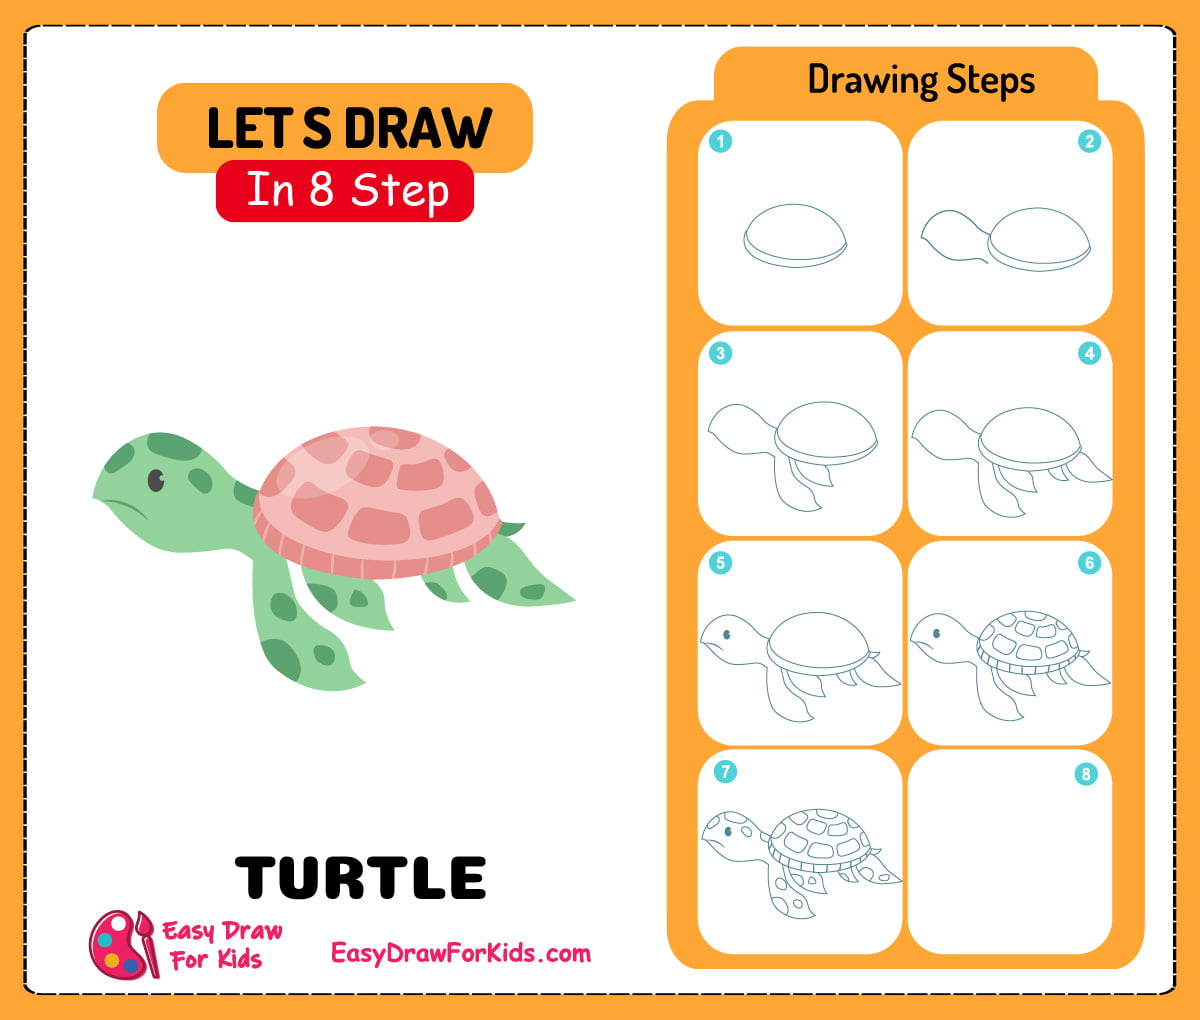
Learning how to draw a turtle is a fun and easy way to practice your drawing skills.
In this tutorial, easydrawforkids.com will guide you learn to draw a turtle from start to finish with 6 ways.
How To Draw A Turtle – A Step By Step Guide
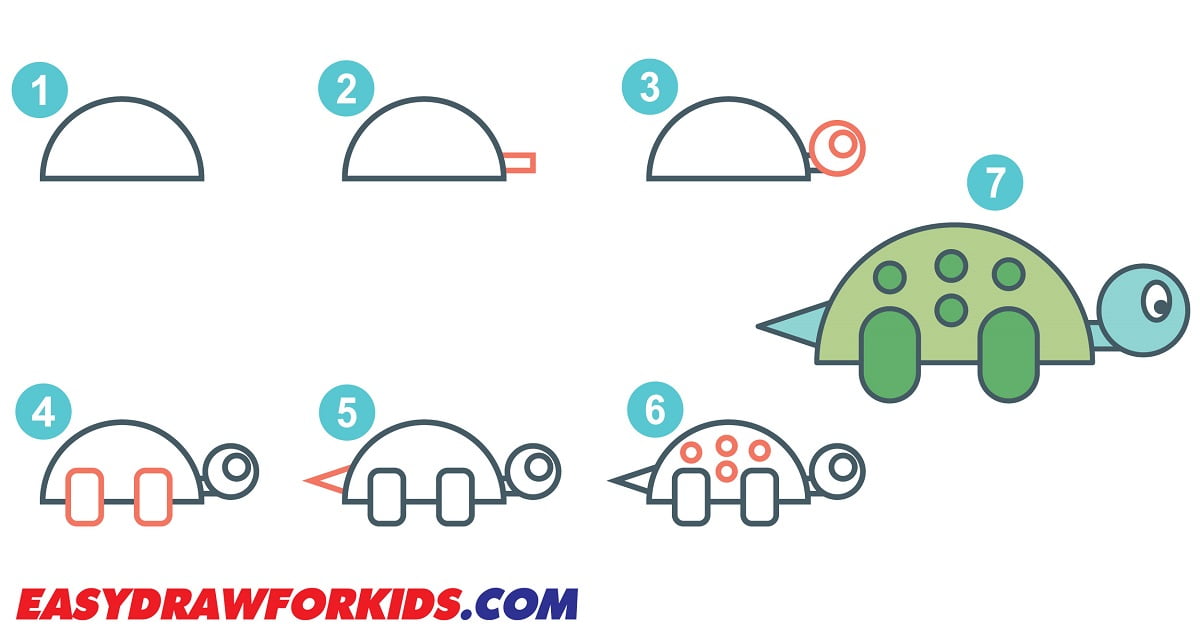
1. Cartoon Turtle drawing
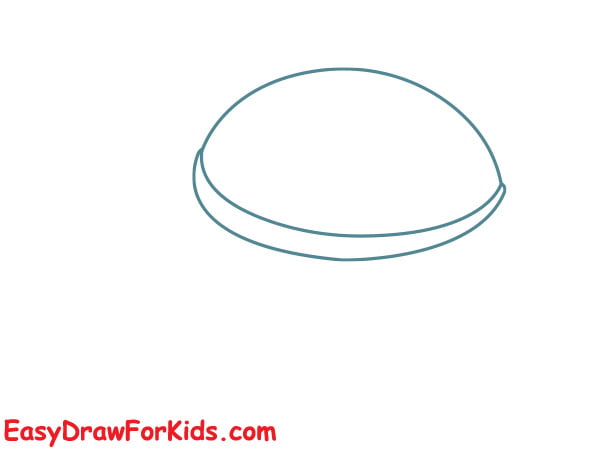
Step 1: Draw s semi-circle for the top part of the shell.
Draw U shape below, overlapping the curved edge of the top shell.
Draw another line across the bottom to complete the shell outline
Step 2: With the shell established, in this step on guide how to draw a turtle, draw a small circle on the upper right side of the shell for the head peeking out from the shell.
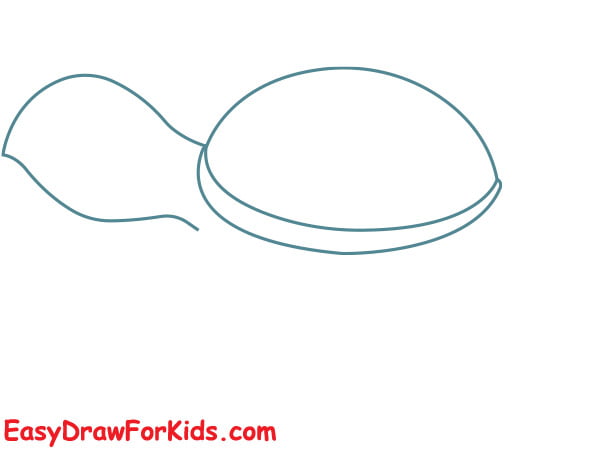
Step 3: Draw two short, thick lines on each side of the shell for the front legs
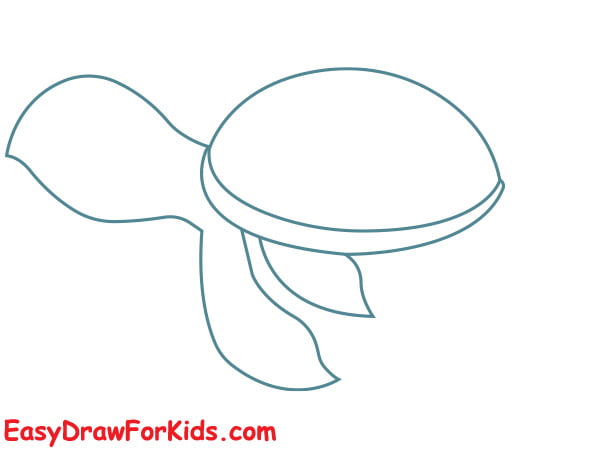
Step 4: Draw two longer back legs in roughly the same position
Step 5: On the turtle’s head, draw a large oval eye.
Below the eye, draw a gentle curved line for a smile.
Behind the body oval, sketch a stubby shape for the tail.
Step 6: Inside the shell, draw lines to divide the shell into sections.
Sketch rectangles, triangles, and trapezoids for the scutes .
Step 7: Draw curves along the outer edges of the shell for contour lines.
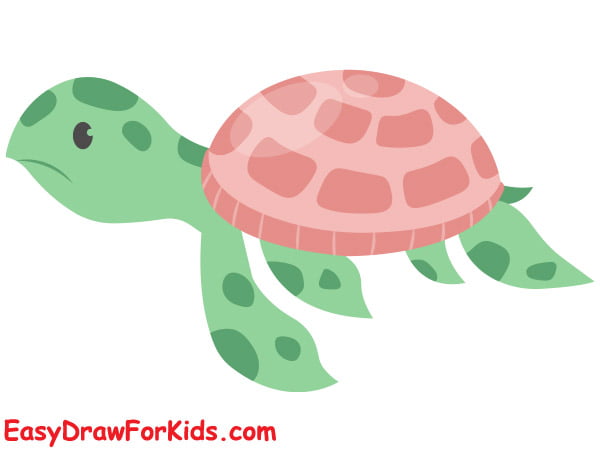
Step 8: Color your turtle drawing with your own color palette.
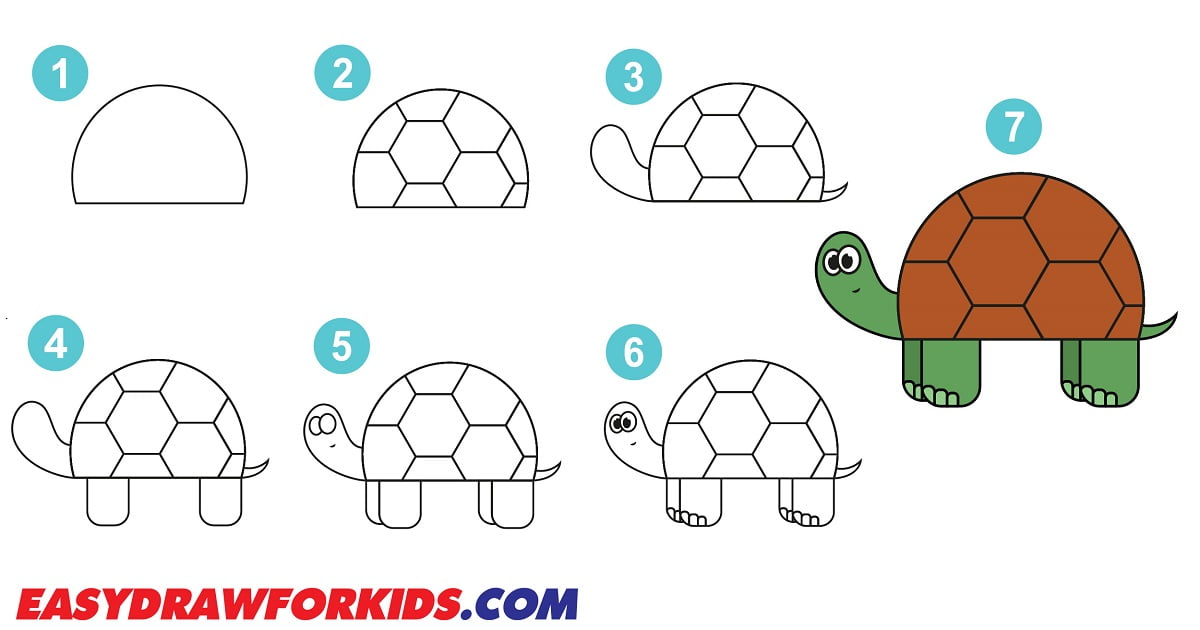
2. Sea Turtle Drawing
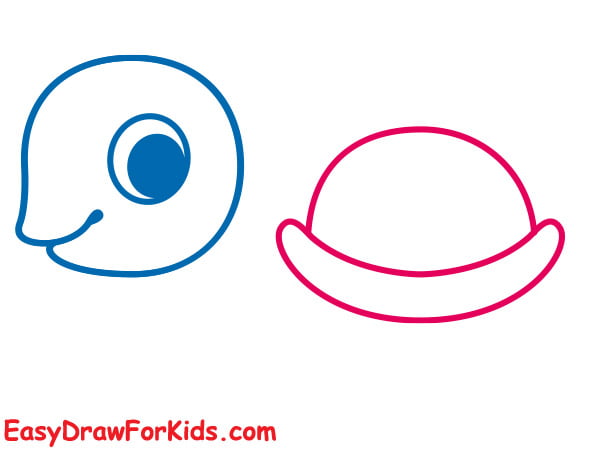
Step 1: Draw a circle for a sea turtle head

Step 2: Draw a large oval shape for the eye with circles inside for irises
Draw a gently curving line for smiling mouth.

Step 3: The third step in the guide on how to draw a turtle is to draw a large oval shape for the upper shell.
Below this, draw a smaller oval in the same position.
Connect the two ovals by drawing curved lines down the sides.
Step 4: Use two curved lines to connect the head and shell of a turtle

Step 5: Use two curved lines to depict the left legs
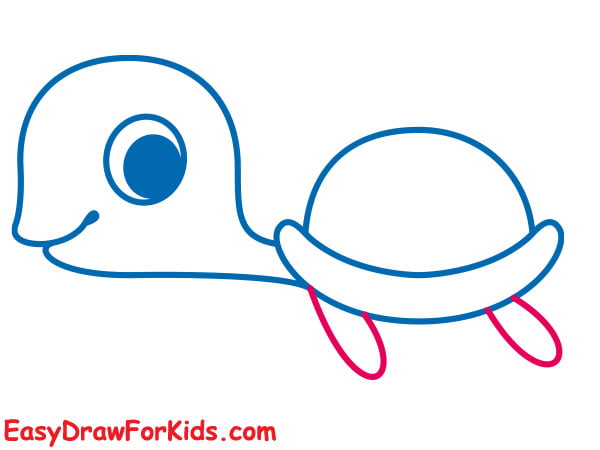
Step 6: Continue drawing the right legs by using two curved lines.
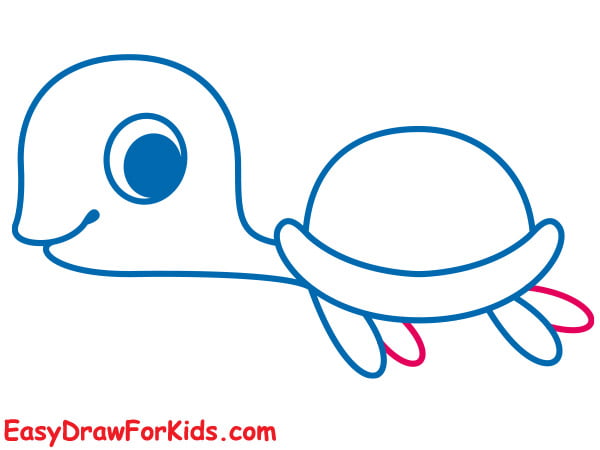
Step 7: You can draw anything you can to your kawaii turtle.

Step 8: Good color for sea turtles include green, brown, yellow, and orange. The shell would be darker, with the body lighter.

3. Cute Turtle Drawing

In this method, you will learn how to draw a turtle in 7 steps to help you draw a cute turtle with ease!
Step 1: Start with a basic outline of the turtle’s shell. This can be a simple oval or circle.

Step 2: Draw a four-cylinder going down from the body for the legs, as shown in the picture.

Step 3: Draw a curve line for the head.

Step 4: Erase the excess lines

Step 5: Fill in the space of the shell with smaller circles or ovals.

Step 6: For the eyes, draw two small circles above the head.
Add a small curved line for the smiling mouth.

Step 7: You can add color to your turtle or even draw a background scene.

4. Kawaii Turtle Drawing
Step 1: Begin this way on how to draw a turtle by drawing an oval shape for the turtle’s shell.

Step 2: Draw a rectangle from the side of the shell to create the turtle’s neck.

Step 3: Draw the circle from the side of the neck for the turtle’s head and a small circle for the turtle’s eye.

Step 4: Draw two legs coming out from the bottom of the shell.

Step 5: Draw a triangle line extending from the back of the shell. This will be the turtle’s tail.

Step 6: Finally, add some details like the turtle’s eyes and pattern on its shell.

Step 7: Now add some color! You can use green, brown, or any other color you like.

5. Simple Turtle Drawing
Step 1: Depict a straight line and add a semicircle on top.

Step 2: Using straight lines of different lengths, draw the decorative relief on the tortoiseshell like a football.

Step 3: Use a curved line for the top of the head and a straight line for the bottom.
Draw a small line coming off of the back of the shell for the turtle’s tail.

Step 4: Draw two small lines coming down from the bottom of the shell for the legs.

Step 5: Draw two lines coming down from the right side of the shell for legs.
Then, draw two circles for the eyes and a small line for the smiling mouth.

Step 6: Make the small round pupils in the eyes
Portray the outline of the claws on the feet.

Step 7: You can use any colors you like, but I recommend choosing bright and vibrant colors to really make your turtle pop.

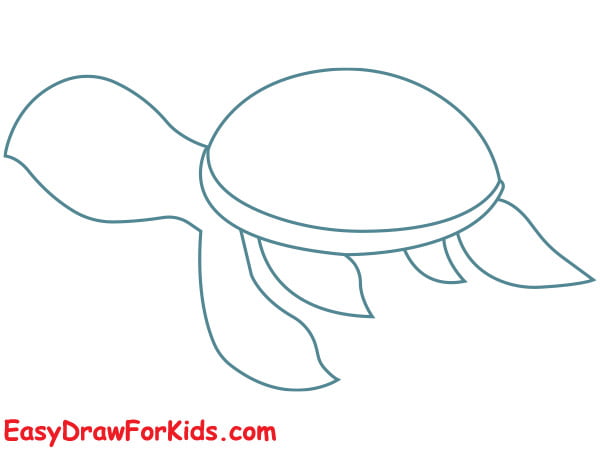
6. Easy Turtle Drawing
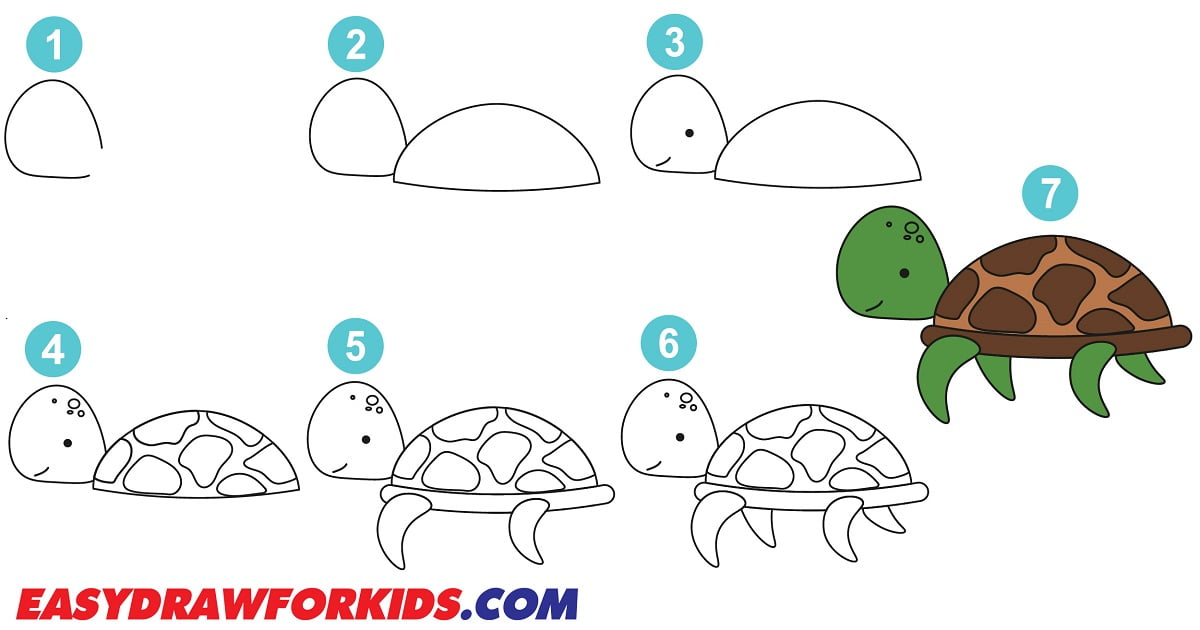
Step 1: The first step on guide how to draw a turtle. Use a smooth curve line for the turtle’s head.

Step 2: Draw the turtle’s shell as shown in the picture

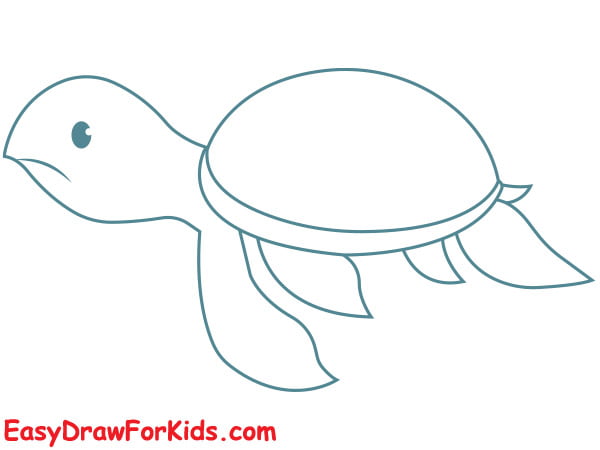
Step 3: Giving the turtle a face and drawing the eye and mouth. Using a semicircular line for the mouth and a dot for the turtle eye

Step 4: Draw small dots around the turtle’s eyes.
Next, add some lines around the edge of the shell to create the scutes or the plates on the turtle’s shell.

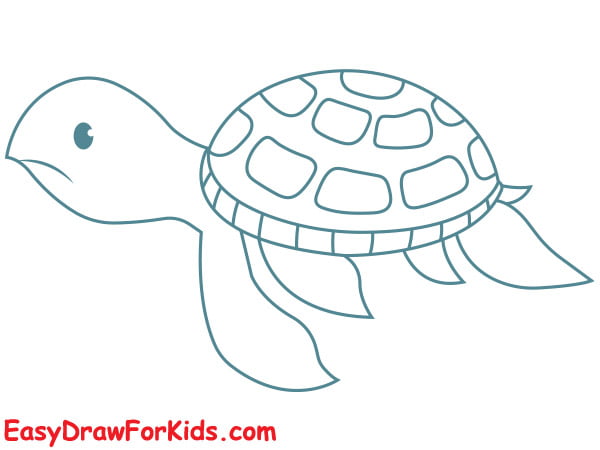
Step 5: Depict two left legs by drawing two curved lines coming down from the bottom of the shell.

Step 6: Continue drawing two right legs of turtle.

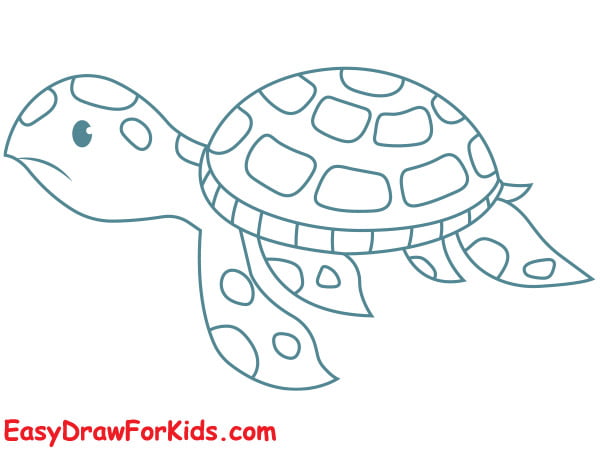
Step 7: Finally! Color your turtle by your style

I hope you enjoyed learning how to draw this friendly turtle!
Just breaking down the process into simple step to end up with a cute finished piece.
This technique works for nearly any animal.
Try out other pets, zoo creatures, or cartoon ideas like fish, dogs, cats, chickens, and monkeys.


